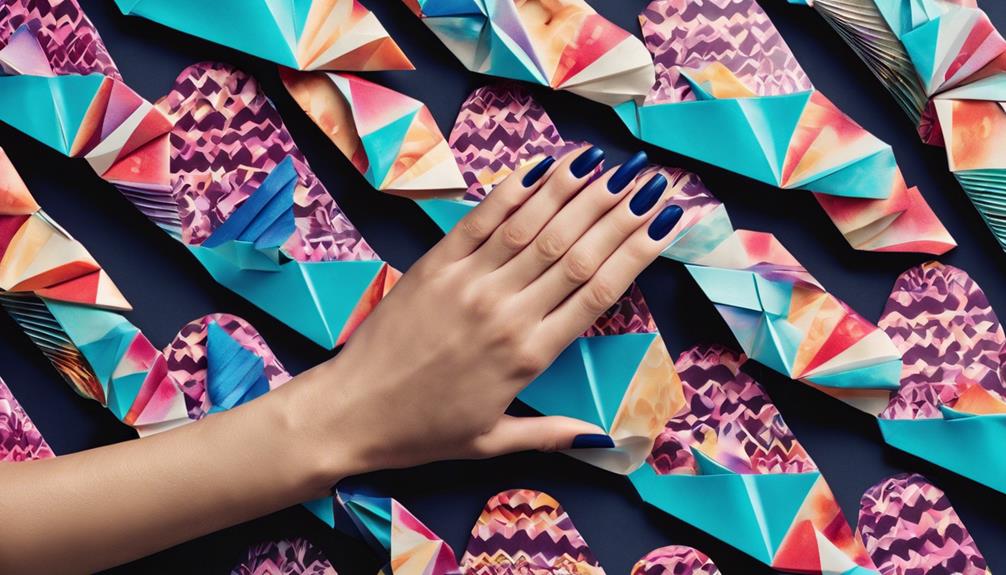

Get ready to immerse yourself in the world of nail art with these 7 stunning moon nail art ideas! Try out the Celestial Moon and Stars Nail Art for popular nail decals or opt for the Glittery Moon Phases Manicure for a touch of shimmer. Embrace elegance with the Minimalist Crescent Moon Design or go bold with the Cosmic Galaxy Nail Art. Explore the night sky with Dreamy Starlit Sky Nails and add a touch of sophistication with the Elegant Lunar Eclipse Mani. For a mystical allure, delve into the Mystical Midnight Moon Nails. Discover more celestial heights with these enchanting nail art ideas!
Key Takeaways
- Celestial Moon and Stars Nail Art with popular decals and stickers.
- Glittery Moon Phases Manicure featuring metallic ombre effects.
- Minimalist Crescent Moon Design for chic elegance.
- Mystical Midnight Moon Nails with dark hues and celestial motifs.
- Customizable Cosmic Galaxy Nail Art for personalized creativity.
Celestial Moon and Stars Nail Art
Explore the enchanting world of celestial moon and stars nail art with an array of popular nail decals and stickers featuring intricate designs. From Sailor Moon-inspired nail decals to 3D embossed celestial patterns, the options are as vast as the night sky itself.
Imagine adorning your nails with shimmering stars and a majestic crescent moon, creating a celestial masterpiece right at your fingertips.
These nail stickers transport you to a domain where the beauty of the cosmos meets the artistry of nail design. Whether you opt for waterslide decals that effortlessly glide onto your nails or nail transfers that showcase the different phases of the moon, each piece is a work of art waiting to adorn your nails.
The combination of stars, moons, and intricate designs offers a whimsical touch that's both elegant and enthralling. Let your nails shine with the mystique of the night sky through these celestial nail art options.
Glittery Moon Phases Manicure
Get ready to elevate your nail game with a mesmerizing glittery moon phases manicure!
Sparkle like the night sky by incorporating metallic silver or gold polish to create the different lunar stages.
Experiment with ombre or gradient effects for an extra celestial touch that will leave your nails looking out of this world!
Lunar-Themed Nail Designs
Discover the enchanting world of lunar-themed nail designs with the mesmerizing allure of glittery moon phases manicure. These celestial-inspired nail art creations feature intricate designs showcasing different lunar phases like crescent, full, and half moons.
The incorporation of shimmering glitter accents adds a touch of magic and enhances the celestial theme of the manicure. You'll often find stars, constellations, and other celestial elements intertwined in these designs, creating an ethereal look that's truly spellbinding.
If you're someone who adores celestial motifs and wants a glamorous and eye-catching manicure, the glittery moon phases nail design is perfect for you. What's great is that this style can be customized to your liking – from choosing various colors to deciding on sizes and placements of the moon phases, you can create a unique and personalized nail design that reflects your individual style and personality.
Embrace the beauty of the night sky on your fingertips with these stunning lunar-themed nail designs.
Step-By-Step Tutorial
Let's now walk through the step-by-step process for creating a stunning glittery moon phases manicure that will elevate your nail art game to celestial heights.
To begin, apply a base coat followed by a dark blue polish to set the night sky background. Using a small nail art brush, delicately craft crescent moon shapes with silver glitter polish, adding a touch of cosmic charm to your nails.
Next, scatter smaller dots and lines to mimic stars and various moon phases, bringing your celestial look to life. Seal in the magic with a clear top coat to safeguard the glitter and guarantee your cosmic manicure lasts.
This glittery moon phases design offers an enchanting and celestial vibe that's perfect for any occasion. Embrace the beauty of the night sky on your fingertips and let your nails shine with the allure of the cosmos.
Minimalist Crescent Moon Design
Looking to rock a chic and elegant nail art look?
Minimalist crescent moon designs are your go-to choice for a touch of lunar simplicity.
These designs exude sophistication with their understated beauty, making them perfect for any occasion.
Chic Crescent Inspiration
Embrace the elegance of a minimalist crescent moon design for a chic and sophisticated nail art look. A single moon shape, with its clean lines and subtle charm, adds an elegant touch to your nails. This minimalist approach is perfect for those who appreciate sophisticated simplicity.
The crescent moon design brings a celestial touch to your manicure, elevating it to a whole new level of style. It's a versatile choice that can complement various nail styles, adding a hint of celestial magic to your overall look.
Opting for this chic crescent inspiration is ideal if you prefer understated yet impactful nail designs. The beauty of the crescent moon lies in its simplicity, making it a popular choice among those seeking a refined and polished appearance.
Elegant Lunar Simplicity
To achieve an effortlessly chic and sophisticated nail art look, consider incorporating an elegant minimalist crescent moon design onto your nails.
These designs are all about simplicity and elegance, featuring a single crescent moon accent on each nail. They offer a chic and sophisticated appearance with minimal effort, perfect for those who prefer subtle and understated nail designs.
The minimalist crescent moon designs add a touch of celestial charm to your manicure, elevating your overall style with a subtle nod to the beauty of the night sky. Whether you're heading to a special event or just want to add a bit of sophistication to your everyday look, these elegant lunar-inspired nails are sure to impress.
Embrace the beauty of the moon in a minimalist way, and let your nails exude a sense of understated glamour and celestial charm.
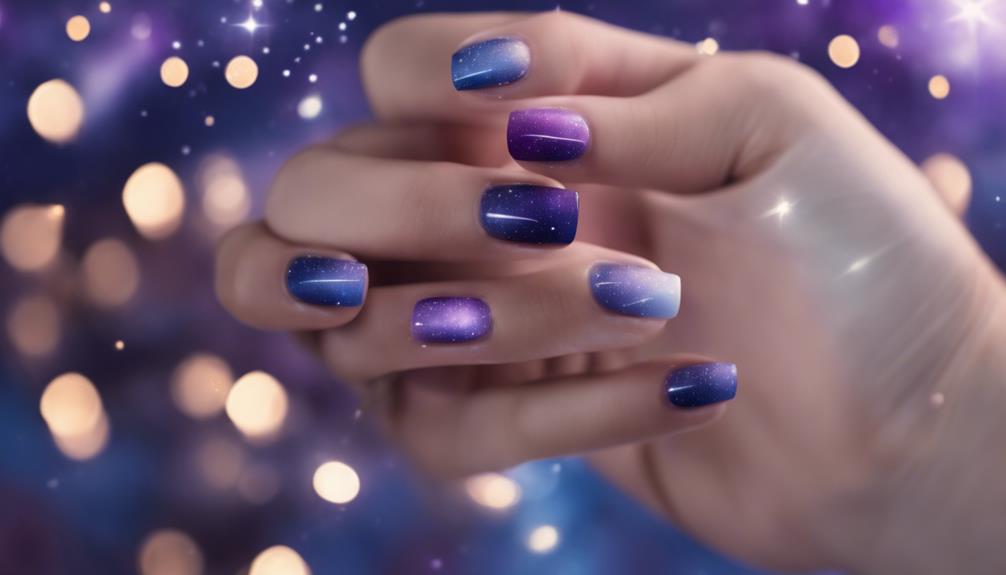
Cosmic Galaxy Nail Art

Get ready to immerse yourself in the mesmerizing world of cosmic galaxy nail art, where vibrant colors and celestial motifs come together to create stunning manicures.
Cosmic galaxy nails are all about capturing the beauty of the night sky right at your fingertips. Picture deep blues, rich purples, and dark blacks blending seamlessly in ombre techniques, mimicking the vastness of space. To add that extra sparkle, glitter and metallic accents are often used to represent twinkling stars scattered across the galaxy.
One of the fascinating aspects of cosmic galaxy nail art is the incorporation of celestial bodies like moons, stars, and planets. These motifs bring a touch of mystery and awe to your manicure, making it truly out of this world.
What's great about this style is the freedom it offers for creativity and personalization. You can mix and match vibrant colors, experiment with different designs, and let your imagination soar as you create your own cosmic masterpiece on your nails.
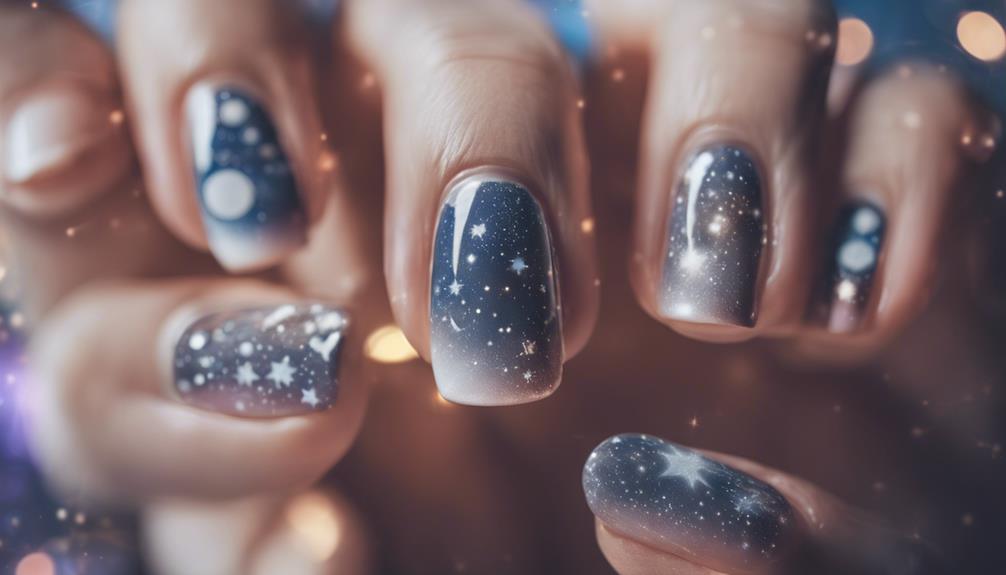
Dreamy Starlit Sky Nails
Immerse yourself in the enchanting world of Dreamy Starlit Sky Nails, where celestial elements like moons, stars, and galaxies come alive in mesmerizing nail art designs. Picture your nails adorned with night sky colors like navy blue and shimmering silver, twinkling with motifs of crescent moons and cosmic swirls.
These Celestial Nail Designs bring a touch of magic to your fingertips, perfect for stargazers and dreamers alike.
Creating these whimsical nail designs is easier than you think! You can achieve the cosmic look with nail stickers, decals, or opt for hand-painted nails for a personalized touch. Let your creativity soar as you embrace the beauty of the cosmos right on your fingertips.
Elegant Lunar Eclipse Mani

Explore the allure of an Elegant Lunar Eclipse Mani, where dark shades and gradient techniques capture the essence of this celestial phenomenon on your nails.
To achieve this enchanting look, opt for deep blues and purples that mirror the colors of a lunar eclipse. Use gradient methods to mimic the mesmerizing shift of colors during this celestial event, creating a stunning visual effect on your nails.
Enhance the mystical design further by adding shimmer or glitter accents that evoke the magical essence of a lunar eclipse. Consider incorporating nail art stickers featuring moon phases to elevate the overall celestial theme of your manicure.
For a sophisticated finish, apply a matte top coat that adds a touch of mystery and elegance to your Lunar Eclipse Mani.
With these elements combined, your nails will exude a celestial charm that captures the beauty of a lunar eclipse in a unique and stylish way.
Let your nails shine with the enchanting allure of the night sky!
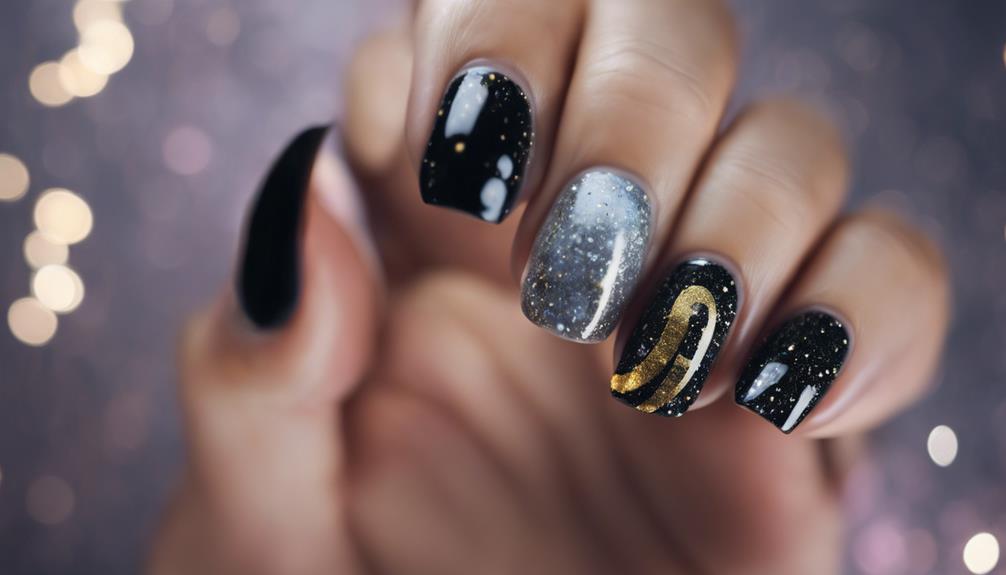
Mystical Midnight Moon Nails

Creating a mystical allure with dark black hues and celestial accents, your nails will captivate with the enchanting style of midnight moon nail art.
Imagine this: intricate star and moon designs adorning your nails, casting a spell of magic and mystery. To enhance the dramatic effect, opt for long stiletto or ballerina nails that exude elegance and sophistication, perfect for a night under the cosmic sky.
Hand-painted celestial motifs add a dreamy touch, making your manicure truly ethereal. For those seeking convenience without compromising style, explore press-on nails with galaxy sparkle designs that will transport you to a cosmic world of beauty.
The shimmer and sparkle will make your nails stand out like stars in the night sky. Embrace the enchantment of the celestial world on your fingertips with these mesmerizing midnight moon nails that are sure to leave you feeling out of this world.
Frequently Asked Questions
What Nail Art Is Trending Right Now?
Looking to stay on top of nail trends? Right now, moon nail art is all the rage! You'll see metallic touches, cool ombre styles, and intricate moon designs everywhere.
Sailor Moon decals and shiny gold stickers are hot choices. Custom press-on nails with celestial themes are super popular for a unique look.
Don't forget to accessorize with some stylish moon and star jewelry to complete your cosmic nail art vibe!
How to Do Moon on Nails?
To do a moon on your nails, start by selecting a dark base color. Use a thin nail art brush or a nail polish pen to draw a curved shape resembling a crescent moon near the cuticle area.
Fill in the shape with the same color or a metallic shade for a celestial effect. Add small dots or stars around the moon for extra flair. Finish with a glossy top coat for a polished look.
How to Do Beautiful Nail Art?
If you want to create beautiful nail art, start by prepping your nails with a base coat.
Choose a color that speaks to you, then add some flair with metallic accents or intricate designs.
Don't be afraid to experiment with different shapes and styles to show off your creativity.
Finish off with a top coat for a glossy finish that'll make your nails pop.
How Do You Paint Moon on Nails?
To paint a moon on your nails, start by grabbing a fine nail art brush. Opt for white or metallic silver polish for that classic moon look. Carefully craft a crescent shape on your nails, then add tiny dot stars around it for detail.
Feel free to get creative with techniques like ombre or layering for a unique twist. If you prefer a quicker option, try using nail art stickers or decals for an easy moon design.
Conclusion
So there you have it, 7 stunning moon nail art ideas to add a touch of celestial magic to your fingertips. If you’re looking for more ways to elevate your nail game, consider trying out stunning marble nail art. This trendy and sophisticated design will give your nails a unique and luxurious look. Whether you prefer bold, colorful marble patterns or more subtle, neutral tones, there are endless possibilities to explore with marble nail art.
Whether you're into glittery moon phases or elegant lunar eclipses, there's a design for every moon lover out there.
Get ready to shine bright like the moon with these dreamy and mystical nail art creations.
Let your nails be the canvas for the beauty of the night sky, and watch as your fingertips become a work of art.