Connect with us

Nail Tips

Creative Holo Taco Nail Art Ideas Step-by-Step

Yearning for mesmerizing nail art? Discover step-by-step Holo Taco techniques to elevate your manicure game and unleash your inner artist.

Published

on

creative nail art tutorial

Ready to master your next manicure? Start by prepping clean, dry nails and applying a quality base coat like Holo Taco's Peely Base. Create a bold canvas with One Coat Black for holographic magic. Enhance stamping with ConEd White for intricate designs. Experiment with gradient art using complementary shades. Elevate your look with holographic polishes like High Def Box Office and Balm Life in Plastic. Seal the deal with a glossy top coat like Sesh Feet for a flawless finish. Your nails will thank you! Discover the secrets to stunning Holo Taco nail art by following these step-by-step tips.

Key Takeaways

  • Start with a clean base using Peely Base for flawless application.
  • Use One Coat Black as a foundation for vibrant holographic designs.
  • Master stamping techniques with ConEd White for intricate nail art.
  • Experiment with gradient designs using Holo Taco polishes for a seamless blend.
  • Finish with Sesh Feet top coat for long-lasting, professional results.

Base Coat Application

For a flawless nail art application, start by making sure your nails are clean and dry. The base coat is your best friend when it comes to protecting your natural nails and ensuring your nail art lasts. Choose a quality base coat like Holo Taco's Peely Base to enhance the adhesion of your nail polish. Apply a thin, even layer of the base coat to create the perfect canvas for your nail art design to shine. This step not only smooths out any imperfections but also guarantees that your colors pop.

Let the base coat dry completely before moving on to the next steps. Rushing through this part can lead to smudging or bubbling, ruining all your hard work. A good base coat not only extends the life of your manicure but also provides a strong foundation for whatever colors and designs you have in mind. So take your time with this essential step to set the stage for stunning nail art.

Canvas With One Coat Black
canvas painting with black

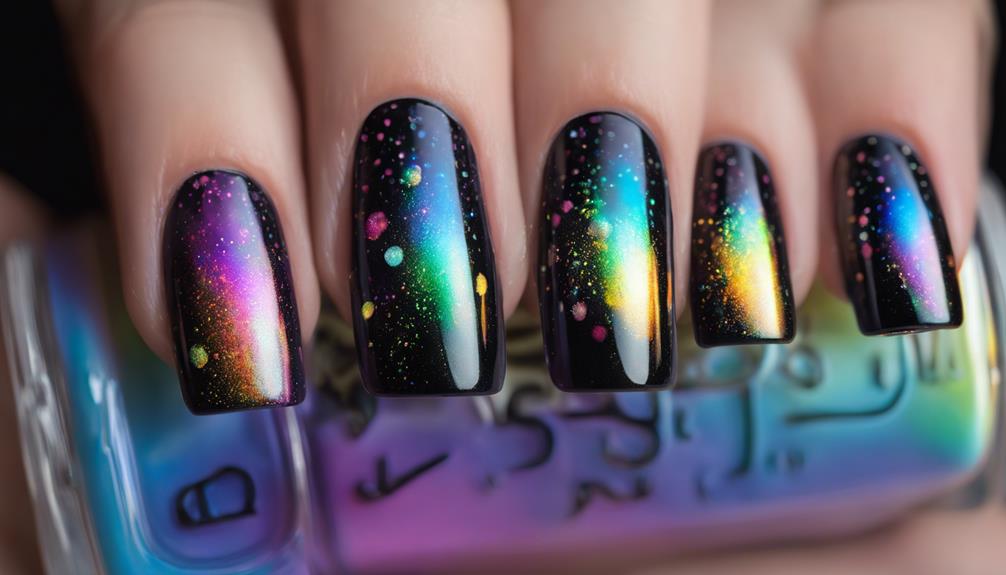
Achieve a sleek and bold canvas for your nail art by applying Holo Taco's One Coat Black as the base color. This deep black shade sets the perfect base for your creative designs, whether you're leaning toward holographic or colorful nail art.

One Coat Black is a time-saving gem, offering full coverage in just one coat, making your nail art process efficient and hassle-free. Imagine the stunning contrast and vibrancy your designs will have when layered on this rich black base.

This versatile polish isn't just a base coat; it's a foundation for your nail art dreams to come to life. Whether you love stamping intricate patterns, blending gradients, or rocking standalone nail art, One Coat Black is your go-to.

The holographic effects of other Holo Taco polishes truly shine when paired with this base. Your creativity knows no bounds on this bold black canvas. We'd love to hear how your nail art journey unfolds with One Coat Black as your trusty base.

Advertisement

Stamping With Coned White

snowy stamping in winter

Ready to level up your nail art game with ConEd White? Let's nail down those stamping techniques first, ensuring your designs pop with crisp precision.

From selecting the perfect stamping patterns to mastering placement, these tips will help you create Instagram-worthy nails in no time!

Stamping Technique Basics

To master the stamping technique basics using ConEd White, make sure you have a steady hand and work swiftly to transfer the design onto your nails effectively. Remember, ConEd White is your best friend for stamping, thanks to its opaque and consistent formula. When stamping with ConEd White, use a firm and steady rolling motion to guarantee the design transfers crisply and covers your nails completely. Cleaning your stamping plate and scraper after each use is essential to keep your designs looking sharp and professional when using ConEd White. Before stamping directly on your nails, practice on paper or a silicone mat to enhance your precision and control. Check out the table below for a quick summary of the stamping technique basics with ConEd White:

Stamping Technique Basics using ConEd White
Steady Hand Work Swiftly Firm Rolling Motion
Clean Tools Practice Makes Perfect Precision Control

Choosing Stamping Patterns

When selecting stamping patterns to use with ConEd White polish, consider opting for intricate designs that will enhance the overall look of your nail art.

These detailed patterns from stamping plates create a striking contrast against dark base colors like One Coat Black, making your nails pop with vibrant holographic effects.

ConEd White polish is the perfect choice for stamping as its precise formula guarantees crisp and clean transfers of the design onto your nails.

Advertisement

By exploring different stamping techniques, you can unleash your creativity and craft unique nail art styles that stand out. You can experiment with layering stamps, reverse stamping, and double stamping to create intricate designs that will surely catch the eye. With these techniques, the possibilities are endless, and you can create magical nail art designs that reflect your personal style and flair. By mastering these stamping techniques, you can elevate your nail art game and express your creativity in new and exciting ways.

The combination of ConEd White on dark hues not only boosts the visibility of the design but also adds depth and dimension to your manicure.

Perfecting Stamping Placement

As you work on perfecting stamping placement with ConEd White polish, focus on positioning the design towards the corners of your nails for a balanced and visually appealing appearance. This technique not only creates a polished look but also guarantees that the design complements the natural shape of your nails.

When using the ConEd White special polish for stamping, you'll notice how the crisp and vibrant design transfer elevates the overall aesthetic of your nail art.

To achieve a cohesive and harmonious look, consider reversing the stamping design for the bottom part of your nails. This small adjustment can make a big difference in tying the whole manicure together. Remember, practice makes perfect! Consistency in stamping placement is key to maintaining symmetry and uniformity across all your nails.

Advertisement

Don't be afraid to get creative and experiment with different stamping designs and placements. Embracing variety won't only showcase your unique style but also add an extra flair to your nail art. So, grab that ConEd White polish and start stamping your way to fabulous nails!

Gradient Design Creation
creative use of gradients

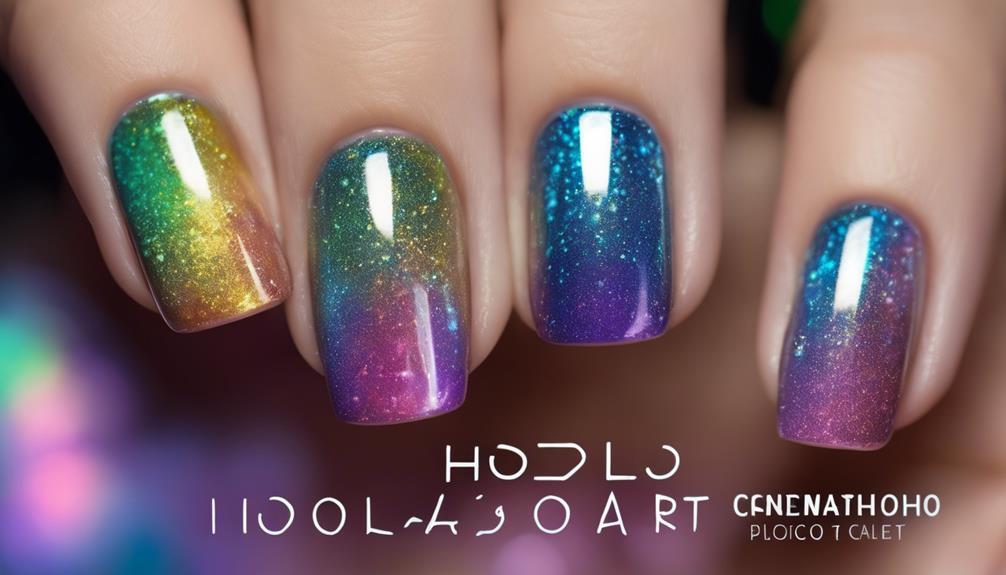
Consider experimenting with creating gradient nail designs using multiple Holo Taco nail polishes applied on a makeup sponge.

To start, choose two or more complementary Holo Taco shades for your gradient. Apply the polishes in stripes onto the makeup sponge, making sure they slightly overlap for seamless blending.

Press the sponge onto your nail, gently dabbing to transfer the gradient. Angle the sponge for a diagonal effect that complements your chosen stamping design.

Remember, blending is key to achieving a smooth shift between colors. To avoid a messy cleanup, apply liquid latex or tape around your nail to catch any excess polish.

Once satisfied with your gradient, seal in the colors and add shine with a glossy top coat. This final step not only enhances the vibrancy of the colors but also ensures your design stays put.

Advertisement

With these simple steps, you can create stunning gradient nail art using your favorite Holo Taco polishes.

Applying High Def Box Office

high definition box office success

To elevate your gradient nail design using Holo Taco polishes, start by applying High Def Box Office, a vibrant blue linear holographic polish that adds a stunning holographic effect to your nails.

This magical polish isn't just your average blue; it's like a disco party on your fingertips! The holographic shimmer dances and plays in different lights, creating an ever-changing spectacle that will have you mesmerized.

As you brush on High Def Box Office, you'll notice how it instantly transforms your nails, giving them a pop of color and dimension that's hard to ignore. For an even more intense holographic effect, don't be afraid to layer it up!

Using Balm Life in Plastic
balm for plastic skin

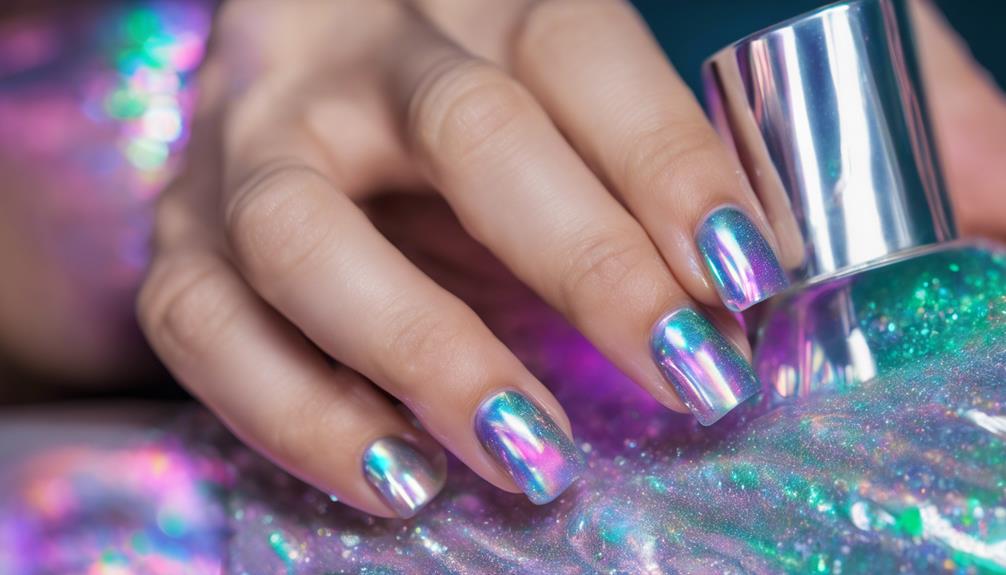
When experimenting with nail art using Holo Taco's Balm Life in Plastic, harness the vibrant neon green holographic polish to create a bold and eye-catching manicure. This shade is a showstopper, adding a pop of color that's bound to turn heads.

Whether you choose to wear it on all your nails or incorporate it into a gradient design for a fun twist, Balm Life in Plastic will elevate your look with its holographic sparkle. The dimension it adds to your nails is truly mesmerizing, catching the light in the most magical way.

To make the most out of this unique shade, try experimenting with different nail art techniques. Consider using stamping plates to create intricate designs that showcase the neon green hue or express your creativity with freehand patterns that complement the holographic effect beautifully.

Advertisement

Whatever you decide, Balm Life in Plastic is sure to bring a touch of fun and excitement to your nail art creations.

Incorporating Anti-Hero Shade

anti heroic character with complexity

Incorporate the enticing Anti-Hero shade from Holo Taco into your nail art repertoire to add a bold and enchanting touch to your manicures. This deep teal holographic polish is perfect for creating eye-catching designs that will make your nails stand out.

Use Anti-Hero as a base color for a striking look, or as an accent color to add a pop of holographic magic to your manicure. You can also experiment with gradients, combining Anti-Hero with other Holo Taco shades like High Def Box Office or Balm Life in Plastic for a cohesive and visually appealing nail art style.

Try different stamping designs and techniques to create depth and dimension in your nail art, showcasing the sparkle and shine of Anti-Hero's holographic finish. Get ready to elevate your creativity and enhance your nail game with the captivating Anti-Hero shade!

Adding Be Kind Rewind
retro movie rental store

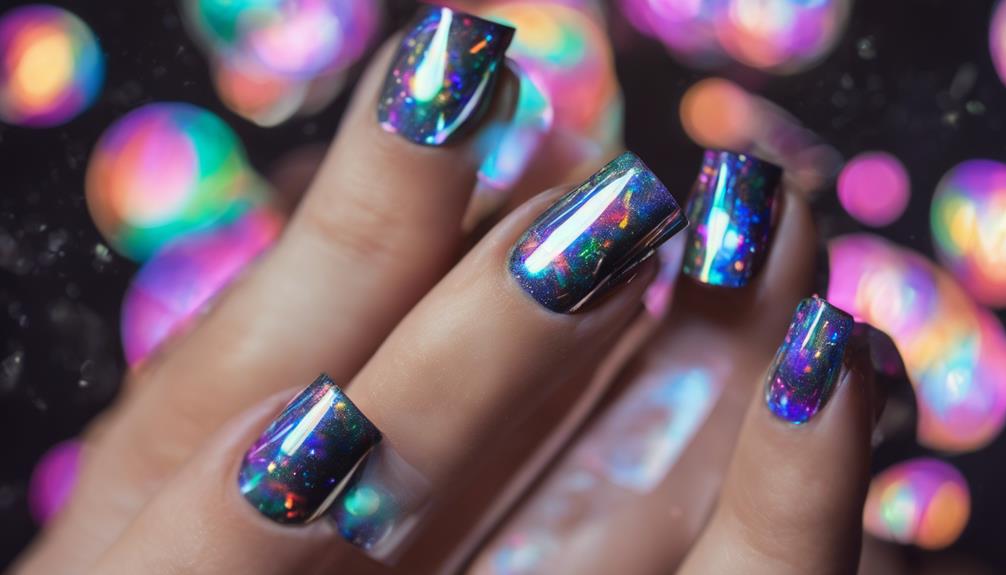
Consider enhancing your nail art designs with the vibrant blue holographic polish, Be Kind Rewind, from Holo Taco. This stunning shade adds a pop of color and holographic sparkle to your manicure, creating a futuristic and eye-catching look. Whether used on its own for a bold statement or as part of a gradient with other Holo Taco shades, Be Kind Rewind's opaque formula guarantees a smooth and vibrant application.

When Be Kind Rewind catches the light, its holographic effect shines brilliantly, giving your nails a mesmerizing finish that changes under different lighting conditions. Combine it with other Holo Taco shades to create unique and dynamic nail art designs that stand out from the crowd.

The versatility of Be Kind Rewind allows you to experiment with various styles, from subtle accents to bold, full-coverage looks. Let your creativity shine with Be Kind Rewind as you elevate your nail art game to the next level.

Advertisement

Final Top Coat Finish

perfecting the final touch

For a flawless and long-lasting finish to your nail art designs, applying a final top coat like Sesh Feet is essential. This last step is important as it not only seals in your beautiful design but also adds a striking glossy finish that enhances the holographic effect of the nail polish, making it pop with vibrancy.

By using a top coat, you're not only protecting your nail art from chipping but also ensuring its longevity, so your stunning design can shine for days to come.

Before you apply the top coat, make sure your nail art is completely dry to avoid any smudging mishaps. Choosing a high-quality top coat will give your nails a professional and polished look, elevating your nail art game to the next level.

Frequently Asked Questions

How to Make a Holographic Nail?

To make a holographic nail, start with a holographic base coat or polish for that dazzling effect.

Use holographic nail powders or flakes to create a holographic finish on your manicure.

Experiment with holographic stamping plates and special holographic stamping polishes for unique designs.

Advertisement

Layer holographic top coats over your nail art for a mesmerizing holographic effect.

Explore holographic nail stickers and decals for easy holographic accents.

Get ready to shine!

How Do I Set up a Nail Art in Home Complete Guide Step by Step?

Alright, let's nail this home nail art setup!

Start with clean, dry nails, slap on that base coat for a smooth ride.

Advertisement

Go bold with One Coat Black, stamp on some intricate designs with ConEd White.

Blend those Hollow Taco polishes for a gradient masterpiece.

Pick a design, stamp away, flip for perfection.

Seal the deal with a glossy top coat, and voilà – share that stunning nail art with the world!

What Are the 5 Basic Nail Designs?

Alright, so let's talk about the 5 basic nail designs you can rock!

Advertisement

First up, you've got solid colors – simple but classy, just one color all over.

Then there's French tips, where you paint the tips a different color for a chic look.

Ombre is next, blending colors for a cool gradient effect.

Don't forget glitter accents for some extra sparkle!

And finally, geometric patterns for a bold and modern vibe.

Advertisement

Time to get creative with those nails!

How to Make Easy Nail Art?

To make easy nail art, start with clean, dry nails and apply a base coat for a smooth finish.

Choose a design from a stamping plate and use a special polish for crisp results.

Create a gradient with complementary shades, applying it at an angle to match the design.

Finish with a glossy top coat.

Advertisement

Share your creation for inspiration. It's simple, fun, and a great way to express your style.

Conclusion

Now that you've mastered these creative holo taco nail art ideas step-by-step, you're ready to display your dazzling nails to the world!

With a touch of holographic magic, your nails will sparkle and shine like never before.

So go ahead and express your inner nail artist, and let your fingertips become a work of art that will leave everyone in awe.

Remember, a little sparkle never hurt anybody!

Advertisement

Advertisement

Nail Tips

Zebra Nail Designs: Fun and Fierce Patterns

Perfect your nail game with zebra designs that blend bold stripes and vibrant colors—discover tips to make your nails truly stand out!

Published

on

By

bold zebra nail art

Zebra nail designs are an awesome way to express your unique style and creativity! You can mix classic black and white stripes with vibrant colors or pastels for an extra splash of fun. Plus, these designs can totally match your mood, whether you're feeling fierce or elegant. To create the perfect stripes, use a thin brush and make sure your base color is dry first. Don't forget to seal your masterpiece with a clear top coat for added shine. If you're curious about more tips, tricks, and patterns that can make your nails really pop, there's plenty more to discover!

Key Takeaways

  • Zebra nail designs feature bold black and white stripes, making them visually striking and perfect for any season or occasion.
  • Personalize your zebra patterns by mixing vibrant colors or pastels, reflecting your unique style and creativity.
  • Incorporate playful elements, like dessert inspirations or accent nails, to add fun variations to your zebra nail art.
  • Use thin brushes for precise lines and ensure your base color is dry to avoid smudging during application.
  • Maintain your designs with regular touch-ups and a high-quality top coat to prevent chipping and fading.

Introduction

beginning of a discussion

Zebra nail designs offer a striking way to express your creativity and wild side with their bold black and white stripes. These fun patterns are a popular choice among nail art enthusiasts, and you can easily find them showcased across social media.

The cool thing about zebra print nails is how versatile they are; you can wear them in any season or for any occasion! To boost your visibility in the nail art niche, consider creating high-quality content that showcases unique designs and techniques.

Want to add a splash of color? You can mix in vibrant hues or even pastel shades to make your nails pop.

Creating zebra nail designs can be a blast, and there are different techniques you can try. You could use stamping for an easy application, or go for freehand painting if you're feeling adventurous! Nail tape can also help you achieve those clean lines.

No matter your skill level, there's a way for you to rock those bold stripes. Plus, you can combine zebra prints with other animal print nail art, making your designs even more exciting.

Advertisement

Expresses Individuality and Creativity

celebrating unique artistic expression

When you choose zebra nail designs, you're not just picking a trendy pattern; you're expressing your unique style and creativity. Zebra nail art is all about bold statements and fun animal prints that let your personality shine.

You can mix and match colors in countless combinations, making each design a reflection of who you are. Just like selecting the perfect best hair styling gels to enhance your look, you can choose nail colors that complement your outfit or mood. Whether you want something fierce and fabulous for a party or a chic, elegant look for a special occasion, these patterns adapt to fit any vibe.

Zebra prints can symbolize wildness and freedom, appealing to those who want to stand out in a crowd. Plus, with social media buzzing with creativity, sharing your unique style can inspire others and build a community of nail art lovers.

You can even experiment by combining zebra stripes with other patterns, unleashing your inner artist! In this playful world of zebra nail designs, every stroke of polish becomes a canvas for your personal expression.

Popular Variations and Ideas

trendy concepts and designs

You'll often find that zebra nail designs come in a variety of exciting variations, each offering a unique twist on the classic look. The classic black and white stripes are always a hit, making zebra print nails a perfect choice for any occasion.

For a fun and playful touch, consider incorporating elements from dessert inspirations, like the colorful sprinkles found in Birthday Cake Blondies, to add vibrancy to your nails. If you want to spice things up, try the Electric Zebra design, which features vibrant colors like pink and yellow, making your nails pop with energy!

For a softer touch, pastel zebra designs are trending, using gentle colors that look great with spring and summer outfits. They add a subtle flair while keeping your style fresh.

Advertisement

If you love mixing things up, consider accent nails! You can pair zebra stripes with other animal patterns, like leopard or giraffe, for a fun and playful effect.

Don't forget to explore creative techniques! Adding ombre effects or glitter to your zebra design can enhance its visual appeal and give your nails a modern twist.

With so many options, you can express your personality and creativity through zebra nail designs that truly stand out! Get ready to show off your unique style and have fun with these fabulous ideas!

Tips and Tricks

expert advice and strategies

Achieving the perfect zebra nail design requires a few handy tips and tricks to elevate your nail art game. First, make sure your base color is completely dry before adding zebra stripes. This prevents smudging and keeps your design looking sharp!

For a clean and professional look, use a thin nail art brush or even a toothpick for that precise application. You'll be amazed at how much easier it's to create those striking lines!

Don't shy away from exploring fun color combinations! Whether you go for pastels or neon shades, choose colors that reflect your personal style. You can even use different colors for accent nails to make your design pop!

Advertisement

Before you dive into the real deal, practice on a nail wheel or fake nails. This will help you refine your technique and boost your confidence.

Once you're happy with your zebra stripes, don't forget to finish with a clear top coat. It not only enhances shine but also prolongs the design's longevity.

With these tips and tricks, you'll be on your way to fabulous zebra nails that'll turn heads!

Care and Maintenance

regular upkeep and attention

To keep your zebra nail designs looking fresh and vibrant, regular care and maintenance are essential. You'll want to touch up your nails every 1-2 weeks to keep those bold colors and intricate patterns shining bright.

Applying a high-quality top coat is a secret weapon for extending the life of your designs. This magical layer helps prevent chipping and fading, making your nails the star of the show!

To keep your nails healthy, don't forget to avoid harsh chemicals in household cleaners. Wearing gloves during cleaning tasks can protect your fabulous designs.

Advertisement

Daily moisturizing of your cuticles and nails is super important, too! This keeps them from becoming dry and brittle, ensuring your zebra patterns look neat and well-maintained.

Scheduling professional manicures every 3-4 weeks is another great way to pamper your nails. Not only will you get precise application of new designs, but they'll also handle removal processes like pros.

With a little love and attention, your zebra nail art will always stand out, making you feel fun and fierce every day! So grab those tools and show your nails some care; they deserve it!

Common Mistakes to Avoid

avoiding common mistakes

Many nail enthusiasts overlook some common pitfalls when creating zebra nail designs. One big mistake isn't letting your base color dry completely before adding those fabulous zebra stripes. If you rush, you might end up with smudging, and nobody wants that!

It's also super important to remember to use a base coat. Skipping this step can weaken your nails and make them prone to chipping or discoloration.

When it comes to drawing your zebra patterns, make sure you use a thin brush or even a toothpick. A thick brush can create clumpy lines, ruining your design.

Advertisement

Plus, try not to overload your nails with too many colors. Sticking to three colors usually gives you the best results, keeping your nail art fun and fierce, not chaotic!

Lastly, don't forget to seal your masterpiece with a top coat! This step keeps your design shiny and prevents fading.

Frequently Asked Questions

Can Zebra Nail Designs Be Done at Home?

Yes, you can definitely do zebra nail designs at home! Grab some nail polish, a fine brush, and a steady hand. With a bit of practice, you'll create stunning patterns that showcase your unique style.

What Nail Polish Brands Work Best for Zebra Patterns?

When you're choosing nail polish brands for zebra patterns, opt for high-quality ones like OPI, Essie, or Sally Hansen. They offer great pigmentation and smooth application, making your zebra designs pop beautifully. You'll love the results!

How Long Do Zebra Nail Designs Typically Last?

Zebra nail designs typically last about a week or two, depending on your daily activities and how well you care for them. Regular maintenance and using a good topcoat can help extend their lifespan significantly.

Advertisement

Are Zebra Nails Suitable for All Occasions?

Zebra nails can definitely suit various occasions. You'll find they add a fun flair to casual outings, yet they might feel a bit bold for formal events. Choose the right moment, and you're set!

Can I Combine Zebra Patterns With Other Nail Art Styles?

Absolutely, you can combine zebra patterns with other nail art styles! Mixing them with florals or geometric designs can create a unique look. Just experiment with colors and techniques until you find the perfect combination!

Conclusion

Now that you know all about zebra nail designs, it's time to get creative and show off your wild side! Whether you choose classic black and white stripes or add some colorful flair, your nails can express your personality in a fun way. Remember, practice makes perfect, so don't worry if your first attempt isn't a masterpiece. Just have fun with it, and soon you'll be a zebra nail design pro, ready to impress your friends!

Continue Reading

Nail Tips

Short Christmas Nails for a Festive Look

Achieve a stunning festive look with short Christmas nails, and explore exciting design ideas that will make your holiday celebrations even more special!

Published

on

By

festive short christmas nails

Short Christmas nails are a practical yet stylish option for the holiday season. You can choose classic colors like vibrant red and deep green, or even mix in some pastels for a modern twist. Adding glitter or metallic accents enhances their festive appeal. Don't forget about fun designs like snowflakes, candy canes, or Christmas trees! Nail stamping or stickers can help you achieve intricate patterns easily at home. Whether you prefer a simple look or something more expressive, short nails offer versatility and creativity. Stick around to discover tips on creating your own festive nail art designs!

Key Takeaways

  • Short Christmas nails offer a stylish yet practical option for holiday activities while maintaining durability and aesthetics.
  • Common festive colors like red and green, along with glitter accents, enhance the seasonal look.
  • Creative designs such as snowflakes, candy canes, and Christmas trees can be achieved easily on short nails.
  • Nail stamping and stickers allow for precise and intricate designs, making festive nail art accessible for all skill levels.
  • Customizable press-on nails provide a quick and effortless way to achieve a festive look without extensive maintenance.

Introduction

beginning of the discussion

When the holiday season rolls around, short Christmas nails offer the perfect blend of style and practicality for your festive activities. You'll love how these nails allow you to dive into the holiday spirit without the worry of long, cumbersome tips.

With a variety of festive designs, you can easily express your creativity while keeping things manageable. Think classic red or emerald green as your base colors, and don't shy away from adding some glitter nail polish for that extra sparkle.

Short Christmas nails lend themselves well to simple nail art, from snowflakes and candy canes to charming Christmas trees. You'll find that many Christmas nail ideas can be achieved at home, making it easy to get ready for a night of gift wrapping or attending holiday parties.

If you're feeling a bit more adventurous, consider luxury designs featuring intricate detailing, 3D elements, or nail gems that add an elegant touch to your look. Whether you're keeping it simple or opting for something eye-catching, short Christmas nails ensure you stay stylish and festive all season long.

Victorian Christmas Nail Traditions

victorian holiday nail customs

Victorian Christmas nail traditions showcase a fascinating blend of artistry and cultural significance. During the Victorian period, women embraced intricate nail art designs as a vital part of their holiday celebrations. You might find them adorning their nails with seasonal motifs like holly, snowflakes, and ornaments, reflecting the era's craftsmanship and attention to detail.

The festive nails were often painted in shades of deep red, green, and gold, echoing the holiday spirit and adding a touch of elegance to their overall look. Nail care was essential during this time, with women using homemade concoctions of oils and waxes to maintain the health and appearance of their nails.

Advertisement

This focus on nail care mirrored societal expectations of femininity and refinement. Additionally, women often showcased their manicured nails as a sign of social status, using decorative nail guards and rings as both accessories and protection for their delicate nails.

In essence, Victorian Christmas nail traditions not only highlighted creativity through intricate nail art but also reinforced the importance of elegance and social standing during the festive season. Embracing these traditions can inspire your own festive nail designs today.

Nail Art Trends for 2024

2024 nail art trends

Nail art trends for 2024 are all about embracing short Christmas nails that blend practicality with festive style. As you prepare for the holiday season, you'll find that these nails cater to your busy lifestyle while still delivering a chic look. Emotional and psychological growth during this time can be reflected in the cheerful designs we choose for our nails.

Classic red and green colors remain popular, making them a go-to choice for festive designs. If you're looking for something a bit different, glittery nails with snowflake accents can add a touch of sparkle to your festivities.

Candy cane patterns are also trending, bringing a playful vibe to your short Christmas nails. For those who prefer a more subtle approach, minimalistic options like understated mistletoe designs or abstract patterns are gaining traction, offering a chic twist to your holiday manicure.

Don't forget about the luxurious feel of 3D and textured nails! With ornament-inspired designs and velvet finishes, you can add depth to your festive look.

Advertisement

Plus, nail stamping techniques have evolved, allowing you to easily recreate intricate holiday themes at home. Incorporating glitter and rhinestones can elevate your designs for a more glamorous touch. Embrace these nail art trends this season, and you'll be ready to celebrate in style!

Choose Seasonal Color Palettes

select seasonal color schemes

Choosing the right seasonal color palette can elevate your short Christmas nails and set the tone for your holiday festivities. To capture the festive spirit, consider classic holiday colors like vibrant red and deep green. These shades instantly evoke Christmas cheer and are perfect for creating simple yet striking designs.

If you want to try something different, mix these classic hues with soft pastels, like pale pink or mint, for a modern twist. Jewel tones such as ruby and emerald also provide a rich, luxurious vibe that's suitable for both casual gatherings and elegant events.

Don't forget about glittery shades! Incorporating reflective silver or shimmer-infused polishes adds an eye-catching element to your festive nail art, making your short nails stand out.

For more creative expression, opt for contrasting colors—think red with white or green with gold. This approach enhances the visual impact of your nails, allowing you to showcase your personal style while celebrating the season.

Embrace these seasonal color palettes to make your short Christmas nails a true reflection of holiday joy!

Advertisement

Nail Art for Holiday Parties

festive holiday nail designs

When it comes to holiday parties, short Christmas nails offer the perfect blend of festive flair and practicality. You can easily maintain your nails while showcasing fun nail art that celebrates the season. Classic red and green color schemes are always a hit, instantly putting you in the holiday spirit. If you’re looking for a more subtle approach, opt for shimmering metallics or elegant white designs that still capture the essence of the holidays. And when the holiday season has passed, you can switch gears and explore stunning birthday nail ideas that showcase your personality and style. From bold and bright patterns to sophisticated and understated looks, there are endless possibilities to make a statement with your nails for any occasion.

For a bit of sparkle, consider adding glitter or incorporating playful candy cane patterns that are sure to catch everyone's eye. If you're feeling creative, there are plenty of DIY options available. Techniques like nail stamping and using nail stickers can help you achieve intricate designs without the hassle of a salon visit.

Unique touches like 3D ornament nails or minimalistic mistletoe accents can elevate your look while still being manageable on shorter nails. To really stand out at your next holiday gathering, don't shy away from metallics and jewel tones.

These chic and sophisticated hues add a touch of elegance to your festive designs, making them suitable for any holiday event. With short Christmas nails, you can effortlessly blend style and convenience for the perfect holiday party look!

Nail Durability Versus Aesthetics

strength over visual appeal

Short Christmas nails strike a balance between durability and aesthetics, making them an ideal choice for the festive season. You'll find that short nails can be adorned with vibrant festive designs, including intricate patterns and 3D elements, without sacrificing strength.

When choosing your nail look, opt for high-quality polishes that resist chipping to ensure your nails stay stunning throughout holiday parties.

The average lifespan of well-applied press-on short nails ranges from one week to several weeks, depending on your care and the quality of materials used. With proper maintenance, you can enhance their durability and keep them looking fresh.

Advertisement

Regularly applying nourishing oils and steering clear of harsh chemicals will help maintain the integrity of your short nails while allowing those festive designs to shine.

While short nails may seem limited in style, they offer a robust canvas for creativity. You can experiment with glitter, intricate designs, and festive motifs, all while enjoying the confidence that comes with strong, long-lasting nails. Additionally, consider incorporating high-quality polishes to ensure your festive designs remain chip-free and vibrant throughout the holiday season.

Festive Snowflake Nail Art

holiday themed nail decorations

Transform your nails into a winter wonderland with festive snowflake nail art that captures the spirit of the season. Start by choosing a base color like royal blue or white, which allows your intricate snowflake designs to really pop.

Nail stamping techniques make it easy to achieve those precise designs right at home, even if you're a beginner. You can get creative with popular color combinations, such as shades of blue, silver, and white, to evoke that chilly vibe perfect for the holiday season.

Don't forget to enhance your manicure with glitter or metallic accents; these elements add a festive flair and elevate the overall look.

Snowflake designs are absolutely adaptable for short nails, ensuring that the delicate patterns remain visible while keeping your style practical for all your holiday activities.

Advertisement

Whether you're heading to a festive gathering or just want to embrace the season, this nail art is a stylish choice. So gather your supplies, experiment with different combinations, and let your nails shine bright with festive snowflake nail art this holiday season!

Nail Art for Joyful Celebrations

festive nail art designs

Nail art brings joy to your holiday celebrations, allowing you to express your festive spirit in a fun and creative way. Short Christmas nails can showcase delightful festive designs like candy canes, snowflakes, and Christmas trees, all while utilizing vibrant colors such as red, green, and gold. These hues instantly enhance your holiday vibe.

You can easily achieve intricate patterns at home through popular nail art techniques like stamping or using stickers, turning your nails into a canvas for creativity. Incorporating glitter and metallic finishes elevates your short Christmas nails, adding that perfect touch of sparkle for those festive gatherings.

For a more understated approach, consider minimalist styles. Subtle mistletoe or garland accents can provide a chic look that radiates elegance without being too over-the-top.

If you're short on time or prefer a quick solution, customizable press-on nails offer salon-quality designs that you can apply in minutes. With a variety of handmade styles available, you can express your individuality while celebrating the season.

Whether you choose acrylic nails or simple nail art, your festive designs will add joy to your holiday celebrations.

Advertisement

Frequently Asked Questions

How to Do Easy Christmas Nails?

To create easy Christmas nails, start with a base coat, then use vibrant holiday colors. Add stickers or simple nail art for quick designs, and finish with a top coat for lasting shine and protection.

What Is the Best Nail Color for Christmas?

When choosing the best nail color for Christmas, you can't go wrong with deep red, emerald green, or sparkling gold. These shades capture the festive spirit and perfectly complement your holiday outfits.

What Nails Look Good on Short Nails?

For short nails, vibrant colors and minimalist designs shine. Try deep reds or emerald greens with simple patterns like stripes or dots. You'll achieve an elegant look that's easy to maintain and showcases your creativity.

How to Do Christmas Plaid Nails?

To create Christmas plaid nails, start with a base coat, apply a solid color, then use tape or a brush to form a grid. Fill in with contrasting colors and finish with a top coat for shine.

Advertisement

Continue Reading

Nail Tips

Simple Red Nail Designs: Classic With a Modern Twist

Incorporate bold red nail designs with modern twists to elevate your style—discover unique ideas that will leave your nails looking stunning!

Published

on

By

modern classic red nails

Simple red nail designs are a fantastic way to show off your style! You can start with classic solid red nails for a bold look. Try a shiny finish for fun or a matte finish for something different. Want a twist? Go for red French tips, or add some glitter for a touch of sparkle! If you're feeling creative, experiment with geometric patterns using nail tape. Just remember to use a base coat to keep your nails safe and looking great. There's plenty more fun tricks to enhance your red nails, so keep exploring to find the perfect designs!

Key Takeaways

  • Classic solid red nails provide a timeless look that suits any occasion, pairing well with both casual and formal outfits.
  • Red French tips add a modern twist, featuring bold red tips on a nude base for an elegant yet contemporary style.
  • Subtle glitter accents on red nails can enhance the design while maintaining simplicity, offering a touch of glam without overpowering.
  • Geometric patterns or negative space designs in red allow for creative expression, merging classic color with modern nail art techniques.
  • Experimenting with different finishes, such as glossy or matte, can transform the overall vibe of your simple red nail design.

Introduction

welcome to the overview

When it comes to nail designs, red is a standout choice that never goes out of style. Simple red nails are perfect for anyone who wants to show off timeless elegance while keeping things modern. A classic red manicure can make you feel confident and sophisticated, whether you're heading to school or getting ready for a party.

You can always add a modern twist by incorporating minimalist accents, like tiny gold bows or a single stripe, which can elevate your basic red look into a bold statement.

Seasonal variations make red even more fun! Think of red and gold glitter for the holidays or coral red for summer days, keeping your nail designs fresh and trendy.

Don't forget about experimenting with different finishes! A glossy finish can make your red nails shine bright, while a matte finish offers a sleek, contemporary vibe.

Whichever style you choose, simple red nails will always be a favorite. With so many ways to personalize your classic red manicure, you're sure to find a look that fits your personality, making every occasion feel special and stylish!

Advertisement

Timeless Elegance and Confidence

classic style and assurance

Red nails exude an undeniable aura of confidence and sophistication, making them a staple in any fashion-savvy individual's repertoire. When you wear red nails, you're not just showing off a classic color; you're embracing timeless elegance. The bold hue symbolizes strength and power, giving you an instant boost of confidence. Studies even show that people often see you as more assertive when you wear red!

Additionally, just like the power of imagination can unlock transformative possibilities in various aspects of life, red nails can reshape your overall appearance, allowing for profound personal expression. Embracing this bold color can enhance your creativity in styling and outfit coordination, leading to innovative fashion choices that reflect your unique personality transformative possibilities.

You can explore various designs, too! From minimalist styles featuring clean lines to modern twists like geometric patterns or negative space, red nails can express your personality while still looking chic. These designs are perfect for any occasion, whether you're dressing up for a party or keeping it casual for a day out.

What's super cool is that red nails complement all skin tones, making them versatile for everyone. You can mix and match your outfits, and those red nails will always shine through.

Popular Variations and Ideas

trendy concepts and adaptations

Nail art enthusiasts have a treasure trove of popular variations when it comes to red nail designs. You can’t go wrong with classic solid red nails, which exude timeless elegance and fit perfectly in both casual and formal settings. Depending on your mood, you can choose glossy or matte finishes to change the vibe! If you’re feeling a bit more adventurous, there are plenty of bold red toenail ideas to explore. Consider adding some sparkle with red glitter polish, or opt for intricate designs like red and black geometric patterns or floral accents. The options are endless when it comes to red nail designs, so don’t be afraid to get creative and show off your style!

For those who love to experiment, exploring modern hair styling tools can elevate your overall look and add more flair to your red nail designs, such as incorporating a user-friendly automatic curler for effortless waves.

If you're looking for a modern twist, why not try red French tips? They pair bold red tips with a nude or contrasting base, giving you a chic look that's sure to turn heads. Want to sprinkle in some sparkle? Incorporating subtle glitter accents into your red manicure adds glam without overpowering the classic color—perfect for special occasions!

Advertisement

For a minimalist yet stylish approach, consider negative space designs. You can create beautiful red accents on a clear or nude base, showcasing the boldness of red while keeping it contemporary.

And if you're feeling creative, geometric patterns like red and peach squares or stripes can elevate your nails. Simply use tape for clean lines! With so many ideas, your red nails will always stand out, blending classic style with modern flair.

Tips and Tricks

strategies for success

Achieving stunning red nail designs is all about the right techniques and care. Start by applying a base coat before your red nail polish. This prevents staining and helps your nails look smooth and polished.

For those who want to keep their space tidy while working on nail art, using a vacuum cleaner like the BISSELL CleanView Swivel Upright can help maintain a spotless environment.

Next, play around with different finishes! You can choose a glossy shine, a matte finish, or even a satin look to give your classic red nails a modern twist.

If you love minimalist designs, try adding negative space or tiny accents like gold bows or stripes. These little touches can make your nails pop!

Advertisement

To create clean lines and geometric patterns, nail tape can be your best friend. It makes it super easy to achieve those sharp edges, even if you're not a nail art pro.

Don't forget to keep your nails looking fabulous by moisturizing your cuticles regularly. Healthy cuticles make any red nail design shine, whether it's classic or modern.

Use a nail art brush for those intricate details, and let your creativity flow! With these tips and tricks, you'll have gorgeous red nails that everyone will admire!

Care and Maintenance

proper upkeep and attention

Maintaining vibrant and healthy nails requires consistent care and attention. To keep your red nail designs looking fabulous, start with a base coat before applying your polish. This magical layer not only prevents staining but also helps the color stick around for longer, giving your manicure a nice, long life!

Don't forget to use a top coat too, as it adds extra shine and protection, ensuring your nails stay chip-free and durable.

Regular manicures every two to three weeks are essential, as they help keep your nails shaped and polished. This prevents chips and wear, letting your nails shine bright like a ruby!

Advertisement

Moisturizing your cuticles and nails is crucial, too, as it keeps them hydrated, preventing dryness and brittleness. A little moisture goes a long way in maintaining that stunning vibrancy.

Also, try to avoid harsh chemicals and too much water exposure, which can weaken your polish.

Remember, the key to gorgeous red nails is in the care and maintenance, so give your nails the love they deserve, and they'll thank you with beauty and brilliance!

Keep smiling, and enjoy those lovely nails!

Common Mistakes to Avoid

avoiding common errors tips

Even with the best care, mistakes can happen that affect your red nail designs. One of the biggest blunders is skipping the base coat. This protective layer keeps your nails from staining, so don't skip it!

Another common mistake is applying too much polish at once, leading to uneven application. Stick to thin layers, and wait for each coat to dry. It's like waiting for your favorite cookie to bake—hard, but worth it!

Advertisement

Don't forget about your cuticles! Neglecting them can result in a messy appearance. Use a small brush or nail polish remover to tidy up after polish application.

Remember to allow enough drying time, too. If you rush, you might end up with smudges or dents. A quick-dry top coat can help speed things along!

Lastly, make sure you choose the right red shade for your skin tone. Testing shades in natural light is the best way to find your perfect match.

Frequently Asked Questions

What Are the Best Red Nail Polish Brands to Use?

When choosing the best red nail polish brands, consider OPI, Essie, and Sally Hansen. They offer vibrant colors, long-lasting formulas, and smooth applications, ensuring your nails look stunning and polished for any occasion.

How Can I Remove Red Nail Polish Without Staining?

To remove red nail polish without staining, use a non-acetone remover. Soak a cotton ball, press it on your nail, and swipe gently. Repeat until the polish is gone, then wash your hands thoroughly.

Advertisement

Are There Any Skin Tones That Suit Red Nails Better?

Absolutely! Red nails can complement various skin tones. If you've got warm undertones, try a brick red. For cooler tones, opt for a cherry or blue-red. Experiment to find what suits you best!

Can I Do Red Nail Art at Home Easily?

Absolutely, you can do red nail art at home easily! Gather your supplies, choose a design, and follow simple tutorials online. With a bit of practice, you'll create stunning looks in no time!

What Occasions Are Best for Wearing Red Nails?

You can wear red nails for various occasions, like date nights, parties, or even formal events. They add a bold touch to your outfit, making you feel confident and stylish no matter where you go.

Conclusion

Now that you've explored the world of simple red nail designs, it's time to unleash your creativity! Whether you choose a classic look or add a fun twist, remember that your nails can be a fantastic way to express yourself. With some practice and care, your nails will shine brightly. So grab your polish, gather your tools, and get ready for some nail art fun! After all, a little red can make you feel like a superstar!

Advertisement

Continue Reading

Trending