Connect with us

Nail Tips

Easy Acrylic Nail Designs for Beginners

Find fabulous and foolproof acrylic nail designs for beginners, from classic French tips to trendy ombre styles, and start creating stunning nails today!

Published

on

acrylic nail design guidance

You're enthusiastic to explore the world of acrylic nail art, and we're thrilled to get you started! Begin with simple stamping nail art designs or classic French tip acrylics, which are perfect for beginners. Try a yellow ombre nail design tutorial or easy floral nail art designs to add some flair. Remember, practice makes perfect, so don't be afraid to experiment and learn from your mistakes. With patience and persistence, you'll be creating stunning acrylic nail art in no time. Now, let's take your skills to the next level – you won't believe the amazing designs waiting for you ahead!

Key Takeaways

• Start with simple designs like classic French tips or ombre nail art to build confidence and skills.

• Practice shaping and refining designs to achieve professional-looking results.

• Experiment with colors, shapes, and decorations to create unique and personalized designs.

• Invest in high-quality materials and learn proper techniques for acrylic nail art success.

Advertisement

• Begin with basic designs and gradually challenge yourself with more complex designs to improve skills.

Simple Stamping Nail Art Designs

With a stamping kit in hand, you can easily create intricate, salon-quality designs on your nails at home. Beginner-friendly stamping kits usually come with plates featuring various designs like flowers, geometric patterns, and animals, making it easy to get started.

The process is surprisingly simple: apply nail polish to a design on the plate, scrape off the excess, and then transfer the design to your nail. This technique allows you to achieve quick and easy nail art without needing advanced painting skills.

The best part? You can experiment with different colors and designs to create unique and personalized nail art using stamping techniques. Try pairing bold colors with delicate patterns or mixing and matching different designs to create a look that's all your own.

With stamping, the possibilities are endless, and you'll be amazed at how easily you can create salon-quality nail art in the comfort of your own home. So go ahead, get creative, and show off your new nail art skills!

Advertisement

Classic French Tip Acrylics

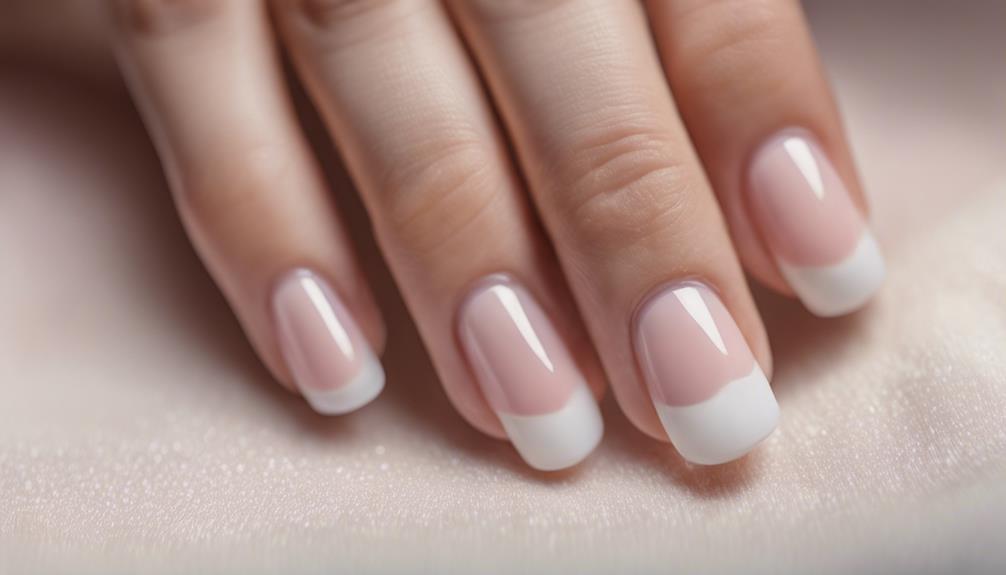
elegant manicure with french tips

As you delve into the realm of Classic French Tip Acrylics, you'll soon realize that mastering the perfect tip application technique is crucial for achieving a flawless look.

You'll need to ponder the shape of the nail, as it greatly impacts the overall aesthetic of the design.

Let's explore these essential points together, and you'll be well on your way to creating stunning French tip acrylics that turn heads!

Tip Application Techniques

You'll typically start by applying a thin layer of white acrylic to the free edge of the nail, creating a crisp, smooth curve that defines the classic French tip look. To achieve a polished finish, use a thin brush to create a crisp smile line when applying the white acrylic. Make sure to apply the white acrylic evenly and smoothly, as this will make all the difference in achieving a professional French tip look.

Feel free to customize the French tip design by adjusting the width and shape of the white acrylic on the nail. You can make it bold and dramatic or soft and subtle, depending on your personal style.

Once you've achieved the desired look, seal it with a clear acrylic overlay for added strength and durability. This will help your French tip design last longer and stay looking fabulous.

Advertisement

With these simple steps, you'll be on your way to creating stunning French tip acrylics that will turn heads!

Nail Shape Considerations

When creating a classic French tip acrylic design, choose a nail shape that complements the straight-edge tip, such as a square or squoval shape, to achieve a balanced and elegant look. A square or squoval shape will create a harmonious contrast with the crisp, straight edge of the French tip, resulting in a sophisticated appearance.

Avoid round or oval shapes, as they may clash with the sharp lines of the tip. By selecting the right nail shape, you'll set the stage for a timeless and elegant look that exudes sophistication.

Yellow Ombre Nail Design Tutorial
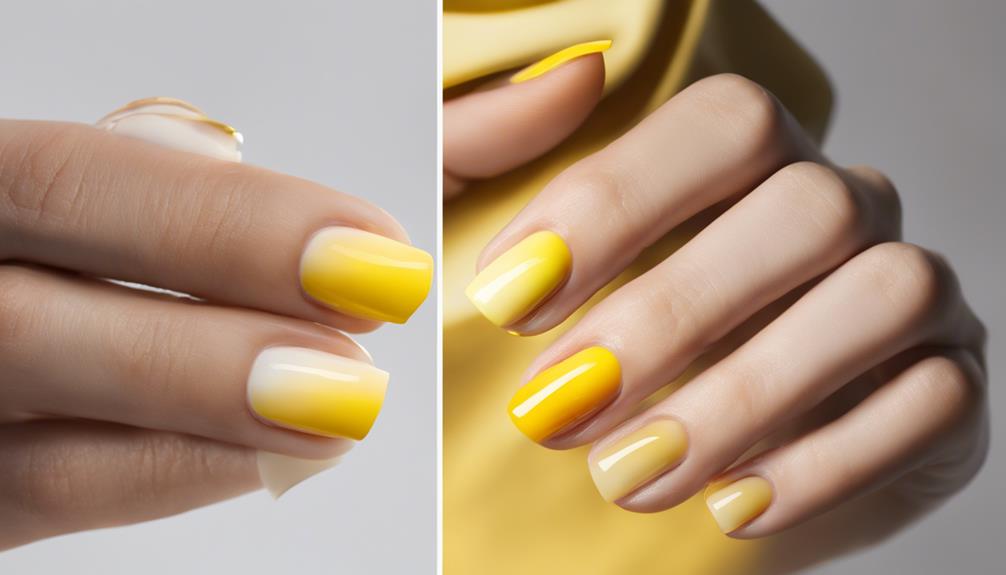
colorful nail art tutorial

Frequently, beginners find it challenging to achieve a seamless ombre effect, but with the right tools and techniques, you can master this stunning yellow ombre nail design.

To get started, protect your natural nails with a clear acrylic base coat. This will provide a smooth canvas for your design.

Next, use a Kalinsky brush to blend yellow nail polish, creating a smooth and marbled ombre effect. Don't be afraid to experiment with different shades of yellow to achieve the desired gradient.

Advertisement

Once you're happy with the design, encapsulate it with clear acrylic for added strength and durability. To shape your nails, use an 80 grit file and an e-file at a speed of 10-11,000 RPM for precision.

Finally, consider adding some extra flair with floral decorations using rhinestone glue for a unique and statement look.

With these steps, you'll be on your way to creating a show-stopping yellow ombre nail design that's sure to turn heads.

Easy Floral Nail Art Designs
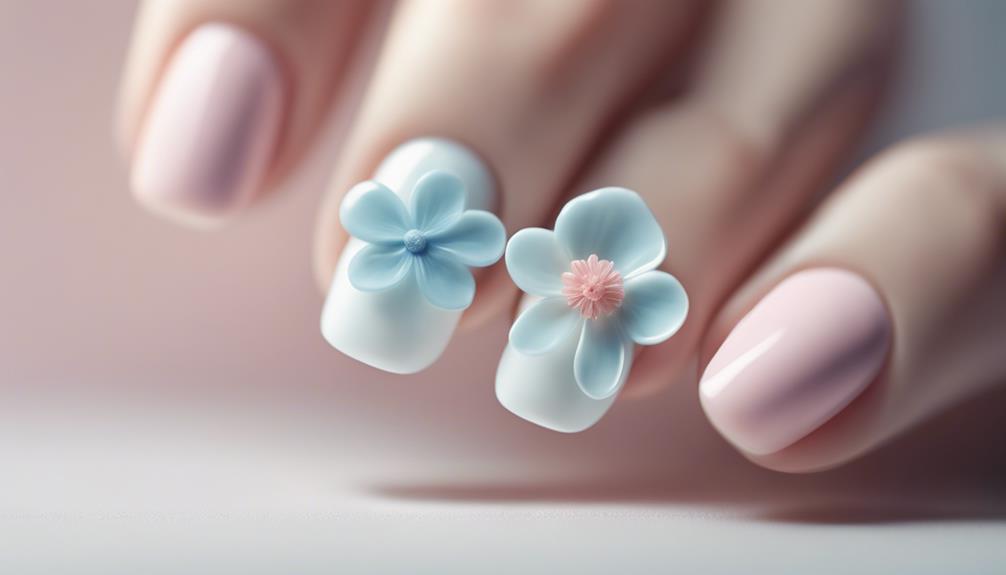
floral nails made simple

As you explore the world of easy floral nail art designs, you'll soon discover that it's all about adding those subtle yet stunning touches to your nails.

You can start by creating simple flower accents or delicate petal designs that will instantly elevate your nail game. Once you’ve mastered the basics, you can then move on to more intricate nail art designs such as 3D floral embellishments or abstract watercolor designs. With a bit of practice and creativity, you can transform your nails into a beautiful canvas for all kinds of stunning nail art designs.

With a few easy techniques and tools, you'll be on your way to creating beautiful, blooming masterpieces on your nails!

Advertisement

Simple Flower Accents

Get creative with simple flower accents, a great way to add a touch of elegance to your acrylic nails without needing to be a nail art expert.

You can achieve beautiful floral nail art designs using simple techniques like dotting tools or nail art brushes. Start by painting a base color on your nails, and then add flower accents using different colors of nail polish. Use a small brush to create delicate flower petals and a dotting tool to make the center of the flowers.

Don't be afraid to experiment with different flower sizes and placements to create a unique and eye-catching design. You can add a few small flowers scattered across your nail or create a bold statement with larger blooms.

Once you're happy with your design, finish it off with a top coat to seal in the design and add shine to your floral nail art. With these simple steps, you'll be rocking elegant flower accents in no time!

Delicate Petal Designs

You can take your flower accents to the next level by exploring delicate petal designs, which involve creating intricate floral patterns using acrylic nail art techniques. By layering different shades of acrylic powders, you can achieve a realistic petal effect that's simply stunning. As a beginner, you can start with simple flower designs and gradually progress to more complex patterns. The key to creating precise petal designs is to use fine detail brushes and tools, which will help you achieve the delicate, intricate look you're going for.

Advertisement

Delicate petal designs add a touch of elegance and femininity to your nails, making them perfect for various occasions. Whether you're heading to a wedding, a dinner party, or just want to elevate your everyday look, these designs are sure to impress.

With a little practice and patience, you can master the art of delicate petal designs and take your nail game to the next level. So, get creative, experiment with different colors and patterns, and watch your nails come alive with beauty and sophistication!

Beginner-Friendly Nail Art Techniques
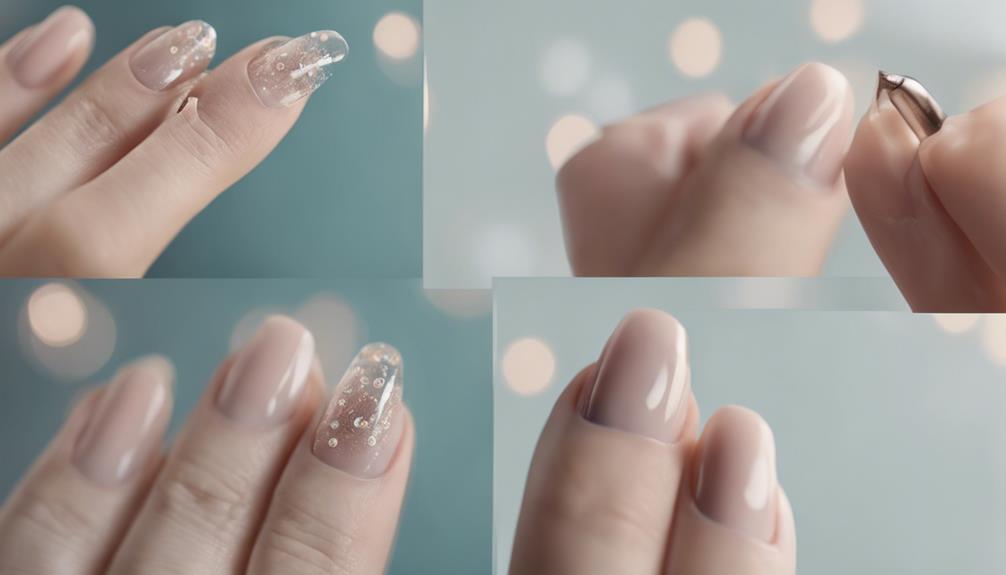
nail art for beginners

By mastering basic acrylic application techniques, you'll set the stage for more intricate nail art designs and create a flawless canvas for your beginner-friendly nail art techniques. Now, it's time to take your skills to the next level with some easy and impressive techniques.

Here are some essential techniques to get you started:

  1. Experiment with ombre and marbling: These simple yet stunning designs will add a touch of elegance to your acrylic nails.
  2. Incorporate embellishments: Add some sparkle with rhinestones or glitter to give your nail art a pop of personality.
  3. Master the art of blending: Seamless blending is key to a flawless finish. Practice makes perfect, so don't be afraid to experiment!
  4. Follow tutorials and find inspiration: Seek out step-by-step guides and nail artists for inspiration to help you improve your skills and stay motivated.

Quick and Easy Acrylic Designs
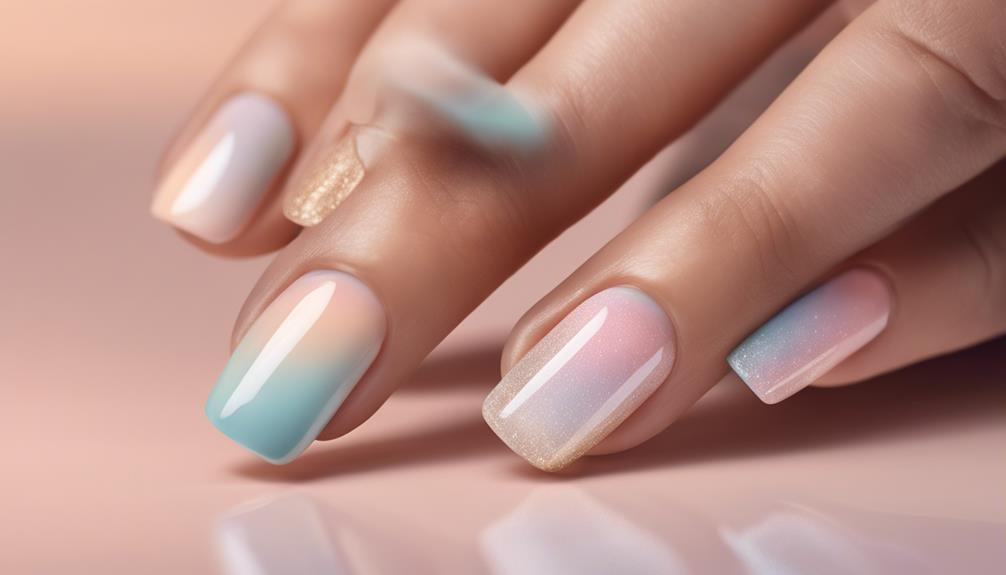
simple and efficient nail art

To create stunning yet effortless acrylic nail designs, start with a clear acrylic base to safeguard and strengthen your natural nails before adding a pop of color or design. This will guarantee a long-lasting and durable finish.

Next, use simple yet effective techniques like ombre or marbling with acrylic paints to add some visual interest to your nails. You can experiment with different colors, shapes, and decorations to create unique designs that reflect your personality. Remember to encapsulate your designs with clear acrylic to seal and protect them.

As you get more comfortable with acrylic nail art, practice shaping and refining your designs with a high-quality file and e-file for professional results. Don't be afraid to try new things and make mistakes – they're an essential part of the learning process!

Advertisement

The key to mastering quick and easy acrylic designs is to keep it simple, have fun, and be patient with yourself. With a little practice, you'll be creating stunning acrylic nail art in no time!

Frequently Asked Questions

What Are the 5 Basic Nail Designs?

When it comes to nailing the perfect look, you've got options!

You're probably wondering what the 5 basic nail designs are, right? Well, let's explore!

You can't go wrong with classic French tips, adding some sparkle with simple glitter accents, or blending hues with ombre nails.

Geometric nail art and floral designs are also great options.

Advertisement

These styles are timeless, trendy, and easy to achieve, giving you a solid foundation to experiment and find your signature look!

What Is the Best Shape for Acrylic Nails for Beginners?

When it comes to acrylic nails, you're probably wondering what shape is best for you as a beginner.

You'll want to opt for a classic square or rounded shape, as they're easier to maintain and less prone to breakage.

These shapes are forgiving and will help you get accustomed to having acrylics without feeling overwhelmed.

Plus, they're perfect for daily tasks and won't cause discomfort.

Advertisement

How to Design Nails for Beginners?

Did you know that 75% of women consider their nails a reflection of their personality?

Now, let's get creative! When designing nails for beginners, start with a clear acrylic base coat to protect your natural nails.

Use a Kalinsky brush to create simple, yet stunning designs like a marbled ombre effect.

Don't forget to add a clear acrylic topcoat for durability.

Finally, refine your nail shape with an 80 grit file and e-file for a flawless finish.

Advertisement

You're just a few steps away from nail art mastery!

What Are the Easiest Acrylic Nails to Type With?

You're wondering what the easiest acrylic nails to type with are? Well, you're in luck! As you'll soon discover, shorter, rounded nails are your best bet.

Opt for a length of around 0.5-1 inch to minimize interference with keys and reduce typing errors. A square or squoval shape provides a wider surface area, making typing a breeze.

Say goodbye to discomfort and difficulty with these easy-to-type-with acrylic nails!

Conclusion

You've made it to the finish line! Mastering easy acrylic nail designs is like riding a bike – once you get the hang of it, you'll be gliding through nail art like a pro!

Advertisement

With these beginner-friendly designs and techniques, you'll be creating stunning looks in no time. Remember, practice makes perfect, so don't be afraid to experiment and try new things.

Happy nail-ing, and get ready to show off your amazing creations!
Advertisement

Nail Tips

Simple Blue Nails: Understated Yet Elegant

Simple blue nails offer a chic and versatile look that captivates; discover how to elevate your nail game with unique designs and care tips!

Published

on

By

sophisticated minimalist nail design

Simple blue nails are a stylish and elegant choice that you can wear anywhere! The soft blue color is calm and cool, making it perfect for both fun days out and fancy events. You can keep it classic with solid color, or try fun designs like light blue French tips or cute polka dots. To achieve a polished look, start with a base coat and finish with a shiny top coat. Plus, by using cuticle oil, your nails will stay healthy and vibrant! Want to discover even more fun tips and ideas? Keep exploring for all the details!

Key Takeaways

  • Simple blue nails offer a minimalist aesthetic that exudes elegance and sophistication for any occasion.
  • Light blue shades evoke feelings of calmness, making them a versatile choice for both casual and formal events.
  • Designs like solid colors or light blue French tips add a modern twist while maintaining an understated appeal.
  • Fun patterns and ombre effects can enhance simple blue nails without overwhelming their elegance.
  • Proper care and maintenance, including base coats and regular touch-ups, ensure lasting vibrancy and polished appearance.

Introduction

beginning of the discussion

When you think of simple blue nails, envisioning a clean and minimalist aesthetic comes to mind. These nails are a fantastic way to show your style without being too flashy.

Light blue shades, in particular, evoke feelings of calmness and serenity, making them an elegant choice for any occasion. You'll find that simple blue nails are an understated yet beautiful look that pairs perfectly with almost any outfit.

For an added touch of glamour, consider incorporating subtle nail art that complements the blue tones, such as delicate white accents or minimalistic designs that reflect your personal style. The versatility of simple blue nails makes them a great base for experimenting with bold colors.

What's even better is that this nail style is a versatile choice for everyone, especially for DIY enthusiasts! You don't need to be a professional to achieve this look.

With just a few basic techniques, you can create your own stunning nails at home. Plus, simple blue nails can serve as a lovely canvas for creative embellishments.

Advertisement

Whether you want to add some tiny sparkles or playful patterns, these details can enhance your nails while still keeping that elegant vibe.

Versatile for Any Occasion

adaptable for every event

Simple blue nails effortlessly adapt to any occasion, making them a go-to choice for your nail care routine. Whether you're dressing up for a party or keeping it casual for a day out, light blue nails are a versatile choice that complements your style. This calming hue goes perfectly with everything from summer dresses to winter formal wear, enhancing your overall look without stealing the spotlight.

Additionally, simple blue nails can be paired with a soothing cup of herbal tea, which is known for its health benefits that promote relaxation and overall well-being.

You'll love how simple blue nails can create an elegant appearance, especially when you choose chic designs like a classic solid color or subtle French tips. They fit right in at professional environments too, making you look polished and put together.

For a little extra flair, think about adding minimalist patterns, like a single glitter nail or delicate stripes, to keep things understated yet sophisticated.

What's really great is that blue nails are timeless. You can rock them any season, and they'll always look fabulous.

Advertisement

Popular Variations and Ideas

trending concepts and innovations

Exploring popular variations and ideas for simple blue nails opens up a world of creativity and style. One classic choice is a solid light blue nail, which gives you a chic minimalist look that's perfect for any occasion.

If you want to mix it up a bit, try light blue French tips! Instead of the usual white, this modern twist looks fabulous in both casual outings and professional settings. To ensure your nails are well-maintained and healthy, consider using natural products for nail care, such as those made with organic ingredients like natural styling products.

For those who love playful patterns, consider adding fun details like polka dots or stripes in light blue. These nail art styles can make your simple nails feel extra special without being overwhelming.

Another great idea is to experiment with ombre effects. A smooth gradient from light blue to white creates an elegant and eye-catching look that everyone will admire!

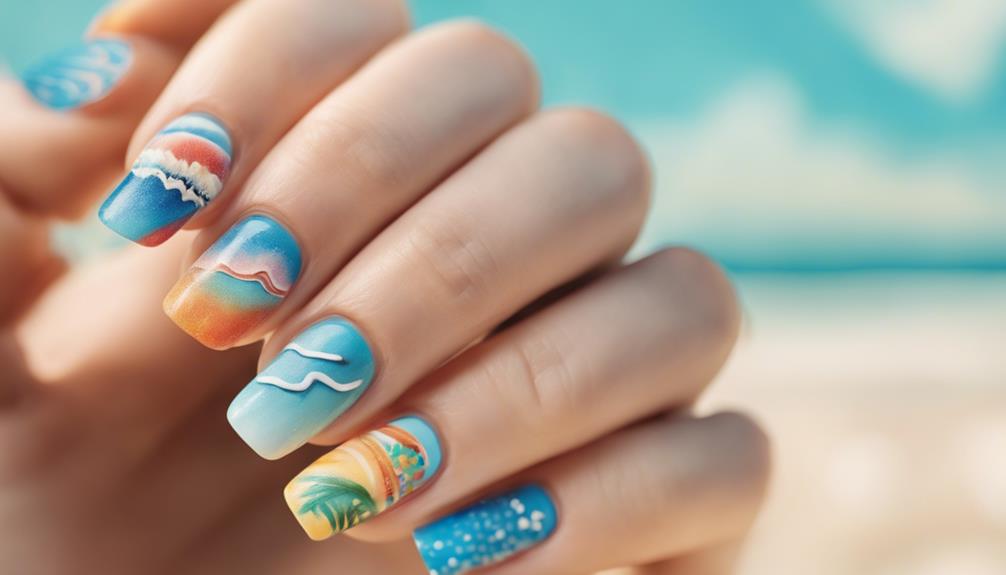
Lastly, don't forget about seasonal themes. Light blue nails can remind you of sunny summer days and beach vibes, making them ideal for warm-weather events.

With these variations, you can express your personality and keep your nails looking simple yet elegant! So, grab your polish and let your imagination run wild—you're going to love the results!

Advertisement

Tips and Tricks

helpful advice and strategies

To achieve the perfect simple blue nails, start with a clean slate by filing and shaping your nails. This step sets the stage for a flawless finish!

Next, apply a base coat to protect your nails and smooth the surface. Choose your favorite blue nail polish, whether you prefer light shades or deeper tones, and apply two coats. Remember to let each coat dry completely to avoid smudging!

Now, let's add a touch of elegance! You can use nail art tape to create clean lines or fun geometric patterns, which will give your manicure a modern twist without needing advanced skills.

Once you're happy with your blue nail designs, finish with a shiny top coat. This not only enhances the shine but also protects your nails from chips and wear.

Regular maintenance is key! Keep your blue nails looking fresh by doing touch-ups as needed and applying cuticle oil.

This simple routine helps your nails stay vibrant between salon visits or DIY sessions. With these tips and tricks, you'll have beautiful blue nails that shine bright and show off your style!

Advertisement

Care and Maintenance

proper care practices

Caring for your blue nails is essential to keep them looking vibrant and polished. Start by applying a base coat before using any blue nail polish. This protects your nails from staining and enhances the longevity of your manicure. It's like giving your nails a cozy blanket!

To keep your nails healthy, don't forget to use cuticle oil daily. This little step helps prevent chipping and cracks, ensuring your blue polish looks fabulous for longer. You wouldn't want to wear a cute outfit with shoes that are falling apart, right?

It's also important to avoid harsh chemicals found in cleaning products, as they can damage your beautiful blue nails. For extra durability, consider using gel formulas or top coats specially designed for shine. They add that extra oomph to your manicure!

Regular touch-ups are key to maintaining the vibrancy of your blue polish, so keep an eye on it.

With a little love and care, your nails will stay stunning and ready for compliments. Remember, the right maintenance routine can make all the difference in keeping your blue nails looking their best!

Common Mistakes to Avoid

avoiding common mistakes

When it comes to achieving the perfect blue nails, avoiding common mistakes can make all the difference. First off, don't skip the base coat! It's essential for protecting your nails from staining and ensuring your polish goes on smoothly.

Next, watch out for thick coats of polish. Applying them can lead to uneven drying and more chips, making your nails look less than elegant.

Advertisement

Proper nail preparation is also key. Make sure to file and buff your nails before painting, so the surface is nice and smooth. This helps the polish stick better and look fabulous!

After you paint, don't forget to clean up the edges around your cuticles. A little extra effort here can prevent a messy look and keep your nails looking simple yet chic.

Lastly, always apply a top coat. It adds shine and protects your blue nails from chipping, so they stay stunning for longer.

Frequently Asked Questions

Which Nail Color Looks Elegant?

When you think of elegant nail colors, consider soft shades like baby blue or deep navy. These colors evoke sophistication and pair beautifully with various outfits, ensuring you look polished for any occasion.

Is Blue a Classy Nail Color?

Absolutely, blue's a classy nail color! Its elegance shines in various shades, from serene light blues to bold navy. You can effortlessly elevate your look while making a sophisticated statement for any occasion.

Advertisement

What Is the Saying About Blue Nails?

You might've heard the saying "blue is the new black," highlighting how blue nails are now seen as a stylish alternative to traditional colors. This shift reflects creativity, individuality, and a modern approach to nail art.

What Does It Mean When a Girl Gets Her Nails Painted Light Blue?

When a girl paints her nails light blue, it often reflects her desire for calmness and creativity. This color choice can signal her individuality, evoke feelings of relaxation, and express loyalty and trust in relationships.

Conclusion

In conclusion, simple blue nails are a fantastic choice for anyone wanting to look stylish without being too flashy! They're perfect for every event, from school to parties, and you can mix them up with fun designs or stick to classic shades. Just remember to take good care of your nails, and avoid common mistakes like forgetting a base coat. So grab your favorite blue polish, and let your creativity shine—your nails will thank you!

Continue Reading

Nail Tips

Neon Orange Nails With Glitter for a Daring Summer Style

Transform your summer look with vibrant neon orange nails adorned with glitter; discover how to make your manicure truly stand out this season!

Published

on

By

daring summer glitter nails

Neon orange nails with glitter are your ticket to a daring summer style. This vibrant hue adds energy and fun to any look, making it perfect for beach outings or summer parties. Pair Kiara Sky Gel Polish 444 with LDS 03 Ace Orange Gel Reflective Glitter for a stunning manicure that sparkles. Don't forget to apply a base coat for protection and longevity, while keeping your nails moisturized to avoid dryness. With so many design possibilities, you can truly showcase your personal style. Keep on exploring these fabulous ideas to transform your nail game this summer!

Key Takeaways

  • Neon orange nails create a bold, energetic vibe perfect for summer, making a statement at any event.
  • Pair Kiara Sky Gel Polish 444 with LDS 03 Ace Orange Gel Reflective Glitter for a stunning, glittery effect.
  • Experiment with ombre designs or geometric shapes to showcase your unique style while incorporating glitter accents.
  • Regular nail care, including a base and top coat, ensures longevity and vibrancy of neon orange polish.
  • Complement your neon orange nails with festive outfits and accessories for a cohesive and daring summer look.

Introduction

beginning of a discussion

Summer is the perfect time to experiment with bold colors, and neon orange nails are a standout choice that can elevate your style. This vibrant hue captures the essence of summer, making it ideal for all your warm-weather events.

Pairing neon orange shades, like Kiara Sky Gel Polish 444, with glittery accents such as LDS 03 Ace Orange Gel Reflective Glitter transforms your manicure into a dazzling work of nail art.

Incorporating glitter into your neon orange nail designs adds sparkle and dimension, making your nails pop and catch the light. This daring look is versatile, perfect for casual outings at the beach or more formal summer gatherings.

Whether you're lounging by the pool or attending a party, bold neon orange nails will ensure you stand out in any crowd.

You don't need to visit a salon to achieve this eye-catching style. With gel polishes and glitter topcoats, you can easily create stunning nail art at home.

Advertisement

Nail Art Trends From 1970S

retro nail art trends

Emerging from a vibrant cultural revolution, nail art in the 1970s embraced bold colors and creative designs as a form of self-expression. You'd find neon orange taking center stage, capturing the spirit of the disco era. This decade was all about experimenting with vibrant nail colors and eye-catching glitter, allowing you to showcase your personality with every swipe of polish.

The 1970s saw intricate designs like floral patterns, geometric shapes, and even psychedelic swirls that reflected the artistic movements of the time. You could easily turn your nails into a canvas for these vivid expressions, making your hands a focal point of your look.

Additionally, press-on nails made their debut, offering a convenient way to achieve elaborate designs without needing a professional. The introduction of nail styles during this period encouraged creativity and allowed individuals to explore various shapes and techniques.

As nail art became more mainstream, you joined a growing community of individuals eager to explore different techniques and styles. The combination of neon hues and glitter not only defined the vibrant nail trends of the 1970s but also set the stage for the contemporary nail art you enjoy today.

Vibrant Hues Enhance Summer Vibes

colorful shades boost summer

As you embrace the vibrant spirit of the 1970s nail art, neon orange nails are the perfect way to amplify your summer style. This bold and vibrant hue captures the essence of summer, providing a striking look that's hard to ignore.

When you choose a Summer Orange Nail Design infused with orange glitter, you're not just adding a pop of color; you're elevating your entire aesthetic. The beautiful shades of neon orange paired with glitter create an eye-catching effect that's ideal for summer festivities.

Whether you opt for reflective or chunky glitter, the sparkle enhances the overall vibe, making your nails a focal point during beach outings or summer gatherings. The playful nature of glitter in your nail design brings a fun twist, perfect for parties or special occasions.

Advertisement

With neon nails, you have the freedom to customize your look, reflecting your personal style while embracing the daring spirit of summer. In fact, the growth of the beauty industry is projected to reach $800 billion by 2025(https://example.com). So, go ahead and rock those neon orange nails with orange glitter, ensuring you stand out with every wave and every smile.

Your fingers will be a beautiful testament to summer's bold energy!

Use a Base Coat

apply a base layer

Before diving into bold neon orange shades, it's crucial to lay down a solid foundation with a base coat. This step not only creates a smooth surface for your neon orange nails but also helps the vibrant color adhere better and last longer. A quality base coat protects your natural nails from staining, especially since neon shades like orange can be more prone to discoloration.

Additionally, applying a base coat enhances the overall finish of your manicure, giving it a more professional look. You'll appreciate how it increases the longevity of your polish, keeping your nails looking fresh for days. Many base coats contain nourishing ingredients that strengthen and condition your nails, promoting healthier growth and reducing brittleness. This is similar to how regular filter replacement in air purifiers ensures optimal performance and longevity.

For the best results, make sure to allow the base coat to dry completely before you apply your neon orange polish. This ensures even color application and prevents smudging, so your stunning nails can shine bright all summer long.

Nail Care Tips for Longevity

long lasting nail care tips

To keep your neon orange nails looking vibrant and fresh for as long as possible, it's essential to adopt a solid nail care routine. One of the best nail care tips is to apply a high-quality top coat every few days. This seals in your design and adds an extra layer of shine, helping to maintain that striking color.

Regularly moisturize your cuticles and surrounding skin to prevent dryness and cracking, which can compromise the look of your manicure.

Advertisement

Additionally, be mindful of your daily activities. Avoid exposing your nails to harsh chemicals or prolonged water immersion, as these can weaken the polish and lead to chipping.

When doing household chores, always wear gloves to protect your nails from damage and to keep that neon color looking its best.

Lastly, store your nail polishes in a cool, dark place. This prevents them from thickening and losing their effectiveness, ensuring a smoother application for your next manicure. Incorporating a high-quality top coat can also enhance the durability of your manicure, giving it that salon-finish look.

Color Impact Versus Maintenance Effort

color impact vs maintenance

Neon orange nails with glitter can make a bold statement, elevating your summer style effortlessly. These vibrant shades not only catch the eye but also enhance your overall summer look, making them a popular choice for those who love to stand out.

The addition of glitter in your nail designs adds an extra layer of sparkle, drawing attention and ensuring your nails remain eye-catching at any event.

However, it's important to consider the balance between color impact and maintenance effort. While neon orange nails are striking, they may require more frequent touch-ups due to their bright nature.

Advertisement

Fortunately, the glitter can help mask any signs of wear, extending the overall look of your manicure. To maintain color longevity, using a good base coat and top coat is essential. These products minimize chipping and keep your nails looking fresh.

On the flip side, easy removal of glitter polish can be a hassle. You'll likely need to soak your nails in acetone or use specialized removers, which mightn't suit everyone's low-maintenance preferences.

Ultimately, the choice is yours—boldness or ease of upkeep.

Vibrant Neon Nail Inspirations

luminous colorful nail ideas

For those eager to embrace the summer spirit, vibrant neon nail inspirations are the perfect way to express your style. Neon colors, particularly a striking orange summer nail, are sure to turn heads and offer a fun, energetic vibe.

When you add glitter to your neon orange polish, you elevate your nail design to a bold and stylish level that sparkles under the sun.

If you're looking for nail designs to try, consider using products like LDS 03 Ace Orange Gel Reflective Glitter or DND Gel Nail Polish Duo 567 Grand Canyon, AZ. These gel nail options provide striking shine and durability, perfect for summer adventures.

Advertisement

You can also explore creative techniques like ombre nails, blending neon orange with other vibrant shades for a unique look. Geometric shapes with glitter can add an artistic flair that sets your manicure apart.

Whether you're dressing up for a summer party or keeping it casual, neon orange nails with glitter are versatile and perfect for any occasion.

Embrace Bold Summer Colors!

vibrant summer color palette

Summer's the perfect time to dive into bold colors, and embracing vibrant shades like neon orange can transform your look. Neon orange nails are a standout choice, giving you an energetic vibe that captures the essence of the season.

When you pair neon orange with glitter, you elevate your manicure, adding the sparkle and glamour that's ideal for summer parties and events.

To enhance the boldness of your neon orange, consider using popular products like LDS 03 Ace Orange Gel Reflective Glitter or DND Gel Nail Polish Duo 567 Grand Canyon, AZ. These products offer shimmering effects that really make your nails pop.

This daring combination not only grabs attention but also allows for creative expression through various nail art techniques. You can experiment with different designs to showcase your personal style.

Advertisement

For added elegance and sophistication, complement your neon orange glitter nails with rhinestone accents. These little touches can take your look to the next level.

Frequently Asked Questions

Is Orange a Summer Nail Color?

Absolutely, orange's vibrant energy makes it a perfect summer nail color. It's lively and fun, reflecting the season's spirit. Whether bold or subtle, orange shades can brighten your look for any summer occasion.

What Is the Summer Nail Trend in 2024?

In 2024, summer nail trends embrace vibrant neon shades, especially neon orange. You'll love incorporating glitter, ombre, and geometric designs, enhancing your look with playful creativity and striking reflective finishes that catch the light beautifully.

Are Neon Nails Trendy?

Yes, neon nails are definitely trendy! They grab attention and showcase your bold style. Whether you choose vibrant colors or add glitter, you'll stand out and express your creativity perfectly this summer.

What Color Goes With Orange Nails?

When you're choosing colors to pair with orange nails, consider teal for a vibrant contrast or navy for sophistication. Pastels like mint green can soften the look, while metallics add glamour to your style.

Advertisement

Continue Reading

Nail Tips

Best Cuticle Trimmer for Salon-Worthy Nails at Home

The best cuticle trimmer can elevate your at-home nail care routine, but the key to achieving salon-worthy results lies in knowing the perfect techniques.

Published

on

By

salon worthy nail care tools

If you want those fabulous salon-worthy nails at home, you need a top-notch cuticle trimmer! Look for sharp and durable stainless steel trimmers, like square-head or semicircular nippers, because they give you great control. Always soak your fingers in warm, soapy water to soften cuticles before trimming. Remember to gently push back cuticles instead of cutting them, and apply some cuticle oil afterward for healthy growth. Keep your trimmers clean and store them dry to keep them shiny! These tips will help you shine, and there's so much more to discover about perfecting your nail care routine!

Key Takeaways

  • Look for high-quality stainless steel trimmers for durability and precision in your nail care routine.
  • Consider different nipper shapes: square-head for grip, circle for corners, and semicircular for precision.
  • Establish a weekly cuticle care routine, including gentle pushing and moisturizing oils to enhance nail health.
  • Always soak fingertips in warm, soapy water before trimming to soften cuticles for easier and cleaner cuts.
  • Regular maintenance, including cleaning and oiling your trimmers, ensures optimal performance and longevity.

Introduction

beginning of discussion

Cuticle trimmers are essential tools for anyone looking to achieve salon-worthy nails at home. You might wonder why these handy little gadgets are so important. Well, a quality cuticle trimmer, especially one made from stainless steel, can make all the difference in your nail care routine.

They're designed to be sharp and durable, so you can easily trim excess cuticles and pesky hangnails. Incorporating some nourishing cuticle oil, like those enriched with essential oils for hair growth, can further enhance the health of your nails and cuticles.

Using cuticle nippers with a good design, like the 1/3 jaw shape, helps you get into those tricky spots where your cuticles might be hiding. Plus, many users have found affordable options that work just as well as expensive brands, proving you don't have to break the bank for professional nail care!

Regularly using a cuticle trimmer, along with some nourishing cuticle oil, keeps your nails healthy and strong. It's a simple step that can prevent hangnails and infections, making your nails look fabulous.

Just remember to use safety tips, like rubber covers for sharp edges, and practice good trimming techniques. With a little care, you'll be well on your way to achieving those perfect nails!

Advertisement

Healthy Nails Start Here

nail care begins now

Achieving healthy nails starts with proper cuticle care, which lays the foundation for strong and beautiful nails. When you take care of your cuticles, you're protecting the nail bed from bacteria and helping your nails grow stronger.

To enhance your overall nail aesthetic, consider incorporating glamour makeup and hair styling ideas to complement your manicured look.

To keep your cuticles in great shape, use a high-quality stainless steel cuticle trimmer. This tool allows you to trim away the dead skin around your nails with precision and ease, making sure you avoid the living eponychium to prevent any bleeding or infections.

Don't forget to moisturize! Using oils rich in jojoba, vitamin E, or almond oil can keep your cuticles from getting dry and brittle. Just a little bit of oil each week can work wonders for your nails.

Establishing a weekly cuticle care routine is essential. Push back your cuticles gently and trim the excess skin carefully.

You'll be amazed at how good your nails will look and feel! With a little love and attention, you're well on your way to achieving salon-worthy nails right at home. So grab your cuticle trimmer and let the nail magic begin!

Advertisement

Popular Variations and Ideas

trendy concepts and suggestions

When it comes to nail care, choosing the right cuticle trimmer can make all the difference. There are several popular variations to help you achieve salon-worthy nails at home. If you need a tool for grip and control, square-head nippers are great. For those tight corners, circle nippers are perfect, while semicircular nippers offer precision trimming. Many of these trimmers are made from durable stainless steel, ensuring they last through countless manicure sessions.

Additionally, similar to how best electric Dutch ovens provide versatility in cooking, cuticle trimmers can also come with multi-functional features to meet different nail care needs.

Brands like Tweezerman and Nghia offer heavy-duty options with comfortable grips, making your nail care routine much easier. With features like anti-slip handles, you'll feel confident using your cuticle cutter or cuticle pusher without worrying about slips. Plus, these handy tools can help prevent hangnails, keeping your nails looking neat and healthy!

You don't have to break the bank, either. There are affordable options like the Professional Cuticle Trimmer Set, priced at just $5.49, which means quality nail care is accessible to everyone.

With high customer ratings, like the JAPONESQUE Velvet Touch Manicure Nipper's 4.7 stars, you're sure to find a cuticle trimmer that suits your needs and makes your nails shine!

Tips and Tricks

helpful advice and strategies

To get the most out of your cuticle trimmer, it's essential to prep your nails properly. Start by soaking your fingertips in warm, soapy water for a few minutes. This helps in softening the cuticles, making them easier to trim.

Once you're ready, grab a high-quality stainless steel cuticle cutter. These tools are durable and sharp, giving you a clean cut without much effort.

Advertisement

When you're trimming, remember to position the blades right at the base of the cuticle. Trim small sections at a time to avoid any accidental cuts—safety first! Don't forget to push back cuticles gently with a cuticle tool before trimming. This will give you a neat appearance and make your nails look fabulous.

After trimming, treat your nails nicely by applying cuticle oil or moisturizer. This hydrates the skin and encourages healthy nail growth. Plus, it really enhances the overall look of your nails!

Lastly, keep your cuticle remover and tools clean to prevent any infections, especially if you're sharing them with friends. Happy trimming, and enjoy those salon-worthy nails at home!

Care and Maintenance

proper upkeep guidelines

Proper care and maintenance of your cuticle trimmer is crucial for its longevity and effectiveness. To keep your trimmer in tip-top shape, always clean and disinfect it before and after each use. This helps to maintain hygiene and prevents the buildup of nail debris.

Store your cuticle trimmer in a dry place, away from moisture, to avoid rusting. You might even want to use a protective cover for the stainless steel blades!

Before trimming, soak your fingertips in warm, soapy water to soften the cuticles. This makes it easier to snip away any excess cuticles and gives you a smoother, more precise cut.

Advertisement

If you notice the blades becoming dull, don't hesitate to seek professional sharpening; a nail technician can help here!

Also, remember to apply a little mineral oil to the blades now and then to keep them working smoothly. This simple step prevents sticking, making your trimmer even easier to use.

With these tips, you'll keep your cuticle trimmer in great shape, ensuring beautiful nails every time you pamper yourself! Happy trimming!

Common Mistakes to Avoid

avoid common mistakes now

Avoiding common mistakes when caring for your cuticles can make a huge difference in your nail health.

First off, remember not to overuse cuticle removers! Too much can dry out your cuticles and irritate the skin around the nails. Use a cuticle clipper or cuticle cutters with stainless steel tips to trim carefully, but don't cut the cuticles! Instead, gently push them back. This keeps your nails safe and prevents any nasty infections.

After using your cuticle tools, always moisturize! Your skin will thank you by staying soft and crack-free. If you notice any redness or swelling, don't ignore it. That could be a sign you need to see a professional!

Advertisement

Also, make sure your tools are in good shape. Dull cuticle cutters can lead to uneven cuts, which can damage your nail bed. Keep your cuticle clipper clean and sharp for the best results.

Frequently Asked Questions

What Do Nail Salons Use to Remove Cuticles?

Nail salons typically use high-quality stainless steel cuticle nippers and pushers for precise cuticle removal. They often apply chemical solutions to dissolve dead skin, ensuring a gentle and efficient process for your nails.

What Is the Best Tool to Use to Cut Cuticles?

The best tool to cut cuticles is a high-quality cuticle nipper. Look for one with sharp stainless steel blades and a 1/3 jaw design. This'll help you maneuver easily and achieve precise results.

What Is the Difference Between a Cuticle Trimmer and a Nipper?

A cuticle trimmer gently pushes back and trims excess cuticle, while a nipper's sharp blades cut stubborn cuticles and hangnails. Nippers offer more precision, but trimmers are ideal for a gentler approach. Choose wisely!

How Do You Use a Cuticle Trimmer on Yourself?

To use a cuticle trimmer on yourself, soak your fingertips, push back your cuticles gently, and trim small sections carefully. Remember to disinfect your tools before and after, and finish with cuticle oil for hydration.

Advertisement

Conclusion

Now that you know how to pick the best cuticle trimmer and keep your nails looking fabulous, it's time to get started! Remember, healthy nails can make a big difference in how you feel. With a little practice, you'll be trimming like a pro, and your friends might just ask for your secret! So grab your trimmer, follow the tips, and get ready to show off those salon-worthy nails right at home. Happy trimming!

Continue Reading

Trending