Connect with us

Nail Tips

7 Simple Nail Art Ideas for DIY at Home

Master the art of DIY nail design with these easy and trendy ideas that will elevate your at-home nail game and leave you wanting more.

Published

on

home diy nail art

Get ready to ignite your creativity with these 7 simple nail art ideas for DIY at home! From easy striped designs to whimsical doodles, you'll find a style that suits your personality. Try the neon dotting technique for a vibrant look, or go for a show-stopping glitter ombre effect. Create a marble design with just a few simple steps, or experiment with abstract swirl patterns. With these ideas, you'll be on your way to salon-quality nail art in no time. And the best part? You'll discover even more inspiration and techniques ahead, so keep exploring to take your nail art skills to the next level! For a bold and playful look, experiment with colorful nail art designs using bright and cheerful shades. Try creating a fun geometric pattern or a chic floral design for a fresh and feminine touch. With a little practice and creativity, you’ll be able to elevate your DIY nail art game and impress everyone with your stunning, one-of-a-kind manicures. Keep experimenting and have fun with it!

Key Takeaways

• Try easy striped nail art with 3-6 complementing colors and a top coat for a versatile and customizable design.

• Achieve a watercolor effect by mixing color polishes with clear polish and adding gold swooshes for elegance.

• Create a neon dotting design with vibrant colors and unique patterns using dotting tools and press-on nails.

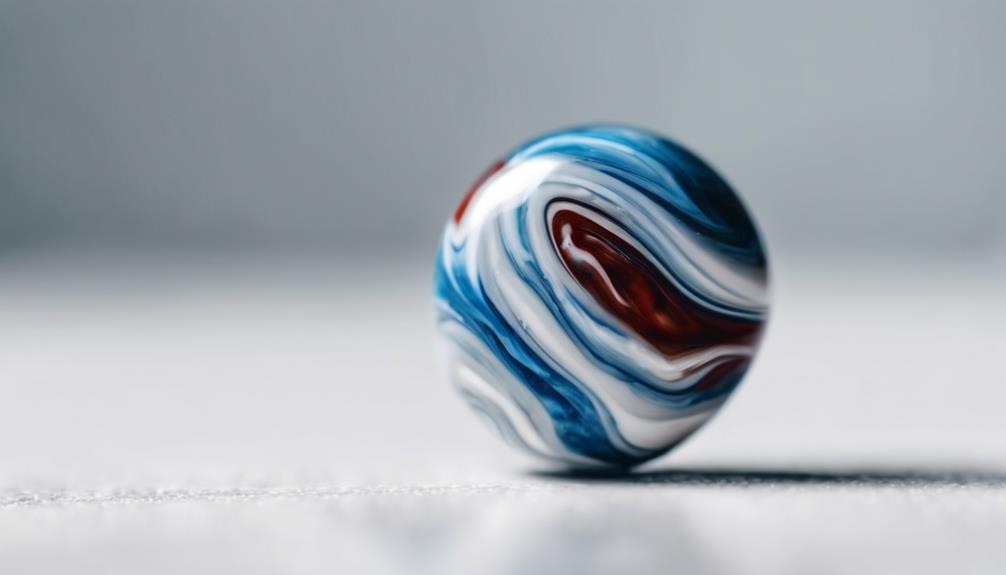
• Use the quick marble nail art technique by swirling drops of polish on wax paper and transferring the design onto nails.

Advertisement

• Express your personality with whimsical doodle nail art using playful patterns, geometric shapes, and cartoon characters.

Easy Striped Nail Art Design

Take a few minutes to prep your nails and gather 3-6 nail polish colors of your choice to create a multi-colored striped nail art design that's both playful and vibrant. This easy DIY project is perfect for beginners and experienced nail artists alike.

To get started, choose colors that complement each other, and don't be afraid to experiment with different combinations.

Once you have your colors, use a nail painting brush to draw alternating color stripes on each nail. You can make the stripes as thick or thin as you like, depending on the look you're going for. The key is to have fun and be creative!

When you're happy with your design, seal it with a top coat to guarantee longevity and a glossy finish.

Advertisement

The best part about striped nail art is that it's incredibly versatile. You can customize the colors to suit your personal style, making it a great option for anyone. Plus, it's an easy way to add some personality to your nail game without breaking the bank.

Simple Watercolor Nail Art
watercolor nail art tutorial

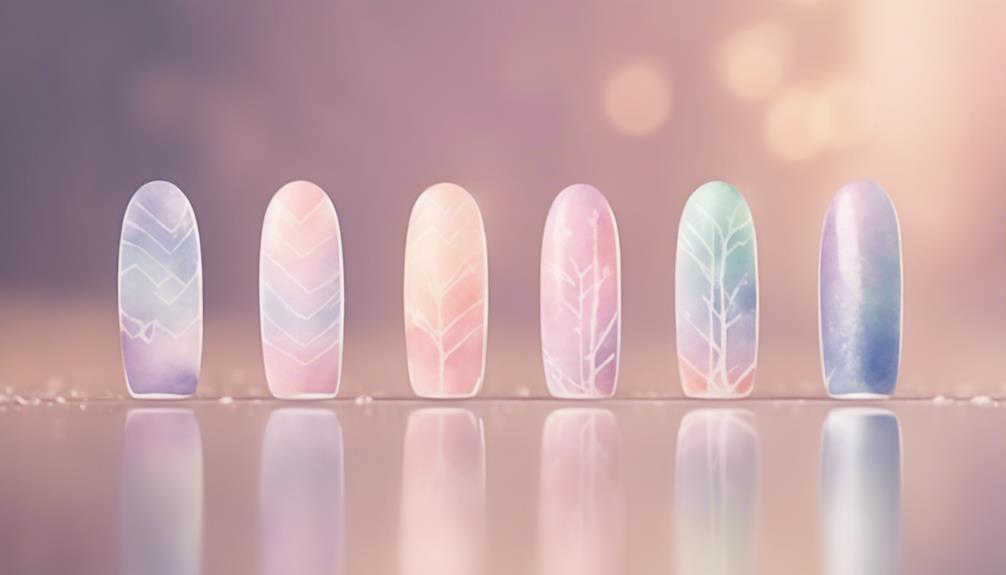
To create a soft, artistic look on your nails, mix color polishes with clear polish to achieve a watercolor effect that's both delicate and eye-catching. This technique is perfect for those who want a subtle yet striking nail art design. Before applying the polish to your nails, test the opacity on paper to get the desired look. You can experiment with different ratios of color to clear polish to achieve the perfect watercolor effect.

To add a touch of flair to your watercolor nail art, create gentle swooshes with gold polish. This will give your nails a sophisticated and elegant look. Remember, the key to achieving a beautiful watercolor design is to experiment with different colors and techniques.

Don't be afraid to try new things and make mistakes – they can often lead to unique and stunning results. With a little practice, you'll be creating stunning watercolor nail art that's sure to turn heads.

Neon Dotting Nail Art Idea
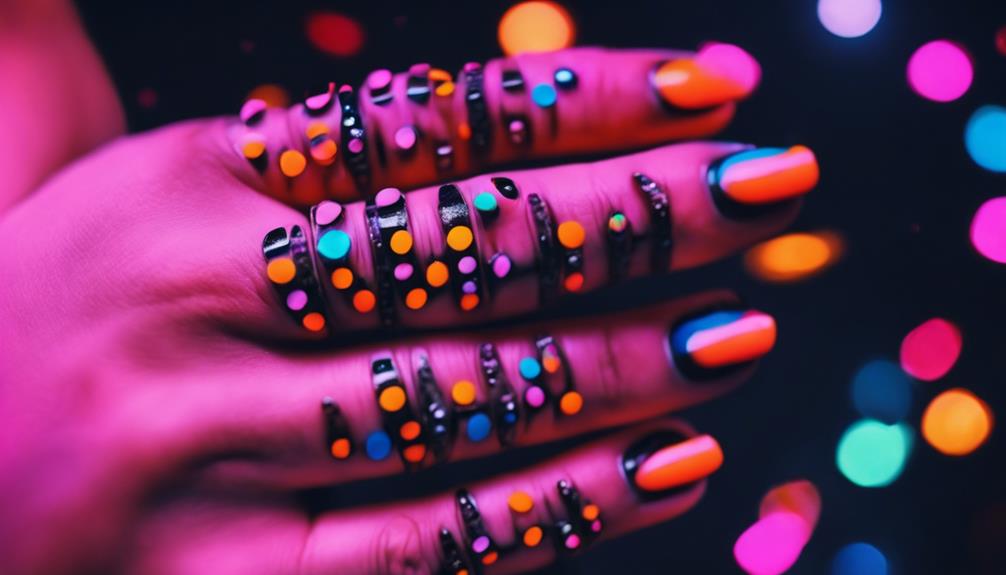
unique neon nail design

Now that you're excited about neon dotting nail art, it's time to get creative!

You'll start by choosing from a range of neon colors that'll make your nails pop, and then experiment with different dotting tools to achieve unique patterns.

From there, you can explore various design variations that showcase your personality and style.

Advertisement

Neon Color Options

You can easily add a pop of fun to your nail art with neon colors like lime green, hot pink, and electric blue, which are popular choices for vibrant designs. These neon colors are perfect for creating statement nail art that's sure to turn heads.

When it comes to neon dotting nail art, you can experiment with different shades to create unique and eye-catching designs. Try pairing hot pink with electric blue for a bold and playful look, or lime green with white for a fun and futuristic vibe.

The key to pulling off neon nail art is to have fun and be creative! Don't be afraid to mix and match different neon colors to create a look that's all your own. With neon dotting nail art, the possibilities are endless, and you can customize your design to fit your personal style.

Dotting Tool Tips

Frequently, achieving precise dotting requires a bit of patience and practice, but with the right tools and techniques, you can master the art of neon dotting nail art.

To get started, make sure you have the right tools, like a dotting tool or even a bobby pin or tailor's pin, which can create different sizes of dots in your neon nail art designs.

Advertisement

Here are some essential tips to keep in mind:

  1. Experiment with press-on nails for easier application of intricate dot designs.
  2. Start with neutral-colored nails as a base to make the neon dots stand out vibrantly.
  3. Apply lime-green polish for a bold and eye-catching neon effect in your nail art.
  4. Ensure dots are completely dry before applying a topcoat to prevent smudging.

Design Variations

One of the best things about neon dotting nail art is that it offers endless design variations, allowing you to get creative with different dot sizes, placements, and neon shades.

You can create a classic French Manicure look by placing small dots at the tip of your nail, or go for a playful polka dot design by scattering dots across the entire nail.

If you're feeling adventurous, try an abstract design by arranging dots in a random pattern. The possibilities are truly endless!

You can also experiment with different neon shades to create a unique look that's all your own. For a bold look, try combining neon dots with a bold base color, or for a more subtle look, use pastel shades for a soft, whimsical effect.

Whatever design you choose, remember to let the dots dry completely before applying a topcoat to prevent smudging. With neon dotting nail art, the only limit is your imagination!

Advertisement

Quick Marble Nail Art Technique

marble nail art tutorial

Using a few simple tools and techniques, you can master the quick marble nail art technique that adds a touch of sophistication to your everyday look. This elegant design is surprisingly simple and easy to achieve at home.

To get started, you'll need:

  1. Nail polish in different colors
  2. Wax paper or a silicone mat
  3. A toothpick or thin brush
  4. A top coat to seal the design

Swirl drops of nail polish on the wax paper to create a marble effect, then transfer the design onto your nail using a toothpick or thin brush. You can customize the look with various color combinations to suit your style.

Once you've achieved the desired design, let it dry completely before applying a top coat to seal and protect your artwork. With these simple steps, you'll be flaunting a sophisticated marble nail art look that's sure to turn heads.

The best part? It's incredibly easy to achieve at home with minimal tools and expertise!

Whimsical Doodle Nail Art Design
quirky nail art design

Get creative and playful with whimsical doodle nail art designs that allow you to express your unique personality through bold lines, vibrant colors, and quirky patterns. With doodle nail art, you can bring out your inner artist and create fun and playful designs that reflect your individuality.

Take inspiration from doodles and let your imagination run wild – the more creative, the better! Seal your masterpiece with a topcoat to make sure it lasts. Experiment with different doodle patterns and styles to find what suits you best.

You can try geometric shapes, swirly patterns, or even cute cartoon characters – the possibilities are endless! What's great about doodle nail art is that it allows you to express yourself in a unique and personalized way. So, don't be afraid to get creative and try out new designs.

Advertisement

Glitter Ombre Nail Art Look

elegant nail design technique

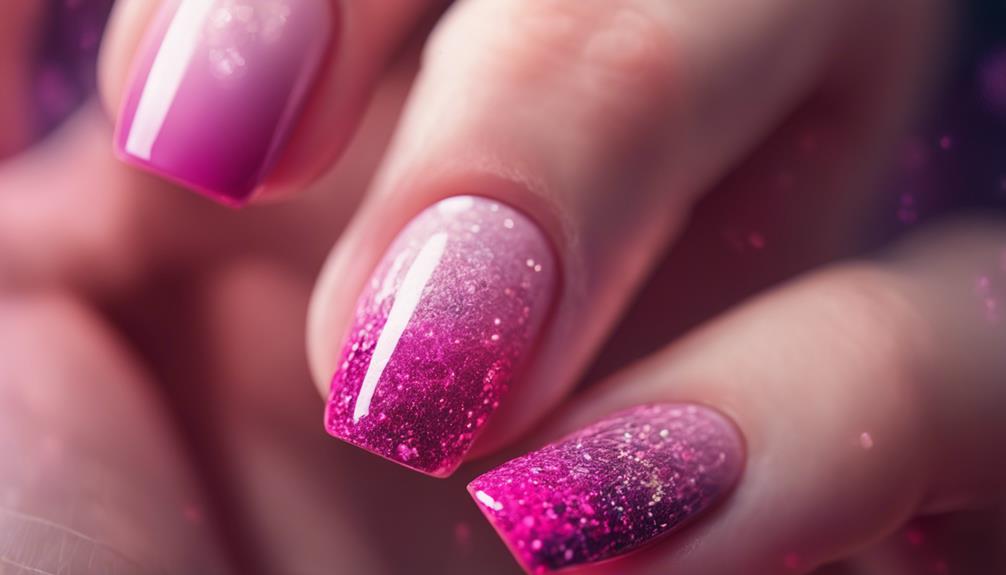
Create a show-stopping effect with a glitter ombre nail art design that's sure to turn heads. This glamorous look is easier to achieve than you think! You'll need two complementary glitter polishes to create a seamless blend effect.

Here's a step-by-step guide to get you started:

  1. Start with a base color and apply the lighter glitter polish at the base of the nail, blending it towards the tip.
  2. Layer the darker glitter polish towards the tip, creating a seamless blend effect.
  3. Blend, blend, blend! Make sure the shift between the two glitter polishes is smooth and even.
  4. Seal the design with a top coat to lock in the glitter and add shine.

Experiment with different glitter colors and combinations to create a personalized ombre look that's all yours. Remember to have fun and be creative – the possibilities are endless!

With a little practice, you'll be a pro at creating stunning glitter ombre nail art designs that are sure to impress.

Abstract Swirl Nail Art Pattern
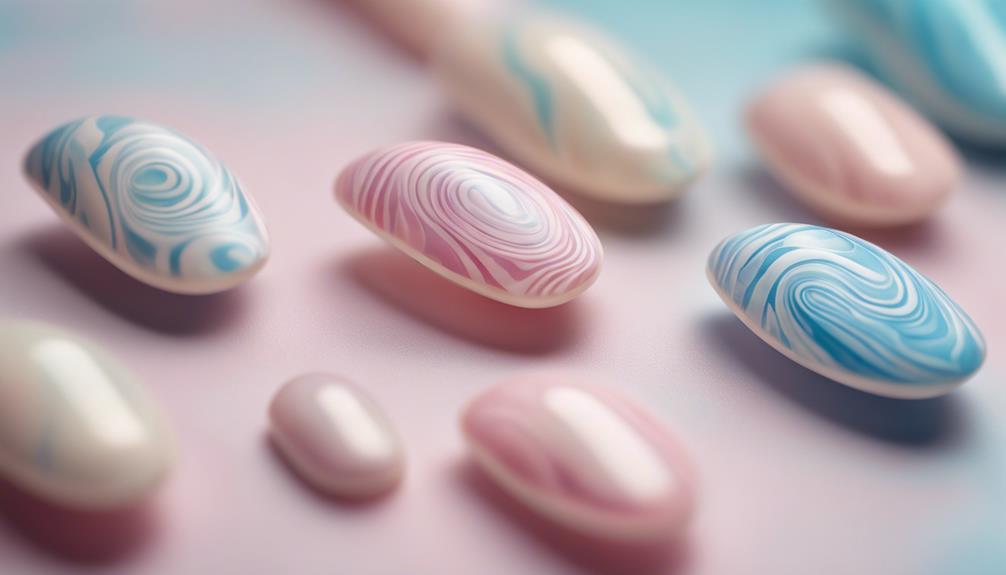
colorful abstract nail design

Now that you're ready to try the abstract swirl nail art pattern, it's time to get creative with your swirl pattern techniques!

You'll want to experiment with different nail polish colors to achieve a unique look that's all your own. By mixing and matching colors, you can create a one-of-a-kind design that showcases your personal style.

Swirl Pattern Techniques

You can achieve a bold and eye-catching effect by experimenting with abstract swirl designs that combine contrasting colors. This technique is perfect for those who want to add a touch of creativity and individuality to their nail art.

To create a swirl pattern, use a thin brush to swipe polish randomly, resulting in varied and mesmerizing nail art designs.

Advertisement

Here are some tips to keep in mind when trying out swirl pattern techniques:

  1. Contrasting colors: Combine bold and bright colors to create a striking effect.
  2. Thin brush: Use a thin brush to create swirling patterns on your nails.
  3. Allow for drying between swirls: Each swirl should be dry before moving on to the next to avoid smudging.
  4. Random movement: Swipe polish randomly to achieve an abstract swirl pattern.

Nail Polish Colors

When selecting nail polish colors for your abstract swirl design, consider pairing bold and bright hues that contrast with each other to create a striking visual effect. This simple yet effective technique will elevate your nail art game and make your designs stand out. To get started, choose three to four different polish colors that complement each other. You can opt for a monochromatic scheme or mix and match bold, bright colors for a unique look.

Here are some color combinations to inspire you:

Color 1 Color 2 Color 3
Navy Blue Neon Pink White
Electric Blue Sunshine Yellow Coral
Emerald Green Hot Pink Black
Lavender Powder Blue Gold

Frequently Asked Questions

How to Make Simple Nail Art at Home?

You're enthusiastic to learn how to make simple nail art at home! Start by picking a design that catches your eye, like stripes or abstract patterns.

Then, grab some easy-to-use tools like nail stickers or metallic polish to add a pop of personality.

Don't be afraid to experiment and try out different techniques – it's all about having fun and expressing yourself!

Advertisement

With a little practice, you'll be a DIY nail art pro in no time.

What Is 5 Basic Nail Art Design?

You're wondering what the five basic nail art designs are, right?

Well, let me tell you – you're about to reveal the secrets to creating stunning nail art at home!

The top five basic designs are stripes, dots, French tips, animal prints, and simple shapes.

These designs are super easy to recreate using nail polish, brushes, and dotting tools.

Advertisement

With a little practice, you'll be a pro in no time, and you can always mix and match to create your own unique look!

How to Do Nail Art Without Nail Art Tools?

You don't need specialized tools to create amazing nail art! You can repurpose household items to get creative.

Use bobby pins to create dots of varying sizes, and toothpicks to paint on straight lines and designs. Cut tape into thin strips for precise lines.

With a little practice and patience, you'll master nail art techniques in no time. Get creative, experiment, and have fun with it!

How to Put Designs on Your Nails?

You're wondering how to put designs on your nails? Well, imagine your nails as a blank canvas, waiting for your creative touch!

Advertisement

Start by prepping your nails with a base coat, then get creative with stripes, dots, or abstract waves using nail polish and a brush.

You can even try DIY marble stickers or French manicure variations for a trendy twist.

The possibilities are endless, and with a little practice, you'll be a nail art pro in no time!

Conclusion

You've made it through the 7 simple nail art ideas, and now it's time to get creative! Can you imagine the oohs and aahs you'll get when you show off your new nail art skills?

With these easy-to-follow guides, you'll be a pro in no time. Remember, the key to mastering nail art is practice, patience, and having fun!

Advertisement

So, what're you waiting for? Get out those nail polishes and let your creativity shine!
Advertisement

Nail Tips

Fall Nail Inspo: Fresh Ideas You’ll Want to Try

Make your nails stand out this autumn with fresh ideas in rich hues and playful designs that will leave you eager for more inspiration.

Published

on

By

autumn nail design inspiration

Fall nail inspo means embracing cozy hues and playful designs that celebrate the season. Think rich colors like caramel brown and burnt pumpkin orange, perfect for autumn vibes. You can try minimalist styles with gradient shades or classic tortoiseshell patterns for a chic twist. Don't forget unique textures—velvet finishes and 3D embellishments with rhinestones add festive flair! Seasonal motifs like pumpkin spice and spooky spider webs are also fun to incorporate. To keep your nails healthy, use a base coat and moisturize regularly. There's plenty more inspiration just around the corner waiting for you to explore!

Key Takeaways

  • Embrace cozy hues like caramel brown and burnt pumpkin orange for a warm autumn vibe in your nail designs.
  • Experiment with minimalist gradient color schemes blending shades like cinnamon and caramel for a subtle seasonal expression.
  • Incorporate classic styles like tortoiseshell patterns or modern French manicures with a twist to stay chic this fall.
  • Add unique textures with velvet finishes or 3D embellishments like rhinestones to elevate your nail art for festive occasions.
  • Explore whimsical seasonal motifs such as pumpkin spice or foliage-inspired designs to express creativity and charm during autumn.

Introduction

beginning of the content

As the leaves change and the air turns crisp, fall nail designs are taking center stage, offering you an exciting way to embrace the season. This autumn season, you'll find that fall nail trends are blossoming with a mix of cozy fall hues and bold patterns. Earth tones like caramel brown, black cherry red, and burnt pumpkin orange embody those warm, inviting fall vibes you crave.

If you're a DIY nail expert, minimalist designs are the way to go. Think gradient color schemes and delicate micro details that elevate your nail look without overwhelming it. For a touch of elegance, consider a classic tortoiseshell pattern or a modern twist on the French manicure.

And don't shy away from unique textures and finishes—velvet and metallic styles are essential for autumn, adding dimension to your nails.

Additionally, seasonal themes like spooky motifs and foliage-inspired designs perfectly capture the essence of fall. With these fresh ideas, you can easily express your love for the season while keeping your nails on trend.

Nail Art's Autumnal Symbolism

autumn inspired nail art

Nail art in autumn goes beyond aesthetics; it embodies the season's spirit and symbolism. Fall nail designs often feature warm hues and earthy tones, like caramel brown and burnt pumpkin orange, reflecting the vibrant colors of autumn foliage. These shades not only capture the essence of the season but also evoke a cozy atmosphere, reminiscent of your favorite seasonal beverages.

Incorporating seasonal motifs, such as foliage-inspired patterns and spooky themes, celebrates autumn's festivities, including Halloween. You can also experiment with textured finishes, like velvet and metallics, which enhance that comforting vibe. Gradient styles in warm shades mimic the inviting transition from summer to fall, much like toasted marshmallows around a fire.

Advertisement

To elevate your nail art, consider adding 3D embellishments, such as rhinestones and pearls. These fun additions channel the festive spirit of autumn celebrations and gatherings. Additionally, the use of warm hues in seasonal nail art can create a visual warmth similar to the comforting atmosphere created by candles during the fall season.

Trending Colors for Fall

autumn s vibrant color palette

Embrace the rich, warm hues that define this fall's nail color trends. The fall palette is all about cozy autumn aesthetics, with shades like caramel brown, black cherry red, and burnt pumpkin orange leading the way.

These trending colors for fall not only capture the essence of the season but also elevate your style with their versatility. Consider opting for olive green, often dubbed dirty martini, which beautifully reflects the muted autumn vibes. High cultural intelligence (CQ) enhances your ability to appreciate and adopt diverse styles, including seasonal trends. Additionally, understanding how to optimize listings can help you showcase your nail designs to a wider audience. Montessori toys can also inspire creative designs, allowing you to express your unique artistic vision. The use of imagination in your nail art can lead to innovative and personal expressions of style.

For those looking to make a bolder statement, spicy pumpkin orange adds a pop of color that's hard to ignore. Darker hues like dark terracotta offer a whimsical yet sophisticated alternative, perfect for any fall nail ideas you might have.

As the weather cools down, these warm tones resonate with the seasonal festivities and the overall ambiance of autumn. These colors can also pair beautifully with natural materials found in farmhouse decor, enhancing your overall seasonal aesthetic.

Whether you're dressing up for a special occasion or simply want to embrace the spirit of fall, these colors will surely complement your outfits and mood.

Advertisement

Use a Base Coat

apply a protective layer

A solid foundation is key to achieving stunning fall nails, and that starts with using a base coat. This essential step acts as a protective layer between your nails and the nail polish, preventing staining and promoting healthier nails over time.

By applying a base coat, you enhance the longevity of your polish, allowing it to adhere better and resist chipping longer. Additionally, a base coat smooths out any imperfections on your nail surface, creating an even canvas for your chosen fall colors.

Many base coats come with added benefits, like strengthening properties or hydration, which are crucial during the harsh fall months. Choosing a non-toxic, vegan base coat not only supports your nail health but also ensures that you're using products that are kinder to the environment.

Nail Care Tips for Autumn

autumn nail care essentials

As the leaves change and temperatures drop, it's essential to adjust your nail care routine to keep your nails healthy and strong.

Start by keeping moisturizers and cuticle oils close at hand to combat the dryness that colder air brings, which can lead to brittle nails. Incorporate non-toxic, vegan polishes into your routine; they're kinder to your nails and promote overall nail health as the season changes.

Regularly using nail strengtheners can provide additional protection against breakage and damage, particularly during these chillier months.

Consider adding a weekly hydrating treatment, such as a nourishing nail mask or soak, to maintain moisture levels in your nails and cuticles. This extra care will go a long way in ensuring your nails stay vibrant and strong.

Advertisement

Don't forget the importance of a balanced diet rich in vitamins and minerals, especially biotin, to support strong and healthy nails as you transition into fall.

Pros and Cons of Nail Art

nail art benefits and drawbacks

Nail art offers countless possibilities for personal expression, allowing you to showcase your unique style and creativity. You can choose from a variety of nail polish shades and techniques, making it easy to find a design that fits your personality and the fall season. Engaging in DIY nail art can be therapeutic, providing a fun hobby that boosts your mood and self-esteem. Additionally, the process of creating art can trigger the release of neurotransmitters like serotonin that enhance emotional well-being. Furthermore, just as essential oils can promote relaxation and enhance mood through aromatherapy benefits, nail art can also serve as a form of self-care. Many designs, such as stunning blue flower designs, can add a touch of seasonal beauty to your manicure.

However, there are some downsides to consider. Nail art can be time-consuming, requiring a significant investment in tools, materials, and practice. If you're not careful, some techniques, especially those involving harsh chemicals or excessive filing, can damage your natural nails.

Fortunately, the rise of non-toxic and vegan nail polishes offers healthier alternatives that minimize the impact on your nails and the environment. Many designs can incorporate trending nail styles that allow for both creativity and safety.

Ultimately, the pros of nail art—its ability to express creativity and provide a joyful outlet—often outweigh the cons, as long as you approach it with care. Embrace the fall vibes, and enjoy experimenting with different styles while being mindful of your nail health.

Autumnal Aura Nail Designs

fall inspired nail art

Autumnal aura nail designs bring a cozy vibe to your manicure, featuring warm, earthy tones like deep burgundy, olive green, and caramel brown. These colors embody the essence of fall, making your nails a perfect reflection of the season.

One way to elevate your look is by incorporating gradient styles, such as a smooth cozy brown gradient that mimics the beauty of changing leaves.

Advertisement

For a modern twist, consider adding shimmer and metallic finishes like pumpkin spice chrome. This eye-catching effect enhances traditional autumn colors, making your nails truly stand out.

Additionally, tortoiseshell patterns in warm shades offer a chic twist on classic designs, blending seamlessly with the autumnal aesthetic.

If you're looking for something whimsical, celestial-inspired motifs, including moons and stars, can add an enchanting touch to your autumnal aura nails.

These designs not only celebrate the season but also infuse a little magic into your manicure.

With these ideas, you'll create stunning nail art that captures the warmth and charm of fall, making your fingertips a seasonal statement piece.

Advertisement

Embrace the cozy vibes and let your nails reflect the beauty of autumn!

Embrace Seasonal Nail Creativity

celebrate seasonal nail art

Fall is the perfect time to unleash your creativity with seasonal nail designs that reflect the rich colors and textures of the season. You can dive into earthy tones like caramel brown, pumpkin orange, and chocolate brown, embodying the true essence of autumn aesthetics.

Consider cozy gradient designs that blend shades of cinnamon and caramel for a chic look that's both sophisticated and warm. If you're feeling adventurous, embrace playful themes with cute motifs like pumpkin spice or plaid patterns. These designs not only celebrate the season but also keep your nails fun and festive.

For a bolder choice, try intricate 3D nails adorned with pearl or rhinestone accents, adding a modern twist to traditional styles. Don't forget to incorporate spooky motifs like spider webs or foliage-inspired patterns in rich reds, oranges, and browns to enhance your fall nail designs.

Minimalist designs are also trending, allowing you to express seasonal creativity in a more subtle way while still capturing the cozy spirit of autumn. Whether you choose vibrant colors or minimalist elegance, your nails can truly reflect the magic of fall!

Frequently Asked Questions

What Are the Best Nail Shapes for Fall Designs?

When considering nail shapes for fall designs, you're looking at square, almond, and coffin shapes. These styles enhance the seasonal colors and patterns, giving you a chic look that's perfect for autumn's vibe.

Advertisement

How Can I Remove Nail Art Without Damaging My Nails?

To remove nail art without damaging your nails, soak them in warm soapy water for a few minutes. Gently push off the art with a cuticle stick, and avoid harsh chemicals that can weaken your nails.

Are There Any Eco-Friendly Nail Polish Brands for Autumn?

Yes, there are plenty of eco-friendly nail polish brands perfect for autumn. Brands like Zoya, Ella + Mila, and Aila Cosmetics offer beautiful colors while being free from harmful chemicals. You'll love their sustainable choices!

Can I Use Gel Polish for Fall Nail Art?

Absolutely, you can use gel polish for fall nail art! It offers durability and a stunning finish. Just pick autumn-inspired colors and enjoy creating beautiful designs that'll last longer than regular polish. Get creative!

What Tools Do I Need for Intricate Fall Nail Designs?

You'll need a fine detail brush, dotting tools, nail tape, and a quality base and top coat. A palette for mixing colors and a good light source will also help you create those intricate designs.

Advertisement

Continue Reading

Nail Tips

Pink Prom Nails for a Stunning Night Out

Make your prom unforgettable with stunning pink nails that perfectly complement your outfit; discover tips to elevate your nail game for the night!

Published

on

By

stunning pink prom nails

Your pink prom nails can be the star of the show, making your night unforgettable! You can choose from classic shades, trendy pastel pinks, or sparkly glitter designs to match your dress. Floral patterns and playful heart accents add a fun twist, while rhinestones bring extra glam. Don't forget to prep your nails for a polished look! Regular moisturizing and a quick touch-up kit are lifesavers. Remember, matching your nails with your outfit creates that perfect, cohesive style. Excited to learn more tips about nailing your prom look? There's plenty more to explore to make your night truly stunning!

Key Takeaways

  • Choose pink nail designs that complement your prom dress color for a cohesive and stunning look.
  • Consider trendy options like pink gradients, floral patterns, or glitter accents to elevate your style.
  • Use high-quality press-on nails for convenience while achieving a polished and beautiful appearance.
  • Incorporate rhinestones or 3D elements for added glamour and personal expression in your nail art.
  • Prioritize nail health and maintenance before prom to ensure your nails look their best on the big night.

Introduction

beginning of discussion

When it comes to prom night, the excitement of choosing the perfect look can be overwhelming, but pink prom nails offer a beautiful blend of versatility and style. You can pick from a variety of designs that suit any dress color, making them a fantastic choice for all kinds of themes.

Whether you prefer classic pink shades, elegant and sophisticated floral patterns, or fun glitter gradients, there's a unique prom nail design just for you! To elevate your look even further, consider incorporating glamorous makeup ideas that complement your nails perfectly.

If you're feeling adventurous, why not add some rhinestones for that extra sparkle? Customization options let you express your personality, making your nails eye-catching and special.

And if you're short on time or not into salon visits, press-on nails come to the rescue! They're super convenient, allowing you to achieve stunning pink nail designs without any fuss.

For spring events, pastel pinks are all the rage, while vibrant pinks can give you that bold summer vibe.

Advertisement

Enhances Overall Prom Aesthetic

elevates prom night experience

With the right pink prom nails, you can effortlessly enhance your overall prom aesthetic. Pink prom nails are a fantastic choice because they complement so many dress colors. Whether you go for a soft baby pink or a bold fuchsia, these shades add a chic touch to your look.

Imagine rocking a stunning pink gradient or an ombre effect that blends different pink tones; it's sophisticated and really eye-catching! To ensure your nails look their best all night, consider incorporating effective hydration techniques to keep your hands and nails moisturized.

If you want to add a touch of romance, floral nail art is perfect. Delicate flowers painted on your nails fit beautifully with spring prom themes and give off a fresh, feminine vibe. Plus, adding rhinestones or 3D elements can elevate your glam factor, making your nails stand out even more!

Think about how elegant your hands will look when you wave to friends or dance the night away. Soft pastels create a romantic appearance that's just right for such a special occasion.

Popular Variations and Ideas

trending concepts and innovations

Pink prom nails come in a variety of stunning styles that can perfectly match your unique look. One fabulous option is pink gradient nails, which create a beautiful ombre effect, blending milky pink at the base to vibrant pink at the tips. This chic style is calming and works great for both casual and formal events.

For those looking to incorporate some trending designs, consider adding elements from nail styles for Valentine's Day that feature romantic hearts or delicate rose patterns. If you're feeling a bit more adventurous, try floral designs! Pink petal nails with delicate white patterns add a fresh spring touch that's perfect for prom.

Want a bit of sparkle and shine? Glittery pink nails with intricate foil accents are sure to catch everyone's eye. They bring glamour to your prom night ensemble, making you feel like a star!

Advertisement

You could also go for playful pink tips, like soft pink bases decorated with heart accents, which gives a youthful vibe that really stands out.

For a touch of sophistication, consider adding pink rhinestones. They elevate your nails and make them pop!

Whichever style you choose, pink prom nails will help you express your personality and make your night unforgettable. So get ready to shine bright—you're going to look amazing!

Tips and Tricks

helpful strategies for success

To ensure your pink prom nails look stunning all night long, start by prepping them properly. First, choose your favorite pink polish—whether you're drawn to vibrant pinks or soft pastel pinks with shimmer. Make sure your nails are well-shaped and moisturize your cuticles so they shine!

Next, think about adding unique designs that show off your personality. Floral designs and whimsical art can create a fun vibe, while ombre effects add a touch of elegance. If you're in a hurry, consider using quality press-on nails; they can give you a polished look without the wait.

When it comes to your nail color, you can mix and match! Pair playful pink tips with heart accents for a cute touch, or go for bold, vibrant pinks that stand out.

Advertisement

Just make sure your nails complement your prom outfit, creating the perfect look for your big night.

Care and Maintenance

proper care and maintenance

Caring for your nails in the weeks leading up to prom can make a noticeable difference in their appearance. Start a simple care routine by moisturizing cuticles daily and avoiding harsh chemicals that can damage your nails.

Regular filing and buffing are super important, too! By keeping your nails shaped and smooth, you'll be ready to show off your stunning pink nail designs.

Consider treating yourself to a professional manicure right before prom. This way, your nails will be perfectly polished and in fabulous shape for the big night.

Don't forget to use a high-quality top coat to protect your nail designs and add a beautiful shine. A great top coat ensures a long-lasting finish, so you won't have to worry about touch-ups every few minutes!

Speaking of touch-ups, carrying a mini nail kit is a smart idea. Include a small bottle of top coat and a nail file, so you can quickly fix any chips or scratches during prom.

Advertisement

With these tips, your nails will look amazing, and you can enjoy every moment of your special night, feeling confident and glamorous!

Common Mistakes to Avoid

avoid common mistakes today

Nail art can be a fun way to express your style, but there are common mistakes that can derail your prom look.

First, don't forget about nail health! Start caring for your nails weeks in advance. Neglecting this can lead to unsightly nails that don't look great with gel polish or a clear base.

Also, remember that simpler styles often make a big statement. Complicated designs can lead to frustration and mightn't last all night!

Make sure to choose matching colors that complement your outfit for a cohesive look. Mismatched colors can create a chaotic vibe that's not ideal for prom.

Comfort is key too! Think about the length and shape of your nails. You want a style that looks elegant but is also practical for dancing and having fun.

Advertisement

Frequently Asked Questions

What Color Nails for Prom?

For prom, you'll want nails that complement your style. Think classic pink for elegance, vibrant shades for cheer, or trendy ombre designs. Sparkly accents can elevate your look, making your nails stand out beautifully.

Should My Nails Match My Prom Dress?

Yes, your nails should match your prom dress. Coordinating colors creates a cohesive look. You can experiment with different designs or accents to enhance your overall style, making your ensemble feel polished and complete for the night.

How Can I Make My Pink Nails Beautiful?

To make your pink nails beautiful, choose vibrant shades with glossy finishes. Add playful designs, gradient effects, or sparkling accents. Minimalist styles with pearl embellishments can also elevate your look for any occasion.

Are Hot Pink Nails In?

Yes, hot pink nails are definitely in! They add a vibrant pop of color that complements your style. Try incorporating glitter or rhinestones for an extra touch, making your nails stand out even more.

Conclusion

So, get ready to rock those pink prom nails! They'll not only make you shine, but they'll also add a splash of fun to your prom night. Remember, whether you go for sparkles or a classic look, your nails can truly complete your outfit. Just keep them well cared for, and avoid those common mistakes. Now, go out there, show off your fabulous nails, and have the best night ever! You've got this!

Advertisement

Continue Reading

Nail Tips

Cute Christmas Nails to Spread Holiday Cheer

Nail your holiday spirit with cute Christmas designs that will inspire and uplift your festive style—discover creative ideas and tips for your next manicure!

Published

on

By

festive holiday nail art

If you want to spread holiday cheer, cute Christmas nails are a must! Think vibrant colors like deep red, emerald green, and sparkling gold. You can go for playful designs featuring tiny Christmas trees, snowflakes, or candy cane stripes. Whether you prefer bold statements or minimalist elegance, there's something for everyone. Plus, using nail stickers and quick-drying top coats can make the process easier and longer-lasting. Don't forget that festive nail art not only expresses your creativity but also boosts your confidence. There's so much more to explore, so keep going for inspiring ideas and tips!

Key Takeaways

  • Embrace classic colors like red, green, and gold for vibrant and cheerful holiday nail designs.
  • Incorporate playful motifs such as snowflakes, candy canes, and tiny Christmas trees for a festive touch.
  • Explore DIY techniques with nail stickers and stencils to create intricate designs easily at home.
  • Opt for a minimalist look with elegant designs that maintain sophistication while celebrating the season.
  • Regular maintenance and a protective base coat help keep your cute Christmas nails looking fresh and vibrant throughout the holidays.

Introduction

beginning of discussion

Christmas nails are a delightful way to express your holiday spirit and creativity. As the holiday season approaches, you might want to explore cute Christmas nails that showcase festive looks.

Think deep red, emerald green, and sparkling gold—these colors perfectly capture the warmth and joy of the season. Whether you prefer nail art featuring simple snowflakes or charming Christmas trees, there are endless Christmas nail ideas to inspire you.

If you have short nails, don't worry! Minimalistic designs can still make a bold statement. A subtle touch of sparkle or a tiny candy cane can elevate your nails while keeping them chic.

Many people enjoy adding glitter and metallic finishes, as they add that extra glam for parties and festive gatherings.

What's even better? Seasonal nail art not only allows for personal expression but also boosts your confidence. Studies show that 70% of individuals feel more self-assured when their nails are well-groomed and festive.

Advertisement

Nail Art in Holiday Traditions

festive nail art designs

During the holiday season, nail art becomes a vibrant canvas reflecting various cultural traditions around the world. From Japan's intricate designs to India's colorful embellishments, each culture adds a unique flair to festive manicures.

In Western traditions, holiday-themed designs during Christmas often spotlight symbols like snowflakes, reindeer, and Christmas trees, creating a delightful showcase of creativity. Seasonal manicures shine with traditional colors like red and green, enhancing the celebratory spirit.

You might find yourself drawn to DIY manicures, where you can express your creativity and customize your nails to mirror your personal style. With social media buzzing with innovative holiday nail art ideas and tutorials, it's easier than ever to try your hand at these festive designs.

The growing fascination with nail art during the holidays allows you to connect with these traditions while celebrating your individuality. As you explore various techniques, remember that each brushstroke is an opportunity for personal expression.

Whether you go for simple patterns or elaborate snowflake nail art, your nails can reflect the joy and warmth of the season, making your Christmas even more special.

Nail Art Enhances Festive Spirit

nail art boosts celebration

Nail art truly enhances the festive spirit, bringing holiday cheer right to your fingertips. When you choose Christmas nails adorned with seasonal motifs like snowflakes, Christmas trees, or candy canes, you're instantly celebrating the season.

Incorporating vibrant colors such as deep red, emerald green, and sparkling gold captures the essence of holiday celebrations, creating a joyful atmosphere wherever you go. Additionally, selecting the right nail shape can further elevate your festive look, allowing your designs to shine even more.

Advertisement

Glitter and metallic finishes in your nail art add a glamorous touch, reflecting the celebratory mood associated with gatherings and events. Imagine showing off playful patterns featuring gingerbread designs or reindeer accents that evoke warmth and nostalgia, allowing you to express your holiday cheer creatively.

If you prefer a more subtle approach, minimalist designs with delicate holiday accents can maintain elegance while still celebrating the season. You'll find that festive nail art can be chic and spirited at the same time. Modern farmhouse style also embraces the use of natural materials and earthy tones, which can inspire your color choices for a cozy holiday look.

Whether you opt for intricate designs or simple touches, nail art is a fun way to embrace the magic of the holidays. So, get ready to showcase your creativity and let your fingertips spread that joyful festive spirit!

Use Festive Color Combinations

vibrant holiday color palettes

Choosing festive color combinations can transform your manicure into a stunning holiday statement. To achieve that perfect holiday look, incorporate classic colors like red, green, and gold. These shades instantly evoke a festive atmosphere, making them ideal for Christmas nail designs.

You might try deep burgundy paired with sparkling gold accents for a rich, elegant touch. Alternatively, forest green with white patterns creates a striking contrast that enhances the holiday spirit.

Don't shy away from jewel tones like ruby and sapphire; they add a luxurious vibe to your nails. If you prefer a softer aesthetic, pastel colors can be paired with whimsical festive designs, offering a cute Christmas nails option that feels playful yet seasonal.

Advertisement

You can also experiment with different color combinations, like candy cane stripes or ombre effects, to express your unique holiday cheer. Additionally, embracing color psychology can enhance your festive designs by evoking specific emotions associated with the season.

With these nail ideas, you can easily create a festive color palette that reflects your style while celebrating the season. So dive into the fun world of holiday nails and let your creativity shine with these gorgeous color combinations!

Nail Art for Holiday Parties

festive nail designs ideas

Holiday parties often call for creative expression, and showcasing festive nail art is a fun way to elevate your look. Consider incorporating classic Christmas colors like deep red, emerald green, and sparkling gold to create a sophisticated holiday look. Adding a twist on traditional styles can make your nails stand out even more.

Nail art designs featuring snowflakes, Christmas trees, or candy cane stripes add a cheerful touch that complements your outfit perfectly. For those who love a bit of glam, don't shy away from using glitter and metallic finishes. These elements can enhance your nail art, providing a dazzling effect that perfectly matches the festive spirit. Additionally, incorporating natural oils in your nail care routine can help keep your nails healthy and vibrant.

If you prefer a more subtle approach, minimalist designs with understated holiday accents can be chic and elegant, making them ideal for various holiday party themes. Even if you have short nails, don't worry! You can still enjoy playful designs like Santa motifs or adorable reindeer faces, which aren't only fun but also practical for busy celebrations. Additionally, incorporating a touch of imaginative play through creative nail designs can further enhance your holiday style.

Whether you opt for intricate festive nail art or keep it simple, your nails will definitely spread holiday cheer and make a statement at any gathering.

Advertisement

Pros and Cons of Nail Art

nail art benefits and drawbacks

Artistic expression through nail designs can be both rewarding and challenging. Nail art allows you to showcase your creativity and personal style, boosting your confidence, especially when sporting festive designs during the holiday season. Regular outings with friends can enhance your social experience just like puppy training classes help dogs with socialization.

Seasonal nail trends can bring out the holiday spirit, making your simple Christmas nail designs a fun way to celebrate. Plus, DIY nail art can save you money, as professional manicures can quickly add up.

However, there are some downsides to consider. While intricate designs can be stunning, they often require more time and effort for application and maintenance than simpler styles. Regular upkeep is essential; without it, you might face breakage and damage, emphasizing the importance of nail health.

Interestingly, maintaining your nail art can reduce breakage by 30%, ensuring your designs last longer. Additionally, just as with tanning, it's crucial to monitor your nail health to prevent damage from excessive use of products.

Ultimately, finding the right balance in your nail art routine can enhance your experience. Enjoy the creativity and festive spirit nail art brings, but be mindful of the time and effort involved. Regular exercise is important not only for dogs but also for maintaining our own well-being as we engage in creative hobbies.

With the right approach, you can revel in beautiful nails while keeping them healthy.

Advertisement

Festive Nail Art Ideas

creative holiday nail designs

As the festive season approaches, you might be eager to show off your nails with cheerful designs that capture the spirit of Christmas. Festive nail art is a perfect way to express your holiday cheer.

You can embrace classic red and green colors for a vibrant look or mix in gold glitter to add some sparkle to your holiday style.

Consider creating playful designs featuring tiny Christmas trees or whimsical snowflake nails that are sure to draw attention at any holiday party.

If you prefer a more understated approach, minimalist designs with subtle holiday accents, like small snowflakes or delicate reindeer, can still make a stylish statement without being overwhelming.

The beauty of Christmas nail art is its accessibility; you can easily achieve these seasonal themes at home using DIY techniques.

Whether you opt for bold patterns or chic minimalist styles, your nails can reflect the joy and warmth of the season.

Advertisement

Nail Art for Joyful Celebrations

creative nail designs celebration

Nail designs can bring a burst of joy to any celebration, especially during the festive season. When you think of holiday cheer, vibrant colors like deep red, emerald green, and sparkling gold instantly come to mind.

These hues not only reflect traditional Christmas themes but also elevate your festive designs, making your Christmas nails truly stand out.

You can easily create playful nail art at home with simple motifs like candy cane stripes and Christmas lights. These designs are perfect for adding a whimsical touch without needing extensive skills.

If you prefer a more understated look, minimalist Christmas nails featuring subtle sparkle can offer chic elegance that works for both casual gatherings and formal events.

The winter season is also a great time to explore nail art ideas shared across social media. You'll find plenty of inspiration and tutorials that can help you express your unique holiday spirit.

Frequently Asked Questions

What Tools Do I Need for DIY Christmas Nail Art?

To create DIY Christmas nail art, you'll need a base coat, a variety of nail polishes, nail art brushes, dotting tools, and a top coat. Don't forget nail tape for clean designs and festive stickers!

Advertisement

How Can I Make My Nail Art Last Longer?

To make your nail art last longer, you should start with a base coat, use quality polish, and finish with a top coat. Avoid excessive water exposure and reapply top coat every few days for longevity.

Are There Any Safe Nail Polish Brands for Kids?

Yes, there are safe nail polish brands for kids! Look for water-based formulas like Piggy Paint or Ella + Mila. These are non-toxic, easy to remove, and perfect for little ones to enjoy without harmful chemicals.

Can I Use Regular Polish for Nail Art?

Sure, you can use regular polish for nail art! Just remember that some formulas can be tricky to work with. Experiment a bit, and you'll find techniques that work best for you and your designs.

How Do I Remove Nail Art Without Damaging My Nails?

To remove nail art without damaging your nails, soak a cotton ball in acetone, place it on your nail, and wrap it in foil. After a few minutes, gently wipe away the polish.

Advertisement

Continue Reading

Trending