Get ready to express your creativity! You can transform your nails into miniature fruit shapes with these fun designs. Try the Strawberry Sweetness look with red polish, white dots, and a green stem. Or, go for the Pineapple Upsurge with yellow polish, brown texture, and white dots. You can also recreate the Watermelon Slice Magic with pink, white, and green polish. Kiwi Delight, Apple Blossom, and fruit salad-inspired designs are also waiting for you! With tropical fruit colors and the right techniques, your nails will be the envy of all your friends. Keep exploring to discover even more exciting ideas!
Key Takeaways
• Create fruit-inspired nail art designs, such as strawberries, pineapples, and kiwis, using bright and fun colors.
• Use a detail brush to paint intricate details, like seeds and leaves, to bring your design to life.
• Choose a favorite fruit and use its colors to create a unique and personalized design.
• Don't be afraid to make mistakes – use a cleanup brush and acetone to fix errors and start again.
• Apply a base coat and quick-drying top coat to protect your design and make it last longer.
Strawberry Sweetness on Nails
Create a juicy and adorable strawberry design on your nails by starting with a base coat of bright red polish. This bold color will be the base of your strawberry, so make sure to apply it evenly.
Once the red polish is dry, it's time to add the seeds. Using a detail brush, paint small white dots around the nail to create the illusion of seeds. You can space them out randomly or create a pattern – it's up to you!
After the seeds are dry, paint a small green stem at the top of the nail. This will give your strawberry a realistic touch.
Finally, add a touch of orange to the center of the strawberry to give it a pop of color. This design is perfect for a sweet and summery manicure.
With these simple steps, you'll be rocking a strawberry sweet design on your nails in no time!
Pineapple Upsurge on Tiny Fingertips
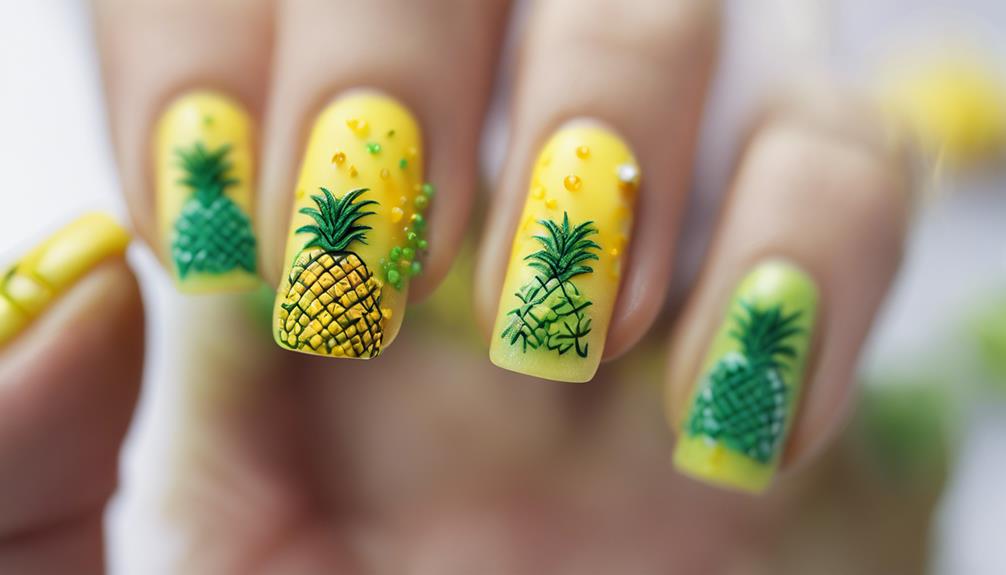
Get ready to bring a tropical vibe to your tiny fingertips with a pineapple design that's as sweet as it's stylish! With a few simple steps, you can create a pineapple that's sure to turn heads.
Here's how to get started:
- Use yellow nail polish to create the base of the pineapple, making sure to cover the entire nail.
- Next, use light brown nail polish to add texture and dimension to your pineapple. You can do this by creating small, rounded shapes.
- Add some white nail polish to create little dots on top of the brown shapes, giving your pineapple some extra texture.
- Finish off your design by adding some green leaf-like shapes at the top of the pineapple, using a nail polish of your choice.
Remember to let each layer of nail polish dry completely before moving on to the next step. And don't forget to finish off your design with a quick-drying top coat for a glossy and long-lasting look!
With these simple steps, you'll be rocking a tropical pineapple design in no time.
Watermelon Slice Magic
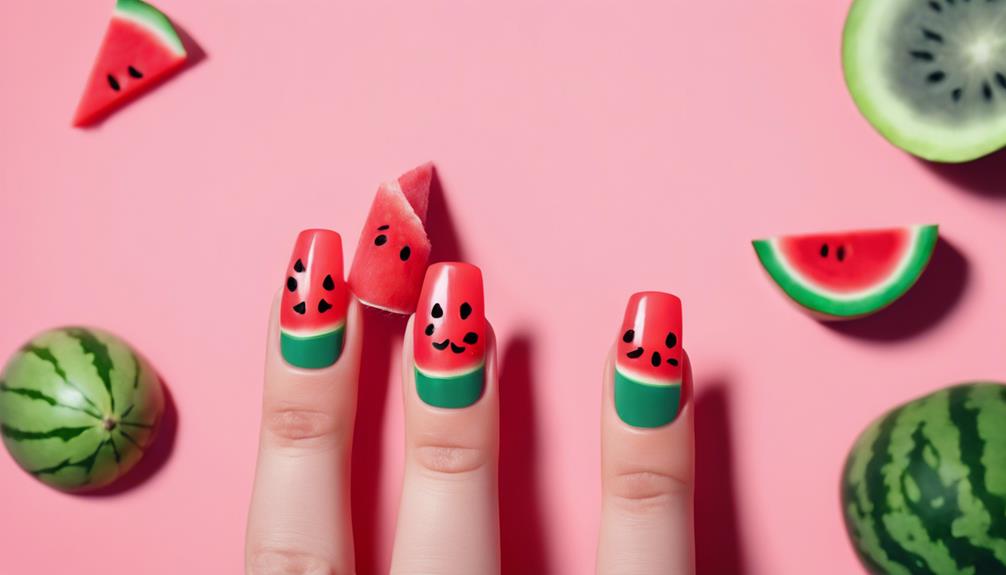
You're ready to slice into a sweet watermelon design that's perfect for summer! To create this adorable watermelon slice nail art, start by applying a base coat of pink nail polish. This will give your design a bright and cheerful foundation.
Next, use a nail art brush to add white lines, representing the rind of the watermelon slice. You can add as many or as few lines as you like, depending on the look you're going for.
Once the white lines are dry, use a light green polish to create the outer layer of the watermelon slice. You can use a nail art brush or a dotting tool to create a smooth, rounded shape.
Now it's time to add some seeds! Use a detail brush and dark green polish to create tiny seeds scattered across the watermelon slice.
Kiwi Delight Nail Art
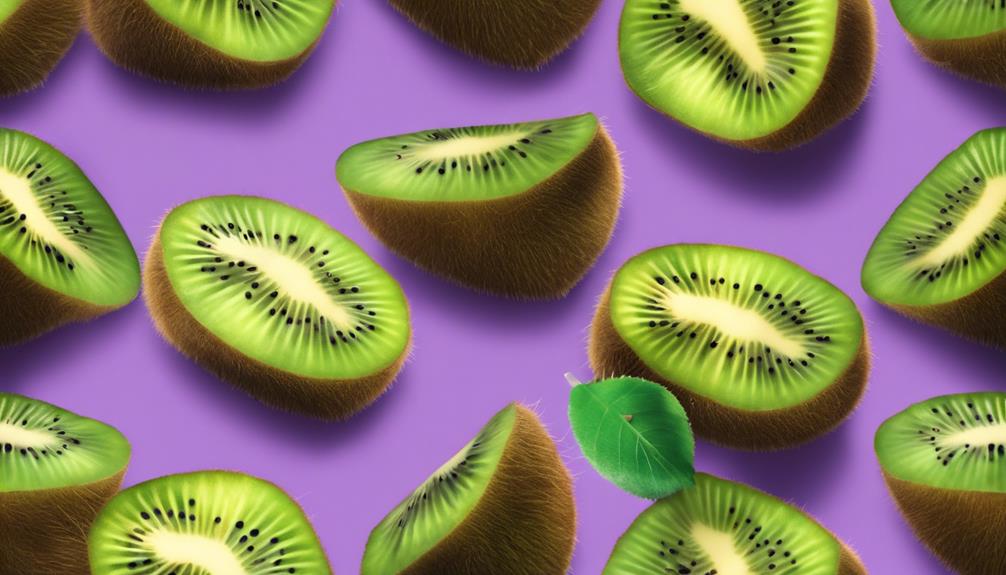
Frequently, kids love showcasing their favorite fruits on their nails, and with Kiwi Delight Nail Art, they can do just that! This vibrant green kiwifruit design is perfect for 10-year-olds looking for a fun and eye-catching nail art idea. With its light green base color and intricate kiwi details, this design is sure to turn heads.
To create this look, follow these simple steps:
- Paint a light green base coat on your nails.
- Use a detail brush to add white, black, and brown accents to create the kiwi's fuzzy skin and seeds.
- Add a few strokes to create the kiwi's stem and leaves.
- Seal in the design with a quick-drying top coat for a glossy finish.
This nail art design is a great way for kids to express their creativity and showcase their love for kiwis. As a first nail art design, it's easy to create and requires minimal skills, making it perfect for beginners.
With Kiwi Delight Nail Art, kids can have fun and get creative with their nail art, making it a great way to spend a rainy afternoon or a fun activity with friends.
Apple Blossom Nail Designs

Now that you've got the basics of apple blossom nail designs down, it's time to get creative!
You'll want to think about the color scheme – will you go for a soft, pastel look or something brighter?
From there, you can start thinking about adding some branch designs to give your blossoms some context, and finally, you can add some delicate petal accents to really make your design pop.
Blossom Color Scheme
With an apple blossom nail design, you can bring the beauty of spring to your fingertips by combining soft, feminine hues that evoke the delicate charm of blooming apple trees. To achieve this look, you'll need a palette of colors that mimic the gentle tones of an apple tree in bloom. Here are the essential colors you'll need:
- Red: A soft, blush-like shade to represent the blossoms.
- White: A little white polish to create delicate petals.
- Green: A muted, mossy tone to mimic the tree's foliage.
- Brown: A warm, earthy shade to add depth and dimension.
These colors will help you create a stunning apple blossom design on your nail.
You can use a sheer polish as the base to give a subtle hint of color before adding detailed petals. With a detail brush, you can paint delicate white or pink petals on your nail to resemble apple blossoms. Add small brown dots or lines in the center of the flowers to enhance the realistic look of the apple blossom design.
Branch Design Ideas
You can take your apple blossom nail design to the next level by incorporating a branch design that resembles a delicate apple tree branch, complete with flowers, leaves, and twigs.
To create this look, first paint a base coat on your nail to safeguard it and provide an even surface. Next, use a thin brush or nail art pen to add brown branches to your design. These will serve as the foundation for your apple blossom branch.
For a realistic touch, incorporate small green leaves using a fine detail brush and light green nail polish. You can place these leaves randomly along the branch to give it a natural look.
Don't forget to add some twigs and details to make your branch design more intricate. Finally, seal your design with a quick-drying top coat to secure its longevity.
With these steps, you'll have a beautiful apple blossom branch design that's sure to impress!
Petal Accents
To add a delicate touch to your apple blossom nail design, paint small pink petals with white centers on the nails using a detail brush. This will give your design a soft, romantic look that's perfect for spring.
When creating your petal accents, remember to:
- Keep your petals small and delicate, just like real apple blossoms.
- Arrange your petals in clusters to resemble apple blossoms scattered across the nail.
- Add a touch of brown for the apple stem and white for highlights to enhance the realistic look of the design.
- Finish with a quick-drying top coat for a polished and long-lasting finish.
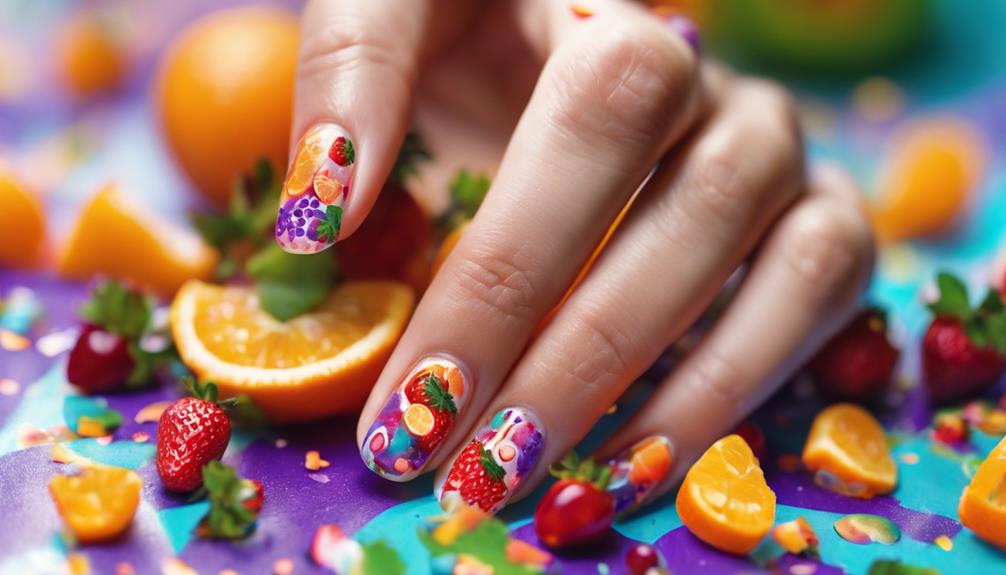
Colorful Fruit Salad Nails

Vibrant colors and playful designs come together in Colorful Fruit Salad Nails, a nail art style that's as sweet as a fresh fruit salad on a summer day. You'll love creating these fun and fruity designs inspired by strawberries, pineapples, watermelons, kiwifruits, and apples.
To get started, start by painting your nails with a base coat to protect them. Then, use a brush dipped in acetone to clean up any mistakes. Next, grab your favorite fruit-inspired nail polish shades, such as red, green, yellow, pink, and orange. You'll need a detail brush to paint the intricate designs, so take your time and be patient.
Fun Fruit Fiesta on Nails
Now it's time to kick off this fiesta! You're about to ignite your creativity and transform your nails into a vibrant celebration of summer with the Fun Fruit Fiesta on Nails.
From tropical fruit colors to fruity nail shapes and summer fruit vibes, you'll discover the perfect combination to make your nails stand out in a colorful crowd.
Tropical Fruit Colors
Get ready to ignite your creativity with a fun fruit fiesta on your nails, featuring a colorful palette of tropical fruit colors that'll make your nails stand out! Using vibrant shades like yellow, green, pink, and red nail polishes, you can create adorable fruit designs that'll make you feel like a tropical paradise.
Here are some essential colors to include:
- Yellow: Perfect for pineapple and banana designs.
- Green: Ideal for kiwi and watermelon patterns.
- Pink: Great for strawberry and apple designs.
- Red: Awesome for cherry and apple details.
To bring out the details in your fruit designs, incorporate light brown, dark green, white, and orange hues. Don't forget to use a detail brush to achieve precision and intricate patterns on your nails. Finally, finish off your tropical fruit nail art with a quick-drying top coat for a glossy and professional look.
With these tropical fruit colors, you'll be the envy of all your friends!
Fruity Nail Shapes
You can create adorable fruity nail shapes by transforming your nails into miniature fruit like strawberries, pineapples, or kiwis using nail polish. With a little bit of creativity and patience, you can achieve these fun and vibrant designs.
To get started, use a detail brush to paint the outline of your chosen fruit, and then fill it in with polish. Don't worry if it gets a bit messy – you can always use a cleanup brush to fix any mistakes. Once you've completed your design, add a quick-drying top coat to protect your nail art and give it a glossy finish.
Fruity nail shapes are a fun and creative way to express yourself and showcase your artistic skills. You can experiment with different fruit designs, colors, and patterns to make your nail art truly unique. So, don't be afraid to get creative and use your imagination – after all, it's all about having fun and trying new things!
Summer Fruit Vibes
Summer is the ideal time to express your creativity with vibrant fruit-inspired nail art designs that exude fun and playfulness, and with summer fruit nail art, you can let your personality shine! Using bright and bold colors like red, green, yellow, pink, and white, you can create stunning fruit designs that scream summer vibes.
To get started, here are some essentials to keep in mind:
- Choose your fruit: Pick your favorite fruits like strawberries, pineapples, or watermelons to feature on your nails.
- Select your colors: Use a variety of bright and bold colors to bring your fruit designs to life.
- Get the right tools: A detail brush is a must-have for creating intricate fruit details, and a cleanup brush and acetone can help fix any mistakes.
- Secure the deal: Apply a base coat and quick-drying top coat to secure your designs last longer and look glossy.
Frequently Asked Questions
How to Do Cute Nails for Kids?
So you wanna learn how to do cute nails for kids?
First, prep those little nails by cleaning them with isopropyl alcohol or nail polish remover.
Next, apply a base coat to protect and prime the nails.
Now, get creative with a detail brush and different colored polishes to design fun fruits like strawberries or apples!
Finish with a quick-drying top coat for a glossy, long-lasting look that'll make those kiddos feel like rockstars!
What Is 5 Basic Nail Art Design?
Imagine your nails as a canvas, waiting for your creativity to shine!
When it comes to basic nail art designs, you've got a world of possibilities. You can start with simple patterns like stripes, which can be thin or thick, vertical or horizontal.
Then, there are dots, hearts, stars, and chevron patterns, all easily created with different colors of nail polish and basic tools.
These designs are perfect for beginners, and you can always mix and match to create a unique look that's all yours!
What Is the Latest Trend in Nail Art?
You're wondering what's hot in nail art right now? Well, you're in luck!
The latest trend is all about fruity fun! Imagine vibrant strawberries, pineapples, watermelons, kiwis, and apples adorning your nails.
These colorful designs are created using a range of hues like red, green, yellow, and pink.
It's a playful and lively look that's sure to turn heads!
How Do You Make Fun Nails?
You're ready to create some fun nails! Start with a base coat to protect your nails and make the polish last.
Then, grab a detail brush and get creative with fun designs like fruity patterns or bold stripes. Clean your brush regularly to prevent color mixing.
Finish with a quick-drying top coat for a glossy look. Don't be afraid to experiment with colors and designs to express your personality!
Conclusion
You've made it to the end of our fruity nail art adventure! Who knew 10-year-olds could be so stylish? Well, we hope you had a blast exploring different citrus-inspired designs and getting creative with your nails. And if you’re looking for more nail art inspiration, why not try out some adorable hello kitty nail designs? There are endless possibilities for expressing your style through nail art, so keep on experimenting and having fun with your manicures! If you’re feeling a more classic look, you can also explore french manicure nail art ideas. Whether you want a traditional french tip or something more creative like a reverse french manicure, there’s so much to explore in the world of nail art. Don’t be afraid to try new techniques and designs to find the perfect nail art to express your personal style. Keep on experimenting and keep those nails looking fabulous!
From strawberries to kiwis, these designs are the perfect blend of sweet and tangy.
And the best part? They're ridiculously easy to recreate!
So, go ahead, get creative, and turn those tiny fingertips into a colorful fruit salad. Your mini-me will thank you, and who knows, you might just start a fruity nail art revolution!