Connect with us

Beauty Tips and Information

Building a Professional Hair Tool Kit: Essentials Every Stylist Should Have

Discover the essential tools every stylist needs in their professional hair kit—your success depends on it, but what are the must-haves?

Published

on

essential hair stylist toolkit

Building a professional hair tool kit is vital for your success as a stylist. Start with high-quality shears, clippers, and razors for precision cuts. Invest in reliable blow dryers, flat irons, and curling irons to create diverse styles. Don't forget essential hair products like heat protectants and styling gels to enhance your results. Keep your kit organized with compartmentalized bags and prioritize hygiene by regularly disinfecting your tools. Choose budget-friendly brands or refurbished tools for cost savings without compromising quality. There's a lot more to explore about maximizing your toolkit for efficiency and satisfaction in your salon!

Key Takeaways

  • A well-stocked kit is essential for professional success, providing the foundation for effective hairstyling and client satisfaction.
  • High-quality cutting tools like shears, clippers, and razors ensure precise, clean cuts for diverse hairstyles.
  • Invest in professional-grade styling tools, such as high-wattage blow dryers and ceramic flat irons, for efficient and effective results.
  • Prioritize hygiene by regularly disinfecting tools and using disposable items to minimize cross-contamination risks.
  • Budget-friendly options, like refurbished equipment and affordable brands, can offer quality tools without overspending.

Importance of a Well-Stocked Kit
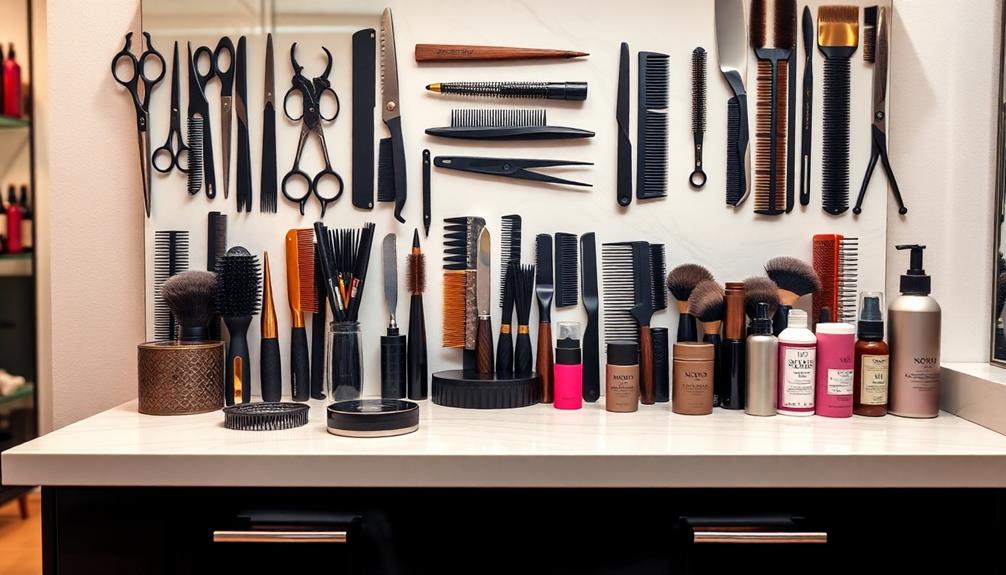
essential preparedness supply collection

A well-stocked hairstylist kit is vital for anyone serious about their craft. It serves as your foundation, enabling you to utilize essential tools that every professional hairstylist needs for success.

When you invest in high-quality products, like professional-grade shears and reliable hairdryers, you enhance your cutting and styling capabilities, ensuring clients leave satisfied with their looks. Incorporating versatile tools like the Shark Flexstyle Air Styling & Drying System can further elevate your styling options and efficiency.

Having a thorough tool kit not only allows you to perform a wide range of hairstyles but also boosts your confidence. An organized kit means quick access to your tools, which is important during busy salon hours.

Maintaining your equipment with regular cleaning—using mild soap and warm water—ensures peak performance and hygiene, contributing to the overall quality of your service.

In a competitive beauty industry, a well-stocked hairstylist kit sets you apart, showcasing your professionalism and dedication to your craft.

Advertisement

Essential Cutting and Styling Tools

haircutting and styling essentials

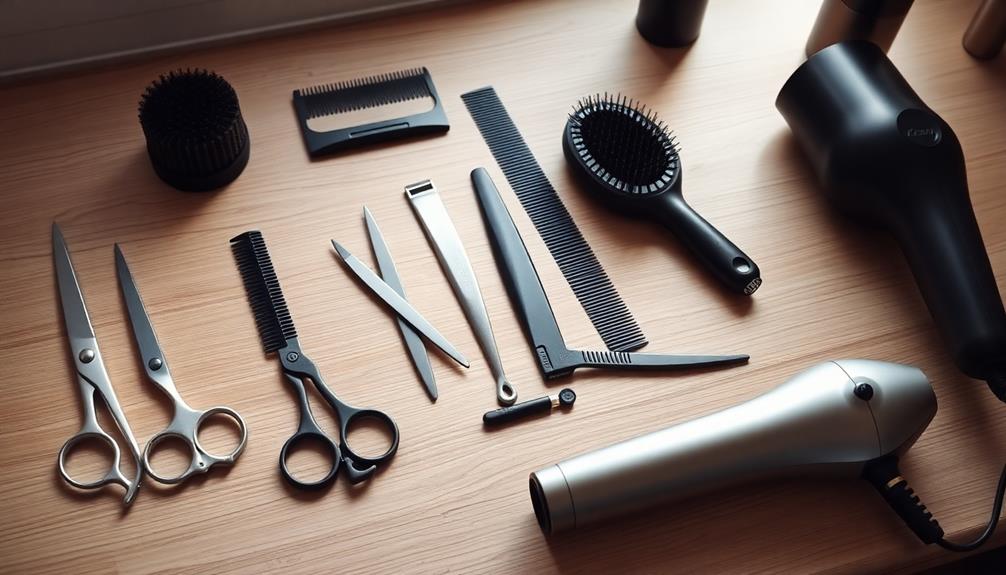
Having the right tools in your kit greatly impacts your ability to create various looks for your clients. Essential cutting tools like high-quality shears are vital for achieving clean, precise cuts. You'll want a variety, including all-purpose shears and thinning shears, to suit different styles and hair types.

For short hairstyles, clippers and trimmers are fundamental; models like the Wahl Balding Star Series are known for their performance and durability. Additionally, best shampoos for highlighted hair can enhance your clients' color-treated locks, guaranteeing their hair looks vibrant and healthy.

Don't overlook razors, either. They're perfect for adding texture and movement to specialized cuts, enhancing your clients' overall style.

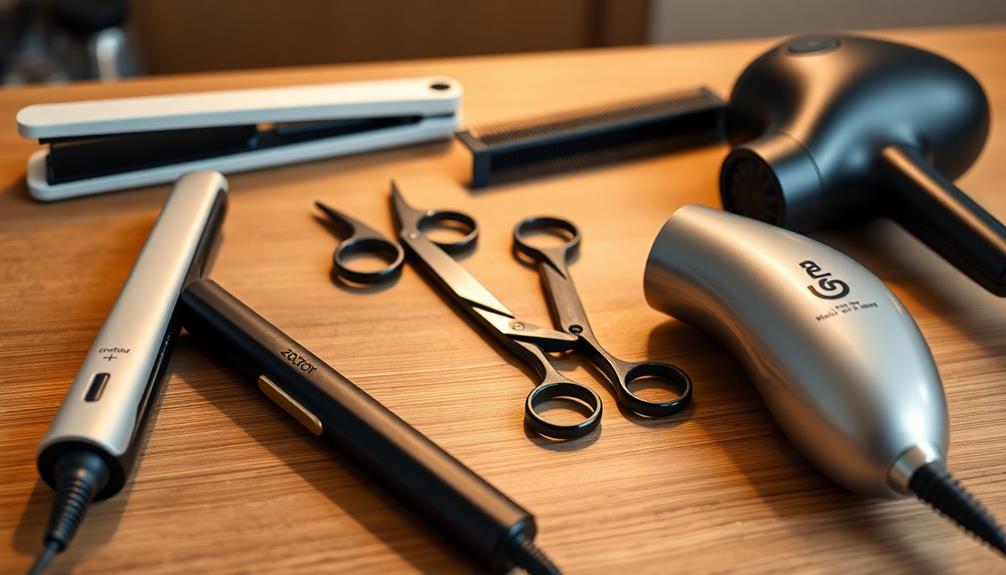
When it comes to styling, high-performance blow dryers, ceramic flat irons, and curling irons are indispensable. These tools help you create diverse looks while catering to various hair textures.

Investing in quality styling products further complements these essential cutting tools, guaranteeing your clients leave your chair satisfied. By choosing reputable brands like GHD and Dyson, you'll not only provide better performance but also elevate your professional reputation.

Equip yourself with these essential cutting and styling tools, and you'll be well on your way to mastering any look your clients desire.

Advertisement

Quality Professional-Grade Equipment

high quality professional tools

Quality professional-grade equipment is essential for any stylist looking to elevate their craft. Investing in quality tools like high-wattage blow dryers and ceramic flat irons enhances your styling efficiency while minimizing heat damage. This ultimately leads to better client satisfaction. Tools such as the Dyson Supersonic blow dryer and Babyliss hair straightener are known for their innovative designs and high-performance capabilities, making them must-haves for any stylist needs.

Here's a quick overview of essential professional-grade equipment:

Tool Type Recommended Brand Key Feature
Blow Dryer Dyson Supersonic Fast drying, minimal heat
Flat Iron Babyliss Ceramic technology
Shears Sam Villa Precise cuts, longevity
Clippers/Trimmers Wahl Adjustable features

Using ion and ceramic technology in your hair styling tools also reduces frizz and promotes shine, allowing you to achieve consistently high-quality results. Remember, investing in these professional-grade tools not only enhances your skills but also boosts your clients' trust in your expertise.

Travel Packing Tips
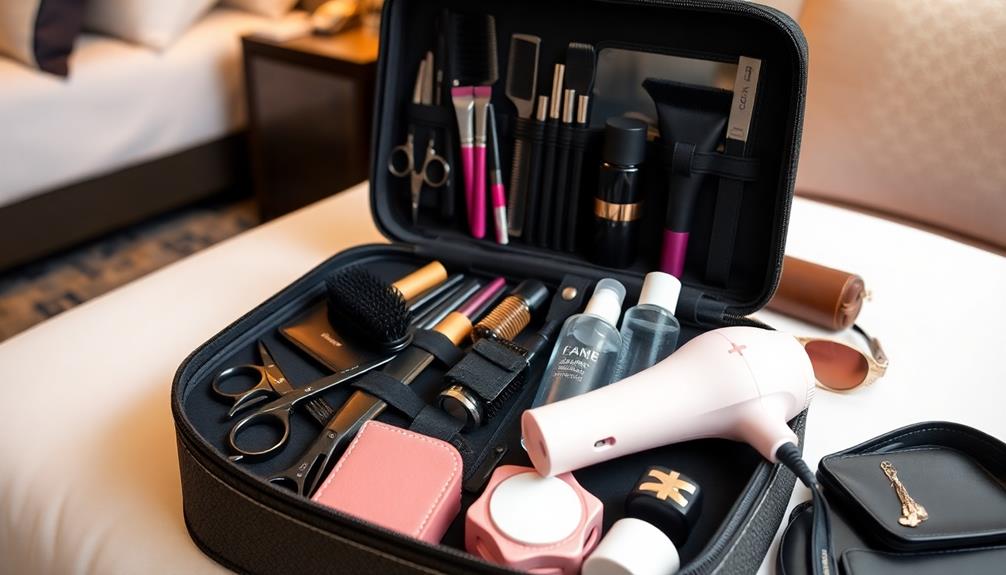
efficient travel packing strategies

When you're packing for a job, think about what you really need and leave the extras behind.

Consider including compact tools that enhance your efficiency, similar to how air purifiers improve air quality in various settings.

Protect your tools with padding to keep them safe during transit, and organize your kit so you can grab what you need quickly.

Packing Light Essentials

Packing light is essential for any professional on the go, especially when it comes to hair tools. To guarantee you have everything you need without the bulk, follow these packing light essentials:

Advertisement

1. Assess Your Needs: Before you pack, evaluate your job requirements. Bring only essential tools and products to minimize weight and space in your travel kit.

Consider including items like best hot rollers for long hair that can provide glamorous curls with minimal effort.

2. Choose Multipurpose Items: Opt for travel-sized items and multifunctional tools. This will save space while maintaining the functionality you need for your styling tasks.

3. Organize Efficiently: Use a lightweight, durable tool bag that allows you to organize your kit effectively.

Categorize your tools and products for quick access during appointments.

Advertisement

Protecting Tools During Transit

Ensuring your hair tools arrive in perfect condition is essential for any stylist on the move. Protecting tools during transit starts with using padded cases or bubble wrap, which can prevent damage and keep your valuable equipment in pristine condition.

When packing your hairstylist kit, focus on travel-sized items and prioritize only the essentials. This not only saves space but also lightens your load, allowing you to transport your kit efficiently. Additionally, consider the importance of piercing care and hygiene when handling any tools that come into contact with skin, ensuring everything remains clean and safe for your clients.

Invest in a sturdy, lightweight tool bag specifically designed for hairstylists. These bags often come with padded dividers and multiple compartments, providing organized storage that helps you keep track of everything.

Zippered pouches or tool belts can also be beneficial for securing smaller accessories like clips and combs, ensuring that they remain easily accessible during travel and ready for quick access during appointments.

Organizing for Quick Access

After securing your tools for safe transport, the next step is organizing your kit for quick access. This is essential for success, especially when you're on the go. To guarantee your hair styling tools are efficiently packed, consider these tips:

Advertisement

1. Prioritize Essential Tools: Assess your job requirements and include only the tools every stylist needs. This minimizes weight and maximizes space in your kit.

Additionally, supporting a partner ready for parenthood can be analogous to making sure you have the right tools for the job, as both involve understanding needs and preparing accordingly.

2. Utilize Travel-Sized Items: Save space and comply with airline regulations by opting for travel-sized beauty supplies.

3. Label Sections: Clearly label compartments in your kit for quick identification of frequently used items. This can greatly streamline your workflow during appointments.

Additionally, use padding materials like bubble wrap or foam to protect fragile tools from damage.

Advertisement

Organizing your kit thoughtfully not only keeps everything in place but also enhances your efficiency. By preparing ahead, you'll reduce setup time and focus on what you do best—creating beautiful styles.

Budget-Friendly Tool Options
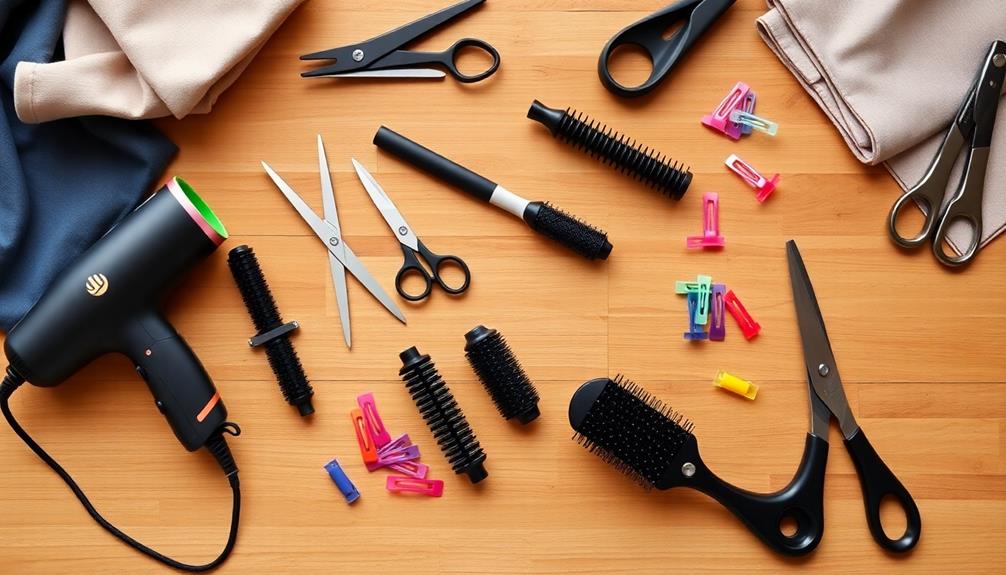
affordable tools for everyone

When you're building your hair tool kit on a budget, it's smart to contemplate affordable tool brands that don't skimp on quality.

Additionally, maintaining your tools regularly can enhance their longevity and performance, similar to how you'd air purifier maintenance dos and don'ts.

You can also save money by choosing refurbished equipment that performs just as well as new items.

Remember to focus on essential tools over luxury options to maximize your investment and get the results you want.

Affordable Tool Brands

For budget-conscious stylists, finding reliable hair tools doesn't have to be a challenge. Many affordable tool brands provide high-quality styling tools that cater to your needs without straining your finances. You can also explore Glamour Makeup and Hair Styling Ideas for inspiration on achieving stunning looks with the right tools.

Advertisement

Here are three options to contemplate:

  1. Remington and Conair: Known for their ceramic flat irons and blow dryers, these brands offer professional-grade tools often priced under $50.
  2. Revlon Perfect Heat: This line features affordable curling irons and hairdryers that utilize ceramic technology for even heat distribution, enhancing your styling results without breaking the bank.
  3. Wahl Color Pro: Perfect for novice stylists, this clipper combines quality performance with affordability, ensuring you can achieve diverse styles without a hefty investment.

Brands like Bed Head and Hot Tools also offer cost-effective options while maintaining professional quality.

If you're looking to save even more, think about investing in refurbished tools from reputable brands, allowing you to build your kit affordably while still achieving excellent results.

With these budget-friendly tool options, you can create stunning hairstyles without overspending.

Refurbished Equipment Benefits

Exploring refurbished equipment can be a game changer for budget-conscious stylists. Many refurbished tools come at significant discounts, allowing you to invest in high-quality tools without breaking the bank. You can typically save anywhere from 20% to 50% compared to buying new items, which means more funds for essential products or training that enhance your skills in the salon environment.

Additionally, understanding the divorce costs can help you allocate your budget effectively.

Advertisement

What's more, refurbished equipment is often certified and tested for performance, ensuring that it meets industry standards. This gives you peace of mind knowing that you're working with reliable gear.

Additionally, purchasing refurbished tools supports sustainability by reducing waste and promoting recycling within the beauty industry, aligning your practices with eco-friendly values.

Another benefit is that many refurbished tools come with a warranty or return policy, providing you with extra protection if you're unsure about the longevity of used items.

By choosing refurbished equipment, you can enjoy high-quality performance while staying within your budget, ultimately improving your service quality and client satisfaction in the salon.

Embrace the advantages of refurbished tools and elevate your stylist toolkit today!

Advertisement

Essential vs. Luxury Items

Choosing the right tools for your kit can make a significant difference in your styling capabilities and overall efficiency. As a stylist, you'll want to focus on essential tools first, while considering luxury items for future upgrades. Here's a quick breakdown:

1. Essential Tools: Invest in high-quality shears and a reliable blow dryer. These are foundational for any stylist and will serve you well.

Additionally, just like selecting the right projector type for ideal image quality in a home cinema, choosing the best tools tailored to your specific needs can enhance your performance and results. Top 5 Projectors for Gaming Enthusiasts can also inspire you to seek out versatile tools that cater to various styles and techniques.

2. Budget-Friendly Options: Brands like Remington and Revlon offer effective tools without the hefty price tag. Look for versatile tools, such as a ceramic curling iron with adjustable settings, which can cater to various hair types.

3. Luxury Items: While advanced ionic dryers and professional-grade flat irons can enhance your performance, they're often not necessary for beginners.

Advertisement

Keep an eye out for promotions at beauty supply stores; you can find excellent deals on essential tools. Additionally, consider refurbished or gently used professional tools, as they provide significant savings while still delivering high performance and durability.

Must-Have Hair Products
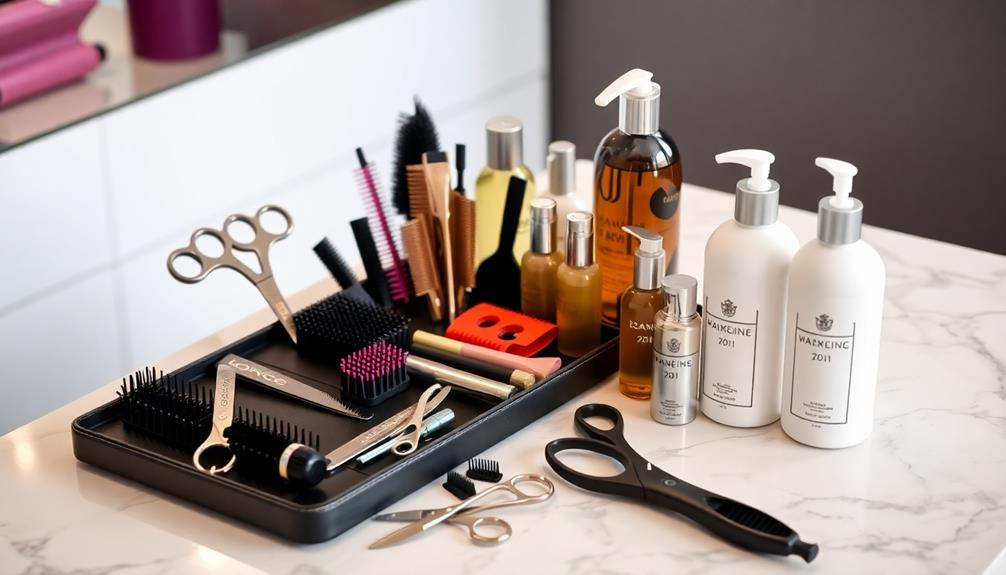
essential hair care items

Fundamentally, having the right hair products in your kit is crucial for delivering exceptional results to your clients. Start with high-quality shampoos and conditioners that cater to various hair types; brands like Olaplex and Kerastase are known for their superior ingredients and results. These essential hair products lay the foundation for effective hair care.

Don't forget heat protectants. They minimize damage during styling by acting as a barrier against the high temperatures from tools like flat irons and curling wands.

Styling products are equally important; mousse adds volume, gel defines curls, and hairspray guarantees your clients' looks stay intact.

Deep conditioning masks are critical, especially for clients with color-treated or damaged hair, as they provide hydration and repair. These treatments help maintain overall hair health, making sure your clients leave your chair feeling rejuvenated.

Lastly, stock a variety of hair color products, including developers, toners, and bleaching agents. This variety allows you to employ versatile coloring techniques, meeting diverse client needs effectively.

Advertisement

With these must-have hair products in your kit, you'll be well-equipped to elevate your clients' hair care experiences.

Hygiene and Sanitation Practices
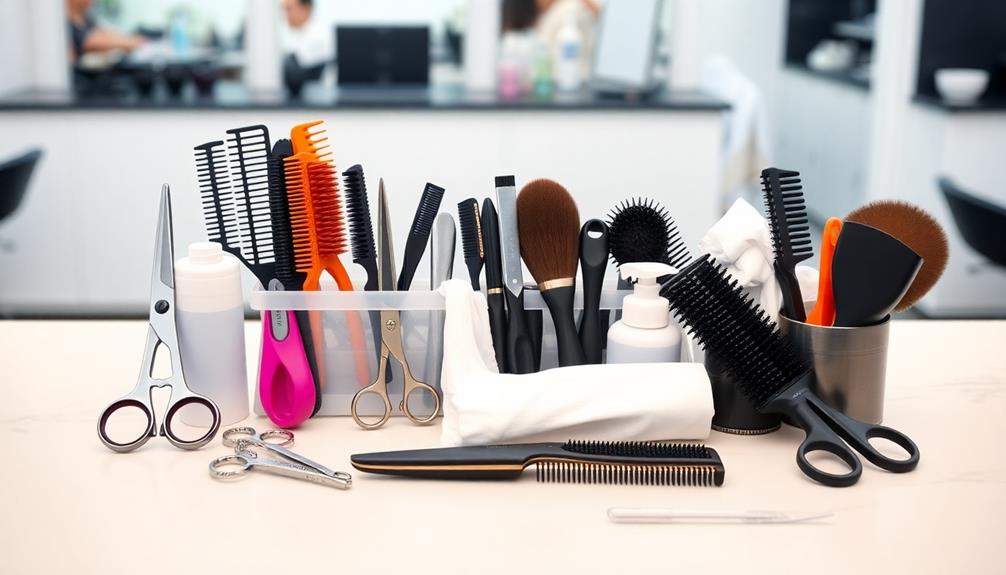
cleanliness and health standards

Maintaining strict hygiene and sanitation practices is essential for guaranteeing a safe and professional environment in your salon. By prioritizing cleanliness, you not only protect yourself and your clients but also enhance your professional image.

Here are three key practices to implement:

  1. Disinfecting Tools: Regularly disinfect tools with appropriate disinfectants, like Barbicide, to eliminate bacteria and viruses. This step is vital for maintaining a safe salon atmosphere.
  2. Using Disposable Items: Opt for disposable capes and towels during hair services. This greatly reduces the risk of cross-contamination and promotes overall hygiene.
  3. Hand Sanitizers: Always have hand sanitizers readily available for use between clients. This helps enhance cleanliness and minimizes the spread of germs.

Additionally, clean tools like brushes and combs with mild soap or shampoo and warm water after each use to prevent product buildup.

Implementing a sanitation checklist can further guarantee all hygiene practices are consistently followed, fostering client trust and satisfaction.

Organizing Your Tool Kit
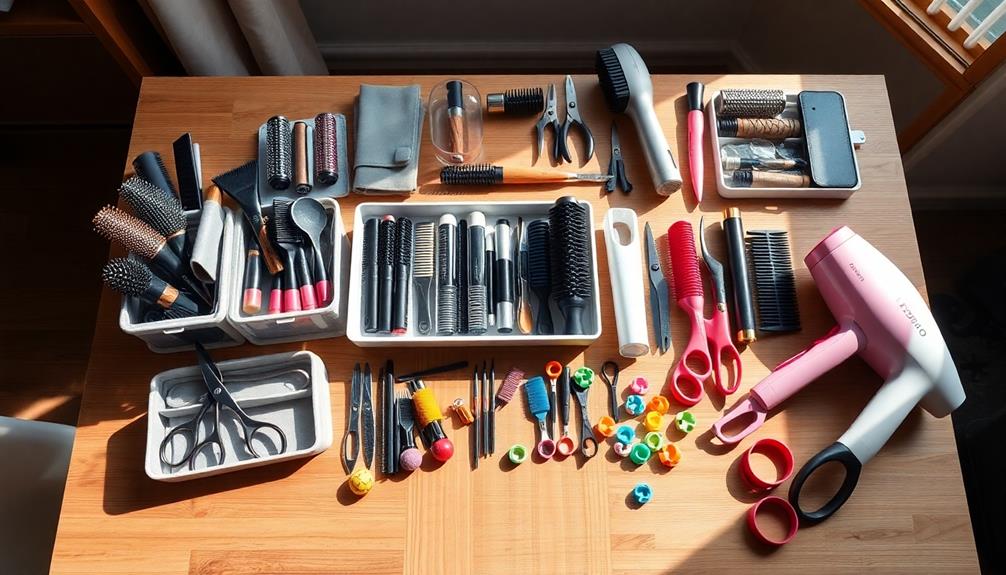
efficient tool kit organization

A well-organized tool kit can greatly improve your efficiency and workflow in the salon. Start by using compartmentalized bags or tool belts that allow you to keep scissors, clippers, and brushes easily accessible during appointments. This enhances your ability to serve clients swiftly and professionally.

Regularly assess and declutter your kit by removing damaged or unused tools. This guarantees that only essential items are available for immediate use.

Utilize drawer organizers and clear containers to categorize tools by type, such as cutting, styling, and coloring. This organization makes it easier to find the right tool quickly, saving valuable time.

Advertisement

Don't forget to designate a specific area for sanitation tools, including disinfectants and disposable supplies. Maintaining hygiene is vital for compliance with health standards and client safety.

Consider color-coding or labeling sections of your tool kit to aid in quick identification of tools. This not only reduces preparation time but also fosters a more organized and professional appearance.

Appointment Management Solutions
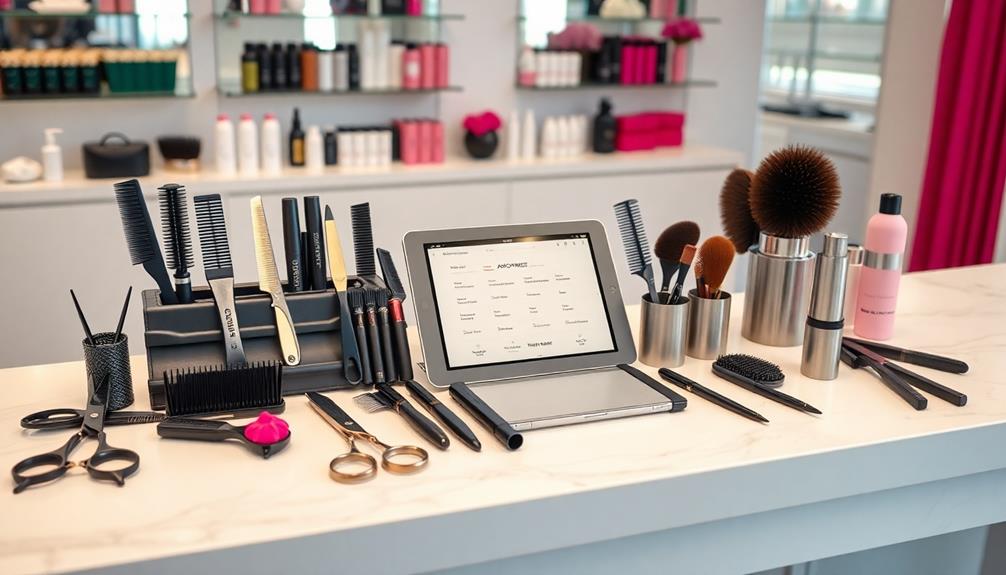
efficient scheduling and coordination

Streamlining your scheduling process with appointment management solutions can transform how you operate your salon. These tools not only simplify the booking experience for your clients but also enhance your business efficiency.

Here are three key benefits you can expect:

  1. Reduced No-Shows: Automated reminder systems can decrease no-show rates by up to 30% through text or email notifications, boosting your client retention.
  2. Optimized Staff Management: By integrating calendar synchronization, you can guarantee your team is scheduled effectively for peak booking times, maximizing productivity and service quality.
  3. Informed Decisions: Utilizing analytics from your appointment management software helps you track client trends, allowing you to tailor your services based on client preferences.

With these solutions, you can streamline scheduling, minimize administrative workload, and provide a more personalized service.

Additionally, many appointment management tools integrate with your Point of Sale (POS) systems, making transaction processing seamless. By adopting these technologies, you position your salon for growth and improved client satisfaction.

Frequently Asked Questions

How Often Should I Replace My Hair Cutting Tools?

You should replace your hair cutting tools every one to three years, depending on usage. If you notice dullness or damage, don't hesitate to upgrade sooner. Keeping your tools sharp guarantees better results for your clients.

Advertisement

What Brands Are Recommended for Professional Hair Tools?

When choosing your professional hair tools, think of a knight selecting the finest sword. Brands like Wahl, Andis, and Babyliss offer reliable options that'll help you conquer any hairstyle with confidence and precision.

Can I Build a Kit on a Tight Budget?

Absolutely, you can build a kit on a tight budget! Focus on essential tools, shop sales, and consider buying second-hand. Prioritize quality over quantity, and you'll still create a functional and effective toolkit.

How Do I Choose the Right Scissors for My Style?

To choose the right scissors for your style, consider your cutting technique and hair types. Test different blades, handle shapes, and weights. Trust your instincts—comfortable scissors will enhance your precision and creativity while you work.

What Tools Are Essential for Specific Hair Types?

To choose essential tools for specific hair types, you'll want to take into account texture and thickness. For fine hair, use lightweight scissors; for thick hair, opt for shears that can handle the density effectively.

Conclusion

To sum it up, having a well-stocked hair tool kit is essential for every stylist's success. With the right equipment and products at your fingertips, you'll feel like a hair wizard, conjuring up stunning styles in no time. Remember to prioritize quality, hygiene, and organization to make your work easier and your clients happier. So gear up, keep your kit in top shape, and get ready to transform every hair appointment into a masterpiece!

Advertisement

Advertisement

Beauty Tips and Information

DIY Beauty: What’s Safe to Try at Home and What You Should Avoid

You can explore safe DIY beauty treatments, but beware of harmful ingredients that could damage your skin—find out what to try and what to avoid!

Published

on

By

safe diy beauty practices

When it comes to DIY beauty, some treatments are safe while others can harm your skin. You can try gentle options like oatmeal, honey, and aloe vera for hydration and soothing effects. However, steer clear of harmful ingredients like lemon juice, baking soda, and vinegar, which can disrupt your skin's pH balance and cause irritation. Always perform patch tests before applying new ingredients, and consult a dermatologist if you have any skin concerns. Understanding safe practices can help you enjoy DIY beauty without the risks, and there's plenty more to discover about this at-home skincare trend.

Key Takeaways

  • Always perform patch tests before using DIY ingredients to prevent adverse skin reactions.
  • Avoid highly acidic or alkaline substances, like lemon juice and baking soda, which can disrupt skin pH balance.
  • Use safe alternatives like oatmeal, honey, and aloe vera for gentle skincare benefits without harsh side effects.
  • Consult dermatologists for personalized advice, especially if you have sensitive skin or existing skin conditions.
  • Conduct thorough research on ingredients to understand their effects and potential risks before trying DIY treatments.

Risks of DIY Beauty Treatments

diy beauty treatment hazards

When it comes to DIY beauty treatments, understanding the risks is vital for your skin's health. Many common DIY methods use ingredients like lemon juice and baking soda, which can disrupt your skin's natural pH balance. This disruption can lead to irritation, burns, or even long-term damage. Overusing highly acidic or alkaline substances can exacerbate existing skin issues, causing inflammation and compromising your skin barrier.

Additionally, maintaining high vibrational energy around beauty practices is important, as it can influence your overall skin health and appearance, just as Abraham Hicks emphasizes on vibrational alignment.

Another risk of DIY beauty treatments is that they often lack preservatives, increasing the chances of bacterial growth. If you reuse or improperly store these products, you could be inviting infections. This makes it important to consult with a dermatologist before experimenting with new skin-care ingredients, as everyone's skin reacts differently.

Before diving into the world of DIY beauty, thorough research and patch-testing are key. You want to make sure that the treatments you try won't lead to harmful side effects. By being cautious and informed, you can explore DIY beauty safely, minimizing the risks and protecting your skin's health.

Always remember that your skin deserves the best care!

Advertisement

Harmful Ingredients to Avoid

avoid harmful ingredients list

When you're mixing up your DIY beauty treatments, it's essential to watch out for common ingredients that can harm your skin.

Things like lemon juice and baking soda may seem innocent, but they can cause irritation and disrupt your skin's balance.

Additionally, certain essential oils can also pose risks if not used correctly, so it's important to understand essential oil safety before incorporating them into your beauty routine.

Fortunately, there are safe alternatives that can help you achieve your beauty goals without the risks.

Common Misused Ingredients

Many DIY beauty enthusiasts unknowingly incorporate harmful ingredients into their routines, risking skin irritation and long-term damage. Some commonly used ingredients in DIY skincare recipes can be more harmful than beneficial.

For instance, lemon juice, with its high acidity, can disrupt your skin's natural barrier, increasing photosensitivity and risking burns or discoloration. Baking soda, while a popular choice, is highly alkaline and can strip away natural oils, leading to irritation and an imbalance in your skin's pH.

Advertisement

Toothpaste might seem like a quick fix for acne, but it often contains irritating substances like triclosan and lacks clinical backing for effectiveness. Vinegar, although it has antibacterial properties, can alter your skin's pH and cause dryness or chemical burns, especially on sensitive skin.

Skin Irritation Risks

Throughout your DIY beauty journey, it's important to be aware of the skin irritation risks posed by certain ingredients. Some seemingly harmless items can actually cause serious problems for your skin. For instance, lemon juice is highly acidic and can lead to burns, increased photosensitivity, and exacerbate existing skin conditions when applied topically.

Additionally, maintaining proper hydration is vital for skin health; dehydrated skin can be more susceptible to irritation from these ingredients. Effective hydration techniques can help mitigate some of these risks.

Baking soda is another common ingredient that disrupts your skin's natural pH balance, potentially causing irritation, dryness, and inflammation with frequent use.

Similarly, raw apple cider vinegar can irritate your skin if used undiluted, risking chemical burns and altering pH levels.

Advertisement

You might think toothpaste is a quick fix for acne, but it contains various ingredients that can irritate your skin and lead to inflammation.

Also, be cautious with essential oils; while they're often touted for their natural benefits, excessive use can trigger allergic reactions and skin irritation.

While natural ingredients can be beneficial, it's important to recognize these skin irritation risks before incorporating them into your routines.

Always patch-test new mixtures and prioritize the health of your skin over DIY experimentation.

Safe Alternatives Available

Finding safe alternatives to harsh DIY beauty ingredients can greatly improve your skincare routine. Instead of reaching for potentially irritating products, consider these gentle kitchen ingredients that provide effective results without the risks.

Advertisement

Regular consumption of certain herbal teas can also support your skin health, as some teas are known for their calming effects and stress reduction, which can reflect positively on your skin. For example, red herbs such as hibiscus are noted for their calming effects and can help alleviate stress-related skin issues.

  1. Oatmeal: This gentle exfoliant nourishes and soothes your skin, making it a perfect replacement for abrasive scrubs.
  2. Honey: With its natural antibacterial properties, honey moisturizes and heals without the harshness of DIY acne treatments.
  3. Aloe Vera: Known for its hydrating and soothing qualities, aloe vera is suitable for all skin types and a safer choice compared to irritating options like lemon juice.

Additionally, if you're looking for exfoliation, green tea is rich in antioxidants and can calm your skin effectively.

For those who prefer a more predictable approach, consider commercially available chemical exfoliants that provide safe and efficient results.

By opting for these safe alternatives in your DIY skincare routine, you can enjoy the benefits of natural ingredients while minimizing the risk of irritation and adverse reactions.

Always remember, taking care of your skin should feel good, not harsh!

Effects of Common Spices

impact of everyday spices

When it comes to DIY beauty treatments, using spices can be both beneficial and risky for your skin. While some spices like turmeric have anti-inflammatory properties, they can also stain your skin if not applied carefully. Always remember that turmeric needs to be managed properly during application to avoid unwanted yellow marks.

Additionally, it's important to take into account the potential environmental factors that may affect your skin health, as prolonged exposure to irritants can lead to increased sensitivity, similar to how hearing impairment can be influenced by environmental factors.

Advertisement

On the other hand, cinnamon is a spice you should completely avoid in your skincare routine. It can lead to severe skin irritation, blisters, and burns. Even seemingly mild spices can be abrasive and cause micro-tears in your skin, increasing the risk of irritation.

To minimize any adverse reactions, spot-testing is essential. Before applying any spice to a larger area, test it on a small patch of skin. This way, you can gauge how your skin reacts and avoid potential discomfort.

While spices can offer unique benefits, their proper handling is vital. Use caution, as individual reactions can vary greatly. Prioritize your skin's health and safety by being informed about the potential risks associated with using spices in your beauty treatments.

Importance of Ph Balance

maintaining optimal ph levels

Maintaining the right pH balance is essential for your skin's health and overall appearance. Your skin's natural pH is around 5.5, which is slightly acidic and vital for protecting against irritants and pathogens.

When you engage in DIY skincare, be cautious—using alkaline substances like baking soda can disrupt this balance, leading to conditions such as eczema, acne, and increased skin sensitivity.

Additionally, incorporating natural remedies like essential oils for skin health can support your skin's pH and promote healing without harsh chemicals.

Advertisement

Here are three key reasons why you should prioritize pH balance in your skincare routine:

  1. Microbiome Support: A balanced pH fosters a healthy skin microbiome, which helps prevent infections and promotes overall skin health.
  2. Barrier Function: Proper pH levels maintain your skin's barrier, ensuring it retains moisture and keeps irritants at bay.
  3. Irritation Prevention: Using products that are too acidic or alkaline can strip your skin of its natural oils, leading to dryness, irritation, and inflammation.

Dermatologist Recommendations

skin care expert advice

Many people underestimate the importance of professional guidance in their DIY beauty routines. Dermatologist recommendations are essential for ensuring that your skincare practices are both safe and effective.

For instance, you should steer clear of highly acidic ingredients like lemon juice. Using these on your skin can lead to damage and increased photosensitivity. Similarly, avoid DIY treatments involving baking soda or vinegar, as they can disrupt your skin's natural pH balance, resulting in irritation or dryness.

It's also important to be aware of the legal implications of using certain ingredients, as some may cause reactions that could lead to liability issues, similar to how one should approach divorce costs in a separation process.

When trying new ingredients in your DIY skincare, always conduct a patch test on a small area first. This step helps you gauge any adverse reactions before applying the product more broadly.

While it may be tempting to experiment with natural ingredients, experts emphasize prioritizing commercially available products that have been clinically tested and tailored for specific skin types.

Advertisement

Consulting a dermatologist is particularly important if you have existing skin conditions. They can provide personalized advice to help you avoid exacerbating issues with unverified DIY methods.

Popular DIY Beauty Trends

current diy beauty trends

You might be tempted to try popular DIY beauty trends that use everyday ingredients like lemon juice or apple cider vinegar.

While these can offer some benefits, it's vital to prioritize safety and know the potential risks involved.

Regular cleaning of your tools and equipment is essential for ideal results, similar to maintaining air purifier performance.

Let's explore which ingredients are trending and the precautions you should take to protect your skin.

Trending DIY Ingredients

The rise of DIY beauty trends has led to an influx of popular ingredients that promise glowing skin and budget-friendly solutions. While these DIY skincare remedies can be tempting, it's crucial to know which ingredients to use and which to avoid.

Advertisement

For instance, incorporating natural anti-inflammatory ingredients like turmeric can enhance your routine by providing additional skin benefits, as it's known for its potent relief for osteoarthritis pain.

Here are three trending DIY ingredients to think about:

  1. Lemon Juice: Known for its vitamin C content and skin-lightening effects, lemon juice can disrupt your skin's pH balance and increase sun sensitivity. Use cautiously to avoid burning and discoloration.
  2. Coconut and Olive Oil: These oils are praised for their moisturizing properties, making them great for dry skin. However, excessive use can trigger increased sebum production and severe acne in oily skin types.
  3. Baking Soda: This natural exfoliant is often recommended, but its high alkaline nature can strip your skin of essential oils, leading to dryness and irritation. It's best not to use it regularly.

When exploring DIY skin care, always consider the potential effects of these ingredients on your skin type to guarantee you're making safe choices for your beauty routine.

Safety Precautions Needed

Exploring DIY beauty trends can be exciting, but safety precautions are essential to secure a positive experience. Before trying any new DIY ingredients, always patch-test them on a small area of skin. This simple step helps you monitor for adverse reactions before applying them more broadly.

Additionally, just as some fruits like apples can be beneficial when consumed in moderation, be mindful of how certain ingredients might interact with your skin. For instance, dogs and apples can highlight the importance of moderation in any dietary or topical application.

When using potent ingredients like raw apple cider vinegar or lemon juice, remember to dilute them to minimize irritation. Aim for a maximum dilution of 20% for apple cider vinegar to prevent chemical burns.

Advertisement

Be cautious with highly alkaline substances, such as baking soda, as they can disrupt your skin's pH balance, leading to irritation and dryness if misused. It's also wise to avoid using common household items like toothpaste and hydrogen peroxide on your skin, since they can cause inflammation and unpredictable reactions.

If you have sensitive skin or existing skin conditions, consult with a dermatologist before trying any DIY beauty hacks. Taking these safety precautions will help secure that your DIY beauty journey is both enjoyable and effective. Your skin deserves the best care!

Specific DIY Hacks Reviewed

diy hacks detailed review

DIY beauty hacks can offer a tempting allure, but not all are created equal when it comes to safety and effectiveness. While some DIY recipes can be beneficial, others can disrupt your skin's pH or cause irritation.

Here are three specific hacks you might want to reconsider:

  1. Hairspray as Makeup Setting Spray: Avoid using hairspray to set your makeup. Its potential to clog pores and the presence of alcohol can irritate and dry out your skin.
  2. Castor Oil for Lash Growth: While it's popular for promoting lash growth, castor oil's heavy consistency may trap moisture and lead to skin issues. Coconut oil could be a lighter alternative, but it can still cause breakouts if your skin is oily or acne-prone.
  3. Lemon Juice and Baking Soda: Mixing lemon juice with baking soda can disrupt your skin's natural balance, potentially causing acne and discoloration. The high acidity and high pH can be harmful if not used carefully.

Always prioritize safety when experimenting with DIY beauty hacks to guarantee your skin remains healthy and radiant.

Best Practices for Safety

safety best practices guidelines

How can you guarantee your DIY beauty experiments are safe and effective? Start by conducting thorough research on the ingredients you plan to use. Understanding their effects and potential risks is vital, especially since some ingredients can make your skin more sensitive.

Always perform a patch test on a small area of skin before applying any new ingredient more widely. This will help you check for allergic reactions or irritation.

When using potent ingredients like raw apple cider vinegar or lemon juice, remember to dilute them to minimize the risk of skin irritation and chemical burns. Monitoring your skin's reactions closely after using DIY products is essential. If you notice any adverse effects, discontinue use immediately.

Advertisement

For added safety, consider consulting with dermatologists or skincare professionals for personalized advice. They can guide you toward safer alternatives to potentially harmful DIY ingredients.

Following these best practices for safety won't only protect your skin but also enhance the effectiveness of your DIY beauty endeavors. With careful attention and informed choices, you can enjoy the creative process of DIY beauty while keeping your skin healthy and glowing.

Safe Alternatives for Skincare

gentle effective skincare options

When it comes to skincare, choosing safe alternatives can make all the difference for your skin's health and appearance. Opting for natural ingredients not only reduces the risk of irritation but can also effectively target concerns like oily skin.

Here are three safe alternatives you can try as home remedies:

  1. Oatmeal: This gentle exfoliant soothes and nourishes all skin types, making it perfect for avoiding irritation while keeping your skin fresh.
  2. Honey: Known for its natural antibacterial properties, honey hydrates your skin without the harsh effects of other DIY ingredients. It's particularly great for maintaining moisture balance.
  3. Aloe Vera: If you're dealing with irritation, aloe vera's hydrating and healing properties can help soothe your skin and promote overall health.

Incorporating these ingredients into your skincare routine can provide effective results.

Frequently Asked Questions

Is DIY Skincare Safe?

DIY skincare isn't always safe. You might irritate your skin or worsen existing issues. Always patch-test new ingredients, avoid highly acidic or alkaline products, and consult a professional if you have severe skin concerns.

What Are the Cons of DIY Skincare?

DIY skincare can lead to skin irritation, chemical burns, and infections. You might disrupt your skin's natural balance and face inconsistent results. It's best to consult a dermatologist before trying any homemade remedies for safety.

Advertisement

Which Homemade Product Is Best for Face?

If you're looking for the best homemade product for your face, try an oatmeal mask. It gently exfoliates and soothes your skin, making it perfect for all skin types. Just remember to patch test first!

Can Dermaplaning Cause Staph?

Yes, dermaplaning can cause staph infections if done improperly. If tools aren't sanitized or your skin isn't clean, bacteria can enter, leading to redness, swelling, or pus. Always prioritize hygiene to protect your skin.

Conclusion

In your quest for that perfect glow, it's essential to know what's safe and what's not. While DIY beauty can be fun and cost-effective, don't go throwing caution to the wind! Always check ingredients and pH levels, and consult with a dermatologist when in doubt. Remember, just because a trend is all the rage doesn't mean it's right for you. So, channel your inner beauty guru, but keep safety front and center—your skin will thank you!

Continue Reading

Nail Tips

Autumn Fall Nudes for a Subtle and Sophisticated Look

Capture the essence of autumn with chic nudes that elevate your look; discover how to effortlessly embrace seasonal sophistication.

Published

on

By

elegant autumn nude palette

Autumn fall nudes create a chic and sophisticated look that perfectly suits the season. Think warm, earthy tones like terracotta, creamy whites, and dusty rose that flatter your skin tone beautifully. You can enhance your style with metallic accents or glossy finishes to add a touch of glam. These versatile shades are ideal for any occasion, offering low-maintenance elegance while masking growth and chips. Plus, designs like the Mocha Marble can bring a cozy feel to your nails. Embrace the sophistication of autumn nudes, and you'll discover even more inspiring ideas to elevate your nail style.

Key Takeaways

  • Autumn fall nudes feature earthy tones like terracotta, creamy whites, and dusty rose, creating a warm and inviting aesthetic.
  • These versatile hues flatter various skin tones, enhancing natural beauty and offering an elegant, sophisticated appearance.
  • Pairing nudes with metallic accents or matte topcoats can elevate the look while keeping it refined and chic.
  • Low maintenance nude shades effectively mask growth and chips, providing a polished appearance suitable for any occasion.
  • Incorporating seasonal colors into nude designs, like the Mocha Marble, adds warmth and creativity while maintaining subtlety.

Introduction

beginning of the content

Autumn fall nudes bring a warm, inviting vibe that's perfect for the season. These shades capture the essence of fall, offering a subtle yet sophisticated look that complements any outfit.

When you think of nude nails, consider earthy tones like terracotta, creamy whites, and dusty rose mauve. These versatile hues flatter various skin tones and provide an elegant look that's both chic and understated.

Nude nail ideas are ideal for those who appreciate minimalism and want to highlight their natural beauty. You can keep it simple with a classic nude polish, or experiment with different finishes and textures.

Adding metallic accents or matte topcoats can elevate your nude manicure, giving it an extra touch of glam without compromising the overall subtlety.

Using a nude base coat not only enhances nail art designs but also ensures even application and longevity. This approach allows you to create stunning designs while maintaining a polished appearance.

Advertisement

Nail Trends From the '90s

retro 90s nail trends

The '90s brought a bold and vibrant shift in nail trends, where self-expression through intricate designs and vivid colors became the norm. You'd see nails adorned with graphic patterns and embellishments, showcasing creativity like never before. This era also saw a rise in celebrity lifestyles that influenced fashion and beauty choices, further emphasizing the importance of personal style.

One of the decade's standout styles was the classic French manicure, with its natural pink base and crisp white tips, a staple for many who sought that polished look.

While French manicures were all the rage, moody shades also emerged as popular fall nail trends. Deep burgundies, forest greens, and navy blues became must-have nail colors, allowing you to express your personality in subtle yet striking ways.

The introduction of metallic and glitter finishes added a playful twist, with chrome and holographic polishes making bold statements on fingers.

Nail shapes in the '90s leaned toward square and oval styles, reflecting the minimalist aesthetics of the time. However, stiletto shapes began to rise, offering a daring alternative.

With celebrities like Jennifer Aniston and Gwyneth Paltrow influencing trends, the '90s were a defining era for nail art, blending sophistication with a touch of daring creativity. Additionally, the popularity of essential oils for enhancing overall well-being was also on the rise during this time, reflecting a growing trend towards holistic health practices.

Advertisement

Nude Shades Enhance Skin Tones

nude shades complement skin tones

Nail trends have evolved significantly from the bold designs of the '90s to the sophisticated simplicity of nude shades. These versatile tones complement a variety of skin tones, enhancing the natural beauty of your hands and fingers.

Whether you have warm or cool undertones, there's a creamy nude that can create an elegant, polished look. For those with soft tan undertones, peachy or caramel hues provide a flattering glow that brightens your appearance.

If your skin has cooler undertones, opt for pinky or taupe shades to achieve a sophisticated balance that looks effortlessly chic. The right nude shade can elevate your manicure, making it suitable for both casual outings and formal events.

To add a touch of glamor while keeping things subtle, consider incorporating metallic or glossy finishes into your nude shades. This not only enhances the overall aesthetic but also maintains that refined look you aim for.

Embrace the power of nude shades this autumn, and let them enhance your unique skin tone while ensuring your nails remain elegantly polished.

Choose Warm Undertones

select cozy color tones

When choosing the perfect nude shade for your manicure, opting for warm undertones can make all the difference. Shades like beige, peachy nude, and dusty rose not only enhance your skin tone but also provide a sophisticated look that's perfect for the fall season.

Warm undertones create a seamless transition from summer shades to autumn hues, ensuring you maintain a polished appearance throughout the cooler months.

Advertisement

Incorporating earthy colors like terracotta and taupe into your nude palette evokes the rich tones of autumn foliage, adding depth to your manicure. These colors harmonize beautifully with the seasonal vibe, reflecting the cozy feelings associated with fall.

Selecting nudes with golden or caramel undertones can further enhance this effect, making them ideal for pairing with your favorite autumn outfits and accessories.

A warm nude base also serves as the perfect canvas for intricate nail art. Whether you opt for delicate designs or bold patterns, they'll pop against the warm backdrop while still maintaining a subtle elegance. Furthermore, experimenting with nail shapes can add a unique touch to your fall-inspired manicure.

Embrace warm undertones in your nude nails this autumn, and elevate your look with these sophisticated choices.

Nude Nails for Every Occasion

versatile nude nail styles

Nude nails offer incredible versatility, making them a go-to choice for any occasion. Whether you're heading to a casual brunch or a formal event, nude nails complement a wide range of outfits and styles.

The beauty of nude shades lies in their subtle variations; creamy whites, peachy nudes, and earthy tones can evoke different moods, ensuring your nails remain adaptable throughout the seasons.

Advertisement

For a touch of sophistication, consider pairing your nude base with metallic accents. This combination elevates your look while maintaining an understated elegance.

If you prefer a more minimalist approach, nude nails alone can make a chic statement, perfect for those who love a refined aesthetic.

To keep your nude nails looking fresh and polished, regular nail care is essential. Moisturizing your cuticles and applying a top coat not only enhances the longevity of your manicure but also protects your natural nails beneath.

Embrace the versatility of nude nails, and you'll find they're suitable for every occasion, effortlessly transitioning from day to night while keeping your style on point. Additionally, user consent management can help ensure that your online shopping experience remains seamless and secure while you explore nail care products.

Pros and Cons of Nudes

benefits and risks of nudes

For those looking to elevate their manicure game, experimenting with nude shades comes with its own set of pros and cons.

On the positive side, a nude base complements your skin tone beautifully, enhancing the overall elegance of your manicure. This versatility allows for easy transitions into autumn, making nudes ideal for seasonal colors. Plus, nude nail colors are low maintenance; they effectively mask growth and chips, extending the life of your manicure.

Advertisement

However, there are some downsides to consider. While nudes offer a polished look suitable for both casual and formal occasions, they mightn't make a bold statement like vibrant colors do. If you prefer a manicure that screams attention, you may find nudes a bit too subtle.

Additionally, the understated nature of nude shades can limit your design options, especially if you're not into layering or adding intricate patterns.

Ultimately, the decision to embrace nudes comes down to your personal style and what you want your nails to convey. Weighing the pros and cons can help you decide if a nude manicure aligns with your fall aesthetic.

Elegant Mocha Marble Design

sophisticated coffee marble pattern

Embracing the elegant mocha marble design can transform your manicure into a stunning autumn statement. This nail art style features creamy nude shades swirled together, reminiscent of warm lattes, evoking that cozy fall feel you love.

The incorporation of subtle gold accents enhances the warmth of the design, adding a touch of sophistication that's perfect for the season. Mocha marble nails blend seamlessly with earthy tones, making them an ideal choice for your fall nail ideas.

Whether you're dressing up for a formal event or keeping it casual, this versatile design suits any occasion. You can achieve the elegant mocha marble effect using nail brushes or sponges, allowing you to get creative and personalize your look. Additionally, consider incorporating professional results from at-home beauty techniques for a polished finish.

Advertisement

As the leaves change and the air turns crisp, elevate your manicure game with this sophisticated look. The elegant mocha marble design not only captures the essence of fall but also showcases your unique style.

Nude Shades for Every Style

universal nude color palette

When it comes to nail fashion, finding the right nude shade can elevate your style effortlessly. Nude shades come in a variety of undertones—warm, cool, and neutral—so you can choose one that complements your skin tone perfectly for that polished appearance.

This fall, consider creamy whites, peachy nudes, and soft beiges as popular choices that serve as a versatile base for your fall manicure, whether you prefer a minimalist or intricate design. Incorporating a high-quality nail product can enhance the overall look and health of your nails. Additionally, using nutrient-dense options like chia seeds can promote overall wellness, which complements your beauty routine; antioxidants found in such foods can also contribute to healthier skin.

Using a nude base coat not only enhances the longevity of your nail designs but also provides a sophisticated foundation that pairs beautifully with seasonal accents. You can easily customize these nude shades with metallics, glitters, or textures, allowing you to express your personality while maintaining a subtle and chic look.

For a seasonal touch, incorporate earth tones like terracotta or dusty rose into your nude designs. These hues add warmth and richness that align perfectly with fall aesthetics, making your nails a stunning complement to your autumn style.

With the right nude shade, your nails can effortlessly reflect your unique flair! Additionally, consider the benefits of glycolic acid in enhancing your overall skin texture, which can help create a flawless backdrop for your manicure.

Advertisement

Frequently Asked Questions

How Do I Maintain My Nude Nails Between Salon Visits?

To maintain your nude nails between salon visits, keep them clean and moisturized. Use a clear top coat for shine, avoid harsh chemicals, and gently file any chips to prevent further damage. Regularly hydrate your cuticles.

Can I Mix Different Nude Shades for a Unique Look?

Absolutely, you can mix different nude shades to create a unique look! Experiment with varying tones to find a combination that complements your skin. Just remember to blend them well for a seamless finish.

What Base Coat Is Best for Nude Nail Polish?

The best base coat for nude nail polish is one that enhances the polish's color and longevity. You'll want a smooth, even application, so choose a base coat that's specifically designed for your nail type.

How Do I Choose a Nude Polish for a Special Event?

Choosing a nude polish for a special event, consider your skin tone and the occasion's vibe. Test shades on your nails to see how they complement your complexion, ensuring they enhance your overall look beautifully.

Are Matte Finishes Suitable for Nude Nail Designs?

Yes, matte finishes can be suitable for nude nail designs. They offer a chic, understated elegance that enhances the polish color. Just ensure your nails are well-prepped to achieve a smooth and flawless look.

Advertisement

Continue Reading

Nail Tips

Neon Orange Nail Designs to Brighten Your Day!

You won’t believe how neon orange nail designs can elevate your style and mood—discover the vibrant options that await you!

Published

on

By

vibrant neon orange nails

Neon orange nail designs are a fantastic way to brighten your day and show off your fun side! This vibrant color symbolizes confidence and energy, making it perfect for everything from beach parties to casual hangouts. You can choose simple solid colors or get creative with ombre effects and cool patterns like flame motifs. Just remember to apply a base coat to keep your nails looking fresh and a top coat for that glossy shine. With a little care, your stunning neon nails will steal the spotlight wherever you go! Stick around to discover even more delightful tips!

Key Takeaways

  • Experiment with vibrant neon orange nail art, including solid colors, ombre effects, and unique designs to enhance your summer look.
  • Add a twist to classic styles with a neon orange French manicure for a fun and fresh appearance.
  • Incorporate contrasting colors like black or turquoise to create striking visual appeal alongside neon orange.
  • Use crystal embellishments or flame motifs for bold statements that capture attention and boost confidence.
  • Maintain nail health with regular moisturizing and protection to keep your neon orange designs looking fresh and vibrant.

Introduction

beginning of discussion

When it comes to making a statement with your nails, neon orange is a vibrant choice that embodies confidence and fun. This eye-catching color is perfect for your summer look, bringing energy and excitement to any outfit.

Whether you're heading to a beach party or just hanging out with friends, neon orange nails can really brighten your day! Incorporating essential oils into your beauty routine can enhance your overall experience; for example, using essential oils for hair growth can promote healthy nails and scalp.

You can choose from a variety of nail designs to express your personal style. A solid color of neon orange is bold and striking, while an ombre effect can add a unique twist, blending different shades for an artistic flair.

The great thing about this vibrant color is that it looks fantastic against many skin tones, ensuring you stand out wherever you go. Neon orange nails aren't just for special occasions, either! They're perfect for casual outings and festive celebrations alike.

Plus, they're easy to maintain, so you can enjoy fresh nails without much hassle. So, grab your favorite neon orange polish, and let your creativity shine through your nail designs! You'll have fun experimenting with this trendy color that never goes out of style.

Advertisement

Boosts Mood and Confidence

enhances emotional well being

Neon orange nails instantly lift your spirits and elevate your confidence. When you rock those vibrant nail designs, you're not just painting your nails—you're giving your mood a boost! Bright colors like neon orange are known to make you feel happier and more energetic, thanks to their cheerful vibe.

Plus, studies show that wearing such lively colors can increase your serotonin levels, which means you'll feel even better from the inside out. Engaging in self-care activities, like creating fun nail art, can also trigger the release of neurotransmitters like serotonin and dopamine, enhancing your emotional well-being and overall mood essential oils can promote relaxation.

Every time you glance at your sparkling nails, you'll feel a wave of positivity wash over you. These eye-catching orange shades draw compliments and attention, making you feel special and boosting your self-image.

It's like a little secret power you carry around! Engaging in personal grooming, like creating fun nail art, adds to your self-care routine, giving you a sense of accomplishment and joy.

Popular Variations and Ideas

trending concepts and innovations

Bright and cheerful, neon orange nails offer a canvas for a variety of stunning designs. You can choose from simple solid colors or go for intricate styles like ombré or swirl patterns. One popular variation is the neon orange French manicure, which adds a vibrant twist at the tips, making it perfect for summer events!

Additionally, consider incorporating unique textures and finishes to elevate your nail game, such as exploring trending finger nail styles that are gaining popularity this year.

If you want to make a bold statement, try adding crystal embellishments or flame motifs to your neon orange nails. These fun elements can really elevate your look. For a unique texture, consider opting for matte finishes instead of shiny ones. Matte neon orange nails can create a modern vibe that's super cool!

Advertisement

You can also get creative by using contrasting colors, like black or turquoise, to craft eye-catching combinations. Imagine how amazing your neon orange nails will look when paired with these colors!

With all these options, your nails can reflect your personality and mood. So, whether you're heading to a party or just hanging out with friends, there's a neon orange design that's perfect for you! Get ready to brighten your day with some fabulous nail art!

Tips and Tricks

advice and strategies guide

Achieving stunning neon orange nails requires a few essential tips and tricks to ensure your design stands out.

First, always apply a good base coat. This helps your neon orange polish go on smoothly and prevents staining your natural nails.

Next, when you paint on that vibrant color, remember to layer it! Applying multiple thin coats creates a striking appearance and avoids any uneven texture.

Once you've got that perfect neon orange, don't forget to seal the deal with a high-quality top coat. It gives your nails a beautiful glossy finish while protecting your fabulous nail designs from chipping, so they last longer, especially in summer!

Advertisement

Want to get creative? Use nail art tape to make clean lines and fun patterns. It's a fantastic way to add some flair to your nails!

Finally, experiment with different nail shapes like almond, stiletto, or square. Neon orange looks great on all shapes, and finding the perfect one can really complement your style.

With these tips and tricks, your neon orange nails will surely turn heads!

Care and Maintenance

health and upkeep essentials

To keep your neon orange nail designs looking fresh and vibrant, regular care and maintenance are essential. Start by applying a high-quality topcoat over your nail art. This magical layer helps prevent chipping and fading, keeping your nails looking fabulous!

It's also super important to moisturize your cuticles with oil or cream. Healthy cuticles not only look great but also prevent hangnails that can ruin your stylish look.

Avoid prolonged exposure to water and harsh chemicals, as they can lead to discoloration and degrade your neon polish. When you're doing chores or using cleaning products, wearing gloves can be a lifesaver, protecting your vibrant nails from damage.

Advertisement

Don't forget to schedule regular nail maintenance appointments! Visiting a salon every few weeks will keep your nails in shape and give you a chance to refresh your neon designs.

Common Mistakes to Avoid

avoiding common mistakes

When it comes to rocking neon orange nail designs, avoiding common pitfalls can make all the difference.

First off, always apply a base coat! Skipping it can lead to staining your natural nails and make the neon orange polish chip faster.

Next, pay attention to nail prep. Make sure you file, buff, and clean your nails to get a smooth finish. That way, the polish sticks better!

Now, let's talk about application. It's tempting to put on thicker layers of neon orange polish, but that can cause bubbles and an uneven look.

Instead, opt for thin, even coats. Also, don't rush the drying time! Applying a topcoat too soon can smudge your beautiful design, ruining its vibrant impact.

Advertisement

Frequently Asked Questions

What Color Goes With Neon Orange Nails?

When you choose neon orange nails, consider pairing them with deep navy blue for a bold contrast or soft pastels like mint green for a playful touch. Metallics or classic black also create striking combinations.

Are Neon Nails Trendy?

Yes, neon nails are definitely trendy right now. You'll find them everywhere on social media, making bold fashion statements. Embrace the vibrant colors and express your unique style with eye-catching nail designs that stand out!

How Do I Decorate My Nails?

To decorate your nails, start with a smooth base. Choose your favorite colors, use brushes or stickers for designs, and add embellishments like glitter. Finish with a topcoat for protection and a glossy shine.

What Nail Polish Goes Well With Burnt Orange?

When you're choosing nail polish to complement burnt orange, consider pairing it with teal for contrast, metallic gold for elegance, or neutral shades like beige to balance its boldness for any occasion.

Conclusion

So, get ready to brighten your day with some fabulous neon orange nail designs! With all the fun styles and tips we've explored, you can express your creativity and boost your mood. Remember, it's all about enjoying the process, so don't worry about making it perfect. Just have a blast, and your nails will shine as bright as your smile! So grab those nail polishes, and let's get painting! Your hands are going to look amazing!

Advertisement

Continue Reading

Trending