
To make your service flow smoother, organize your nail cart with designated zones for tools, polishes, and disinfectants. Keep frequently used items within arm’s reach on the top tier and store less-used supplies lower or on side shelves. Use clear bins, labels, and stackable containers to keep everything visible and accessible. Optimize space with vertical storage and proper sanitation practices. Continue exploring tips that will help you elevate your workspace even further.
Key Takeaways
- Group supplies by category and use clear labels for quick identification and easy access.
- Optimize storage with vertical, stackable, and designated containers to maximize space and organization.
- Position frequently used items within arm’s reach to streamline workflow and reduce unnecessary movement.
- Regularly reassess and adjust your setup to adapt to changing needs and improve efficiency.
- Incorporate color-coding, sanitation stations, and systematic organization for safety and smoother service flow.
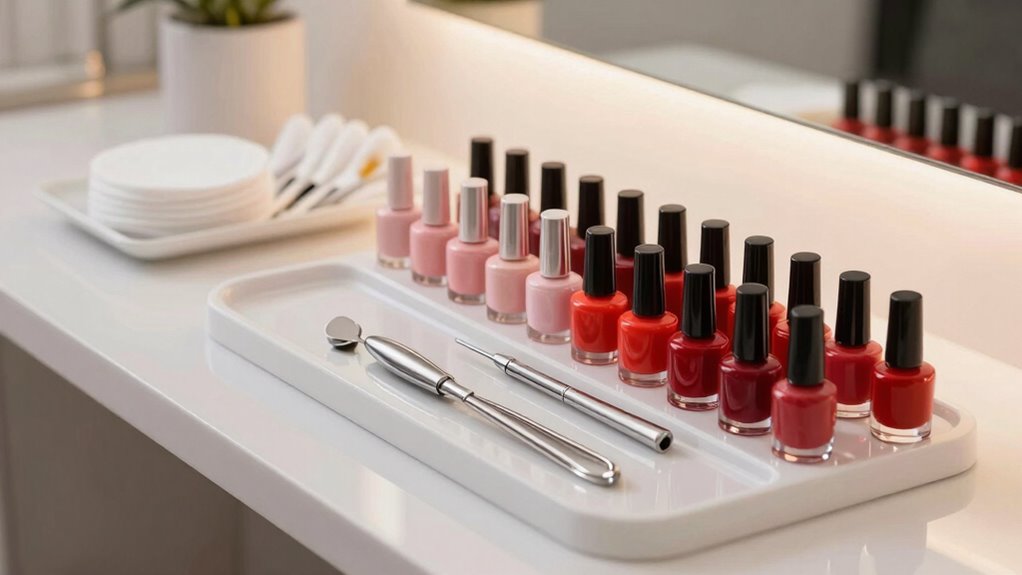
Setting up your nail cart properly is essential for creating an efficient and organized workspace. When you focus on nail cart organization, you make it easier to find tools quickly, reducing downtime and keeping your service flowing smoothly. Start by categorizing your supplies into sections based on their use—nail polishes, tools, files, buffers, and disinfectants. This way, you won’t waste time searching through clutter, and your workspace stays neat. Effective storage optimization involves choosing the right containers and placements so everything has a designated spot. Small drawers, clear bins, and magnetic trays work well to keep items visible and accessible at a glance.
Organize your nail cart by categorizing supplies and using clear, accessible storage for a smooth, efficient workspace.
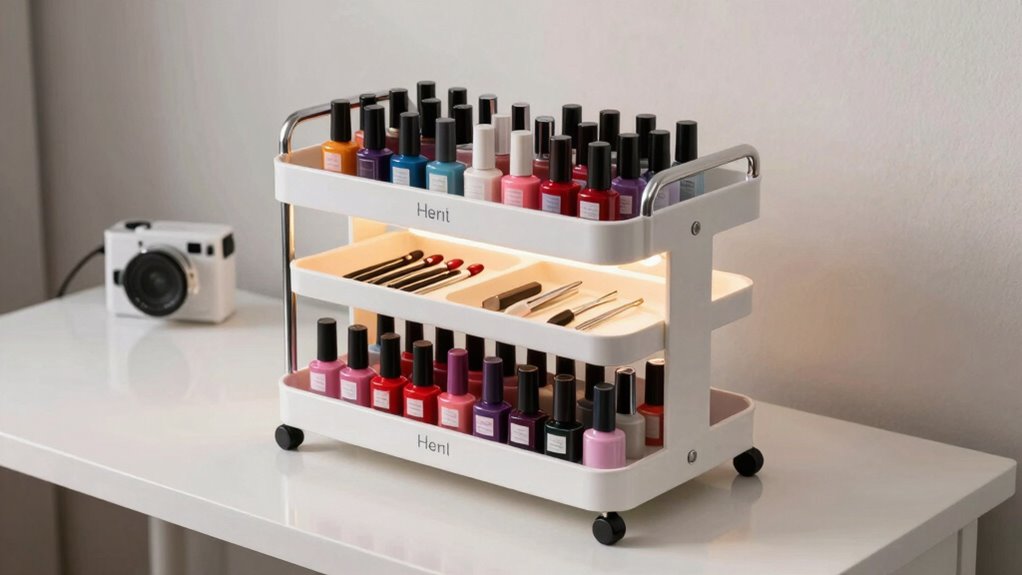
Position your most-used items within arm’s reach, so you don’t have to move around unnecessarily. For example, place your top nail polishes, brushes, and essential tools on the top tier of your cart or in front of you, where they’re easy to grab. Less frequently used supplies can go in the lower drawers or on the side shelves. This arrangement not only speeds up your workflow but also maintains a clutter-free environment, making your station look professional and inviting. When considering storage optimization, think vertically. Use stackable containers or tiered trays to maximize space, especially if your cart has limited surface area. Vertical storage helps keep everything within reach without overcrowding your workspace.
Labeling each storage container can further improve nail cart organization. Clear labels on drawers or bins save you time searching for specific items and help maintain order when multiple clients are booked. Regularly reassess your setup—what works during a quiet day might need adjustment during busy hours. Keep your most essential tools sterilized and stored separately to prevent cross-contamination, which is crucial for sanitation and client safety. Additionally, implementing systematic organization can help you develop routines that enhance efficiency and reduce clutter. Incorporating storage solutions tailored to your workspace can also make a significant difference in maintaining order. Moreover, utilizing color-coded storage can further streamline your workflow by quickly identifying different categories of supplies. Also, consider adding a small trash bin or disposal area nearby to discard waste promptly, keeping your workspace tidy. Recognizing the importance of proper sanitation helps ensure a safe environment for both clients and technicians. Incorporating systems thinking into your setup can help you identify potential bottlenecks and streamline your workflow even further.
Invest in a well-structured nail cart setup, and you’ll notice how service flow becomes more seamless. When everything is organized thoughtfully, you spend less time hunting for supplies and more time focusing on delivering excellent results. Streamlining your storage and keeping your tools accessible not only enhances your efficiency but also creates a more professional atmosphere. Remember, a well-organized nail station isn’t just about aesthetics—it’s about creating a workspace that promotes productivity, safety, and customer satisfaction.
nail polish organizer clear bins
As an affiliate, we earn on qualifying purchases.
As an affiliate, we earn on qualifying purchases.
Frequently Asked Questions
How Do I Customize My Nail Cart for Different Services?
You can customize your nail cart for different services by using custom storage solutions and flexible compartments. Arrange tools, polishes, and supplies in designated sections to keep everything organized and easily accessible. Use removable dividers or adjustable trays to adapt the cart for various treatments. This way, you streamline your workflow, reduce clutter, and guarantee each service runs smoothly, making your work more efficient and professional.
What Materials Are Best for Nail Cart Durability?
You should choose nail cart materials like stainless steel or high-quality plastic for durability. Stainless steel offers strength, resistance to corrosion, and easy cleaning, making it ideal for a busy salon. For added durability, consider applying durability tips like opting for carts with reinforced frames, rubber wheels for mobility, and waterproof surfaces. These choices help prevent wear and tear, ensuring your nail cart stays sturdy and functional over time.
How Often Should I Sanitize My Nail Cart?
You should sanitize your nail cart daily to maintain hygiene and prevent infections. Follow a consistent sanitization schedule, especially after each client. Use cleaning essentials like disinfectant sprays, wipes, and brushes to thoroughly clean all surfaces, tools, and handles. Regularly disinfect your nail cart to guarantee a safe environment for clients and staff. Staying on top of cleaning essentials helps keep your workspace sanitary and professional, reducing the risk of cross-contamination.
Can I Upgrade My Nail Cart for Better Organization?
Think of upgrading your nail cart like upgrading to a well-organized toolbox—it makes your work smoother and faster. You can definitely improve your setup with better tool storage solutions and dedicated nail polish organization. Add stackable drawers or labeled containers to keep everything accessible. This not only streamlines your workflow but also impresses clients with your professionalism. An organized cart transforms chaos into efficiency, making every service seamless.
What Is the Ideal Size for a Nail Cart in Small Spaces?
For small spaces, aim for a compact nail cart around 24-30 inches wide. This size allows you to efficiently organize nail polish storage and tools without feeling cramped. Use vertical space to maximize storage, placing frequently used items at eye level. With a smaller, well-organized cart, you’ll streamline your workflow and keep everything within reach, making your service more efficient and less cluttered.
nail technician tool storage containers
As an affiliate, we earn on qualifying purchases.
As an affiliate, we earn on qualifying purchases.
Conclusion
So, after all this talk about perfect nail cart setups, you might think it’s just about having everything neatly organized. But here’s the irony: the more you try to streamline your space, the more you realize that sometimes, a little chaos fuels creativity. Embrace those moments of clutter — they might just become your secret weapon for smoother service and happier clients. After all, perfection isn’t always about order; it’s about making your unique chaos work for you.
vertical nail cart storage solutions
As an affiliate, we earn on qualifying purchases.
As an affiliate, we earn on qualifying purchases.
disinfectant station for nail salon
As an affiliate, we earn on qualifying purchases.
As an affiliate, we earn on qualifying purchases.