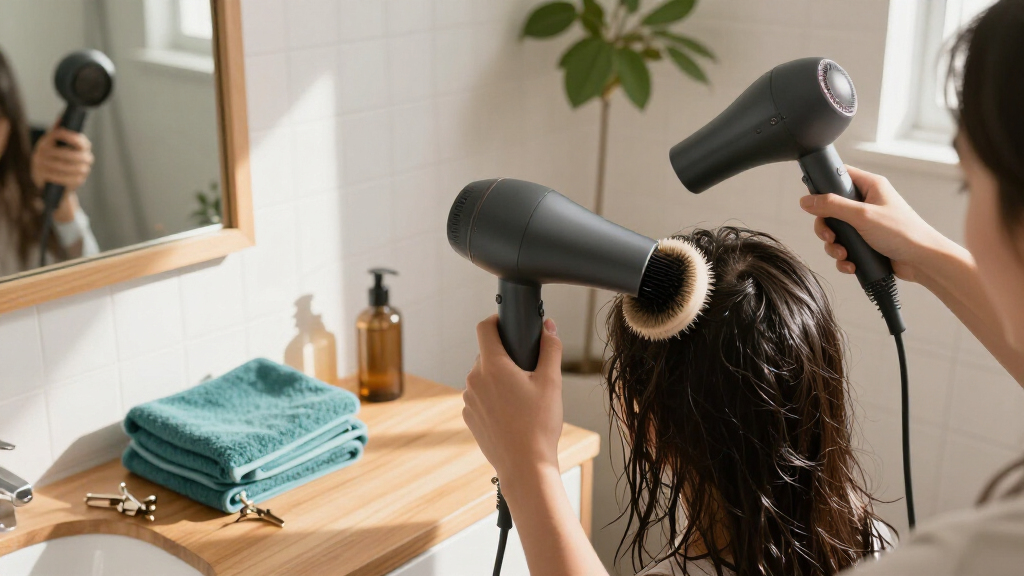

Use professional hair styling tools to dry, smooth, or curl your hair at home. This guide is for beginners who can use a brush and want a reliable routine for a blow-dryer, hot brush, flat iron, or curling iron. Allow 30-60 minutes, depending on your hair length, thickness, and chosen style. You will finish with dry, controlled hair styled with an appropriate tool and heat setting.

Get beauty and skincare favorites delivered free with Prime
- Fast, free delivery on millions of items
- Prime Video, Amazon Music and more included
- Member-only deals all year

RUSK Engineering W8less Professional 2000-Watt Hair Dryer
- ✔ Power: 2000 watts
- ✔ Weight: Less than 1 pound
- ✔ Technology: Ceramic and tourmaline ionic

CHI Original Digital Ceramic Hairstyling Iron, 1.5-Inch, Chocolate
- ✔ Plate width: 1.5 inches
- ✔ Plate material: Ceramic
- ✔ Temperature range: 180°F–425°F

TYMO ROVY 1.25-Inch Beach Waves Curling Iron
- ✔ Barrel size: 1.25 inches
- ✔ Heating elements: 4 built-in PTC elements
- ✔ Heat-up time: 30 seconds
Difficulty: Beginner | Time: 30-60 minutes
What You’ll Need
Tools & Materials:
- A professional blow-dryer with a concentrator nozzle
- A heat-resistant round or paddle brush
- A flat iron, curling iron, or hot brush if your style requires one
- Heat-protectant product labeled for your chosen tool
- Sectioning clips, a comb, and dry towel
- A heat-resistant surface or mat
Knowledge:
- Basic brushing and sectioning
- How to operate the tool and select its temperature
- How to read product directions and tool safety instructions
Set aside 30-60 minutes and read the tool manual before first use. Check that cords, plugs, plates, barrels, and attachments are intact. Use tools on a dry, stable surface near an outlet, away from water. If you have extensions, chemically treated hair, or a scalp condition, check the relevant care instructions before applying heat.
RUSK Engineering W8less Professional 2000-Watt Hair Dryer
Among these three tools, the RUSK W8less is the most practical foundation for a broad styling routine. Its stated weight of less than one pound matters when drying takes several minutes or when we are lifting the tool around the crown and back of the head. The 2000-watt motor is designed for fast drying, while ceramic and tourmaline ionic technology aims to distribute heat evenly and help reduce frizz and static.Its top ranking reflects usefulness across a range of hair types and textures, rather than a claim that it can replace the shaping tools beside it. Unlike the CHI, it cannot straighten or curl with heated plates; unlike the TYMO, it is not built to create a specific wave pattern. We should also keep expectations grounded: the supplied details say there are multiple heat and speed settings but do not list exact levels or attachments. This pick makes the most sense when drying performance and lighter handling matter more than a narrowly defined finish.
Pros:
- Weighs less than one pound for easier handling during longer drying sessions
- 2000-watt power is designed to support fast drying
- Ceramic and tourmaline ionic technology is intended to help limit frizz and static
- Multiple heat and speed settings support different styling needs
Cons:
- Does not provide the direct straightening and curling versatility of the CHI iron
- The supplied details do not specify attachments or the exact number of settings
Best for: People who regularly blow-dry at home and want a lightweight tool with multiple heat and speed settings.
Not ideal for: Anyone primarily seeking a tool to straighten hair, create curls, or form beach waves without a separate dryer.
Bottom line: We recommend the RUSK as the broadest-use pick when comfortable, fast drying is the first step in our styling routine.
“We recommend the RUSK as the broadest-use pick when comfortable, fast drying is the first step in our styling routine.”
CHI Original Digital Ceramic Hairstyling Iron, 1.5-Inch, Chocolate
If we want one heated tool to handle more than one finish, the CHI Original Digital Ceramic Iron offers the broadest shaping range in this comparison. Its 1.5-inch floating beveled plates are intended for straightening, curling, and waving, so it can take us from a smooth look to bends and loose curls without switching to the TYMO. The digital display and 180°F–425°F adjustable range give us more explicit heat control than the product details provide for the other two picks.That versatility comes with a learning curve: a flat iron depends on section size, movement, and temperature choice, while the TYMO’s single clamp is designed around a more specific beach-wave motion. The CHI heats in 60 seconds and has dual voltage, useful when we want a multi-purpose tool that travels. Its maximum of 425°F may be limiting for someone specifically looking for higher heat, and the supplied description does not establish that any temperature is right for every hair type. We should use the lowest effective setting for our hair and technique.
Pros:
- Floating beveled plates support straightening, curling, and waving
- Digital display and adjustable settings offer clear heat control
- Heats up in 60 seconds
- Dual voltage supports use while traveling
Cons:
- Maximum temperature is 425°F, which may not meet every high-heat preference
- Shaping multiple finishes requires more technique than the TYMO’s single-clamp wave approach
- A heated plate tool requires careful sectioning and handling
Best for: People who want one adjustable-heat tool for straight styles, curls, and waves, including travelers who value dual voltage.
Not ideal for: Buyers seeking a dedicated beach-wave curler with an insulated wrap, or those whose routine requires temperatures above 425°F.
Bottom line: We would choose the CHI when adjustable heat and multiple finishes matter more than a tool dedicated to one wave style.
“We would choose the CHI when adjustable heat and multiple finishes matter more than a tool dedicated to one wave style.”
TYMO ROVY 1.25-Inch Beach Waves Curling Iron
The TYMO ROVY is the specialist in this lineup: its single clamp and 1.25-inch barrel are designed to make beach waves the main event. A full-wrap insulated design is intended to help protect fingers and the neck from burns, which may make the tool feel more approachable for someone learning a wave routine. It also has a stated 30-second heat-up, dual-sided heating, and a tourmaline ceramic coating with negative ions designed to smooth flyaways and add shine.Compared with the CHI, the TYMO narrows the task in exchange for a more directed wave-making format; it does not offer the same listed ability to straighten hair. Compared with the RUSK, it shapes already-dried hair rather than handling drying. The main buying question is heat control: the supplied description does not specify whether temperature settings are adjustable, so buyers who need to tailor heat should verify that detail before choosing it. Its barrel may also create larger waves than someone wants for tighter curls or more compact styling.
Pros:
- Single-clamp design is focused on creating beach waves
- 30-second heat-up supports quick styling starts
- Full-wrap insulated design is intended to help protect fingers and neck
- Tourmaline ceramic coating and negative ions are designed to reduce flyaways and add shine
Cons:
- The supplied description does not specify adjustable temperature settings
- The 1.25-inch barrel may create waves that are larger than some styles call for
- Its wave-focused design is less versatile than the CHI flat iron
Best for: People who mainly want beach waves and value a single-clamp design with an insulated wrap.
Not ideal for: Anyone who wants a flat iron’s straightening flexibility, tighter curls, or clearly specified adjustable temperature controls.
Bottom line: We would pick the TYMO when beach waves are the goal and its heat-control details suit our routine.
“We would pick the TYMO when beach waves are the goal and its heat-control details suit our routine.”
As an Amazon Associate we earn from qualifying purchases.
Before You Start
Start with clean or product-ready hair that is free of tangles. Never use a flat iron or curling iron on damp hair unless the tool is specifically designed for wet-to-dry use and its instructions allow it. Heat can burn skin and damage hair, so keep hot surfaces away from your scalp, face, ears, and hands. Do not leave a switched-on tool unattended.
Choose one goal before you begin: smooth and dry, sleek and straight, or curled. Using fewer passes and a lower effective temperature helps limit heat exposure.
Step-by-Step Instructions
Step 1: Wash or prepare your hair
Start with hair that is clean or suitable for restyling. If it is freshly washed, remove excess water by pressing it gently with a towel; avoid rough rubbing, which can tangle strands. Comb through from the ends upward until the hair is free of knots. If you are refreshing dry hair, brush out tangles and check that no styling product has left it damp.
Tip: If your hair is very tangled, divide it into sections and work from the ends toward the roots.
Check: Your hair is detangled and has no wet patches before you use a hot iron or curling tool.
Step 2: Apply heat protectant
Choose a heat protectant that matches your hair type and tool. Apply it as directed on the label, distributing it evenly through the lengths that will contact heat. Keep sprays and creams out of your eyes, and avoid applying more product than the instructions recommend. If the product leaves hair damp, wait until it is fully dry before using a hot iron.
Tip: Heat protectant reduces exposure to direct heat; it does not make hair immune to damage.
Check: The product is distributed without leaving your hair wet, sticky, or heavily coated.
Step 3: Select a tool and temperature
Choose the tool that fits your goal. Use a blow-dryer and brush to dry and shape; use a flat iron to smooth dry hair; use a curling iron to form curls; use a hot brush when you want to smooth or add shape with one tool. Set the temperature according to the hair and tool maker’s instructions. If the tool offers adjustable heat, begin at a low setting and increase only if needed to style a small test section.
Tip: Fine, fragile, lightened, or chemically treated hair usually needs gentler heat and fewer passes. Do not assume the highest setting is faster or better.
Check: You have a tool suited to your intended style and a safe setting recommended for your hair.
Step 4: Divide your hair into sections
Use a comb to part your hair into manageable sections. Clip the upper layers away and leave a lower section free to style first. Make sections narrow enough for your brush or iron to work through evenly. Continue releasing one section at a time so you can track which hair is finished.
Tip: Smaller sections improve control, but very tiny sections can extend heat exposure and styling time.
Check: The first section is separate, easy to reach, and small enough for the chosen tool.
Step 5: Dry your hair with a blow-dryer
If your style starts on damp hair, attach the concentrator nozzle and direct airflow down the hair shaft, from roots toward ends. Keep the dryer moving and hold it at a comfortable distance, following the manual. Lift each section with a brush and guide the airflow along it. Dry the roots and lengths fully before moving to an iron. For extra smoothness, finish with a cooler airflow if your dryer has that setting.
Tip: Do not press the dryer nozzle against hair or hold hot air in one spot. Pause if your scalp or hair feels uncomfortably hot.
Check: The hair is dry throughout, including underneath and near the roots, with no damp sections remaining.
Step 6: Smooth or curl one section at a time
For a flat iron, place a narrow section between the plates near the roots while keeping the tool clear of your scalp. Close the plates gently and glide toward the ends in one controlled pass. For a curling iron, wrap or clamp a section according to the tool manual, keeping fingers clear of the barrel, then release it carefully. For a hot brush, draw the brush through a section as directed by its maker. Let each section cool before brushing or reshaping it.
Tip: Avoid repeated passes over the same strands. If one section does not respond, check that it is dry, appropriately sized, and at the recommended temperature.
Check: Each section has the intended shape without snagging, sizzling, or requiring repeated high-heat passes.
Step 7: Finish and switch off the tools
Release the remaining sections and check the shape in a mirror from the front, sides, and back. Make small adjustments only where needed, using the same controlled technique. Add finishing product only if suitable for your hair and style. Switch off and unplug each tool, then place it on a heat-resistant surface until fully cool. Keep it away from children, pets, and flammable materials while it cools.
Tip: Do not wrap a hot cord tightly around the tool; follow the maker’s storage directions.
Check: The style looks even from multiple angles, and every tool is switched off and cooling safely.
Common Mistakes to Avoid
- Using a flat iron or curling iron while hair is damp. — Dry every section completely first unless the tool is specifically rated and instructed for wet-to-dry use.
- Setting the tool to maximum heat by default. — Begin with the lowest setting that can style a test section, and follow the tool and hair-care instructions.
- Taking sections that are too thick. — Divide hair so the tool can make even contact; reduce the section size if the inside remains unstyled.
- Repeating passes to correct a poor result. — Pause and check for tangles, dampness, excess product, or a section that is too large before applying heat again.
Troubleshooting
Problem: The hair remains frizzy after blow-drying.
Solution: Check that the concentrator is attached and aim airflow from roots toward ends. Work with smaller sections and keep the dryer moving. Confirm the hair is fully dry before finishing.
Problem: The flat iron snags or pulls.
Solution: Switch it off and let it cool. Detangle the hair, then use a smaller section. Check the plates for residue and clean them only as the manual directs.
Problem: Curls fall out quickly.
Solution: Make sure the hair is fully dry and the section fits the barrel. Let each curl cool before brushing it, and use styling products only as their labels direct.
Problem: The tool smells unusual, sparks, or has a damaged cord.
Solution: Turn it off, unplug it if safe, and stop using it. Do not attempt a repair while it is connected to power. Follow the manufacturer’s service or replacement guidance.
What Success Looks Like
Your hair is fully dry if you used a blow-dryer, has the smoothness or curl pattern you intended, and shows no snagging or visibly scorched strands. The style should look reasonably even from the front, sides, and back. The tool is switched off, unplugged, and cooling on a heat-resistant surface.
Next Steps
After the tools cool, remove product residue according to the manufacturer’s cleaning instructions and store them dry with cords loosely arranged. Note the temperature and section size that worked so you can repeat the routine. If you regularly use heat, build in heat-free styles and follow a hair-care routine suited to your hair’s condition. Stop styling and seek advice from a qualified hair professional if you notice persistent breakage or scalp irritation.
Frequently Asked Questions
Can I use a flat iron every day?
Frequent heat can contribute to dryness and breakage. Use the lowest effective setting, avoid repeated passes, and alternate with heat-free styles when possible.
Do I need to dry my hair before curling it?
Yes. Hair should be fully dry before using a standard curling iron. Follow the manual if your tool is specifically designed for damp hair.
How small should each section be?
Use sections that fit the width of your tool and allow it to work evenly. If a section is not styling throughout, reduce its size rather than increasing heat or repeating passes.
Why does my hair feel stiff or sticky after styling?
Too much styling product or uneven application may leave buildup. Use the amount on the product label, distribute it evenly, and clean the tool as its maker instructs.
Halloween Picks
halloween
As an affiliate, we earn on qualifying purchases.