Connect with us

Nail Tips

Best Winter Nail Art Ideas: 5 Top Designs to Try

Awaken your winter style with these top 5 nail art designs that will leave you wondering which one to try first.

Published

on

winter nail art designs

You can elevate your winter style with these top 5 nail art designs. Moody Winter Aura Nails feature dark, moody colors with chrome accents for a metallic shine. Festive Snowflake Nail Designs capture the magic of the season with intricate patterns and added sparkle. Glazed Donut French Tips combine neutral base colors with a metallic tip for a fun, playful look. Shimmery Hot Cocoa Nails evoke the essence of a cozy winter with shades of brown and cream. Finally, Disco Ball Nail Art Designs feature sparkling, mirror-like finishes reminiscent of disco balls. Explore these designs further to find the perfect winter look for you.

Key Takeaways

• Moody Winter Aura Nails feature dark, moody colors like black and gray, with optional chrome accents for a touch of shine.

• Festive Snowflake Nail Designs capture winter magic with intricate patterns, glitter, and metallic accents, perfect for holiday parties.

• Glazed Donut French Tips combine neutral base colors with shiny, metallic tips, adding a fun and playful touch to winter nail art.

• Shimmery Hot Cocoa Nails evoke cozy winter nights with brown and cream shades, optional glitter and metallic accents, and cute design elements.

Advertisement

• Disco Ball Nail Art Designs feature sparkling, mirror-like finishes with holographic and glittery elements, balancing bold colors with neutral shades.

Moody Winter Aura Nails

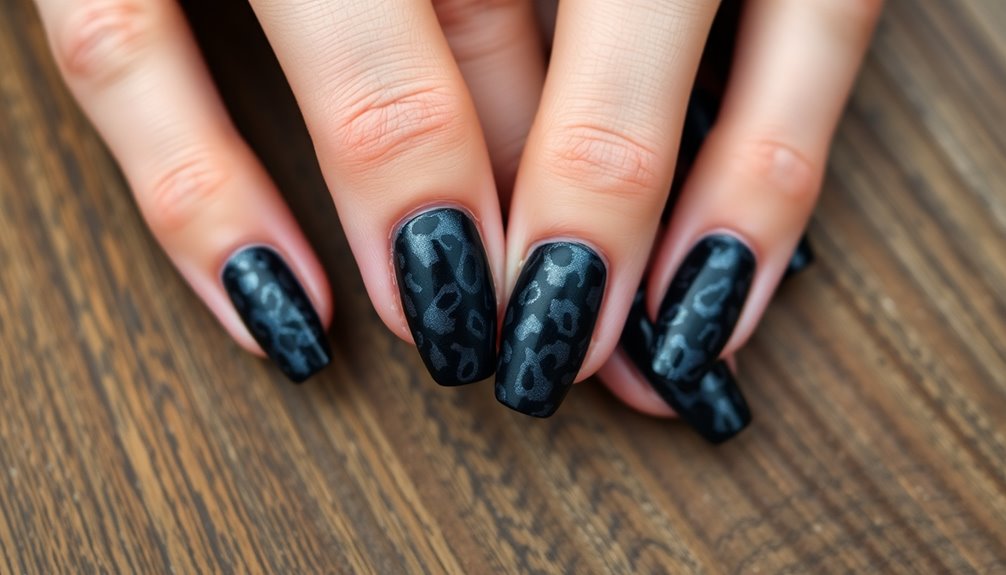
Create a dramatic winter look by opting for moody winter aura nails, which feature dark and moody colors like black, gray, and deep blues to evoke a winter atmosphere. This winter nail look is perfect for those who want to capture the essence of the season.

You can add chrome accents to give your moody winter aura nails a touch of metallic shine and a modern twist. If you're looking for a lighter option, consider light-blue aura nail designs that capture a serene and calming winter vibe with clean, light hues.

According to Instagram trends, light-blue winter nails are a fresh and trendy look inspired by Elsa from Frozen. For a more glamorous option, metallic light-blue winter nails offer a sparkling finish reminiscent of icy winter landscapes and magical winter nights.

Whichever option you choose, moody winter aura nails are sure to make a statement this winter season. With their deep colors and metallic accents, you'll be sure to turn heads at any winter gathering.

Advertisement

Festive Snowflake Nail Designs

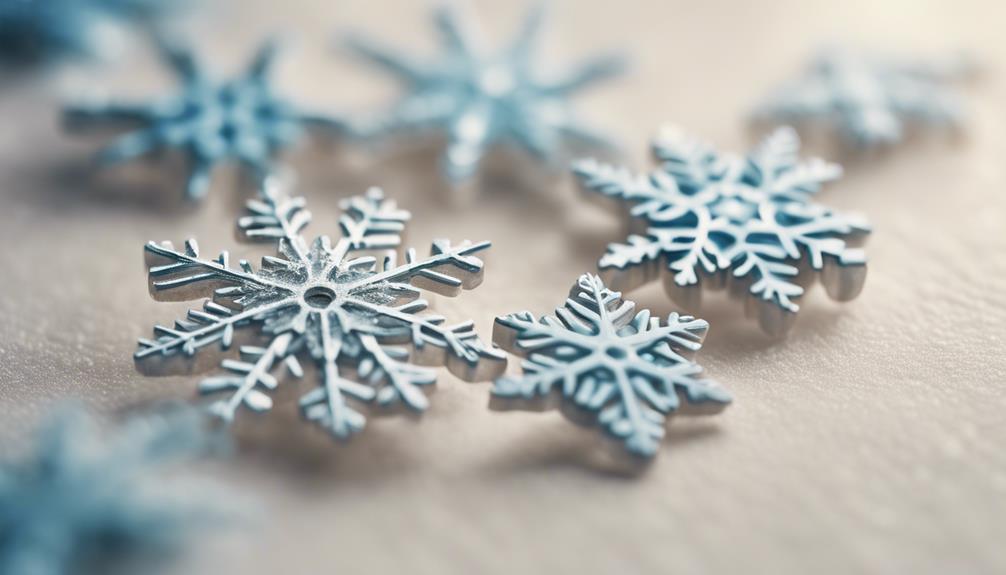
winter holiday nail art

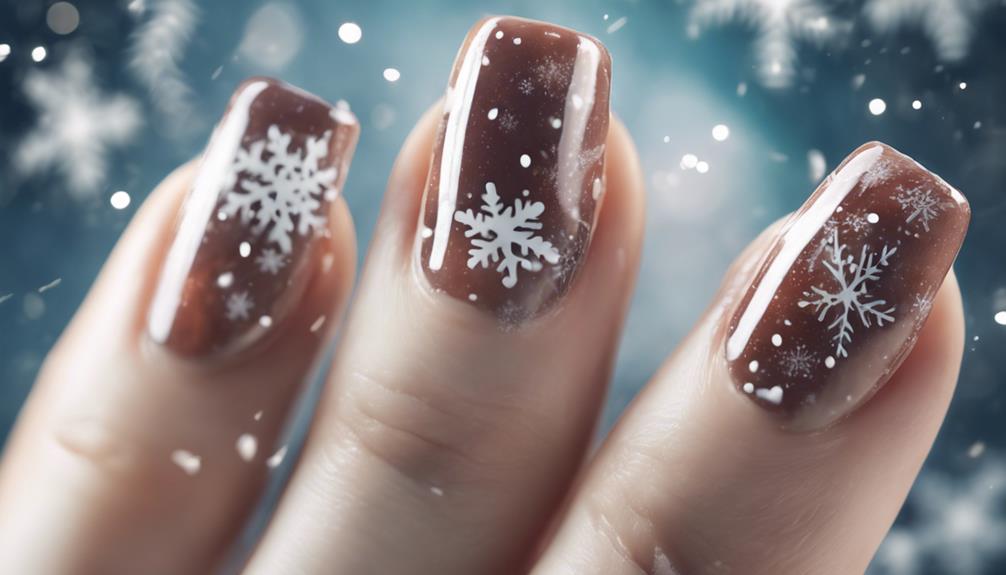
As you swap out your moody winter aura nails for a more festive look, why not try festive snowflake nail designs that capture the magic of the winter season? These designs often feature intricate patterns of snowflakes in white, silver, or blue hues, giving you a wintery feel that's perfect for the holiday season.

You can add some sparkle and dimension to your snowflake nail art by incorporating glitter, rhinestones, or metallic accents. Whether you're attending holiday parties or cozying up by the fireplace, snowflake nail designs are a great way to get into the festive spirit.

To create unique snowflake nail designs, you can use different techniques like hand-painting, stamping, or decals. From simple and elegant to elaborate and detailed patterns, snowflake nail art can be versatile and tailored to your personal style.

Glazed Donut French Tips
tasty treat for nails

What's the sweetest way to upgrade your winter nail game – with Glazed Donut French Tips, of course! This unique design is inspired by the glossy finish of a donut, and it's a must-try for winter nail art enthusiasts.

To achieve the look, you'll need chrome powder to create a high-shine finish that's reminiscent of a freshly glazed donut. Typically, Glazed Donut French Tips combine neutral base colors with a metallic or chrome tip, giving the classic French manicure a modern twist.

This design adds a fun and playful element to your winter nail art repertoire. By incorporating chrome powder into your nail art routine, you'll be able to achieve a shiny, metallic effect that's sure to turn heads.

Shimmery Hot Cocoa Nails

warm holiday nail art

You can warm up your winter nail game with Shimmery Hot Cocoa Nails, a cozy and inviting design that's as comforting as a steaming mug on a chilly day.

This winter nail design is all about capturing the essence of a cozy winter, with shades of brown and cream that evoke feelings of warmth and comfort.

Advertisement

To add some extra sparkle, glitter and metallic accents can be incorporated into the design, giving it a festive touch.

The nail art can also feature cute elements like marshmallows or cocoa swirls, making it a fun and playful option for winter. For a more sophisticated look, consider a mesmerizing cat eye nail design. This design uses a special magnetic polish to create an eye-catching, holographic effect that resembles the shimmer of a cat’s eye. It’s a subtle yet stunning option for those who want to add a touch of elegance to their winter nail art.

Shimmery Hot Cocoa Nails are perfect for holiday gatherings or cozy nights in, offering a trendy and festive option for winter nail art.

By incorporating these elements, you can create a luxurious and indulgent look that's sure to turn heads.

Disco Ball Nail Art Designs
sparkling nail art inspiration

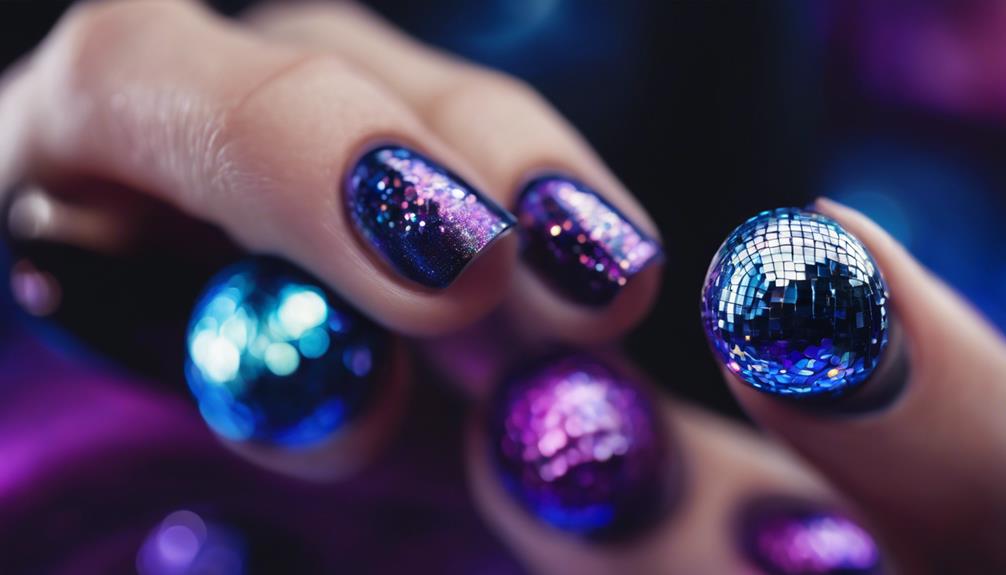
Get ready to shine bright like a disco ball with nail art designs that feature sparkling, mirror-like finishes reminiscent of the iconic dance floor staple. Disco Ball Nail Art Designs are perfect for making a statement at New Year's Eve parties or any event where you want to stand out.

These dazzling designs often incorporate holographic and glittery elements for a festive and glamorous look. You can create your own Disco Ball nails using chrome powders, holographic nail polishes, and glitter accents. The result is a winter manicure that's truly sparkling and eye-catching.

Advertisement

With Disco Ball Nail Art, you'll be the center of attention at any festive gathering. The key to pulling off this look is to balance bold, glittery colors with neutral shades to avoid overwhelming the senses. By pairing bold glitter polish with subtle, shimmering hues, you'll create a winter manicure that's both festive and sophisticated.

Frequently Asked Questions

What Are the Five 5 Basic Nail Designs?

You're wondering what the five basic nail designs are. Well, let's break it down for you.

The five fundamental designs include French tips, ombré nails, accent nails, geometric patterns, and simple nail art.

French tips feature a classic white or nude base with a contrasting tip color or design.

Ombré nails blend two or more colors seamlessly from light to dark or vice versa.

Advertisement

What Nail Art Is Trending Right Now?

You're wondering what nail art is trending right now. Coincidentally, winter nail art trends are all about metallic finishes, jewel tones, and festive accents like snowflakes and stars.

You'll also see French tip variations, textured and opulent finishes like snakeskin-inspired designs, and glitter-gem combinations.

Minimalist elegance with sterling touches and starry beds are also sought-after designs for a chic winter look.

What Is the Winter Nail Polish Trend?

You're wondering what's trending in winter nail polish. This season, rich, deep shades like plum, burgundy, and metallic blues are dominating the scene.

Shimmery finishes, holographic effects, and metallic accents add a festive touch to winter nail designs.

Advertisement

These trendy shades and finishes will elevate your winter nail game, and incorporating them into your nail art will guarantee you're on-trend this winter.

What Is the Most Attractive Nail Color?

You might think that bold and vibrant colors are the most attractive, but surprisingly, a classic red is the winner. According to Nail Polish Direct, this timeless shade is the most attractive nail color, and it's easy to see why – it's versatile and suits most skin tones.

Neutral shades like nude and light pink are also highly attractive, offering a chic and understated look.

Conclusion

As you explore these winter nail art ideas, your creativity will sparkle like a snowflake under the microscope.

From Moody Winter Aura Nails to Disco Ball Nail Art Designs, each style brings a unique touch to your winter look.

Advertisement

With these 5 top designs, you'll be sure to make a statement at your next holiday gathering.

So, get creative, grab your nail polish, and shine like a winter wonderland!

Advertisement

Nail Tips

Cute Smiley Face Nails to Brighten Your Day

Smiley face nails can elevate your mood and style; explore vibrant designs that will leave you inspired and eager for more creative ideas!

Published

on

By

playful nail art design

Cute smiley face nails can truly brighten your day! These vibrant designs express your personality and lift your spirits. Whether you choose classic yellow smileys or mix in pastel shades for a spring vibe, there's a design to match any occasion. You can create minimalistic looks or go bold with hearts and flowers for extra charm. Try using bright hues to really catch the eye, or experiment with nail stickers for quick fun. No matter your style, you'll find a smiley nail art idea that resonates. Stick around to discover more creative variations and tips to enhance your nail game!

Key Takeaways

  • Smiley face nails, with their cheerful designs, express personality and uplift spirits, making them a perfect choice for any occasion.
  • Seasonal trends allow for creativity, with pastel colors in spring and vibrant neon hues in summer to brighten your look.
  • Customization options, such as combining smiley faces with hearts or flowers, add charm and personalization to your nail art.
  • Simple application techniques, like using nail stickers or fine brushes, make it easy to achieve cute and playful designs at home.
  • Minimalist smiley face designs can suit professional settings, while bold styles are perfect for casual outings and festive celebrations.

Introduction

beginning of a discussion

When it comes to nail art, cute smiley face designs are a fun way to express your personality and lift your spirits. Smiley face nails bring a cheerful vibe to your look, making them perfect for any occasion. The classic yellow smiley faces are a timeless choice that appeals to everyone, and they easily brighten up your day.

You can personalize your nails with various styles, from vibrant hues to pastel nails, allowing you to match your mood or outfit. These designs aren't just about color; they also allow for creativity. You might mix and match different styles, incorporate glitter accents, or add seasonal themes, like hearts for Valentine's Day or nature-inspired elements for summer festivals.

The possibilities are endless! Plus, using 3D elements and unique textures in your smiley face nail art can add depth, making your nails stand out even more.

Whether you want to keep it simple with cute smiley faces or go all out with playful designs, smiley face nails are an excellent way to showcase your playful side and boost your confidence. So why not give them a try?

Origin of Smiley Face

history of smiley face

Cute smiley face nails draw inspiration from the rich history of the smiley face symbol itself. Created in 1963 by Harvey Ball, the original smiley was designed to boost employee morale at an insurance company. This iconic yellow smiley quickly became a universal symbol of happiness and positivity, ingraining itself in popular culture.

By the 1970s, the smiley face exploded in popularity, appearing on stickers, T-shirts, and buttons, often linked to the counterculture movement. As time went on, this cheerful symbol evolved, adapting to various forms of art, fashion, and digital communication, including our beloved emojis.

Advertisement

Today, you'll find smiley faces adorning nail polish designs, making them a go-to choice for those wanting to express joy and playfulness in their nail art.

Whether painted with a bright yellow hue or incorporated into intricate designs, these symbols embody a spirit of positivity that resonates with nail art enthusiasts everywhere.

Seasonal Smiley Face Trends

seasonal emoji face styles

As the seasons change, so do the trends in smiley face nail art, reflecting the vibrant colors and themes of each time of year.

In spring, you'll find pastel shades taking center stage, with delicate smiley faces paired with floral patterns that embody the joy of blooming flowers.

As summer arrives, neon colors become popular, turning your nails into a celebration of sunshine and fun. Bright yellows, pinks, and greens bring a cheerful vibe, perfect for beach outings and barbecues.

When fall rolls around, think of warm hues like oranges and browns. Smiley faces can be adorned with autumn motifs, like leaves and pumpkins, creating a cozy, festive look.

Advertisement

Winter invites a different kind of joy, as holiday-themed smileys pop up, often incorporating reds and greens to celebrate the season.

Use Vibrant Color Combinations

bold and bright hues

Vibrant color combinations can transform smiley face nails into a striking statement piece. When you opt for neon yellows and pinks, you'll create eye-catching designs that elevate your mood and grab attention. Bright yellow smiley faces against a bold blue or sunny orange background convey a playful vibe, perfect for festivals or parties.

For a more relaxed look, consider mixing pastel shades with your smiley motifs. This combination promotes a cheerful yet calming aesthetic, making it ideal for spring and summer nail art.

If you love edgy styles, try using contrasting colors—neon smileys on a dark base not only enhance visibility but also make your design pop.

Another fun approach is to experiment with colorful ombré effects. By incorporating smiley faces into a gradient look, you add depth and endless creative possibilities to your nails. Additionally, using bold colors can elevate the overall impact of your nail art and make it more visually appealing.

Whether you choose vibrant hues or soft pastels, these color combinations will ensure your smiley face nails stand out and brighten your day. So, get creative and let your personality shine through your nail art!

Advertisement

Nail Art for Celebrations

festive nail art designs

Smiley face nails bring a sense of joy and playfulness that fits perfectly with any celebration. Whether it's a birthday party, holiday gathering, or a special event, these cheerful designs elevate the festive spirit. In addition to the vibrant colors, incorporating Halloween traditions can inspire new designs and themes for your nail art.

You can customize your smiley nails with vibrant colors and playful patterns to match the theme of the occasion. For instance, during seasonal celebrations, consider using holiday colors that reflect the mood while incorporating smiley faces for added charm. Additionally, using functional cookies on your website can enhance user experience by offering tailored content that reflects festive themes. Furthermore, embracing cruise attire can set the perfect tone for your celebrations, ensuring everyone feels stylish and festive.

To enhance your manicure, you might want to mix in some glitter nails. The sparkle not only adds glamour but also complements the joyful vibe of smiley face nail designs. By layering different elements like glitter or floral patterns, you create a unique look that stands out at any celebration.

Engaging in smiley face nail art isn't just about aesthetics; it's a fun way to express your creativity and promote positivity. When you look down at your nails adorned with happy faces, you can't help but feel uplifted. Additionally, incorporating personalized gifts into your celebrations can further enhance the joy and thoughtfulness of the occasion.

Pros and Cons of Designs

advantages and disadvantages of designs

When considering cute smiley face nails, it's essential to weigh their pros and cons. One major advantage is their versatility; you can choose from classic yellow smileys to vibrant rainbow variations, making them suitable for various fashion tastes.

The playful aspect of smiley face designs can uplift your spirits and boost your confidence, particularly with pastel themes that promote a calming effect, perfect for spring and summer. Additionally, incorporating various shades of blue into your smiley designs can add depth and creativity.

However, there are some downsides to keep in mind. Certain designs may require advanced techniques or tools, which can be challenging for beginners or those who prefer simpler nail art.

Advertisement

Additionally, while bright and bold smiley face designs are fun, they mightn't fit all professional environments, limiting when and where you can sport them.

Creative Smiley Face Variations

unique emoji design ideas

There are countless creative variations of smiley face nails that can elevate your nail art game. You can choose from vibrant neon yellow designs for a bold statement or opt for soft pastel smiley faces to create a more subdued yet cheerful look.

Mixing and matching styles lets you express your personality; consider pairing smiley faces with other fun emojis like hearts and flowers for a playful vibe.

To add depth, incorporate 3D elements such as gems or textured designs, making your nails pop with dimension. Seasonal themes also offer a fun twist—think watermelon smileys for summer or festive holiday-themed smileys that celebrate the spirit of the season.

For a modern approach, explore geometric and ombré styles that give traditional smiley faces a stylish upgrade.

These creative smiley face variations not only reflect your mood but also keep you in tune with the latest nail trends. So, get ready to experiment with color and style, transforming your nails into a canvas of happiness and creativity!

Advertisement

Brighten Your Nails Today!

nail care and enhancement

Ready to brighten your nails today? Dive into the world of cute smiley face nails! These playful designs are perfect for elevating your mood and adding a splash of color to your look. Start with classic yellow smiley faces on your nails; this vibrant hue instantly brings joy and cheer.

Why not get creative with your manicure? You can mix and match smiley faces with other fun motifs, like hearts or flowers, to create a unique style that reflects your personality.

Whether you prefer a minimalist approach or a bold, eye-catching design, the possibilities are endless!

Yellow nails adorned with smiley faces are ideal for any occasion, from casual outings to festive events. They're not just for the young; people of all ages can enjoy this timeless trend.

Plus, with so many colors and styles to choose from, you'll find endless inspiration to keep your nails looking fresh and fun.

Frequently Asked Questions

What Color Nails Are Uplifting?

When you choose uplifting nail colors, opt for bright shades like yellow, orange, or pink. Pastel tones and vibrant neons also boost your mood, helping you feel more cheerful and energized throughout your day.

Advertisement

How to Do Smiley Nails?

To do smiley nails, start with a clean base. Apply a light polish, then use a dotting tool for eyes and a smile. Finish with a top coat to keep your design shiny and durable.

Continue Reading

Nail Tips

How to Use a Cuticle Pusher for Perfect Nails

Learn the simple steps to use a cuticle pusher for perfect nails, and discover essential tips that will elevate your nail care routine!

Published

on

By

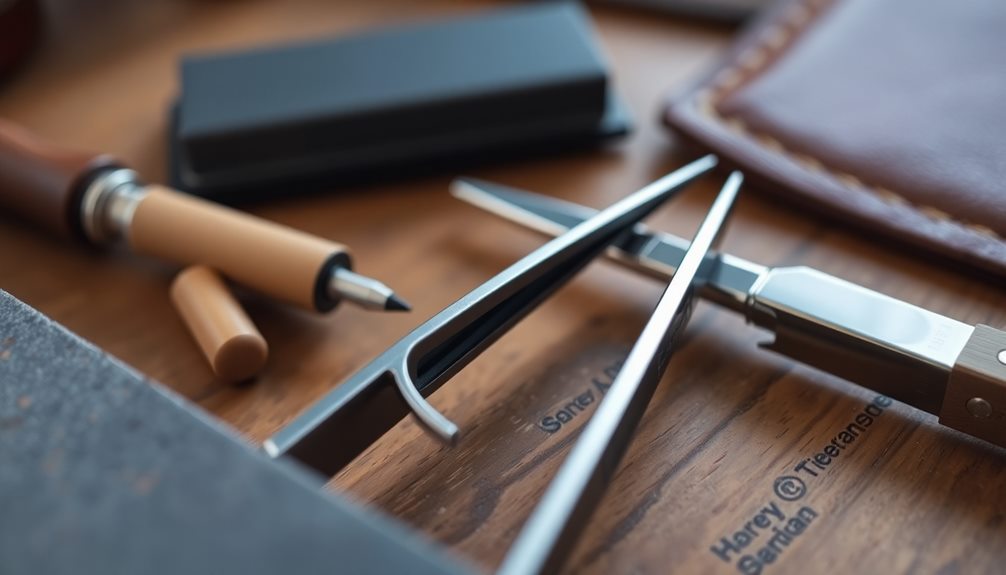
cuticle pusher nail technique

Using a cuticle pusher's super simple! First, soak your nails in warm, soapy water for about 5-10 minutes. This softens your cuticles and makes them easier to push back. Next, grab your stainless steel pusher and angle it at 35 to 45 degrees. Gently press back your cuticles, but be careful not to push too hard—ouch! After you're done, wash your hands and clean your pusher with soap to keep it germ-free. Regularly taking care of your cuticles gives your nails a fabulous look! Want even more tips on keeping those nails perfect? There's plenty ahead to discover!

Key Takeaways

  • Soak your nails in warm, soapy water for 5-10 minutes to soften cuticles before pushing them back.
  • Choose the appropriate cuticle pusher, preferably stainless steel, for effective and safe manipulation.
  • Hold the pusher at a 35 to 45-degree angle and apply gentle pressure to avoid injury.
  • Always push back dead skin rather than cutting cuticles to maintain their health and prevent infections.
  • Clean your cuticle pusher thoroughly after use and apply cuticle oil to keep cuticles moisturized and healthy.

Introduction

beginning of the topic

When it comes to nail care, using a cuticle pusher can make a significant difference in achieving that polished look. This handy tool helps you push back your cuticles, which not only makes your nails look neat but also promotes healthy nail growth.

Before you start, it's a great idea to soften your cuticles. You can do this by soaking them in warm, soapy water or using cuticle oil for a few minutes—think of it as giving your cuticles a cozy spa treatment! Additionally, incorporating moisturizing properties into your nail care routine can enhance the overall health of your nails.

Once they're soft, grab your cuticle pusher and gently push back your cuticles at a 35 to 45-degree angle. Remember to use gentle pressure; you don't want to hurt your nail bed or surrounding skin.

Regularly pushing back your cuticles—ideally once a week—helps maintain nail health and keeps excess cuticle at bay. Plus, it can make your manicures last longer since polish sticks better to well-groomed cuticles.

Nail Health Impacts Overall Appearance

nails reflect overall health

Maintaining healthy cuticles is vital for the overall appearance of your nails. When you push back your cuticles, you help promote nail growth and create a clean, elongated nail bed. This simple act not only improves your nail health and appearance but also makes your nails look more polished and pretty!

Remember, healthy cuticles act as a protective barrier against hangnails and infections, so don't skip your cuticle care. Using essential oils for aromatherapy can also enhance your overall grooming routine, as certain oils promote relaxation and well-being.

Advertisement

To keep your cuticles in tip-top shape, consider using cuticle oil. This magical potion helps moisturize your cuticles, keeping them soft and supple. Plus, when your cuticles are well cared for, nail polish adheres better, leading to a smoother and longer-lasting manicure. Think of it as giving your nails the royal treatment!

Don't forget, consistent cuticle care reflects your overall health and grooming standards. It's all about that little extra effort to show you care.

Popular Variations and Ideas

creative concepts and alternatives

Cuticle pushers come in a variety of styles to suit your personal preferences and nail care needs. You'll find metal cuticle pushers that are super durable and perfect for tough cuticles. If you prefer a gentler touch, wooden cuticle pushers are a great choice, as they're softer on your skin.

For versatility, look for dual-ended cuticle pushers, which have a rounded part for pushing back cuticles and a pointed tip for cleaning under nails. Using ergonomic tools can enhance your experience, similar to how educational toys support skill development in children by promoting comfort and efficiency.

Many pushers now feature ergonomic handles, making them comfy to hold while you're busy with your cuticle pushing and nail care. If you're a nail artist at heart, specialty pushers designed for unique nail shapes can help you create stunning designs while keeping your nails healthy.

And let's not forget the fun part! Decorative cuticle pusher sets are gaining popularity, allowing you to express your style while ensuring your tools are functional.

Advertisement

Tips and Tricks

helpful advice and strategies

To achieve the best results when using a cuticle pusher, follow a few essential tips that can make all the difference.

First, always soak your nails in warm, soapy water for 5-10 minutes. This helps soften the cuticles, making them easier to push back.

When you're ready, use a stainless steel cuticle pusher and hold it at a 35 to 45-degree angle to your nail bed. This angle is key for effective pushing without causing damage.

As you push them back, remember to apply gentle pressure. Too much force can lead to soreness or injury, so be light!

After you're done, wash your hands thoroughly and dry them with a clean towel. This keeps everything hygienic and safe.

Plus, it's a great time to clean your cuticle pusher to prevent any germs from sticking around.

Advertisement

Care and Maintenance

nurturing and upkeep essentials

After you've pushed back your cuticles and given your nails some TLC, it's time to focus on how to care for your cuticle pusher. Keeping it clean is super important! Always wash it with soap and water or use disinfecting wipes before and after each use. This helps prevent any pesky bacteria from causing trouble.

Next, store your cuticle pusher in a dry, clean spot. If it's made of metal, be extra careful to avoid rust or damage. You should also inspect it regularly for any signs of wear. If it's looking a bit worn out, it's time to replace it to ensure your safety!

After each use, don't forget to apply cuticle oil or moisturizer. This helps keep both your cuticles and your cuticle pusher in tip-top shape, boosting the overall health of your nails.

Make it a part of your weekly routine to use your cuticle pusher. This way, you can consistently maintain cuticle health and prevent any excessive buildup.

With a little care and maintenance, your cuticle pusher will be your best buddy in achieving perfect nails!

Common Mistakes to Avoid

avoid these common mistakes

Avoiding common mistakes when using a cuticle pusher can make a significant difference in your nail care routine.

First, always remember to use the right cuticle pusher. It's designed to help you gently push back your cuticles without causing harm. Before you start, don't skip soaking your fingers; this helps soften the cuticles, making pushing back the cuticles easier and safer.

Advertisement

When you're pushing back your cuticles, be sure to avoid applying excessive pressure. If you push too hard, you might damage the nail bed or the skin around it.

Also, never use the cuticle pusher to cut your cuticles. Cutting live skin can lead to pain and increase your infection risk. Instead, focus on removing only the dead skin.

Always ensure your tools are properly sanitized before and after use. Clean tools help keep your nails healthy.

Lastly, don't forget to give your cuticles some love with regular moisturizing. This keeps them soft and prevents dryness, snags, and hangnails.

Follow these tips, and you'll be well on your way to perfect nails!

Advertisement

Frequently Asked Questions

Are You Supposed to Push Back Your Cuticles?

Yes, you're supposed to push back your cuticles. Regularly doing this promotes healthy nail growth and keeps your nails looking neat. Just remember to soften them first to avoid any discomfort or injury.

How Often Should You Use a Cuticle Pusher?

You should use a cuticle pusher once a week to keep your nails healthy and prevent excess buildup. Regular care reduces hangnail risks and improves nail aesthetics, ensuring your polish looks great and lasts longer.

How Do You Get Perfect Cuticles on Your Nails?

To achieve perfect cuticles, soak your fingers in warm, soapy water, then gently push them back using a cuticle pusher. Regularly moisturize with cuticle oil to keep them healthy and prevent excess buildup.

What Is the Other Side of a Cuticle Pusher For?

The other side of a cuticle pusher's sharp tip helps you clean under your nails and remove excess cuticle. Just be careful not to apply too much pressure, as it can injure sensitive skin.

Conclusion

Now that you know how to use a cuticle pusher for perfect nails, it's time to give it a try! Remember, taking care of your nails is super important, not just for looks but for keeping them healthy too. With a little practice and the tips you've learned, you'll be on your way to nail greatness! So grab your cuticle pusher, have fun, and let your nails shine like the stars they are! Happy pushing!

Advertisement

Continue Reading

Nail Tips

Nail Designs With Lines: Simple and Stylish Ideas

Nail designs with lines offer endless possibilities for creativity and style—discover how to elevate your manicure game with chic and modern ideas!

Published

on

By

stylish line nail designs

Nail designs with lines are super fun and a great way to show off your style! You can keep it simple with classic black lines on a white background, or pick pastel colors for a softer look. Don't forget about negative space—leaving parts of your nails bare looks really chic! Try mixing colors or adding geometric shapes for something new and exciting. Remember, using high-quality brushes can help you create clean lines, and a topcoat keeps your designs from chipping. There's so much more fun to discover about nail art, so let's get those creative juices flowing!

Key Takeaways

  • Create classic looks with black lines on a white background for timeless elegance.
  • Experiment with pastel shades and negative space techniques for a playful, modern vibe.
  • Incorporate geometric patterns such as triangles and squares for a unique touch.
  • Use high-quality nail art brushes and striping tape for clean, precise line work.
  • Regular maintenance and touch-ups ensure your line designs remain fresh and chic.

Introduction

beginning of the discussion

Nail designs with lines effortlessly fuse simplicity and elegance, making them a go-to choice for any occasion. Whether you're getting ready for a birthday party or just want to brighten your day, line nail designs can work wonders. You can create stunning looks using simple nail art techniques that anyone can master.

For example, think about using black lines on a white background for a classic look, or try pastel shades for something softer and more playful. Consider incorporating some of the latest trends, like bold colors and intricate patterns, to elevate your nail art game.

Minimalist line designs are all about using negative space, which means leaving parts of your nails bare to create a chic and modern vibe. Imagine a single line or thin stripes that stretch across your nails, giving them an elegant look without being too flashy.

You can even switch things up with seasonal inspirations, like floral lines in the spring or geometric patterns in the fall!

With a little creativity and practice, you can easily achieve these stylish designs. So grab your nail polish and let's dive into the wonderful world of line nail designs that are perfect for you!

Advertisement

Expresses Personal Style Effortlessly

effortlessly showcases individual style

Expression through art is one of the most rewarding aspects of personal style, and line nail designs make it easy to showcase your individuality. With simple nail designs featuring line art, you can create a canvas that reflects your personality.

Imagine clean lines and geometric shapes dancing across your nails, making them chic and understated. These designs can be enhanced by incorporating elements of creativity, similar to how arts and crafts toys encourage self-expression and fine motor skills in children. You can easily play with contrasting colors, like striking black and white or cheerful pastels, to create bold statements that stand out.

These designs are perfect for showing off your personal creativity and can match any outfit or occasion. Want to feel extra stylish? Try using negative space techniques to elevate your nail art, giving it an artistic flair that's hard to miss!

Seasonal trends can also inspire your designs, allowing you to adapt your nails to match your mood or the latest fashion. Whether you're feeling playful or sophisticated, line nail designs offer endless possibilities for self-expression.

Popular Variations and Ideas

trendy concepts and innovations

Exploring popular variations of line nail designs opens up a world of creativity and style. You can mix and match colors, like classic black and white for a timeless look, or go bold with bright hues and metallic colors.

Simple designs often include single lines or thin stripes, using negative space to create a modern vibe that's super elegant. For a romantic touch, consider incorporating elements like nail styles for Valentine's Day with hearts and pastel colors.

If you love shapes, try geometric patterns! You can use triangles and squares, adding overlapping lines and color blocking for a fun twist. These nail art designs not only look fantastic but also give your nails a unique flair.

Advertisement

French tips can also be spiced up with colorful lines, making them stand out even more!

Don't forget to consider the seasons! You could choose floral lines for spring, while darker colors work great for fall.

To achieve these stunning looks, grab high-quality nail polish, nail art brushes, and striping tape. With these tools in hand, you'll be ready to create nail designs that express your personality.

Tips and Tricks

helpful advice and strategies

Achieving stunning line nail designs can be a breeze with a few essential tips and tricks. First, use high-quality nail art brushes, like the Winstonia 5 pcs Nail Art Brushes Set, to create clean and precise lines. This makes all the difference in your nail art design!

Next, consider experimenting with striping tape. It helps you make sharp edges and consistent shapes, especially for geometric patterns.

Don't forget about negative space! Leaving parts of your nail's natural color can really make your designs pop. You can also use simple dotting tools to add fun little details or embellishments, giving your designs a unique touch.

Advertisement

If you're going for a French manicure, adding fine lines can elevate your look even more!

Care and Maintenance

proper upkeep guidelines required

Maintaining the beauty of your line nail designs requires consistent care and attention. Regular touch-ups are essential for keeping your nails looking fresh, so don't wait too long to fix any chips or wear. A steady hand will help you achieve those crisp lines when you do your touch-ups!

To promote nail health, use cuticle oil daily. It helps keep your nails moisturized and prevents dryness, which can ruin your fabulous designs. Also, be careful with harsh chemicals found in some cleaning products; they can fade and chip your lovely nail art.

Gentle filing of the edges should be part of your maintenance routine. It helps prevent chipping and breakage, so you can keep showing off your stylish nails!

Scheduling manicures every two to three weeks is a great idea, too. This way, you'll get professional touch-ups and proper care, ensuring your line designs stay beautiful and intact.

Lastly, don't forget to apply a good base coat before starting your designs. It helps your nail art last longer! With a bit of effort and love, your line nail designs will shine bright!

Advertisement

Common Mistakes to Avoid

avoid common mistakes today

When creating stunning line nail designs, avoiding common pitfalls can make all the difference in achieving a professional look. First, always let each layer of polish dry completely before adding more. If you skip this step, your designs might smudge, leaving you with a messy finish.

Also, don't forget to apply a topcoat! It protects your art from chipping and keeps those lines looking shiny and fresh.

Using quality tools is essential, too. A nail artist's best friend is a thin brush for painting straight lines. Low-quality brushes can lead to wobbly designs that don't look as neat.

Additionally, prep your nails properly! This includes caring for your cuticles and cleaning your nail surface to ensure the polish adheres well.

Be careful not to overload your brush with too much polish; instead, use a light hand for a more controlled application. Thick lines can take forever to dry and may not look as polished.

Frequently Asked Questions

What Nail Design Is Trending Right Now?

Right now, you're seeing minimalist nail designs with clean lines and negative space everywhere. Abstract patterns, soft pastels, and playful early 2000s motifs are particularly popular, reflecting both sophistication and artistic expression in today's nail art trends.

Advertisement

What Are the 5 Basic Nail Art Designs?

You're exploring basic nail art designs, and here are five: the classic French manicure, playful polka dots, chic stripes, modern negative space, and delicate floral lines. Each offers unique styles for your creativity to shine!

What Nail Designs Make Them Look Longer?

To make your nails look longer, try vertical lines or thin geometric patterns. Using a light base with darker accents, or opting for elongated French tips, can enhance their appearance and add elegance to your style.

How to Do Checkered Nails?

To do checkered nails, start with a base coat. Use striping tape to create a grid, paint contrasting colors, then remove the tape. Finish with a top coat for shine and durability. Enjoy your stylish look!

Conclusion

Now that you've learned about fun nail designs with lines, you can show off your unique style! Whether you choose simple stripes or playful patterns, the possibilities are endless. Remember, practice makes perfect, and don't be afraid to experiment with colors and shapes. Keep your nails clean and healthy, and you'll always be ready to dazzle. So grab your nail polish, unleash your creativity, and let your fingers do the talking! Happy designing!

Advertisement

Continue Reading

Trending