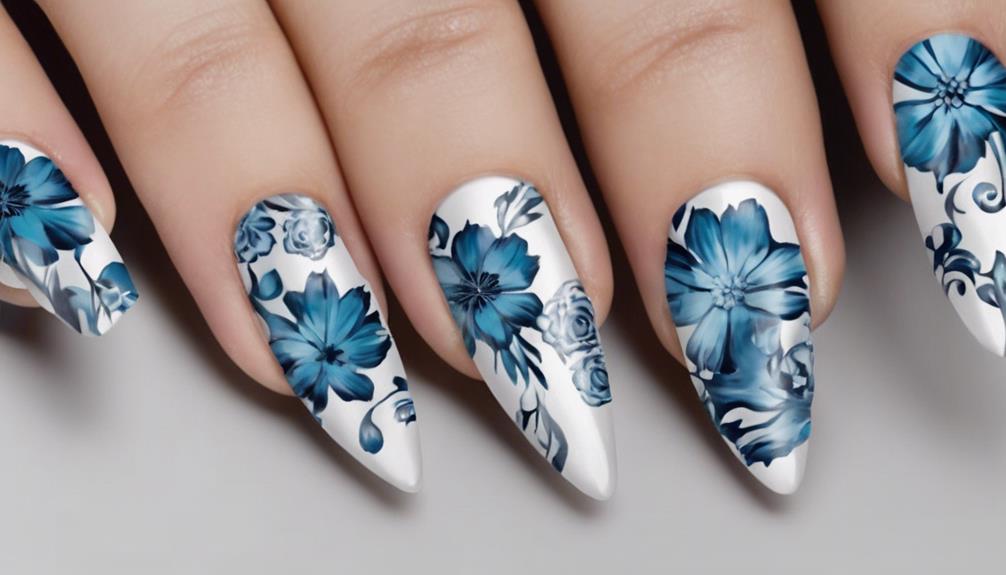

Begin creating beautiful blue floral nail designs with our comprehensive guide. Start by prepping your nails through filing, buffing, and applying a protective base coat. Use blue and white gel polishes to design intricate flower patterns, finishing off with a glossy top gel polish. For added durability and shaping, consider acrylic application. Experiment with gel color layering to achieve vibrant designs with dimension. Add mylar glitter accents for extra sparkle. Perfect detailed floral painting using acrylic paint. Finish with a top coat to seal, boost shine, and safeguard your design. Dive deeper into our ultimate guide to flawless floral nails.
Key Takeaways
- Clean and shape nails before applying base coat.
- Paint intricate blue floral patterns using gel polish.
- Add mylar glitter accents for sparkle and dimension.
- Seal the design with a top gel polish for longevity.
- Finish with a top coat to enhance shine and protection.
Nail Preparation
To begin preparing our nails for the blue floral design, we should clean and shape them using a nail file and buffer to create a smooth canvas. This step is vital as it guarantees a flawless application of the nail polish.
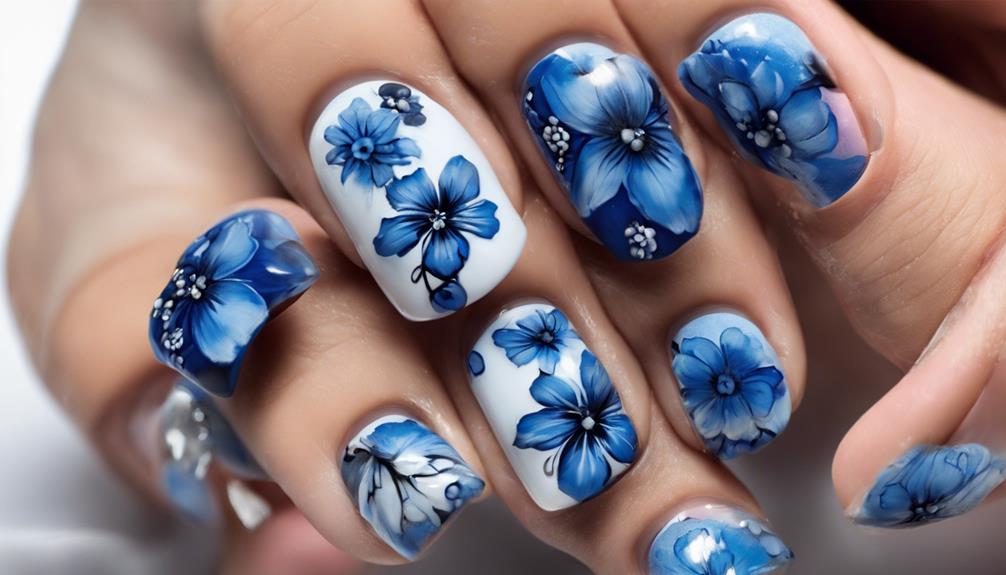
Next, applying a base coat is necessary to protect the natural nail and enhance the adherence of the gel polish. Selecting blue and white gel polishes for the floral design will result in a sophisticated and timeless manicure.
Using a delicate nail art brush, intricate flower patterns can be painted with white gel polish on the blue base, adding a touch of elegance to the design.
To finish off the look, a top gel polish should be applied for a glossy and durable finish. By following these steps meticulously, we can achieve a stunning blue floral nail design that's sure to captivate.
Acrylic Application
Let's explore the process of applying acrylic for creating stunning nail designs. Acrylic application is essential for building and shaping nails to achieve various styles like extensions, overlays, and intricate designs. One of the significant advantages of acrylic nails is their durability and long-lasting nature, making them a favored choice in the world of nail art.
When using acrylic, nail artists can sculpt and structure nails to the desired shape and length, resulting in professional-looking results.
The key to successful acrylic application lies in mastering the technique to make sure the acrylic adheres properly and creates a strong bond with the natural nail. By understanding how to sculpt and shape the acrylic correctly, nail artists can craft beautiful designs that last.
With practice and precision, individuals can enhance their skills in acrylic application, leading to stunning nail creations that stand out for their beauty and longevity.
Gel Color Layering
As we progress from discussing acrylic application, the next step involves mastering the technique of gel color layering to create vibrant and intricate nail designs.
Gel color layering is the art of applying multiple gel colors on the nails to achieve depth and dimension in the design. This technique allows for seamless blending and shifting between different colors, resulting in cohesive and eye-catching patterns and effects.
Mylar Glitter Accent
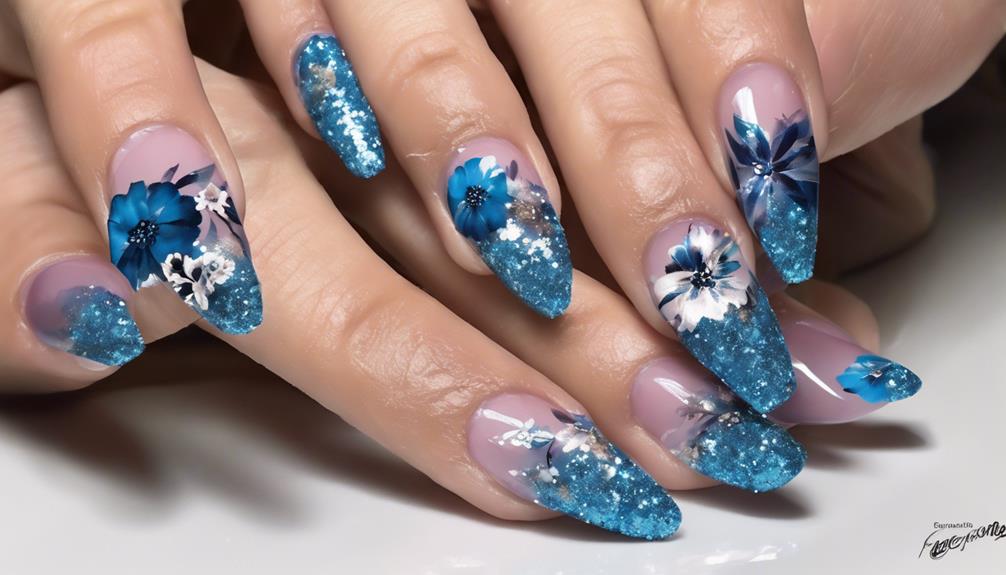
When it comes to nail art, adding a touch of mylar glitter can elevate your design with a sparkling effect. Precision in placing the glitter on the free edge can create a glamorous accent that enhances your floral nail art.
Sparkling Mylar Application
We can achieve a stunning and glamorous nail design by incorporating sparkling mylar glitter accents into our nail art. Mylar glitter, known for its reflective properties, adds dimension and a unique sparkling effect to nail designs.
When applying mylar glitter, gently press it into wet gel or nail polish for a secure hold. Layering techniques or strategic placement of mylar glitter can create a dimensional shine that elevates the overall look of the nail art.
These accents are popular for their ability to transform a simple design into a glamorous and eye-catching masterpiece. By mastering the art of using mylar glitter in our blue floral nail designs, we can achieve a sophisticated and elegant manicure that stands out with its sparkling effects.
Precision Glitter Placement
Utilizing precision glitter placement techniques with mylar glitter accents enhances the sophistication and allure of our blue floral nail designs.
Mylar glitter, known for its sparkling accent, is carefully pressed into specific areas to achieve a controlled effect. Available in various colors and shapes, mylar glitter caters to different design preferences, allowing for personalized touches of glamour.
By incorporating this technique into our nail art, we elevate the overall look with a subtle yet impactful shimmer. Whether you prefer a more understated or bold approach, precision glitter placement using mylar glitter can add an enchanting dimension to your blue floral nail designs.
Mastering this skill will certainly elevate your nail art game to new heights.
Enhance Floral Nail
Enhancing floral nail designs with mylar glitter accents brings a charming sparkle to the overall look. Mylar glitter adds a sparkling effect, especially when strategically placed on the free edge of the nails.
Pressing mylar glitter into turquoise gel creates an eye-catching detail that complements the blue floral design. By using mylar glitter as an accent, you can bring dimension and shine to the intricate nail art.
The key is to guarantee that the mylar glitter enhances the floral design without overpowering it. This subtle addition can elevate your nail art, giving it that extra pop and creating a stunning finish.
Experiment with different placements to find the perfect balance of sparkle and sophistication.
Intricate Floral Painting
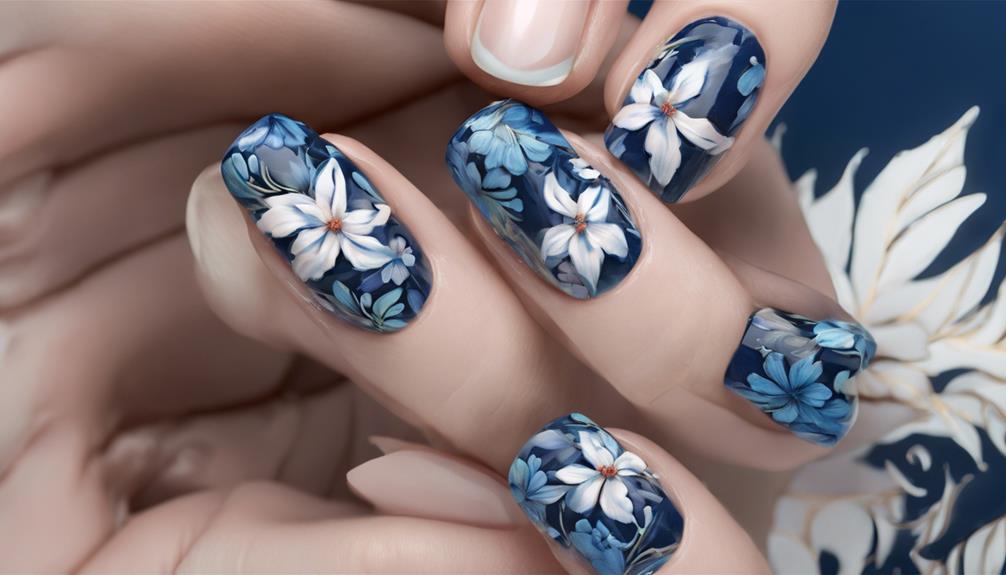
Creating intricate floral nail designs involves using acrylic paint to meticulously craft detailed flower patterns on the nails. To achieve a realistic floral look, precision and attention to detail are key. Artists like Emilia Dobkowska showcase how layering colors and adding shading can bring depth to floral nail art, elevating the design. This technique allows for customized designs, where different flower types, colors, and arrangements can be incorporated to create unique and stunning nail art.
When working on intricate floral painting, it's important to carefully layer the acrylic paint to build up the design gradually. Paying attention to shading helps create dimension and realism in the flowers. Adding a top coat at the end not only seals the design but also protects the delicate artwork, ensuring your intricate floral nails stay beautiful for longer. By mastering the technique of intricate floral painting with acrylics, you can create breathtaking nail designs that showcase your artistry and attention to detail.
Finishing Touches
Before completing the blue floral nail design, it's essential to apply a top gel coat for protection and longevity.
Adding gemstone embellishments can elevate the look and offer a personalized touch to the manicure.
To achieve a glossy and professional finish, seal the design with a shiny gel for a polished appearance.
Top Coat Application
For a flawless finish to your blue floral nail design, apply a high-quality top coat to protect and seal the intricate design. Here are some essential tips for top coat application:
- Protect: The top coat acts as a shield, safeguarding your nail art design.
- Enhance Shine: It boosts the shine of the design, making it look even more vibrant.
- Prevent Chipping, Fading, Smudging: A top coat helps maintain the integrity of the design by averting common issues like chipping, fading, and smudging.
- High-Quality: Opt for a high-quality top coat to guarantee a professional and long-lasting finish.
- Dry Completely: Allow the top coat to dry completely to avoid any smudges or imperfections, resulting in a flawless and durable manicure.
Gemstone Embellishments
After applying the top coat for protection and shine, adding gemstone embellishments will elevate the glamour and sophistication of your blue floral nail design. Gemstone embellishments come in various shapes, sizes, and colors, allowing you to customize your nails to match different nail art styles.
Whether you prefer a subtle or bold look, gemstones can be easily applied using nail glue or gel top coat for a secure hold. These luxurious additions provide a stunning finish, enhancing the overall appeal of your manicure.
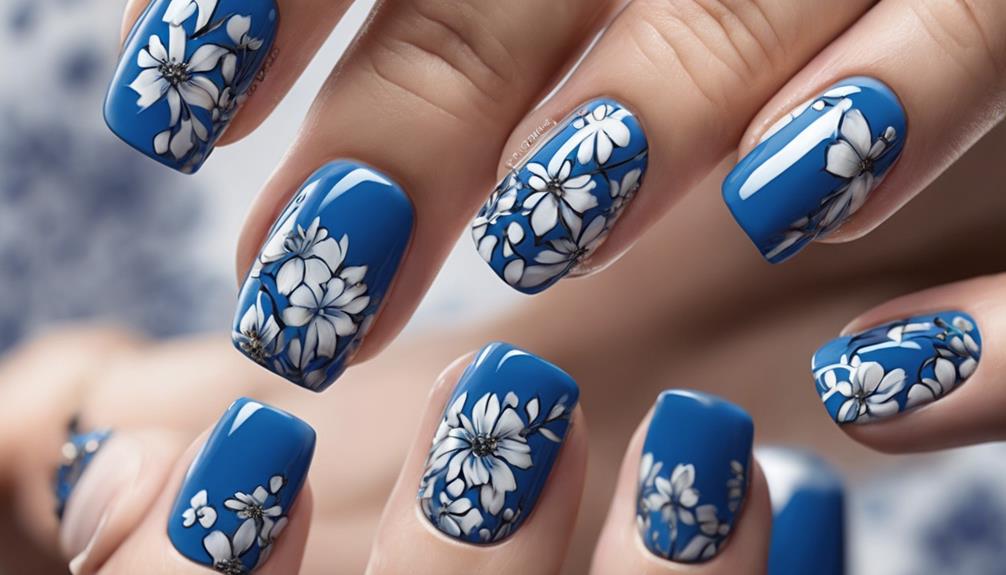
Seal With Gloss
To enhance the shine and longevity of your blue floral nail design, sealing it with a glossy top coat is essential. Applying a top gel polish not only adds shine and protection to the dried floral design but also helps seal the dried flowers securely onto the nails.
This step enhances the overall look of the manicure while ensuring its longevity and durability. By adding a top coat of gloss, you provide a vital finish to the intricate blue floral nail art, giving it a polished and refined appearance.
Don't skip this vital final step in your nail design process; it will make your beautiful blue floral nails last longer and look professionally done.
Frequently Asked Questions
What Are the Steps in Performing Nail Design?
Performing a nail design involves multiple steps for a polished result.
First, choose a base color like navy blue and create a French tip with silver glitter gel. Then, add a gradient effect with blue glitter gel and apply chunky blue glitter for texture.
Next, paint intricate white flowers using acrylic paint. Finish with a top gel application for longevity and shine.
These steps combine to create a stunning blue floral nail design.
How Do You Dye Your Nails With Flowers?
To dye your nails with flowers, first choose small dried flowers that fit on your nails. Apply clear polish as a base, then gently press the flower onto the nail. Seal with another layer of polish.
Let it dry before adding a protective top coat. This technique provides a charming and natural way to incorporate floral designs on your nails.
How Do You Apply the Basic Nail Design?
To apply the basic nail design, start by prepping and extending nails as desired. Apply silver glitter gel for a French tip, add a blue gradient effect, and enhance with chunky blue glitter.
Paint intricate white flowers with acrylic paint for detailing. Seal with a top gel for a lasting manicure.
Follow Andrea Weber's tutorial for a detailed guide on creating blue and white floral nail art.
How Do You Draw Little Flowers on Your Nails?
Drawing little flowers on your nails involves using a thin brush to create petals around a white center dot. Add 5-6 strokes for petals, using varying shades of blue for a realistic look. Finish with a top coat for shine and protection.
This step enhances the beauty of your nail art. Mastering this technique requires practice and attention to detail to achieve stunning floral designs.
Can Blue Floral Nail Designs Complement Low Maintenance Short Feathered Hairstyles?
Yes, blue floral nail designs can complement low maintenance short hairstyles perfectly. The vibrant and fun nail art can add a pop of color to your look, while keeping the overall style fresh and effortless. This combination is a great way to add a touch of personality to your overall appearance.
Conclusion
To sum up, mastering the art of blue floral nail designs requires precision, patience, and practice. By following the step-by-step guide outlined above, you can create stunning and intricate floral patterns that will surely turn heads.
Remember, attention to detail and a steady hand are key when it comes to achieving flawless nail art. So, grab your tools, express your creativity, and let your nails bloom with beautiful blue floral designs!