Nail Tips
Chrome Nail Design: Add Some Metallic Glam to Your Look
Get ready to elevate your style with stunning chrome nail designs that promise to dazzle, but there’s so much more to discover!
Chrome nails are a super cool way to add metallic glam to your look! You can choose from shiny silver, luxurious rose gold, or even colorful holographic shades that sparkle in the light. To get this stunning style, start with a good base coat, apply chrome powder using a fluffy applicator, and finish with a no-wipe top coat for a shiny finish. Don't forget to take care of your nails by moisturizing cuticles and avoiding harsh chemicals. With endless designs like ombre or geometric patterns, there's so much to explore. Who knows what fabulous nail art awaits?
Key Takeaways
- Choose from a variety of chrome colors, such as classic silver, vibrant neon peach, or luxurious rose gold, to suit your style.
- Experiment with creative designs like ombre effects, geometric patterns, or holographic finishes to add unique flair to your nails.
- Always apply a high-quality base coat to enhance chrome adhesion and protect your natural nails from damage.
- Seal your chrome design with a no-wipe top coat and use a UV lamp for optimal curing and long-lasting shine.
- Regularly moisturize your cuticles and schedule touch-ups every two to three weeks to maintain nail health and appearance.
Introduction
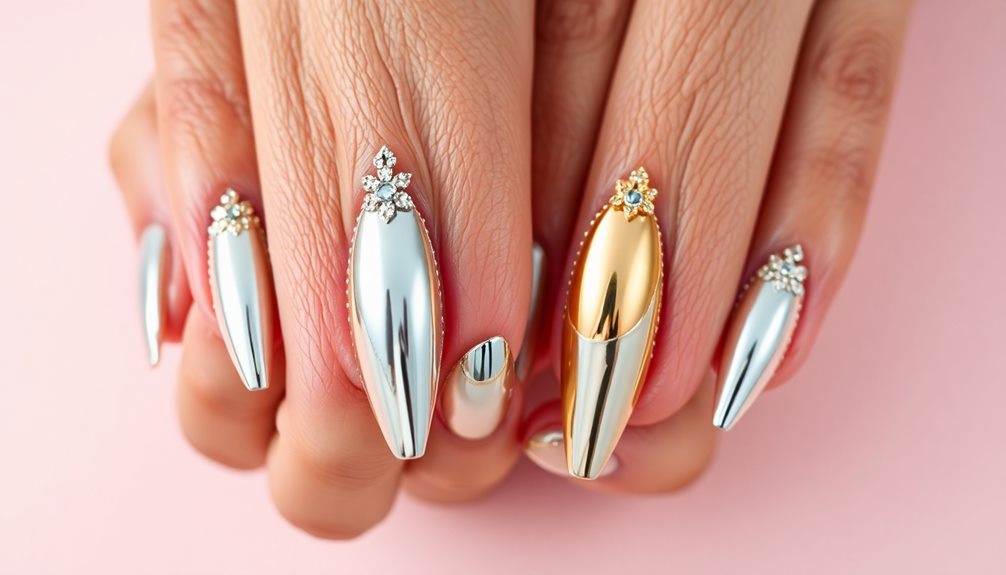
When it comes to nail art, chrome nails have become a standout choice for many. Their shiny, metallic finish makes your nails look super cool and eye-catching! Made with chrome powder, these nails can be buffed onto a gel polish base, giving you that sleek and shiny look everyone loves.
You can even choose from different colors like silver, gold, or fun holographic shades, making them perfect for any occasion. Chrome nails can also be styled in various shapes like Coffin Nail Styles, allowing you to showcase your individuality.
What's really exciting is that chrome nail designs can be customized! You can add unique flair with techniques like ombre, geometric patterns, or even accent nails. This makes them not just a trendy nail choice, but an opportunity to express your creativity.
Whether you're heading out for casual outings with friends or dressing up for formal events, chrome nails fit right in!
Just remember, keeping your nails healthy is super important! Make sure to moisturize your cuticles regularly and take breaks from polish to keep your nails in top shape.
Nail Art Trend Explosion
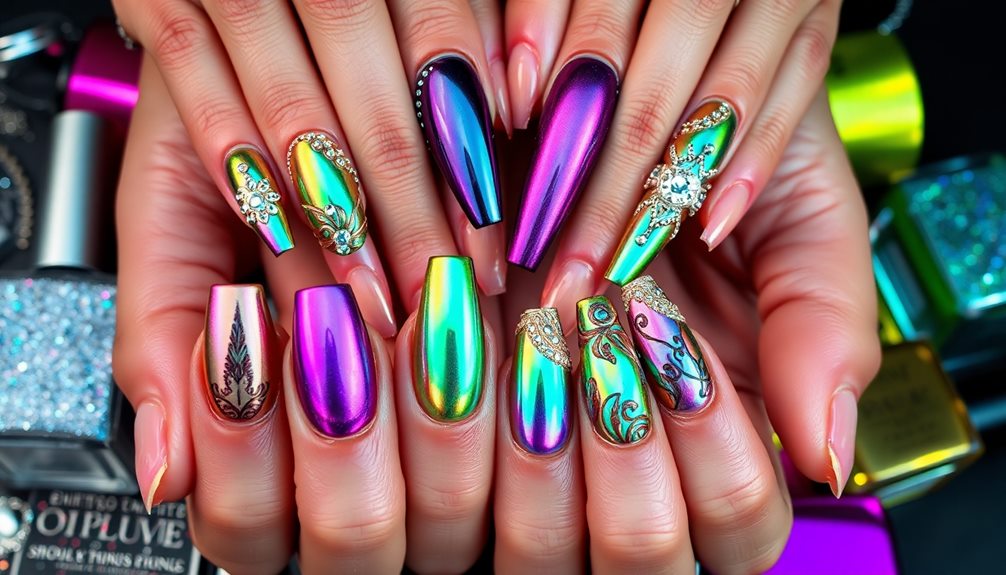
Nail art is experiencing a trend explosion, with chrome designs leading the way thanks to their stunning, reflective finishes. Chrome nails are perfect for anyone looking to add a touch of metallic sheen to their style.
Whether you're heading to a casual hangout or a special event, these striking finishes catch the eye and make your manicure stand out! Techniques like layering and blending can enhance your chrome look, creating depth and dimension that really shines.
Social media, especially Instagram and TikTok, has played a big role in the rise of chrome nails, with so many users sharing creative nail design ideas. You can easily personalize your chrome look with unique twists, like ombre effects or geometric patterns, alongside stunning blue flower nail designs for an added touch of creativity.
Plus, seasonal variations, like soft pastel shades for spring or deep, rich tones for fall, give you endless options to match your style.
Thanks to DIY chrome nail kits, you can create these fabulous designs right at home! You don't have to visit a salon to enjoy the fun of chrome nails.
Popular Variations and Ideas
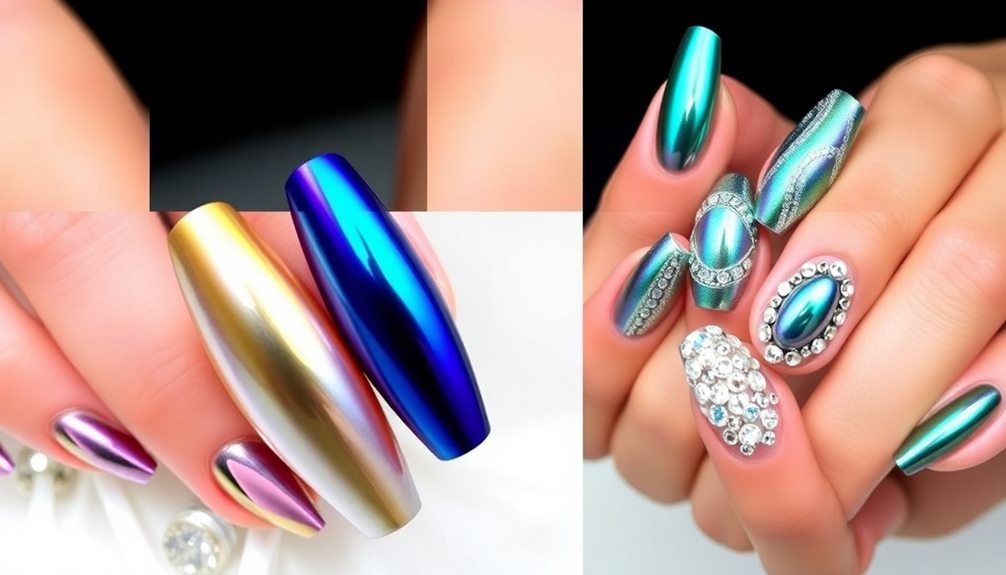
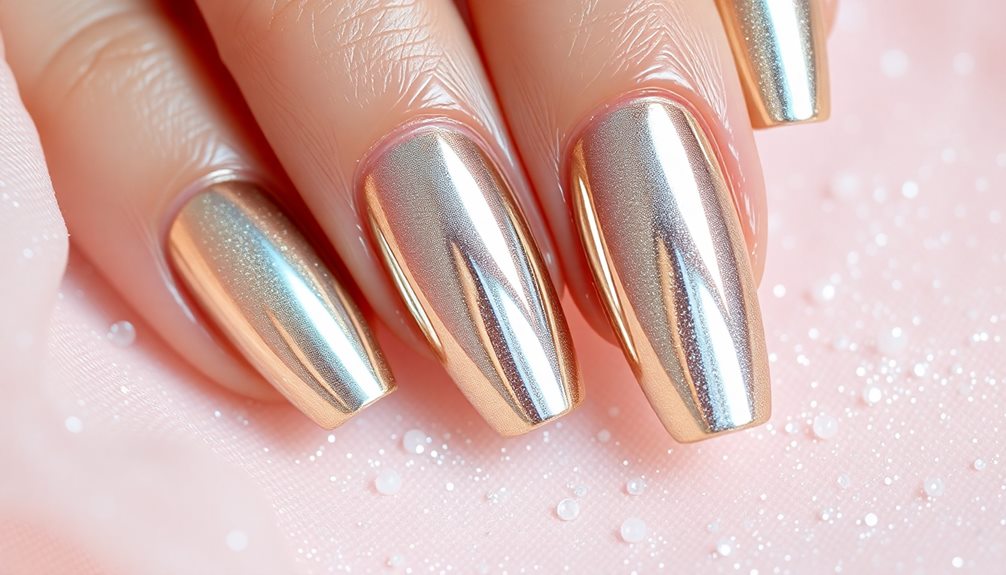
There's no shortage of creativity when it comes to chrome nail designs, with popular variations offering something for everyone. If you're looking for a timeless choice, you can't go wrong with classic silver chrome. It's sleek and perfect for any occasion!
For a pop of fun, try vibrant neon peach, which adds a joyful burst of color to your look. If you want to feel extra fancy, luxurious rose gold nails will give you that glamorous touch.
Incorporating chrome designs can be a great way to express creativity, much like how educational toys foster creativity in early childhood. For something truly eye-catching, consider holographic chrome nails. They shift colors when they catch the light, making your nails sparkle like a rainbow!
Ombre chrome nails are another fantastic option, blending multiple shades for a cool gradient effect that can be as subtle or bold as you like. Want to stand out even more? Geometric chrome nails feature intricate patterns with reflective finishes, combining edgy designs with elegance.
If you're new to chrome, accent nails can be a great way to add a unique look. Highlight one or two nails with chrome while keeping the rest simple, making your manicure both stylish and manageable.
With these ideas, you're all set to rock some metallic glam!
Tips and Tricks
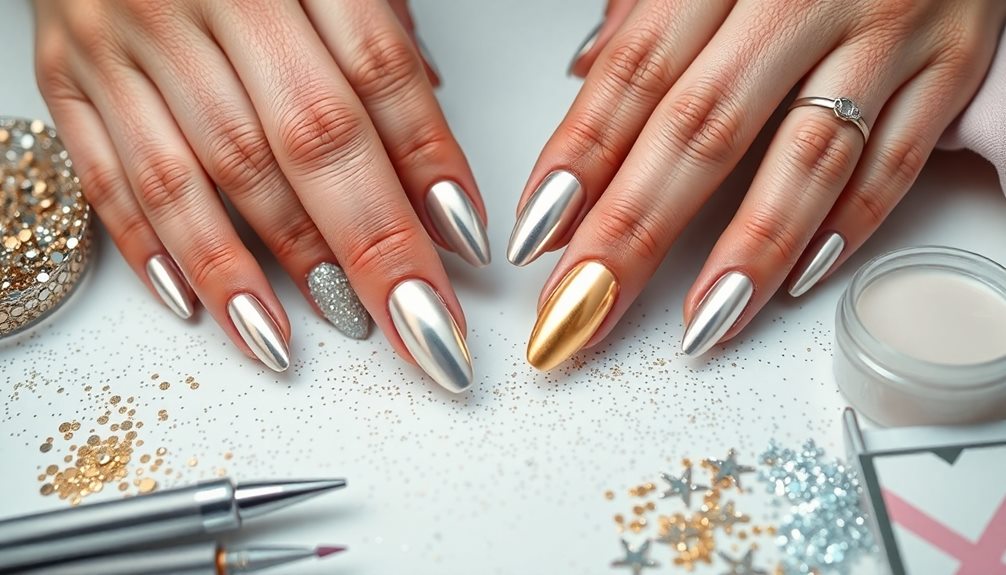
To achieve stunning chrome nails, start with a high-quality base coat. This step's super important, as it helps create a smooth surface and enhances the reflective quality of your chrome finish.
Once your base is dry, it's time to bring out the chrome powder! Use a fluffy applicator or sponge to gently rub it in, making sure you cover your nails evenly for that perfect mirror-like effect.
Next, seal your masterpiece with a no-wipe top coat. This will protect your design and keep that shiny finish intact without dulling the metallic glam.
For the best durability, consider using a UV lamp to cure your gel polishes and top coats properly, preventing any chipping so your nails look fabulous longer.
Don't forget to have fun! Try out different chrome shades or techniques, like ombre for a trendy gradient look or geometric patterns for unique nail designs that truly stand out.
With these tips and tricks, you'll rock those chrome nails with confidence and style! Happy nail designing!
Care and Maintenance
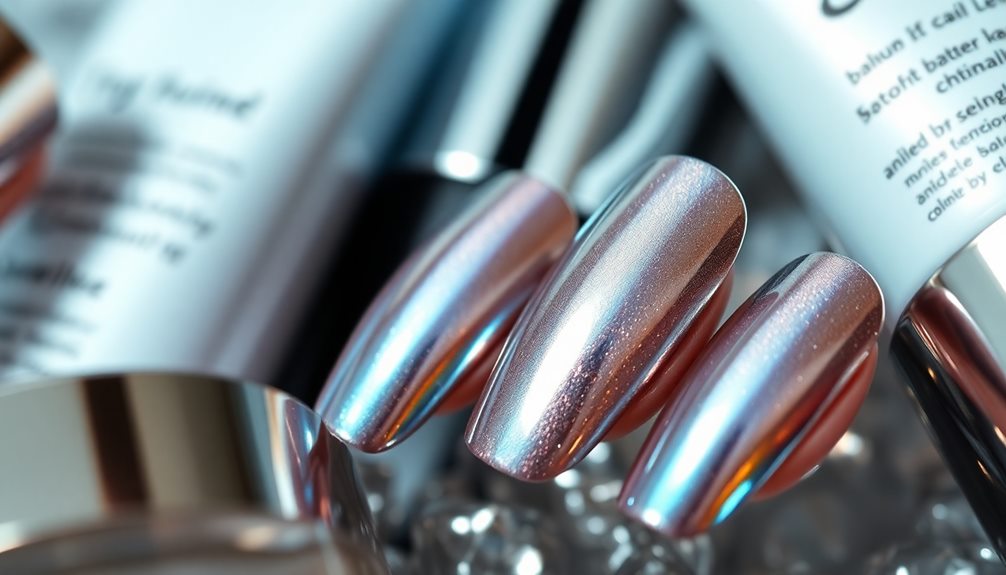
Maintaining your stunning chrome nails requires a bit of care to keep them looking fresh and vibrant. First, always apply a high-quality base coat before your chrome polish. This not only protects your natural nail but also helps the chrome finish stick better.
To keep your nails happy, remember to moisturize your cuticles regularly. This prevents dryness and brittleness, which can lead to chipping and peeling.
Be careful to avoid harsh chemicals, as they can weaken the shine of your chrome nails. If you know you'll be exposed to water for a while, don't forget to wear gloves!
Scheduling regular touch-ups or fills at the salon every two to three weeks is key. This keeps your nails looking their best and extends the longevity of chrome nails.
When it's time to remove your chrome nails, opt for the soak-off method using acetone. This method helps ensure a smooth removal process without damaging your natural nail.
Common Mistakes to Avoid
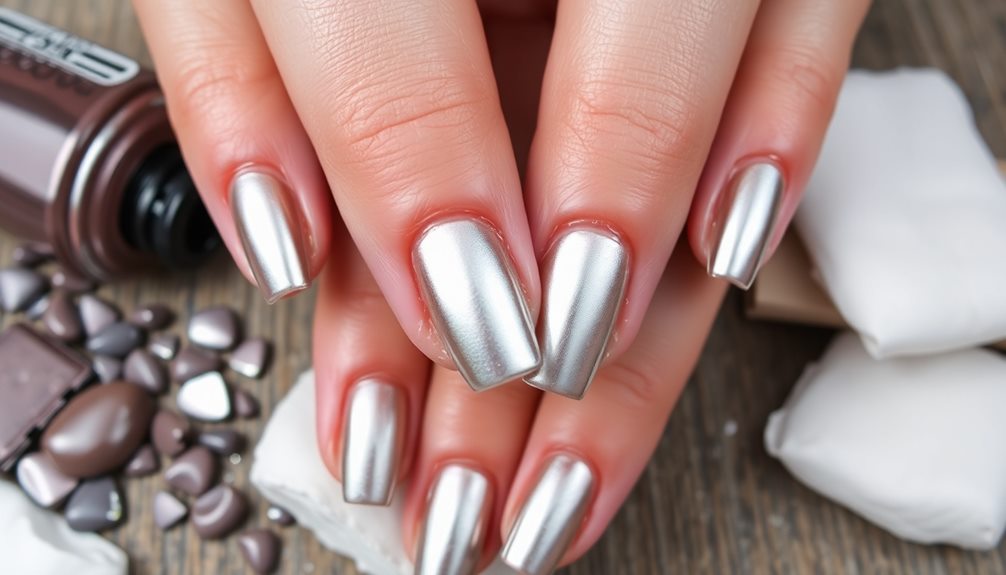
When creating the perfect chrome nail design, avoiding common mistakes can make all the difference in achieving a stunning finish. First, don't skip the base coat! It helps with adhesion and creates a smooth surface, preventing uneven application.
Next, be careful with the amount of chrome powder you use. Applying too much can make your nails thick and dull instead of shiny and reflective.
Another key point is curing time. If you don't cure the polish and topcoat for the right amount of time, your nails might feel tacky and could smudge easily. That's definitely not the look you want!
It's also important to steer clear of low-quality products. Using cheap chrome powders or gel polishes can lead to poor pigmentation and quick chipping, which will ruin your manicure's glamour.
Frequently Asked Questions
Can Chrome Nails Be Done at Home or Only in Salons?
You can definitely do chrome nails at home! With the right tools and products, you'll achieve stunning results. Just follow tutorials, practice your technique, and you'll create a salon-worthy look in no time.
How Long Do Chrome Nails Typically Last?
Chrome nails typically last about two to three weeks, depending on your nail care routine and daily activities. Keeping them well-maintained will help extend their wear, so be sure to apply a top coat regularly.
Are Chrome Nails Safe for Natural Nails?
Yes, chrome nails can be safe for your natural nails if applied correctly. Ensure your technician uses quality products and follows proper techniques. Always give your nails time to breathe between applications for optimal health.
What Tools Are Needed for Applying Chrome Nail Polish?
To apply chrome nail polish, you'll need a base coat, chrome powder, a top coat, an applicator or sponge, and a UV or LED lamp. Make sure to have nail wipes for cleanup, too!
Can Chrome Nail Designs Be Combined With Other Nail Art Styles?
Absolutely! You can mix chrome designs with various nail art styles, like ombre or floral patterns. Experimenting with different techniques and colors lets you create unique, eye-catching looks that reflect your personal style.
Conclusion
So, are you ready to shine with your fabulous chrome nails? With so many fun designs and colors to choose from, you can truly express yourself! Remember to keep your nails clean and well cared for, and avoid common mistakes to make your nail art last longer. So grab your favorite chrome polish, get creative, and let your nails sparkle like the stars! You'll be turning heads and spreading smiles everywhere you go!
Khetoli is an expert in hair and nail care and brings her knowledge and creativity to Nightingale Studio. As a skilled writer, she creates informative and engaging content that covers a wide range of beauty topics. Whether you need advice on nail art, hair treatments, or overall beauty maintenance, Khetoli’s expertise ensures that our content is informative and inspiring.
Nail Tips
Nail Designs With Lines: Simple and Stylish Ideas
Nail designs with lines offer endless possibilities for creativity and style—discover how to elevate your manicure game with chic and modern ideas!
Nail designs with lines are super fun and a great way to show off your style! You can keep it simple with classic black lines on a white background, or pick pastel colors for a softer look. Don't forget about negative space—leaving parts of your nails bare looks really chic! Try mixing colors or adding geometric shapes for something new and exciting. Remember, using high-quality brushes can help you create clean lines, and a topcoat keeps your designs from chipping. There's so much more fun to discover about nail art, so let's get those creative juices flowing!
Key Takeaways
- Create classic looks with black lines on a white background for timeless elegance.
- Experiment with pastel shades and negative space techniques for a playful, modern vibe.
- Incorporate geometric patterns such as triangles and squares for a unique touch.
- Use high-quality nail art brushes and striping tape for clean, precise line work.
- Regular maintenance and touch-ups ensure your line designs remain fresh and chic.
Introduction
Nail designs with lines effortlessly fuse simplicity and elegance, making them a go-to choice for any occasion. Whether you're getting ready for a birthday party or just want to brighten your day, line nail designs can work wonders. You can create stunning looks using simple nail art techniques that anyone can master.
For example, think about using black lines on a white background for a classic look, or try pastel shades for something softer and more playful. Consider incorporating some of the latest trends, like bold colors and intricate patterns, to elevate your nail art game.
Minimalist line designs are all about using negative space, which means leaving parts of your nails bare to create a chic and modern vibe. Imagine a single line or thin stripes that stretch across your nails, giving them an elegant look without being too flashy.
You can even switch things up with seasonal inspirations, like floral lines in the spring or geometric patterns in the fall!
With a little creativity and practice, you can easily achieve these stylish designs. So grab your nail polish and let's dive into the wonderful world of line nail designs that are perfect for you!
Expresses Personal Style Effortlessly
Expression through art is one of the most rewarding aspects of personal style, and line nail designs make it easy to showcase your individuality. With simple nail designs featuring line art, you can create a canvas that reflects your personality.
Imagine clean lines and geometric shapes dancing across your nails, making them chic and understated. These designs can be enhanced by incorporating elements of creativity, similar to how arts and crafts toys encourage self-expression and fine motor skills in children. You can easily play with contrasting colors, like striking black and white or cheerful pastels, to create bold statements that stand out.
These designs are perfect for showing off your personal creativity and can match any outfit or occasion. Want to feel extra stylish? Try using negative space techniques to elevate your nail art, giving it an artistic flair that's hard to miss!
Seasonal trends can also inspire your designs, allowing you to adapt your nails to match your mood or the latest fashion. Whether you're feeling playful or sophisticated, line nail designs offer endless possibilities for self-expression.
Popular Variations and Ideas
Exploring popular variations of line nail designs opens up a world of creativity and style. You can mix and match colors, like classic black and white for a timeless look, or go bold with bright hues and metallic colors.
Simple designs often include single lines or thin stripes, using negative space to create a modern vibe that's super elegant. For a romantic touch, consider incorporating elements like nail styles for Valentine's Day with hearts and pastel colors.
If you love shapes, try geometric patterns! You can use triangles and squares, adding overlapping lines and color blocking for a fun twist. These nail art designs not only look fantastic but also give your nails a unique flair.
French tips can also be spiced up with colorful lines, making them stand out even more!
Don't forget to consider the seasons! You could choose floral lines for spring, while darker colors work great for fall.
To achieve these stunning looks, grab high-quality nail polish, nail art brushes, and striping tape. With these tools in hand, you'll be ready to create nail designs that express your personality.
Tips and Tricks
Achieving stunning line nail designs can be a breeze with a few essential tips and tricks. First, use high-quality nail art brushes, like the Winstonia 5 pcs Nail Art Brushes Set, to create clean and precise lines. This makes all the difference in your nail art design!
Next, consider experimenting with striping tape. It helps you make sharp edges and consistent shapes, especially for geometric patterns.
Don't forget about negative space! Leaving parts of your nail's natural color can really make your designs pop. You can also use simple dotting tools to add fun little details or embellishments, giving your designs a unique touch.
If you're going for a French manicure, adding fine lines can elevate your look even more!
Care and Maintenance
Maintaining the beauty of your line nail designs requires consistent care and attention. Regular touch-ups are essential for keeping your nails looking fresh, so don't wait too long to fix any chips or wear. A steady hand will help you achieve those crisp lines when you do your touch-ups!
To promote nail health, use cuticle oil daily. It helps keep your nails moisturized and prevents dryness, which can ruin your fabulous designs. Also, be careful with harsh chemicals found in some cleaning products; they can fade and chip your lovely nail art.
Gentle filing of the edges should be part of your maintenance routine. It helps prevent chipping and breakage, so you can keep showing off your stylish nails!
Scheduling manicures every two to three weeks is a great idea, too. This way, you'll get professional touch-ups and proper care, ensuring your line designs stay beautiful and intact.
Lastly, don't forget to apply a good base coat before starting your designs. It helps your nail art last longer! With a bit of effort and love, your line nail designs will shine bright!
Common Mistakes to Avoid
When creating stunning line nail designs, avoiding common pitfalls can make all the difference in achieving a professional look. First, always let each layer of polish dry completely before adding more. If you skip this step, your designs might smudge, leaving you with a messy finish.
Also, don't forget to apply a topcoat! It protects your art from chipping and keeps those lines looking shiny and fresh.
Using quality tools is essential, too. A nail artist's best friend is a thin brush for painting straight lines. Low-quality brushes can lead to wobbly designs that don't look as neat.
Additionally, prep your nails properly! This includes caring for your cuticles and cleaning your nail surface to ensure the polish adheres well.
Be careful not to overload your brush with too much polish; instead, use a light hand for a more controlled application. Thick lines can take forever to dry and may not look as polished.
Frequently Asked Questions
What Nail Design Is Trending Right Now?
Right now, you're seeing minimalist nail designs with clean lines and negative space everywhere. Abstract patterns, soft pastels, and playful early 2000s motifs are particularly popular, reflecting both sophistication and artistic expression in today's nail art trends.
What Are the 5 Basic Nail Art Designs?
You're exploring basic nail art designs, and here are five: the classic French manicure, playful polka dots, chic stripes, modern negative space, and delicate floral lines. Each offers unique styles for your creativity to shine!
What Nail Designs Make Them Look Longer?
To make your nails look longer, try vertical lines or thin geometric patterns. Using a light base with darker accents, or opting for elongated French tips, can enhance their appearance and add elegance to your style.
How to Do Checkered Nails?
To do checkered nails, start with a base coat. Use striping tape to create a grid, paint contrasting colors, then remove the tape. Finish with a top coat for shine and durability. Enjoy your stylish look!
Conclusion
Now that you've learned about fun nail designs with lines, you can show off your unique style! Whether you choose simple stripes or playful patterns, the possibilities are endless. Remember, practice makes perfect, and don't be afraid to experiment with colors and shapes. Keep your nails clean and healthy, and you'll always be ready to dazzle. So grab your nail polish, unleash your creativity, and let your fingers do the talking! Happy designing!
Khetoli is an expert in hair and nail care and brings her knowledge and creativity to Nightingale Studio. As a skilled writer, she creates informative and engaging content that covers a wide range of beauty topics. Whether you need advice on nail art, hair treatments, or overall beauty maintenance, Khetoli’s expertise ensures that our content is informative and inspiring.
Nail Tips
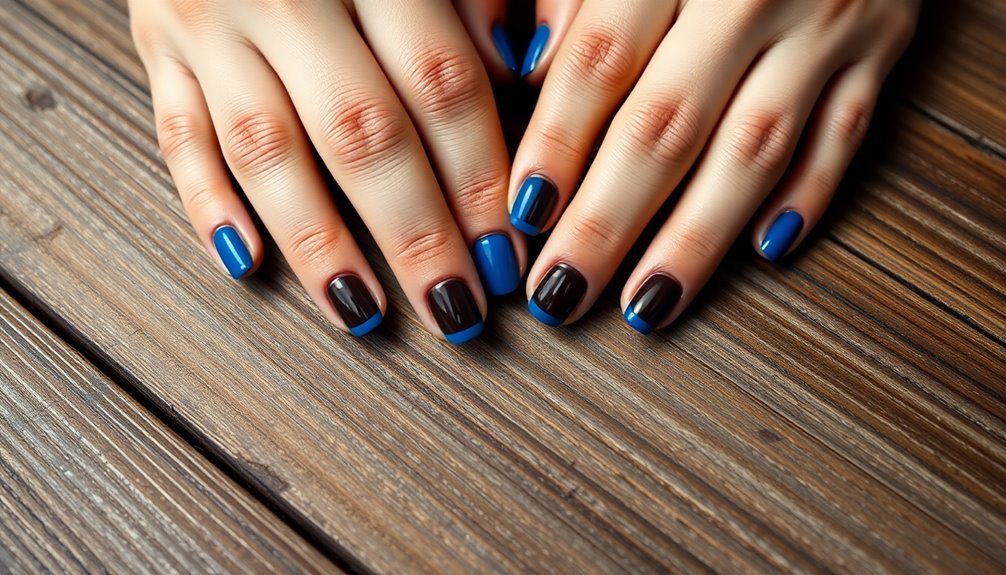
Blue and Silver Nail Designs for a Frosty, Elegant Look
Master the art of winter elegance with stunning blue and silver nail designs that will leave everyone curious about your next creative twist!
If you want frosty, elegant nails, blue and silver are the perfect combo! Consider icy blue shades with shimmering silver snowflakes for a festive vibe, or try an ombre that blends deep navy into silver glitter—how cool is that? You could even go for romantic hearts in these colors or sleek silver stripes on a blue base. Don't forget to apply a base coat to keep your nails healthy and a top coat for that shiny finish! By experimenting with different designs, your nails will turn heads this winter! There's so much more to explore, so keep that creativity flowing!
Key Takeaways
- Blue and silver nail designs evoke a frosty elegance, perfect for winter occasions and festive celebrations.
- Ombre effects transitioning from deep navy to shimmering silver create visually striking and sophisticated looks.
- Incorporate intricate designs like snowflakes or hearts to enhance the festive theme and add romantic flair.
- Use chrome finishes and glitter accents for a chic, modern touch that elevates any nail art.
- Regular nail care, such as applying a base coat and top coat, ensures long-lasting beauty and prevents damage.
Introduction
When you're looking to capture the essence of winter, nail designs featuring blue and silver can create that frosty look you crave. Imagine your nails sparkling with the elegance of silver and the calmness of blue, just like a snowy winter day!
These colors blend beautifully, and they're perfect for getting into the seasonal spirit. Incorporating elements like educational toys can also inspire creativity in other areas of your life, such as nail art. You can try intricate designs like delicate snowflakes that dance across your nails or use an ombre effect to smoothly transition from a deep navy to sparkling silver.
This combination not only looks stunning but also adds a festive touch to any winter-themed event. You might want to explore using chrome finishes or glittery accents to really make your nail art pop!
Social media platforms, like Instagram, are full of amazing blue and silver nail art inspirations, making it super easy to find ideas that suit your style. Whether you prefer a bold cobalt blue or a soft icy hue, there's a design for everyone.
Seasonal Color Trend Appeal
As winter approaches, the seasonal color trends of blue and silver nail designs become increasingly appealing. You'll find that these colors evoke a frosty elegance, making them perfect for winter-themed occasions, like holiday parties and cozy gatherings.
Blue, symbolizing calmness, pairs beautifully with silver, which adds a touch of sophistication. This combination creates a balanced and visually stunning look that works for everyone! Additionally, just like how chia seeds support digestive health, these nail designs can boost your confidence and enhance your style.
When you think about blue nail designs, consider trying deep shades of blue, like navy or cobalt. These colors, when combined with shiny silver accents, can enhance your festive style.
Want to take it up a notch? Techniques like ombre effects, where colors blend seamlessly, and glitter application can make your nails really pop!
You can choose simple designs, like minimalistic silver stripes, or go bold with intricate nail art that showcases your personality. Whether you're feeling creative or just want a chic look, blue and silver designs cater to all preferences.
Popular Variations and Ideas
There are countless ways to elevate your blue and silver nail designs, making them truly unique and eye-catching. One popular choice is combining icy blues with silver snowflakes, creating a perfect winter nails theme that's super festive!
You might also love the ombre effect, where light blue blends beautifully into silver glitter at the tips. This dreamy look suits both casual days and fancy nights. For a touch of romance, consider incorporating romantic designs featuring hearts in similar hues, as seen in nail styles for Valentine's Day.
If you want something elegant, consider dark blue paired with shiny chrome silver accents. This sophisticated combo is just right for evening outings and special events.
For those who appreciate detailed artwork, textured designs featuring knitted patterns in shades of blue with silver accents can add a cozy vibe to your blue manicure.
For a simpler style, you can't go wrong with simple blue nails adorned with metallic silver stripes or fun polka dots. This minimalist approach is versatile, making it perfect for everyday wear or stylish outings.
Each of these ideas showcases the beauty of blue nail polish and silver nail accents, allowing you to express your personality while staying on-trend. So, grab your supplies and get creative!
Tips and Tricks
To make the most of those stunning blue and silver nail designs, mastering a few tips and tricks can make all the difference.
First, experiment with different shades like deep blue and silver chrome to create a sophisticated, elegant look that's perfect for winter. You can also play around with ombre effects and negative space designs to give your nails a unique twist!
Adding glitter or metallic accents will make the silver pop against the blue base, so don't be shy! To keep your designs looking fresh and fabulous, always apply a top coat. This protects your artwork and extends its life.
For intricate patterns, precision tools like dotting pens and nail tape are your best friends. Nail tape helps you create clean lines and shapes, while dotting pens let you add fun details easily.
Care and Maintenance
Proper care and maintenance are essential for keeping your frosty blue and silver nail designs looking their best. Start with a good base coat; it's your shield against staining, especially when using dark blue shades or sparkly silver. This step is super important!
Next, always apply a top coat. It helps your designs last longer and keeps them shiny and beautiful. To maintain that lovely shine, you can reapply a top coat every few days, especially if you notice any dull spots.
Don't forget about your nails and cuticles! Keeping them moisturized with cuticle oil or hand cream is key to preventing dryness. Dry nails can peel, which isn't what you want for your frosty look!
When it's time to remove your nail polish, use an acetone-based remover, especially for gel or glitter polishes. It'll dissolve the products without hurting your natural nails.
With these simple nail care tips, you'll enjoy stunning blue and silver designs for longer. Remember, a little maintenance goes a long way in making your nails shine like the frosty winter! Enjoy showing off your fabulous nails!
Common Mistakes to Avoid
Maintaining your frosty nail designs is just as important as avoiding common mistakes that can compromise their beauty.
First, don't overload your nails with too much glitter! While glitter adds sparkle, too much can create a chaotic look. Aim for balance and use accents sparingly.
Next, always apply a base coat. Skipping this step can lead to staining and damage, which isn't good for nail health.
When applying nail polish, remember to use thin, even coats. Thick layers can cause uneven drying, resulting in smudges that ruin your clean look.
Once you're happy with your designs, don't forget the top coat to seal everything in! This step is crucial for keeping your manicure chip-free and shiny for longer.
Lastly, proper nail preparation is key. Clean and buff your nails before starting; this helps the polish stick better and gives you that polished appearance you want.
Frequently Asked Questions
Is Blue a Classy Nail Color?
Absolutely, blue's a classy nail color! Its calming tones and versatility suit any occasion, whether formal or casual. Pair it with silver for a luxurious touch, elevating your style to sophisticated elegance. You won't regret it!
What Color Nails to Wear With a White Dress?
When choosing nail colors for a white dress, consider shades like light pink, nude, or classic red. Each color enhances your outfit, creating a stylish contrast that showcases your overall look beautifully.
Is Blue Nail Polish Still Popular?
Yes, blue nail polish is still popular! You'll find a variety of shades, from pastel to deep navy, appealing to different styles. It's versatile and perfect for any occasion, ensuring it remains a favorite choice.
Are Navy Blue Nails in Style?
Yes, navy blue nails are definitely in style! You'll find them trending during the fall and winter seasons, and they pair beautifully with metallics, making your manicure both elegant and sophisticated for any occasion.
Conclusion
Now that you know how to create stunning blue and silver nail designs, it's time to get creative! Whether you're going for a frosty look or something more glamorous, these tips will help your nails shine bright. Remember to take care of your nails and avoid common mistakes, like rushing the drying time. So, grab those polishes, invite your friends over, and have a fun nail art day! Your elegant nails will be the talk of the town!
Khetoli is an expert in hair and nail care and brings her knowledge and creativity to Nightingale Studio. As a skilled writer, she creates informative and engaging content that covers a wide range of beauty topics. Whether you need advice on nail art, hair treatments, or overall beauty maintenance, Khetoli’s expertise ensures that our content is informative and inspiring.
Nail Tips
Seashell Nails That Bring the Beach to Your Fingertips
Perfectly designed seashell nails capture the essence of the beach—discover techniques and tips to create your own stunning coastal-inspired manicure!
Seashell nails are the perfect way to bring the beach to your fingertips! They capture vibrant ocean hues and intricate patterns reminiscent of real seashells. You can experiment with techniques like water marbling, stamping, or freehand painting to create stunning designs that reflect coastal beauty. To enhance these looks, layer pastel shades, ocean blues, or metallics for added shimmer. Remember to start with a high-quality base coat to protect your nails and maintain their health. By exploring different color palettes and textures, you can create a unique, beachy vibe that's all your own. There's much more to explore about this trend!
Key Takeaways
- Seashell nails use vibrant colors and intricate patterns to mimic the beauty of ocean-inspired designs, perfect for beach lovers.
- Techniques like water marbling and freehand painting create stunning textures that resemble real seashells, enhancing the overall aesthetic.
- Color palettes incorporating pastel shades, ocean blues, and metallics evoke beach vibes, allowing for personalized and seasonal designs.
- Incorporating 3D elements like pearls and rhinestones adds dimension to seashell nails, making them visually captivating and unique.
- Proper nail care, including a quality base coat and cuticle oil, ensures lasting beauty and health for your seashell-inspired manicure.
Introduction
Seashell nails are a stunning way to bring a touch of the ocean to your manicure. This nail design captures the essence of beach vibes, allowing you to showcase your love for the sea right on your fingertips. By incorporating various seashell designs and shapes, you can enhance the oceanic aesthetics of your nails.
To create beautiful seashell nails, you can experiment with popular techniques like water marbling, stamping, and freehand painting. These methods offer a range of artistic expressions, ensuring your ocean nails are uniquely yours.
Color palettes often feature pastel shades, ocean blues, and metallics, reflecting the soothing hues of the beach. Adding 3D elements like pearls and rhinestones can elevate your seashell nail art, introducing texture and dimension that make your design visually striking.
Seasonal trends can also guide your choices; for instance, summer seashell nails may burst with vibrant colors and playful motifs, while fall designs might embrace more earthy tones.
Whether you're heading to the beach or just want to channel those vibes, seashell nails are an ideal way to express your style and creativity. Get ready to dive into the world of ocean-inspired nail art!
Nail Art in Coastal Communities
Nail art in coastal communities reflects the vibrant culture and natural beauty of the ocean. In these seaside areas, you'll find unique nail designs that incorporate local marine life, like shells and starfish. Nail artists draw inspiration from their stunning surroundings, creating beach nails that capture the essence of sandy textures and iridescent finishes reminiscent of seashells.
Many nail salons specialize in beach-themed services, using colors and motifs that resonate with the ocean environment. Whether it's soft blues, sandy beiges, or vibrant corals, these designs make a statement.
Seasonal events and festivals often prompt themed nail art, giving you the chance to express your love for the beach through creative and colorful designs.
Social media plays a significant role in this nail art culture, as local enthusiasts share their seashell nails and inspire one another. This sense of community fosters creativity and innovation among nail artists, making coastal nail designs a dynamic aspect of local culture.
Seashells Inspire Unique Nail Designs
Inspired by the beauty of the ocean, unique nail designs featuring seashells capture the imagination and creativity of artists. Seashell nails are perfect for embracing summer vibes, showcasing intricate patterns that reflect the colors and textures of the beach.
You can choose from various shapes and hues, using pastels to evoke a soft, beachy aesthetic or vibrant colors to make a bold statement. Popular techniques like freehand painting, stamping, and water marbling allow you to create stunning seashell motifs that stand out.
Consider adding 3D elements such as pearls and tiny shells to your nail art for an extra whimsical touch. These elements not only enhance texture but also bring your ocean vibes to life.
When it comes to color palettes, think ocean blues, sandy neutrals, and coral hues that mirror the vibrant scenery of the coast. While summer nails often burst with bright colors and playful patterns, you might find that fall designs lean toward earthy tones with subtle shell accents.
Whatever the season, seashell-inspired nail art offers a delightful way to celebrate the beauty of the ocean at your fingertips.
Use a Base Coat
Often overlooked, using a base coat is essential for achieving stunning seashell nail designs. A base coat acts as a protective barrier between your natural nails and the pigments in colored polishes, preventing staining and damage. This step is crucial for maintaining nail health, as it helps keep your nails looking their best.
Applying a base coat enhances the adhesion of the nail polish, ensuring that your seashell designs stay vibrant and last longer. Without it, you risk chipping and wear, which can ruin your beautiful beach-inspired art.
The base coat also smooths out imperfections on your nail surface, providing a more even application of color for your nail art. Many base coats are infused with nourishing ingredients like vitamins and minerals, contributing to overall nail health and strength.
Nail Care Tips for Longevity
How can you ensure your seashell nails remain stunning for as long as possible? Start with nail care tips that focus on protection and hydration.
Always apply a high-quality base coat before your polish. This step not only protects your nails from staining but also enhances the longevity of your manicure, allowing your seashell designs to shine for days. Additionally, keeping your nails healthy can be supported by a balanced diet that includes nutritional choices like fruits and grains, which are essential for overall nail health. A diet rich in calcium and vitamins can also contribute to stronger nails, as protein intake plays a crucial role in nail growth.
After applying your nail art, don't forget to seal it with a top coat. This protective layer adds a beautiful shine while preventing chipping or peeling, keeping your nails looking fresh and vibrant.
To maintain the health of your nails, regularly use a moisturizing cuticle oil. This keeps your nails and surrounding skin hydrated, preventing dryness and brittleness that can lead to unsightly splits or breaks. It's also important to monitor for signs of health issues that could impact your nail condition.
It's also crucial to avoid prolonged exposure to water and harsh chemicals, as these can weaken the nail structure and cause your designs to fade or lift. Additionally, consider incorporating nourishing ingredients like oils or vitamins into your nail care routine for enhanced protection and strength.
Pros and Cons of Seashell Nails
Seashell nails bring a vibrant, beachy flair to your look, but like any nail art, they come with their own set of advantages and disadvantages.
On the plus side, these stunning designs often feature intricate patterns and bright colors, making them perfect for summer nail inspo. You can customize your seashell nails with various techniques like water marbling or freehand painting, allowing for unique personal expression that reflects your style.
However, there are some downsides to consider. The application of 3D elements, such as shells and pearls, can increase both the time and cost of your nail services compared to simpler nail ideas. Additionally, these embellishments might add extra weight to your nails, leading to potential chipping or peeling if they're not properly maintained.
Despite these challenges, seashell nails enhance the appearance of both short and long nail shapes, offering versatility for different personal preferences.
If you love a fun, beach-inspired look and are willing to invest a bit more time and care, seashell nails could be the perfect choice for your next nail art adventure!
Seashell-Inspired Color Palettes
Bright and inviting, seashell-inspired color palettes capture the essence of coastal beauty and bring a refreshing vibe to your nail art. To create stunning seashell nails, consider using oceanic shades like aqua and turquoise, which evoke the soothing feel of the sea. These colors not only calm the senses but also provide a perfect backdrop for showcasing intricate designs.
To add a tropical touch, incorporate coral tones and peach hues that reflect beach sunsets. These warm colors create a vibrant contrast against cooler shades and enhance the overall aesthetic. For a balanced look, soft whites and creams can mimic sandy beaches and ocean foam, serving as neutral bases that allow your seashell art to shine.
If you're aiming for drama, deep blues and greens can emphasize the intricate patterns of your seashell nails, making them pop. Finally, don't forget to use metallic hues like gold and silver to reflect sunlight, adding an elegant shimmer that captures the essence of beach vibes.
With these color palettes, your nails will truly embody the beauty of the ocean, making every gesture feel like a day at the beach.
Seashells: Nature's Nail Inspiration
Drawing inspiration from the vibrant colors and intricate patterns of seashells can elevate your nail art to a new level. Seashells come in countless shapes, sizes, and hues, making them a versatile source for creating stunning seashell nails that embody the essence of the beach.
By using pastel colors like soft pinks, blues, and corals, you can evoke a serene beach vibe that instantly transports you to a coastal paradise.
Incorporating 3D nail art techniques allows you to mimic the natural textures of seashells, bringing your designs to life with realistic details. Consider adding embellishments like pearls and glitter to simulate the sparkling sunlight on ocean waves, enhancing the overall aesthetic of your nail art.
Don't forget to explore various techniques, such as airbrushing and freehand painting, to create unique seashell designs that reflect your individual creativity.
Whether you want a subtle nod to the beach or a bold seashell statement, your nails can be a canvas for ocean-inspired art. With these ideas, you'll surely create seashell nails that capture the beauty of nature and the spirit of the sea.
Frequently Asked Questions
What Is a Sea Nail?
A sea nail is a nail design inspired by ocean elements. You'll see seashells, starfish, and marine colors, often created using techniques like stamping or freehand painting, bringing a beachy vibe to your manicure.
What Does Putting Nail Polish on Seashells Do?
Putting nail polish on seashells enhances their beauty with a glossy finish and vibrant colors. It also protects them from damage, creates unique effects, and helps bond them in crafts, expanding their decorative possibilities.
What Are Mermaid Fingernails?
Mermaid fingernails are vibrant, ocean-inspired designs that feature shades like teal and coral. You'll see iridescent finishes, glitter, and 3D embellishments such as pearls or starfish, making them perfect for a playful summer look.
What Nails to Wear on Tropical Vacation 2024?
For your tropical vacation in 2024, choose vibrant neon colors or soft pastel seashell designs. Ombre effects mimicking sunsets and textured nail art with 3D elements will keep your manicure stylish and fun while you relax.
Ken is our in-house hair expert, committed to sharing his knowledge and passion for hairstyling with our audience. With a sharp eye for trends and techniques, Ken offers insightful articles, tips, and tutorials to help our visitors achieve their desired hair looks. Whether you’re looking to master the latest hairstyle or learn how to care for your locks, Ken’s expertise will guide you every step of the way.
-
Entertainment News3 months ago
Cristiano Ronaldo’s Net Worth: How Much Is the Football Superstar Worth?
-
Entertainment News3 months ago
Net Worth of Michael Corleone Blanco: Inside the Real-Life Narco Empire!
-
Entertainment News3 months ago
James Best Net Worth: How Much Was He Worth at His Peak?
-
Entertainment News3 months ago
Pete Best Net Worth in 2023: How Much Is the Former Beatle Worth Now?
-
Entertainment News2 months ago
What Is Shahid Anwar’s Net Worth? The Story Behind His Financial Success!
-
Entertainment News3 months ago
Selena Gomez Vs Justin Bieber: Who Has the Higher Net Worth?
-
Nail Tips2 months ago
2025 Nail Colors by Month: Stay Trendy All Year Long!
-
Entertainment News3 months ago
Highest Net Worth Reggaeton Artist: Who’s the King of Latin Music Money?