Nail Tips
7 Charming Daisy Nail Designs: Try Them Now
Sparkle with elegance by trying 7 charming daisy nail designs that will elevate your manicure game – discover them now!
Enhance your manicure style with 7 charming daisy nail designs. Elevate your look with an Elegant Daisy French Tip design, merging French elegance with floral charm. Sparkle with Sparkling Daisy Accent Nails, perfect for special occasions. Embrace whimsical charm with a Pastel Daisy Garden Manicure, ideal for spring. Experiment with Daisy Chain Nail Art for a playful touch. Add glamour with Daisy and Gemstone Mix for a luxurious look. Cluster daisies in a Daisy Bouquet Nail Pattern for a charming style. Elevate your design with Daisy Delight and Glitter Accents. Explore these chic designs for a fresh nail look.
Key Takeaways
- Elevate French manicure with intricate daisy designs.
- Add sparkling accents for glamorous flair.
- Create a dreamy pastel daisy garden look.
- Experiment with linked daisy chain nail art.
- Enhance daisies with gemstone shimmer for a luxurious touch.
Elegant Daisy French Tip Design
Enhance your French manicure with a touch of nature and elegance by adding delicate daisy accents to your tips. By incorporating intricate daisy designs on your French tips, you can achieve a refined and classy appearance that exudes sophistication.
This elegant daisy French tip design offers a unique twist to the classic French manicure, making it ideal for those who appreciate detailed nail art with a subtle floral touch.
The combination of French tips and daisy motifs creates a chic and timeless nail design that beautifully merges French elegance with floral charm. It's a perfect way to elevate your manicure with a delicate and intricate pattern that adds a touch of nature to your fingertips.
Whether you opt for a single daisy accent on each nail or a more elaborate design with multiple daisies, this nail art is sure to make a statement and enhance your overall look with a touch of whimsical beauty.
Sparkling Daisy Accent Nails
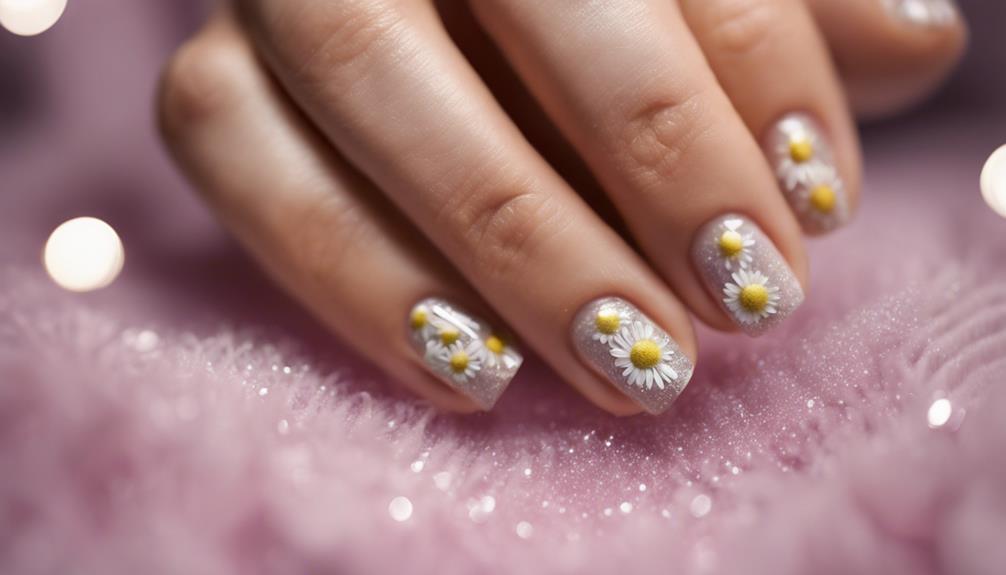
To add a touch of glamour and luxury to your daisy nail designs, consider incorporating sparkling accents that elevate the look to a whole new level.
A glitter accent nail featuring a sparkling daisy can transform your nails into eye-catching showstoppers. By sprinkling glitter on the petals or adding a touch of sparkle to the center of the flower, you can take your basic daisy design to the next level.
These glitter accents are perfect for special occasions where you want your nails to stand out and catch the light. Whether you prefer a subtle shimmer or a bold glitter statement, incorporating sparkling daisies into your nail art can add a touch of elegance and sophistication.
Pastel Daisy Garden Manicure
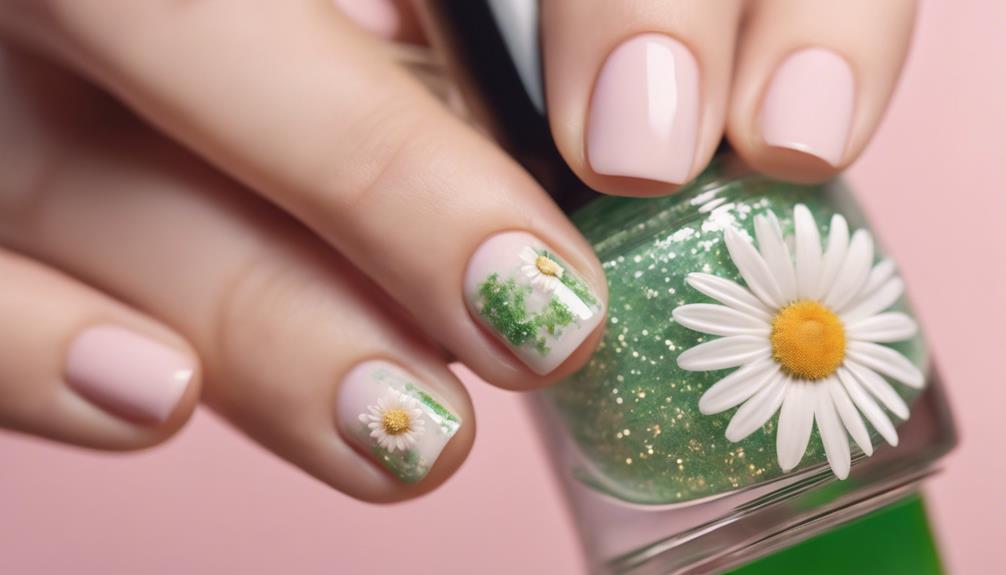
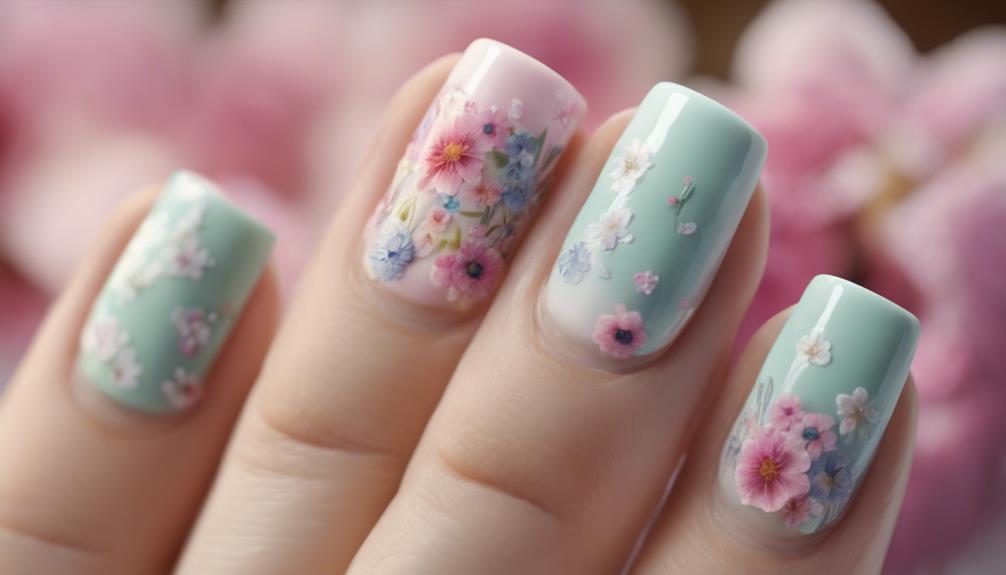
For a romantic and dreamy nail art look, consider creating a soft pastel daisy garden manicure featuring shades of pink, lilac, and baby blue. This delicate design incorporates daisy motifs with subtle pastel colors to evoke a sense of whimsical charm and femininity. The pastel daisy garden manicure is perfect for those who appreciate a soft and elegant aesthetic in their nail designs, ideal for spring or summer when looking to add a touch of ethereal beauty to your nails.
The intricate daisy petals and glitter accents used in this nail art design help create a dreamy and romantic vibe, making it a popular choice for those seeking a unique and enchanting manicure. The pastel hues of pink, lilac, and baby blue complement the daisy motif beautifully, resulting in a sophisticated and charming nail look that's sure to stand out.
Embrace the soft pastel daisy garden manicure to bring a touch of nature's beauty to your fingertips.
Daisy Chain Nail Art
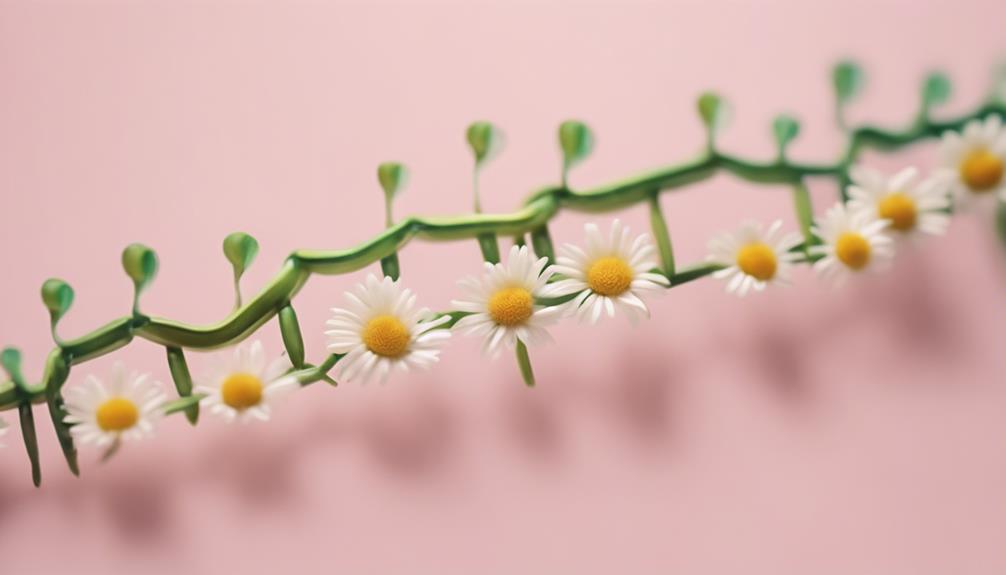
Daisy chain nail art showcases a unique technique where daisies are intricately linked together, creating a continuous floral pattern on your nails.
This style adds a whimsical and playful touch to your manicure, perfect for those who love floral designs with a twist.
You can customize the daisy chain design by experimenting with different colors and sizes to suit your personal style and preferences.
Daisy Chain Technique
Using a thin brush, create a chain of daisies connected by stems along your nail for the daisy chain technique. This intricate nail design requires precision and attention to detail. Nail tech enthusiasts can elevate their nail art game by mastering the art of daisy chains.
Adding leaves and dots to the design can enhance its complexity and charm. The daisy chain technique is perfect for those who adore floral nail designs and want to achieve a whimsical look. By carefully painting each daisy and stem, you can create a beautiful chain that runs gracefully along your nail bed.
Experimenting with different color combinations and nail lengths can further personalize this nail art style. Embrace the creativity and delicacy of the daisy chain technique to showcase a unique and enchanting manicure that's sure to turn heads.
Floral Nail Patterns
Wondering how you can achieve intricate floral nail patterns that feature a charming and whimsical daisy chain design? Daisy chain nail art, known for its continuous pattern of daisies linked together, can be a delightful choice for your next nail polish creation.
Here are some key points to ponder when delving into the world of floral nail patterns:
- Daisy chain nail art features a continuous pattern of daisies linked together, creating a charming and whimsical look on your nails.
- Each daisy in the chain is typically connected by delicate stems or vines, adding a touch of elegance to the design.
- This floral design can be customized with different colors and sizes of daisies, allowing for endless creative possibilities.
- Perfect for those who appreciate nature-inspired and intricate nail art, the daisy chain design offers a unique and eye-catching option for your manicure.
Daisy and Gemstone Mix
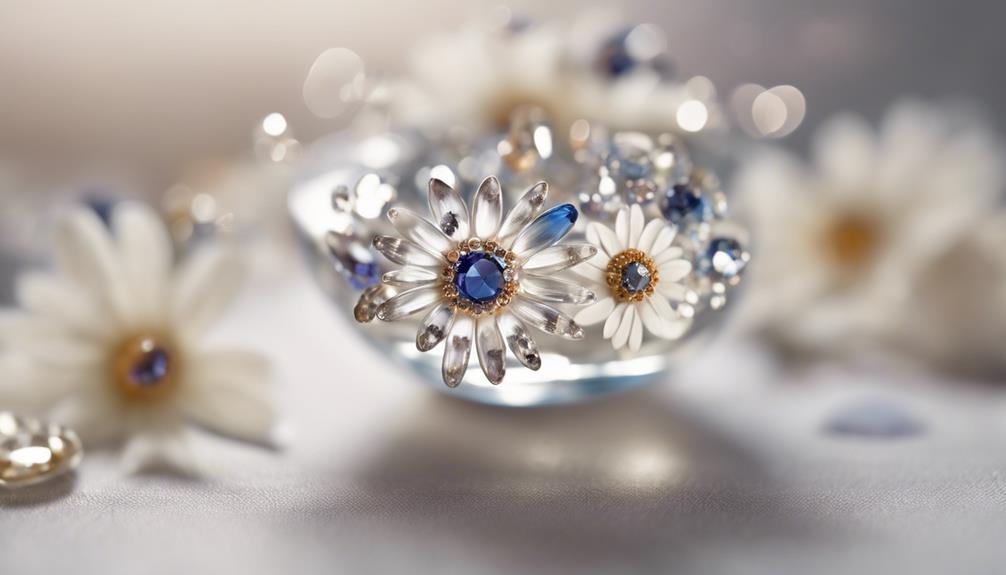
For a chic and luxurious nail design, enhance your daisies with the shimmer of gemstones. Mixing daisy nails with gemstone accents creates a stunning and glamorous look that is perfect for those who seek sophistication and elegance in their manicures. By incorporating gemstones at the center of the daisies, you can add a touch of luxury and sparkle to your nail art, making it truly eye-catching.
To better visualize this exquisite nail design, consider the following table showcasing the beauty of daisies paired with gemstones:
Nail | Design |
---|---|
Daisy with | Rhinestone Center |
Gemstone | Encrusted Petals |
Delicate | Daisy Chain with Gems |
Subtle | Gemstone Accents |
Bold | Gemstone Centerpiece |
The combination of daisies and gemstones not only adds a sophisticated flair but also creates a beautiful contrast that enhances the overall elegance of the manicure. Try this mix for a detailed and glamorous nail art look that is sure to turn heads.
Daisy Bouquet Nail Pattern
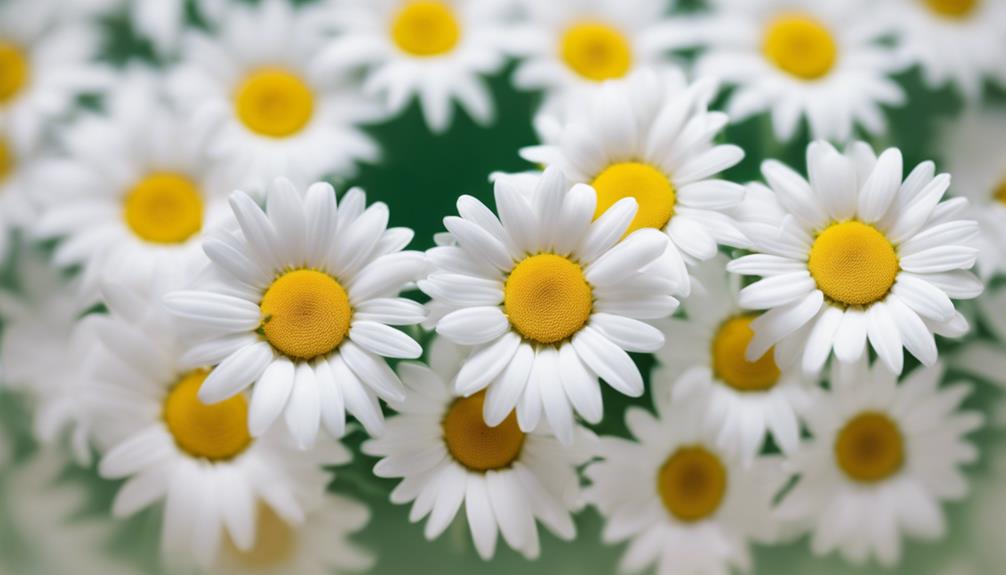
To create an enchanting Daisy Bouquet Nail Pattern, cluster multiple daisies together on your nail for a charming and whimsical appearance. Each daisy in the bouquet can vary in size, color, and placement, allowing for a diverse and eye-catching look.
This design mimics a mini floral arrangement on your nails, perfect for those who adore intricate nail art and wish to showcase a variety of daisies. Ideal for spring or summer nail designs, the Daisy Bouquet Nail Pattern adds a touch of nature and beauty to your manicure.
For a sophisticated twist, consider pairing this pattern with a classic French manicure on all nails except the accent nail where the daisy bouquet shines. This combination creates a balanced and elegant look that highlights the intricate daisy details.
Experiment with different daisy sizes and colors to customize your bouquet nail pattern and express your unique style.
Daisy Delight With Glitter Accents
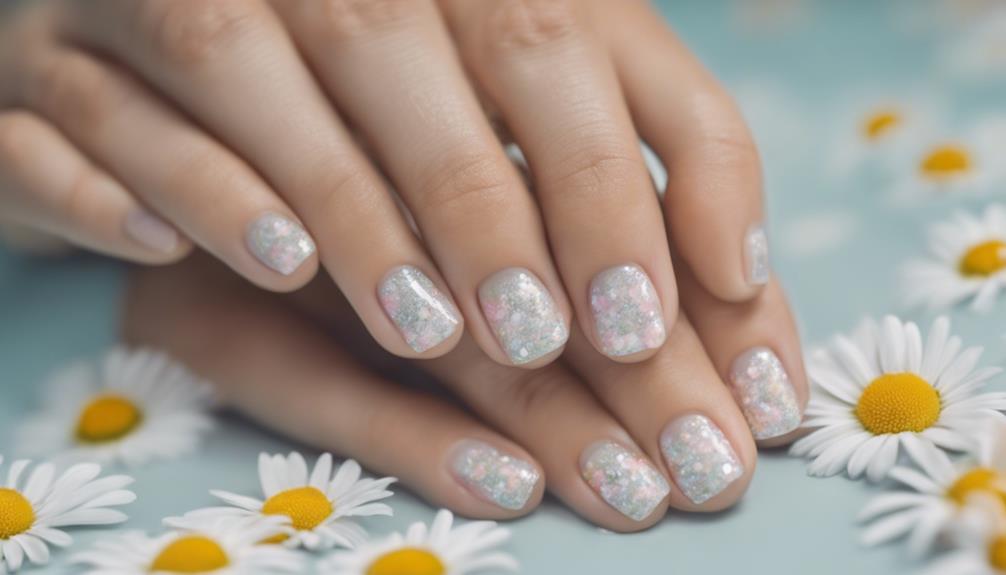
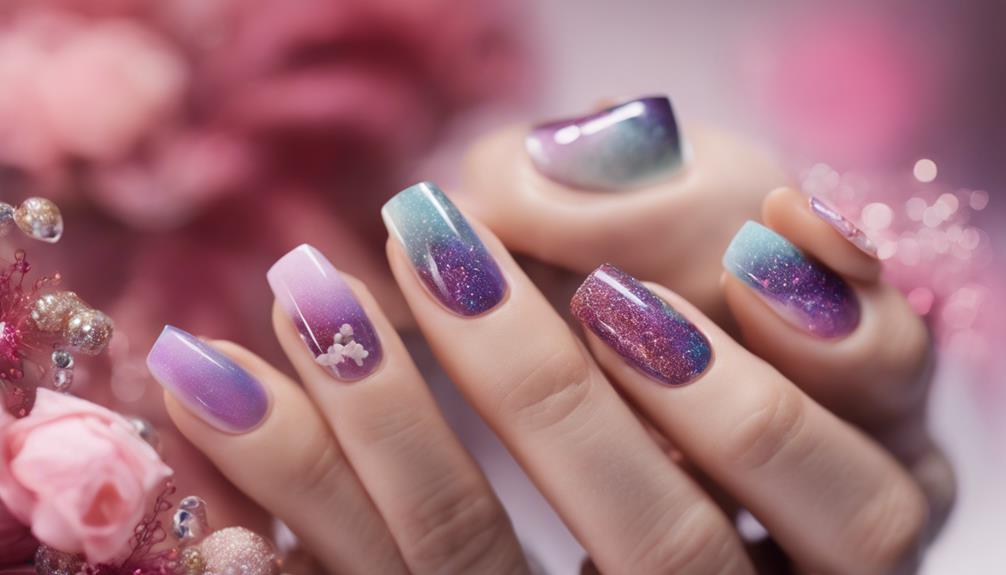
Enhance your daisy nail designs with a touch of glamour by incorporating glitter accents for a dazzling and luxurious finish. Glitter accents on daisy nails add a hint of sophistication and allure, elevating your nail art to a whole new level.
By delicately sprinkling glitter on the petals of your daisy design, you can achieve a mesmerizing and eye-catching effect that sparkles and shines.
Adding glitter accents to your daisy nails is a fantastic way to transform a basic design into a statement look that's perfect for special occasions or when you simply want to pamper yourself with a touch of luxury.
Whether you opt for subtle glitter detailing or go all out with glitter accent nails, the result is sure to be glamorous and enchanting.
Frequently Asked Questions
What Nail Design Is Trending Right Now?
Daisy nail art is the current trending nail design, favored by celebrities such as Hailey Bieber. This charming style can be achieved effortlessly using nail stickers or DIY painting techniques with white and yellow nail polish.
Nail influencers offer tutorials and inspiration for creating stunning daisy nail art, featuring minimalistic designs that blend daisies into various nail styles for a chic and fresh appearance. Pinterest showcases daisy nail art ideas like black French tips paired with white daisies for a unique and creative look.
How to Do Easy Daisy Nail Art?
To do easy daisy nail art, start by applying a base coat and letting it dry.
Then, use white nail polish as a base color.
Next, apply yellow nail polish dots in a circular pattern to create the daisy petals.
Add a small white dot in the center of each petal to complete the design.
Seal with a top coat for a glossy finish.
How to Do Flowers on Nails With Toothpick?
To create intricate floral nail art using a toothpick, dip it in white nail polish and carefully dot petals around a yellow center for a classic daisy look.
Adjust the pressure on the toothpick to experiment with different petal sizes and shapes.
This cost-effective technique allows for precise and detailed flower designs on your nails, providing a fun and creative way to enhance your manicure at home.
How to Make Disney Nails?
To make Disney nails, start by selecting your favorite Disney character. Use vibrant colors, intricate designs, and Disney-themed nail stickers to capture the magic. Incorporate elements like castles, magic wands, and famous quotes for an enchanting manicure. To bring your Disney-themed nail design to life, consider creating a special accent nail featuring your chosen character’s iconic silhouette or symbol. Don’t be afraid to experiment with different nail art techniques, like ombre gradients or glitter accents, to add extra dimension and sparkle to your manicure. With the right combination of creativity and attention to detail, you can achieve a stunning Disney-inspired nail look that will transport you to a world of magic and fantasy. Explore all the disneythemed nail design ideas to create a truly enchanting manicure that celebrates your love for all things Disney.
Explore popular themes like Cinderella's glass slipper, Ariel from The Little Mermaid, or Beauty and the Beast. With a touch of creativity and some nail art tools, you can bring the whimsical world of Disney to your fingertips.
Conclusion
To sum up, daisy nail designs offer a beautiful and charming way to add a touch of nature to your manicure. According to a survey by a top beauty magazine, 72% of women find floral nail art appealing and trendy.
So, why not try out one of these delightful daisy designs now and elevate your nail game with a touch of floral elegance? Remember, beauty is at your fingertips!
Khetoli is an expert in hair and nail care and brings her knowledge and creativity to Nightingale Studio. As a skilled writer, she creates informative and engaging content that covers a wide range of beauty topics. Whether you need advice on nail art, hair treatments, or overall beauty maintenance, Khetoli’s expertise ensures that our content is informative and inspiring.
Nail Tips
Fall Manicure Ideas You’ll Want to Copy This Season
Transform your nails this fall with rich earth tones and unique designs that capture the season’s spirit—discover the must-try trends inside!
This fall, you're going to want to embrace rich earth tones and cozy vibes in your manicure. Try deep burgundies, warm terracottas, and playful orange shades for a seasonal pop. Edgy French manicures with colorful tips or textured designs like chocolate swirls can elevate your look. Don't forget about incorporating fun motifs, like leaves and pumpkins! Regular nail care, including moisturizing and using nourishing oils, will keep your nails looking their best. As you explore these ideas, you might find even more ways to showcase your fall spirit through your manicures.
Key Takeaways
- Opt for rich earth tones and deep burgundies for a moody fall aesthetic that complements seasonal wardrobes.
- Experiment with edgy French manicures using playful seasonal colors like terracotta and cinnamon for a modern twist.
- Incorporate autumn motifs such as leaves and pumpkins into your nail art for a festive touch.
- Try gradient French tips to add sophistication and depth to your fall nail designs.
- Maintain healthy nails with nourishing oils and regular moisturization to keep your manicures looking fabulous all season long.
Introduction
As fall approaches, it's time to refresh your manicure and embrace the season's vibrant colors and designs. This autumn season brings a shift from light pastels to rich earth tones, making fall nails the perfect canvas for showcasing deeper shades like chocolate brown, deep burgundies, and vibrant oranges.
You'll want to explore the latest fall nail trends that capture the essence of the season. One standout design is the Edgy French manicure, where traditional white tips transform into playful seasonal colors, allowing for creative combinations that reflect your personality.
Pair this with techniques like gradient French tips, which add a sophisticated twist to your look.
Don't forget the fun of incorporating seasonal motifs into your nail art; think scattered leaves and adorable pumpkins that celebrate the fall spirit.
Jelly nails also remain a favorite, transitioning to warmer tones while maintaining their glossy finish, making them versatile for any nail length.
With these ideas in mind, you're all set to nail your autumn aesthetic and flaunt your fabulous fall nails!
Autumn Harvest Festival Traditions
Autumn Harvest Festivals bring communities together to celebrate the bounty of the season, showcasing local produce and artisanal goods. You'll find these vibrant festivals from late September through November, perfectly timed with the peak of the harvest. Seasonal foods take center stage, allowing you to savor delicious treats made from freshly picked ingredients.
As you explore the festivities, you can participate in traditional activities like apple picking and pumpkin decorating, providing fun, family-friendly entertainment for everyone.
Don't miss the lively craft fairs, where local artisans display their talents and crafts, enriching the community's cultural heritage.
These festivals emphasize sustainability, encouraging support for local farmers and promoting farm-to-table practices. By attending, you're not just enjoying the autumn atmosphere; you're also preserving agricultural traditions that have been passed down through generations.
With live music and performances by regional artists, you'll experience a sense of connection to your community.
Seasonal Color Palette Inspiration
With the vibrant hues of autumn surrounding you, it's the perfect time to explore a seasonal color palette that reflects the essence of fall. This year, deep burgundies and rich plums create a moody aesthetic that's ideal for your fall nail ideas.
Pair these bold shades with earthy tones, like dusty rose mauve and terracotta, to balance the vibrancy with a cozy warmth.
Don't forget to include seasonal orange variations, such as vibrant Autumnal Orange and Pumpkin Chic, to add a fun pop of color that mirrors the beautiful foliage.
To elevate your look, consider textured finishes like chocolate swirls or chrome brown, which add depth and sophistication. These finishes can really make your manicure stand out during the season.
For a more youthful and light transition from summer to fall, incorporate creamy whites and light grays.
These transitional colors will help you bridge the gap between the two seasons while keeping your nails fresh and stylish.
Choose Warm-Toned Shades
Choosing warm-toned shades for your fall manicure can instantly elevate your style and capture the essence of the season. These colors, reminiscent of the vibrant fall foliage, not only evoke cozy vibes but also enhance the richness of your autumn wardrobe. Deep burgundy and chocolate brown are perfect choices that create a sophisticated look while complementing your outfits.
For a more playful touch, consider incorporating pumpkin spice or autumnal orange into your nail designs. Vibrant variations like tangerine tips can add a cheerful pop, keeping you on-trend as the leaves change.
Earthy tones such as terracotta and dusty rose mauve provide a beautiful transition from summer to fall, offering a warm and inviting palette.
If you want a chic yet cozy vibe, opt for shades like cinnamon latte or mocha marble in your manicure. These warm hues work wonderfully for both casual and formal settings, ensuring your nails always look polished.
Nail Care Tips for Fall
As the temperatures drop, your nails need extra care to stay healthy and strong. Start with these essential nail care tips for fall to keep your manicure looking flawless.
First, regularly moisturize your hands and cuticles. This combats dryness caused by cooler weather, preventing brittle nails.
Incorporate a nourishing nail oil into your routine, especially ones with jojoba or vitamin E. These ingredients help maintain hydration and promote stronger nail growth.
Don't forget to exfoliate your cuticles gently once a week. This prevents hangnails and keeps your manicure fresh.
Using a base coat with strengthening properties is crucial, too. It protects your nails from potential damage caused by darker fall polishes. Additionally, consider using gel manicures to enhance durability during the fall season, ensuring your nails remain resilient against the elements.
Pros and Cons of Trends
Nail trends each season bring fresh inspiration and excitement, but they also come with their own set of pros and cons.
For instance, this Fall, earthy tones and cozy coffee-inspired shades offer versatility, allowing you to achieve both casual and formal styles. These nail polish colors can easily transition from day to night, making them a practical choice.
On the flip side, while the Edgy French mani gives you a modern twist with creative color options, it can also be challenging to master. You might find that some designs, like Fall Florals and Scattered Leaves, require more effort and skill, which could be a downside if you prefer nail art without the hassle.
Moreover, the nostalgic jelly nails in warmer hues reflect a balance between trendy and classic, but you'll need to consider how long these styles will remain fashionable. Additionally, trends in nail art can reflect a broader understanding of software quality assurance principles, as attention to detail is crucial in both fields.
Lastly, trends like the Russian manicure can offer an elegant look, but they come with risks to nail health that you should be aware of.
Ultimately, embracing these trends can enhance your Fall nails, but weigh the pros and cons to find what suits you best.
Pumpkin Chic Inspiration
Embracing the vibrant hues of autumn, Pumpkin Chic nail designs bring a festive flair to your fall looks. These trendy fall nail designs feature bright orange hues that perfectly capture the essence of the season. You can easily pair them with Halloween-themed attire for various festive occasions.
If you're looking to enhance your autumn aesthetic, consider incorporating pumpkin motifs into your nail art. Simple pumpkin colors or playful designs with glitter can add a unique touch while remaining easy to replicate at home. This versatility allows you to express your creativity, whether you prefer bold statements or subtle accents.
Pumpkin Chic nails not only celebrate the fall season but also reflect current nail art trends, making them a popular choice among nail enthusiasts.
You'll find that these designs can effortlessly add a pop of color to more muted autumn outfits, ensuring you stand out.
Embrace Cozy Fall Vibes
After celebrating the festive Pumpkin Chic designs, it's time to embrace the cozy vibes that fall brings. This season, opt for nail colors that reflect the warmth of your favorite coffee drinks. Cozy coffee-inspired shades like Cinnamon Latte and Mocha Marble create an inviting aesthetic that's perfect for any chic manicure. Maintaining skin hydration is also important during this time, as it helps keep your cuticles healthy and your nails looking their best. Additionally, using essential oils can enhance your nail care routine, providing benefits such as improved skin hydration.
Consider earthy and neutral tones such as browns, greens, and dark teals; these colors evoke the natural beauty of autumn and pair effortlessly with your fall wardrobe. For a splash of vibrancy, try seasonal orange variations like Pumpkin Chic and Autumnal Orange, which enhance the cozy feel of muted outfits. Additionally, you might want to incorporate natural ingredients in your nail care routine, as they can help maintain healthy nails during the seasonal transitions.
Don't forget to experiment with textured and metallic finishes, like Mocha Marble and Magic Metallic, adding depth and sophistication to your nail designs. Additionally, opting for developmental milestones in nail art can inspire unique patterns that reflect the progression of seasonal trends.
If you're leaning towards more playful looks, fun and casual styles, such as Wavy Baby and Check Mate, reflect the carefree spirit of the season while keeping your nails trendy. Staying hydrated not only benefits your skin but also supports overall nail health, ensuring your manicure looks fabulous all season long.
Whether you prefer short nails or longer ones, these ideas offer the perfect blend of comfort and style for your fall manicure.
Frequently Asked Questions
What Nail Color Is in Trend for Fall 2024?
For fall 2024, you'll see deep burgundies, plums, and chocolate browns trending. Earthy tones and vibrant shades like pumpkin orange add warmth. Don't forget to experiment with glossy finishes and creative nail art styles!
What Nail Trend Is in 2024 for Short Nails Fall?
This fall, you'll love experimenting with earthy tones and ombre styles for short nails. Edgy French manicures and playful patterns offer a chic twist, while deep burgundy and plum shades elevate your seasonal look effortlessly.
What Nail Shape Is Trending for Fall?
This fall, you'll find classic square and almond shapes trending, offering elegance and modernity. Coffin and stiletto shapes add drama, while short rounded nails provide comfort. Don't forget the versatile squoval shape for a flattering look!
What Is the Most Popular Nail Color for Fall?
For fall, deep burgundies and plums dominate the nail color scene, giving you that rich, warm vibe. Earthy tones like terracotta and muted greens also shine, perfectly complementing your autumn wardrobe and keeping things cozy.
Ken is our in-house hair expert, committed to sharing his knowledge and passion for hairstyling with our audience. With a sharp eye for trends and techniques, Ken offers insightful articles, tips, and tutorials to help our visitors achieve their desired hair looks. Whether you’re looking to master the latest hairstyle or learn how to care for your locks, Ken’s expertise will guide you every step of the way.
Nail Tips
How to Use Nail Clippers Like a Pro!
Discover the secrets to mastering nail clippers like a pro and achieve salon-quality results at home—your nails will thank you!
Using nail clippers like a pro is super easy and fun! First, grab a high-quality pair for sharp, clean cuts. Always use separate clippers for your fingers and toes to stay hygienic. Hold your clippers at a 45-degree angle, and make 3-4 small cuts on each nail. Remember to leave a tiny white tip to prevent cutting too close to your skin. Afterward, gently smooth any rough edges with a nail file. Keep your clippers clean and disinfected to avoid germs. With these tips, your nails will look fabulous and fresh, and there's even more to discover about nail care!
Key Takeaways
- Use high-quality stainless steel clippers and separate clippers for fingernails and toenails to maintain hygiene and achieve precise cuts.
- Position clippers at a 45-degree angle and make 3-4 small cuts per nail to prevent tearing and ensure a smooth finish.
- Leave a tiny white tip (1-2 mm) on each nail to protect sensitive skin and avoid cutting too close to the nail bed.
- Regularly clean and disinfect your clippers with rubbing alcohol to maintain hygiene and prevent infections.
- Experiment with different nail shapes and file nails in one direction to enhance your personal style and maintain a polished appearance.
Introduction
Nail clippers are essential tools for maintaining healthy nails, whether on your fingers or toes. Using nail clippers correctly can make a huge difference in your nail care routine.
First, make sure you've got high-quality clippers with sharp, stainless steel blades. These will help you cut and clip your nails without damaging them or causing any tearing. Proper nail care is also important for overall skin health and can enhance your maintenance routine.
Remember, it's best to have separate clippers for your fingernails and toenails. This helps keep things hygienic and effective!
When you're clipping your nails, position the clippers at a 45-degree angle and take 3-4 small cuts per nail. This way, you'll create a smooth finish and protect your nail bed. Always leave a small white tip at the end of your nails—about 1-2 mm—to prevent cutting too close, which can lead to pain or infection.
After you've finished, don't forget to disinfect your clippers with rubbing alcohol. This simple step keeps bacteria away and ensures your nails stay healthy and happy!
Prevent Painful Nail Injuries
Using the right technique when clipping your nails is key to preventing painful injuries. First, make sure you use the appropriate clippers for your fingernails or toenails. Using the wrong tool can lead to nail damage or even hurt you!
When you clip your nails, try to do it at a slight angle. Instead of making one big cut, take several small cuts. This way, you avoid cutting too close to the nail bed, which helps prevent painful ingrown nails. Additionally, maintaining good hygiene is essential, just like how the safety of certain foods for dogs can contribute to their overall well-being.
It's also super important to leave a tiny white tip at the end, about 1-2 mm. This helps you avoid cutting too short, which can expose your sensitive skin and increase the risk of infections.
Always clip your nails in a well-lit area so you can see what you're doing clearly. This minimizes the chance of accidental cuts or uneven trimming.
Don't forget to disinfect your nail clippers regularly! Cleaning them helps keep away pesky bacteria and fungus that could lead to painful infections in your nail bed.
Following these tips will keep your nail clipping experience safe and enjoyable! Happy clipping!
Popular Variations and Ideas
Clipping your nails can be an opportunity to express your personal style and keep your hands and feet looking great. Proper nail care is essential, as neglect can lead to issues like ingrown nails, similar to how routine health checks are recommended for pets.
You can create the perfect nail look by experimenting with different shapes! For fingernails, use curved blade clippers to follow the natural rounded shape, while straight blade clippers are best for toenails to help prevent nail problems like ingrown nails. When clipping, aim to cut straight or at a 45-degree angle, making several small cuts instead of one big one. This helps avoid splits and tears!
Once you've clipped your nails, remember to leave a small white tip (about 1-2 mm) at the end of each nail to keep them healthy and comfy.
Don't forget to file your nails too! Use an emory board and file your nails in one direction to smooth those edges and prevent breakage. You can try different shapes, like rounded or squared, to see what suits you best.
Regularly assess your nail length, and stay on top of trimming to keep your nails looking fantastic. With these tips, you'll be a nail-clipping pro in no time!
Tips and Tricks
When it comes to achieving the best results with your nail clippers, keeping a few essential tips in mind can make all the difference. First, always use high-quality stainless steel clippers for a clean, precise cut. Low-quality clippers can cause damage and leave you with uneven nails.
When you cut your nails, try to clip at a slight angle instead of straight across. This helps prevent tearing and gives you a smooth finish!
Another common mistake is cutting too close to the nail bed. To avoid this, keep a slight white tip, about one or two millimeters, at the edge of your nails. This not only looks nice but allows for healthy nail growth, too!
After you've clipped, don't forget to gently scrape the edges with a nail file, smoothing them out and preventing breakage.
Care and Maintenance
To keep your nail clippers in top condition, proper care and maintenance are essential. After each use, make sure to clean nail clippers by disinfecting them with rubbing alcohol or an antibacterial solution. This helps maintain hygiene and prevents the spread of bacteria. It's a quick step, but it makes a big difference!
Before you trim your nails, always inspect clippers for any signs of wear or damage. If you notice dull blades or loose parts, it's time to replace them for safety. Keeping those blades sharp is important too; sharp blades help prevent tearing or damaging your nails while clipping.
Don't forget to dispose of nail clippings properly after each use! This keeps your grooming area neat and hygienic.
Lastly, store clippers in a clean, dry place. This protects them from rust and bacterial growth, ensuring they're ready for your next nail care session.
With these simple steps, you'll be on your way to using nail clippers like a pro, keeping your nails looking great and your clippers in fantastic shape! Happy clipping!
Common Mistakes to Avoid
Before you start trimming your nails, it's crucial to be aware of common mistakes that can lead to nail damage or discomfort.
First, always choose the right clippers for every nail shape—using fingernail clippers on toenails can cause problems. When you clip, don't go too short! You still need a tiny white tip to keep your nails safe from injury and infection.
Another mistake is clipping straight across. Instead, clip at an angle; this helps prevent ingrown toenails and keeps your nails healthy.
When you hold the clippers, make sure you're steady and focused. Poor lighting can lead to uneven cuts, so try to find a bright spot to work in.
Also, don't forget about your tools! Clean clippers are essential. If you neglect to disinfect them, you could introduce bacteria to your nails and skin, leading to infections.
Frequently Asked Questions
How Do You Cut Your Nails Like a Professional?
To cut your nails like a professional, use high-quality stainless steel clippers. For fingers, clip at a 45-degree angle in small cuts. For toes, cut straight across, leaving a small white edge for safety.
What Is the Correct Way to Use Nail Clippers?
To use nail clippers correctly, choose the right type for your nails, hold them at a 45-degree angle, make small cuts, leave a tiny white edge, and clean them after each use for hygiene.
How Do You Cut Your Toenails Like a Pro?
To cut your toenails like a pro, use larger clippers, trim straight across, and start with the big toe. Make several cuts per nail, ensuring good lighting for precision, then disinfect your clippers afterward.
How Do You File Your Nails Like a Pro?
To file your nails like a pro, always file in one direction. Start with a coarse file, then switch to a finer one. Keep the file angled for control and regularly check your nail length.
Conclusion
Now you're ready to tackle nail trimming like a pro! Remember to keep your clippers clean, take your time, and avoid those pesky mistakes. With these tips, you'll have neat and healthy nails in no time. Plus, you'll impress your friends when they see how great your nails look! So grab your clippers, relax, and enjoy the process. Happy clipping, and may your nails shine bright like a star! 🌟
Khetoli is an expert in hair and nail care and brings her knowledge and creativity to Nightingale Studio. As a skilled writer, she creates informative and engaging content that covers a wide range of beauty topics. Whether you need advice on nail art, hair treatments, or overall beauty maintenance, Khetoli’s expertise ensures that our content is informative and inspiring.
Nail Tips
Halloween French Tip Nails to Elevate Your Spooky Look
Bring your Halloween style to life with chic French tip nails that blend elegance and spookiness—discover the creative ideas that await!
If you want to elevate your spooky look this Halloween, try Halloween French tip nails! These stylish nails mix classic elegance with festive flair, featuring black tips and vibrant orange accents. You can even add touches like hand-painted ghosts or pumpkin motifs for extra charm. For a unique twist, consider glow-in-the-dark polish that lights up when the sun sets. It's the perfect conversation starter at parties. Plus, this nail art is fun to DIY, allowing you to express your creativity. Get ready to impress, and there's even more inspiration waiting for you to explore!
Key Takeaways
- Incorporate classic black tips with vibrant orange accents for a stylish Halloween French tip design that exudes festive elegance.
- Experiment with spooky variations like ghost motifs or dripping blood effects to add a playful twist to traditional French tips.
- Use glow-in-the-dark polish as a top coat to create an eye-catching glow at night, enhancing your Halloween nail art.
- Explore DIY techniques and online tutorials to replicate unique nail styles at home, fostering creativity and personal expression.
- Complement your Halloween look with seasonal motifs like pumpkins, black cats, and spider webs for a complete spooky aesthetic.
Introduction
Halloween French tip nails are a stylish way to celebrate the spooky season while keeping your look chic. These nail designs blend elegance with festive flair, making them a perfect choice for Halloween festivities. You can opt for classic black tips that evoke the spirit of Halloween, or you might choose to add a playful touch with vibrant orange accents or hand-painted ghosts.
The beauty of Halloween French nails lies in their versatility. Whether you prefer a minimalistic approach with simple black and white patterns or something more elaborate featuring intricate spider webs and creepy characters, there's a design for everyone.
Social media platforms like Instagram are buzzing with creative nail art ideas, showcasing the latest trends and inspiring you to experiment with your own Halloween nail designs.
As you prepare for the spooky season, consider how French tip nails can elevate your style. They allow you to express your festive spirit without sacrificing sophistication.
Halloween Nail Art Origins
Nail art has deep roots in ancient traditions, where people painted their nails to ward off evil spirits during harvest season. This practice laid the groundwork for what we now celebrate as Halloween nail designs.
Over the years, nail art evolved significantly, particularly in the late 20th century, when the rise of nail salons and pop culture made it a popular form of self-expression.
French tips, originally popularized in the 1970s, began to incorporate seasonal themes like Halloween. You'll often see these classic designs adorned with festive colors and spooky motifs, aligning with the broader cultural practice of dressing up and decorating during this time of year.
The typical Halloween color palette—think vibrant oranges and deep blacks—makes these nail art designs even more captivating.
Today, social media plays a crucial role in the explosion of Halloween nail art. Influencers and nail artists showcase creative designs that blend traditional French tips with a Halloween twist, inspiring you to try something new each year.
One popular technique is to use glitter accents to enhance the overall look and add a festive touch to your Halloween nails.
Whether you go for subtle art designs or bold statements, there's no shortage of options to elevate your spooky look!
Spooky French Tip Variations
When it comes to adding a festive flair to your nails, spooky French tip variations offer a perfect blend of elegance and playful creativity. You can easily incorporate spooky Halloween elements into the classic French manicure, giving your look a seasonal twist.
For instance, try black French tips adorned with hand-painted ghosts for a hauntingly chic vibe. If you're feeling bold, vibrant orange tips paired with pumpkin motifs will certainly catch eyes at any Halloween gathering.
For a more dramatic effect, consider red tips with a dripping blood design—this look is sure to stand out. You can also play with textures, like matte finishes or metallic accents, to enhance the visual impact of your spooky French tips.
Minimalistic styles, such as simple nude bases accented with delicate gold spider webs or cute ghost decals, allow you to embrace the spooky spirit without overwhelming your look. Additionally, incorporating bright colors like pink can add a fun twist to your Halloween nail art.
These variations let you merge traditional elegance with fun Halloween elements, making them suitable for both casual outings and themed events. So, unleash your creativity and transform your nails into a festive masterpiece this Halloween!
Use Glow-In-The-Dark Polish
Transforming your French tips into a glowing masterpiece is easier than you might think. By using glow-in-the-dark polish, you can add a spooky twist to your Halloween nail designs that really stands out in low light conditions. This polish absorbs light during the day and emits a soft glow at night, making your nails shine during Halloween festivities.
To create this effect, simply apply the glow-in-the-dark polish as a top coat over your traditional French tips. You can choose from various colors, like eerie green or vibrant orange, to enhance your spooky look. For the best glow, make sure your base coat is completely dry before applying the glow polish.
Don't forget to expose your nails to light for a few minutes to charge them up before heading out.
Not only does glow-in-the-dark nail art elevate your Halloween aesthetic, but it also serves as a unique conversation starter at parties. Your glowing French tips will capture attention and add an extra layer of fun to your overall Halloween outfit.
Nail Art for Halloween Parties
Get ready to impress at your Halloween parties with creative nail art that combines elegance and festive flair. Halloween nails can elevate your spooky look while showcasing your personal style.
Consider designs like the "Bloody Ghostface" or "Dripping Blood" for a chic yet haunting vibe. These designs infuse your nails with a playful touch without sacrificing sophistication.
If you're aiming for a more lighthearted feel, opt for "Hey Pumpkin" or "Ghost Edit" designs. These options create a fun atmosphere, perfect for casual celebrations.
For those who prefer a refined aesthetic, try the "Scary Tips" or "Spider Tips," which add subtle Halloween elements while remaining elegant.
Utilizing an autumn-inspired color palette is key. Think burnt orange, black, and deep red hues to recreate that perfect Halloween vibe.
To truly stand out at your Halloween parties, consider adding unique details like metallic accents or 3D elements, transforming basic French tips into eye-catching nail art.
With these designs, your nails will surely be the talk of the party, blending style with the festive spirit of Halloween.
Pros and Cons Overview
As Halloween approaches, many are contemplating the pros and cons of Halloween French tip nails. On the plus side, this nail look offers a chic and sophisticated way to embrace the holiday spirit without going overboard. You can opt for classic black and white designs or vibrant orange tips to match your spooky vibe. Additionally, these nails can be complemented by customized advertisements that reflect your unique style and preferences.
The versatility of French mani designs allows you to easily transition from Halloween festivities to everyday wear. Plus, the ability to customize your nails with fun elements like spider motifs or dripping blood effects means you can express your creativity while keeping the timeless French tip structure.
However, there are some downsides. If you prefer solid color nails, you might find the French tip style a bit too subtle for the occasion. Also, if you're not skilled with nail art, achieving that perfect balance between spooky and sophisticated can be challenging.
Additionally, while many designs are trendy on social media platforms like Instagram, the effort to maintain the look can be time-consuming. Relationships with narcissists can lead to emotional abuse, making it essential to prioritize self-care during festive seasons.
Ultimately, the choice comes down to your personal style and how you want to celebrate Halloween!
Creative Pumpkin Nail Designs
Embracing the festive spirit of Halloween can be as simple as sporting creative pumpkin nail designs. If you're looking for nail inspo, consider vibrant orange French tips on a nude base, capturing that harvest-ready aesthetic perfect for lighter Halloween themes.
You'll find that these seasonal pumpkin nail art designs aren't just cute but also easy to recreate at home, making them accessible for everyone.
To add a playful twist, try incorporating pumpkin faces into your designs. This fun element appeals to both kids and adults, making it a versatile choice for all ages.
For an extra pop, think about using glitter or adding cute ghost decals to your accent nail, creating an eye-catching and festive look throughout the fall season.
Whether you're preparing for a Halloween party or just want to celebrate the season, these creative pumpkin nail designs will surely elevate your style.
Grab your art tools and let your creativity flow; you'll be amazed at how a little nail art can bring a cheerful autumn vibe to your hands!
Spooky Season Nail Inspiration
Halloween isn't just about pumpkins; it's also the perfect time to explore spooky season nail inspiration that adds an extra flair to your festive look. Dive into creative nail polish designs that incorporate seasonal elements like black cats, ghosts, and spider webs. A manicure with gel can help you achieve that long-lasting effect, allowing your nail looks to shine throughout the festivities.
For a playful twist, consider black tips with vibrant orange grids showcasing hand-painted ghosts. If you prefer a minimalistic style, monochromatic black and white French tips adorned with bats and moons can provide a chic option. You could even experiment with ombé nail designs that blend shades of red or black, adding a dramatic flair to your Halloween ensemble.
Don't shy away from unique styles like dripping blood effects or pumpkin-themed accents, which allow for personal expression. The versatility of French tips means you can easily replicate these looks at home, making it a fun DIY project. Incorporating seasonal themes such as Halloween motifs into your nail art can truly elevate your overall look.
This spooky season, let your nails reflect the witching works of creativity, ensuring you stand out at any Halloween gathering.
Frequently Asked Questions
What Is French Tip Coffin Nails?
French tip coffin nails combine the classic French manicure with a coffin shape. You'll enjoy their modern edge and versatility, as they allow for creative designs, making them perfect for both everyday wear and special occasions.
What Color to Paint Your Nails for Halloween?
For Halloween, you might choose bold shades like blood red or deep purple to evoke a spooky vibe. Vibrant orange and green hues can also add a festive flair, so pick what resonates with your style!
How to Do French Tip Nails Hack?
To do a French tip nails hack, start with a neutral base coat. Use nail tape for crisp lines, apply your desired tip color, and finish with a top coat for a long-lasting look.
How to Do Heart French Tip Nails?
To create heart French tip nails, start with a base coat. Use a thin brush to paint small hearts at the tips in a contrasting color. Finish with a top coat for shine and durability.
Ken is our in-house hair expert, committed to sharing his knowledge and passion for hairstyling with our audience. With a sharp eye for trends and techniques, Ken offers insightful articles, tips, and tutorials to help our visitors achieve their desired hair looks. Whether you’re looking to master the latest hairstyle or learn how to care for your locks, Ken’s expertise will guide you every step of the way.
-
Entertainment News2 months ago
Cristiano Ronaldo’s Net Worth: How Much Is the Football Superstar Worth?
-
Entertainment News3 months ago
Net Worth of Michael Corleone Blanco: Inside the Real-Life Narco Empire!
-
Entertainment News3 months ago
James Best Net Worth: How Much Was He Worth at His Peak?
-
Entertainment News3 months ago
Free Spirit Equestrian Net Worth: How She Built an Empire on Horseback!
-
Entertainment News3 months ago
Pete Best Net Worth in 2023: How Much Is the Former Beatle Worth Now?
-
Entertainment News2 months ago
What Is Shahid Anwar’s Net Worth? The Story Behind His Financial Success!
-
Entertainment News2 months ago
Selena Gomez Vs Justin Bieber: Who Has the Higher Net Worth?
-
Entertainment News3 months ago
Who Is the Highest Net Worth K-pop Idol? Find Out Who’s on Top!