Get ready to nail your Halloween look with these easy ideas! For Frankenstein nails, paint one green, another black, then draw his features. Design a creepy Jack-o'-Lantern for a spooky vibe. Create a skull motif with white and black polishes for a bone-chilling effect. Try spider web nails by drawing intersecting lines and adding glitter. For a festive manicure, mix it up with different base coat colors, each nail telling a Halloween tale. With just 5 steps, you'll have claws that are to die for! These simple techniques will have your nails ready for the spookiest night of the year!
Key Takeaways
- Start with a base coat on nails for a clean canvas.
- Use different colored polishes for festive designs.
- Draw iconic Halloween motifs like Frankenstein and Jack-o'-Lanterns.
- Add details with nail art pens for precision.
- Seal with a top coat for longevity and shine.
Frankenstein Nail Art
To create Frankenstein nail art, start by painting your nails with a base coat. Use green polish on the thumb and black polish on the middle finger.
Grab a black nail pen and carefully draw Frankenstein's hair on the green nail. Make sure to add those signature angry eyebrows and a menacing mouth to give him that classic look.
With a white nail pen, add in the eyes on the green base, bringing your Frankenstein to life. Using the black nail pen again, it's time to add those little details that make him truly monstrous – scars, stitches, whatever spooky extras you fancy.
Repeat this process on your other hand for a perfectly chilling Halloween look. Your nails will be the talk of the town with these ghoulishly delightful Frankenstein designs! Don’t be afraid to get creative with your color choices and experiment with different shades of green, black, and silver for added flair. To take your look to the next level, consider incorporating the latest *gel x nail designs 2024* trends into your spooky manicure. With a mix of intricate details and bold pops of color, your nails will be ready to steal the show at any Halloween gathering!
Jack-o'-Lantern Design

For a fun and spooky Halloween nail art design, create a Jack-o'-Lantern on your nails using a black pen to draw the eyes and mouth.
Start by drawing the eyes and mouth of the Jack-o'-Lantern with a black pen, then add a green stalk on top for a realistic touch. To make the eyes pop, use a white pen to add intricate details.
Repeat this design on your other hand for a perfectly matching look. For an extra eerie effect, finish off by adding white details in the middle of the eyes.
This Jack-o'-Lantern nail art is sure to give your Halloween look a festive and playful vibe. The combination of the classic pumpkin design with the contrasting colors of black and white will make your nails stand out in the best way possible.
Get ready to show off your spooky style with these easy-to-create Jack-o'-Lantern nails!
Creepy Skull Motif
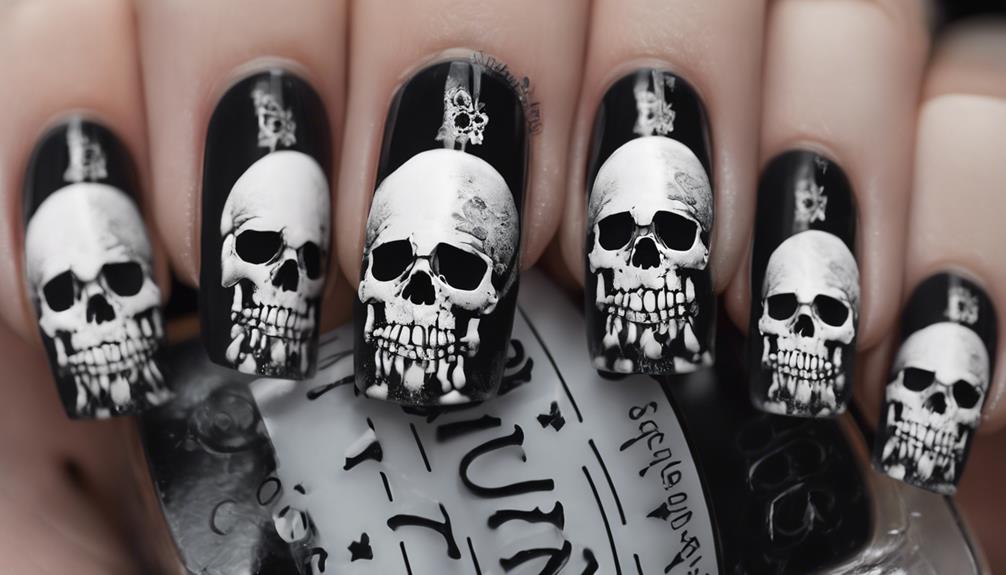
Create a spine-chilling look by painting your nails with a white base coat and adding a creepy skull motif using a black nail art pen.
Get ready to spookify your nails with these simple steps:
- Start with a White Base: Apply a white base coat to all your nails for a clean canvas to bring your skulls to life.
- Outline the Skull: Use a black nail art pen to draw the outline of a skull shape on each nail, focusing on the eye sockets, nose, and teeth to add a bone-chilling effect.
- Add Detail: Enhance the skull design by adding intricate details like shading around the eye sockets or teeth for a more realistic look.
- Repeat for All Nails: Make sure to repeat the skull design on all your nails to create a cohesive and eerie Halloween vibe.
Complete your spooky skull nails by sealing the design with a top coat for that extra shine and to keep your Halloween look intact all night long.
Spider Web Nails

Begin by applying a black base coat on all nails to achieve the classic spider web look. Using a white nail art pen or thin brush, draw intersecting lines on each nail to create the intricate web pattern. Remember, spiders don't just weave straight lines, so add small curved lines connecting the intersecting lines for an authentic spider web design.
Once you've perfected the web, add a touch of glamour by applying a silver or glittery polish to make your spider web nails sparkle in the Halloween moonlight.
Don't forget the finishing touch – seal in your spooky design with a clear top coat. This step not only adds shine but also guarantees your nail art lasts through all your Halloween festivities.
With your spider web nails ready to spook, you're all set to show off your creepy-chic look this Halloween season!
Festive Halloween Manicure

To add a festive touch to your Halloween nails, consider creating a variety of spooky designs on each nail for a fun and themed manicure. Start by painting each nail with a different base coat color to set the stage for your Halloween masterpiece.
Here's how you can achieve this festive Halloween manicure:
- Draw Frankenstein's hair, angry eyebrows, and mouth using a black pen on one nail for a classic monster look.
- Create Jack-o'-Lantern designs by drawing eyes, mouth, and a green stalk on another nail to bring the Halloween spirit to life.
- Design scary teeth by drawing red French tips, adding fangs, and small teeth on a different nail for a truly terrifying effect.
- Draw a skull shape with black side bits, eye sockets, and a nose on another nail to add a spooky touch to your manicure.
With these simple steps, your nails will be the talk of the Halloween party!
Frequently Asked Questions
How to Do Easy Halloween Nail Art?
Looking to immerse yourself in Halloween nail art? Let's delve into some easy Halloween nail art!
First, choose a spooky design like Frankenstein or a Jack-o'-Lantern. Grab your nail art tools and bring that design to life with intricate details.
Repeat the design on each nail for a cohesive look. Finish off with a top coat to seal in your Halloween masterpiece.
Get ready to show off those spooky nails!
What Are the 5 Basic Nail Designs?
Looking to spook up your nails for Halloween? You're in luck! The 5 basic nail designs for the occasion are Frankenstein, Jack-o'-Lantern, Scary Teeth, Skull, and Spider.
Each design has its own unique elements and requires specific colors and tools to bring them to life. From Frankenstein's signature hair to the Skull's eye sockets, these designs offer a fun and spooky way to celebrate the season on your fingertips!
How to Make Easy Nail Art?
You can make easy nail art by choosing a base coat color for each nail and using a fine-tipped pen or nail art brush to create fun designs like Frankenstein's hair or Jack-o'-lantern faces.
Let each layer dry before adding more details like eyes and mouths.
Repeat the design on both hands for a cohesive look.
How to Do Nail Art for Kids?
When doing nail art for kids, you want to keep it simple and fun. Choose vibrant colors like orange, green, white, and black for a festive Halloween theme. If you’re doing nail art for a different occasion, such as Christmas, you can use red, green, gold, and silver for a classic holiday look. Keep the designs simple, like snowflakes, candy canes, and Christmas trees, to make it fun and easy for kids to enjoy. Christmas nail art is a great way to get into the holiday spirit and add a festive touch to any outfit.
Opt for easy designs such as pumpkins, ghosts, bats, or spiders to make it kid-friendly. Remember to use safe, non-toxic nail polishes and child-friendly tools.
Encourage creativity by letting them add their personal flair. Provide step-by-step guidance and supervision for a successful and enjoyable nail art experience.
Conclusion
So there you have it, five easy Halloween nail art ideas to get you in the spooky spirit!
Remember, all it takes is a few simple steps to create festive and fun designs that will impress all your friends.
Whether you go for Frankenstein, Jack-o'-Lanterns, skulls, spider webs, or a mix of all of them, your nails are sure to be the talk of the town.
So grab your nail polish and get creative this Halloween season!