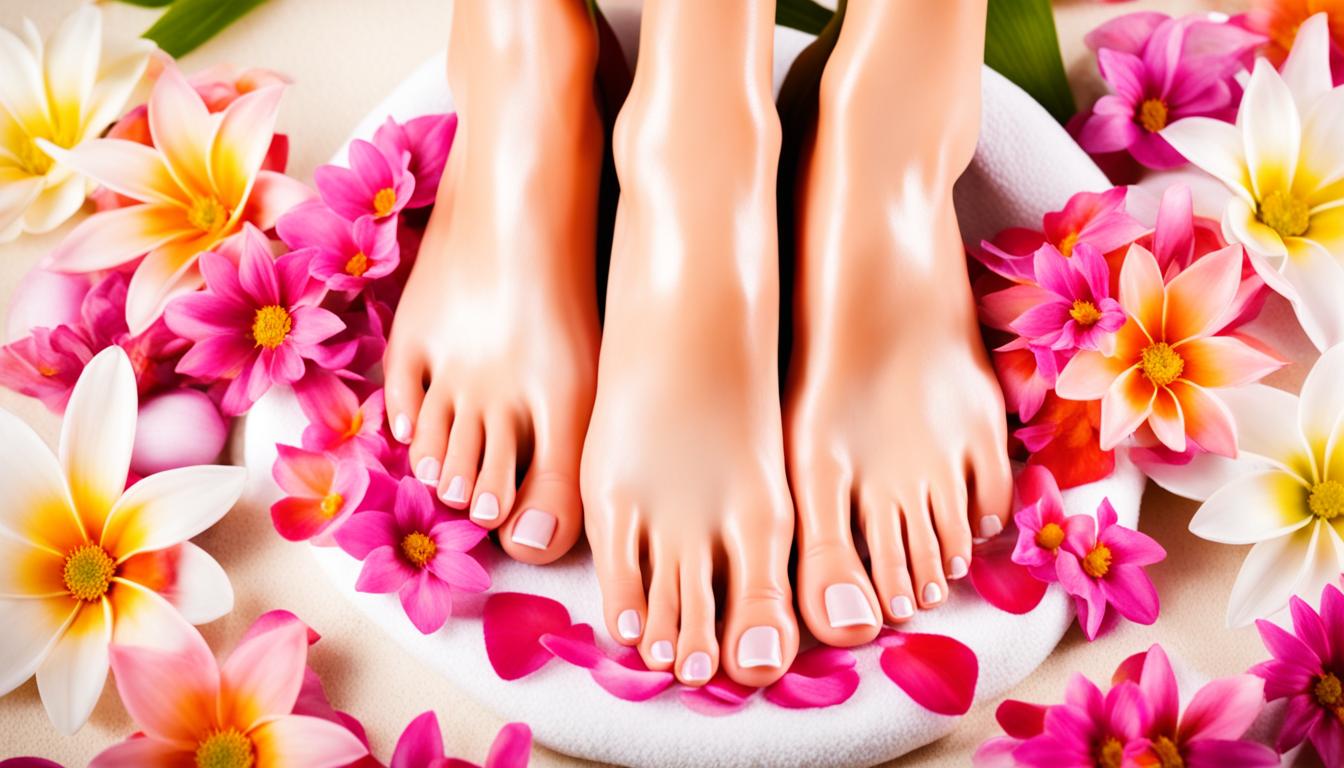

Did you know that the average person takes over 8,000 steps a day? This puts a lot of pressure on your feet, especially during the summer when they are exposed in sandals and open-toed shoes. It’s no wonder that getting a fresh pedicure is a popular beauty ritual for many people. But how can you make sure your pedicure lasts longer and looks great? We’ve gathered tips from experts to help you get the most out of your pedicure treatments.
Key Takeaways:
- Schedule your pedicure appointment on a chill day to avoid smudging or chipping.
- Bring sandals to your appointment to keep your freshly painted toes intact.
- Avoid heat and moisture for the first 12-24 hours after your pedicure to prevent premature chipping.
- Consider gel polish for a longer-lasting pedicure.
- Avoid chlorine as it can fade, crack, and dry out your pedicure.
Choose a Chill Day for Your Pedicure
Contrary to popular belief, nail polish takes 12-24 hours to completely harden. To avoid damaging your freshly painted toes, schedule your pedicure appointment on a day when you can relax and give your feet a break. By choosing a chill day, you can kick back and let your pedicure dry properly without any risk of smudging or chipping.
When you have a hectic schedule, it’s easy to book a pedicure appointment on any available day. However, taking the time to consider the drying process of nail polish can make a significant difference in maintaining your pedicure’s longevity and integrity.
Imagine rushing to your appointment, only to find yourself dashing to your next activity before the polish has fully hardened. Not only can this result in unattractive smudges or chips, but it can also leave you feeling frustrated and disappointed.
By deliberately choosing a relaxed day, you’ll have the opportunity to fully enjoy and take care of your pedicure. Whether it’s a lazy Sunday afternoon or a weekday evening when you have no other commitments, planning your appointment on a chill day ensures that your pedicure has ample time to dry and harden.
So, instead of squeezing in a pedicure on a hectic day, allow yourself the luxury of a little extra time. After all, a dose of self-care and relaxation is just what you need.
By selecting a chill day for your pedicure appointment, you’ll not only protect your newly painted toes but also enhance your overall experience. Embrace the tranquility, and revel in the anticipation of flaunting your fabulous pedicure.
Bring Sandals to Your Pedicure Appointment
When you book your pedicure appointment, it’s essential to come prepared with the right footwear. To protect your fresh pedicure and maintain its flawless appearance, remember to wear or bring a pair of sandals with you. By opting for sandals instead of closed-toed shoes, you’ll prevent any potential damage to the polish and preserve all your hard work.
Wearing sandals allows your feet to stay well-ventilated, preventing any unwanted smudges, chips, or imperfections. Closed-toed shoes immediately after a pedicure can disturb the drying process of nail polish, leading to premature chipping and ruining the overall look.
At our salon, we understand the importance of keeping your pedicure intact. That’s why we emphasize the need for sandals during your appointment. By following this simple step, you’ll ensure that your freshly painted toes remain flawless and ready to show off.
Don’t underestimate the power of proper footwear! Bring your sandals to your next pedicure appointment and enjoy long-lasting beauty.
Avoid Heat and Moisture for 12 Hours
After getting a fresh pedicure, it’s essential to give your nails the proper care and attention they deserve. One crucial aspect of pedicure aftercare is avoiding heat and moisture for the first 12 hours. Heat and moisture can interfere with the nail polish hardening process, leading to premature chipping and fading. To ensure long-lasting beauty, it’s important to skip activities that expose your feet to excessive heat and moisture during this crucial period.
Here are a few activities to avoid:
- Hot baths and showers
- Jacuzzis and saunas
- Hot yoga classes or intense exercise causing excessive sweating
By steering clear of these heat and moisture sources for the first 12 hours after your pedicure, you can protect the integrity of your nail polish and extend the life of your beautiful pedicure.
Let’s delve into more useful tips and tricks to help you maintain your fresh pedicure in the following sections.

Consider Gel Polish for a Longer-Lasting Pedicure
If you’re looking for a pedicure option that will last even longer, consider getting gel polish. Brands like EVO by Bio Sculpture or Dazzle Dry offer gel polishes that harden completely within just a few minutes of application. This means you can enjoy a durable and chip-resistant finish that will keep your pedicure looking fresh for weeks.
With gel polish, you no longer have to worry about the restrictions of the first 12-24 hours after your pedicure. Unlike traditional nail polish, gel polish dries and hardens instantly, allowing you to go about your day without waiting for it to fully set.
Whether you’re planning a beach vacation or have a busy schedule, gel polish is a great option for long-lasting beauty. The strong and resilient nature of gel polish makes it ideal for those who want their pedicure to withstand the test of time.
Additionally, gel polish offers a high-shine finish that remains glossy throughout its wear. Say goodbye to dulling polish and hello to a salon-quality pedicure that stands up to everyday activities.
The Benefits of Gel Polish
Gel polish offers several benefits that make it a popular choice for those seeking a long-lasting pedicure:
- Durability: Gel polish is known for its longevity, with most pedicures lasting up to two weeks or more without chipping or fading.
- Chip Resistance: The unique formulation of gel polish provides a protective barrier that helps prevent chips and cracks, even with daily wear.
- Quick Drying Time: Gel polish cures quickly under a UV or LED lamp, allowing you to get back to your regular activities without fear of smudges or smears.
- High-Shine Finish: Gel polish offers a glossy and professional-looking finish that maintains its luster until the next salon visit.
With the right gel polish and proper aftercare, you can enjoy a pedicure that lasts weeks, saving you time and money on frequent touch-ups and salon visits.
| Pros of Gel Polish | Cons of Gel Polish |
|---|---|
| Gel polish lasts longer than traditional polish. | The removal process can be more time-consuming. |
| It provides a durable and chip-resistant finish. | The initial cost of gel polish can be higher. |
| Gel polish offers a high-shine, glossy finish. | UV or LED lamps are required for curing. |
| It dries quickly, minimizing the risk of smudges. | Improper removal can damage the natural nails. |
Overall, gel polish is a great option for anyone looking for a pedicure that lasts. Its durability, chip resistance, and quick drying time make it a popular choice among individuals who want to maintain their pedicure for an extended period.

Say No to Chlorine for Your Pedicure
As tempting as it may be to take a dip in the pool during the summer, chlorine can be detrimental to your pedicure. Chlorine can cause the polish to fade, crack, and dry out your skin and cuticles. If you can’t resist the pool, make sure to rinse off your feet with fresh water and apply unscented lotion immediately after to minimize the damage.
When it comes to preserving the beauty and longevity of your pedicure, avoiding contact with chlorine is crucial. Chlorine is a chemical commonly found in swimming pools and can be harmful to both the color and health of your nails. Exposure to chlorine can lead to the fading and cracking of nail polish, affecting the overall appearance of your pedicure.
But don’t worry, we’ve got you covered with some tips to protect your pedicure while still enjoying a refreshing swim. Before entering the pool, ensure you rinse your feet with fresh water to remove any residual chlorine that may be lingering on the surface. Additionally, applying unscented lotion immediately after swimming can help restore moisture to your skin and cuticles, preventing them from drying out.
Remember, prevention is key when it comes to avoiding chlorine-related damage to your pedicure. By taking a few simple steps, you can maintain the vibrant color and flawless finish of your pedicure all summer long.
So, next time you’re tempted to dive right into that chlorinated pool, think twice and consider the impact it may have on your gorgeous pedicure. By forgoing chlorine exposure or taking proper precautions, you can preserve your pedicure’s brilliance and keep your feet looking fabulous.

Use Unscented Lotion for Daily Moisturizing
Moisturizing your feet is essential for maintaining the health and longevity of your pedicure. However, using scented lotions can compromise the integrity of the polish, leading to chipping and cracking. Opt for unscented lotions to keep your feet hydrated without risking damage to your pedicure.

Protect Your Pedicure with Toe Coverings
While we understand the desire to show off your fresh pedicure, it’s important to protect it from the elements. Overexposure can actually shorten the lifespan of your pedicure and leave you disappointed. So, when you’re not flaunting your beautiful toes, make sure to cover them up with socks or other toe coverings.
Using toe coverings not only shields your pedicure from accidental bangs and scuffs, but it also helps maintain its shine and longevity. By keeping your toes covered when you’re not displaying them, you can prevent damage and extend the life of your pedicure.
Whether you’re lounging around at home or out and about running errands, slipping on a pair of cozy socks or toe coverings will keep your pedicure safe and looking flawless. Plus, it adds a touch of style to your overall look!

Remember, the key to a long-lasting and beautiful pedicure is in the little details, and toe coverings are a crucial part of the equation. So, don’t forget to cover up and protect your pristinely polished toes!
Reapply Top Coat for Added Protection
During your pedicure, a top coat is applied to protect the polish and enhance its longevity. However, over time, this protective layer starts to wear off, leaving your pedicure vulnerable to chips, scuffs, and scratches. To maintain the shine and durability of your pedicure, we recommend reapplying a top coat every couple of days.
By getting your own bottle of top coat and regularly applying it, you can ensure that your pedicure remains looking fresh for longer. The top coat acts as a barrier, shielding the polish from external factors that can damage its appearance.
Pro Tip: Choose a top coat that is specifically designed for nail polish longevity and protection. Look for products that offer extra durability and chip resistance.
Reapplying the top coat is a simple step that can make a big difference in preserving the beauty of your pedicure. It helps to lock in the color, add shine, and provide an additional layer of defense against everyday wear and tear.
By incorporating this practice into your pedicure routine, you can enjoy a fresh and polished look for an extended period, allowing you to show off your stunning toes with confidence.

Why Reapplying Top Coat Matters
“Reapplying a top coat is like giving your pedicure an extra layer of armor. It not only helps to protect the polish but also adds a glossy finish, giving your pedicure a salon-quality look.” – Nail expert, Sarah Thompson
By taking a few moments every couple of days to reapply the top coat, you can significantly extend the lifespan of your pedicure. This simple step ensures that your nails stay protected and maintains the overall appearance of your pedicure.
| Benefits of Reapplying Top Coat |
|---|
| 1. Prevents chips and peeling |
| 2. Enhances the shine and glossiness of the polish |
| 3. Adds an extra layer of protection against daily activities |
| 4. Provides a smooth and flawless finish |
Reapplying the top coat is a quick and easy step in your pedicure maintenance routine. Simply brush on a thin layer of top coat over your existing polish, making sure to cover the entire nail surface. Allow it to dry completely, and you’re good to go!
Remember, a little extra effort goes a long way in keeping your pedicure fresh and beautiful. So, don’t forget to reapply that top coat regularly and enjoy the long-lasting protection it provides.
Get Extra Polish for Quick Fixes
At Namaste | Nail Sanctuary, we take pride in providing high-quality pedicure services that stand the test of time. Unlike some salons that dilute their polishes to maximize usage, we ensure that our polishes maintain their integrity. While you don’t need to bring your own polish to your appointment, it’s always a good idea to have a bottle on hand that matches the color used during your service. This way, you’ll be prepared to administer quick fixes if any chips or damages occur.

When it comes to maintaining your pedicure’s flawless appearance, having extra polish readily available can be a game-changer. Even with careful precautions, accidents can happen, and a tiny flaw can quickly diminish the overall look. With your matching bottle of polish, you’ll be equipped to address any minor imperfections swiftly and effortlessly.
Whether you notice a small chip or a minor scrape, reaching for your personalized bottle of polish allows you to touch up the affected area without compromising the rest of your pedicure. By gently applying a thin layer of polish over the damaged spot, you can restore its original beauty and maintain the overall harmony of your pedicure.
By having extra polish on hand, you’ll be prepared for any occasion, ensuring your pedicure looks impeccable at all times. Whether you’re attending an important event, going on vacation, or just taking advantage of the warmer weather to flaunt your toes, you can trust that quick fixes will be a breeze.
Apply Cuticle Oil for Nail Health
As we all know, dry cuticles and nails can have a negative impact on the longevity of your pedicure. To keep your nails healthy and maintain the beauty of your pedicure, it’s important to incorporate cuticle oil into your daily nail care routine.
By applying a few drops of cuticle oil to your toenails every day, you can provide essential moisture to your cuticles and nails, preventing them from becoming dry and brittle. This not only promotes nail health but also helps to ensure that your pedicure stays glossy and long-lasting.
When applying cuticle oil, gently massage it into your cuticles and nails, allowing the oil to penetrate deeply. This will help to nourish and moisturize your nail bed, keeping it soft and supple. Not only will this improve the overall appearance of your nails, but it will also help to prevent the polish from chipping or peeling prematurely.
There are various cuticle oils available on the market, each with its own unique blend of nourishing ingredients. Look for oils that contain moisturizing agents such as jojoba oil, vitamin E, and almond oil, as these can provide superior hydration and nourishment to your nails.
Remember, regular application of cuticle oil is key to maintaining healthy nails and a long-lasting pedicure. Make it a part of your daily routine, and you’ll enjoy beautifully manicured toes that are sure to turn heads!
Benefits of Cuticle Oil:
- Moisturizes and nourishes the cuticles
- Improves nail flexibility and prevents breakage
- Enhances the longevity of your pedicure
- Creates a glossy and healthy nail appearance
- Stimulates nail growth
| Brand | Ingredients | Price |
|---|---|---|
| OPI ProSpa Nail & Cuticle Oil | Vitamin E, Avocado Oil, Sunflower Seed Oil | $10 |
| CND SolarOil Nail & Cuticle Conditioner | Sweet Almond Oil, Jojoba Oil, Vitamin E | $15 |
| Essie Apricot Cuticle Oil | Sweet Almond Oil, Jojoba Oil, Vitamin E | $9 |
Tips for Using Cuticle Oil:
- Apply cuticle oil after washing your hands or feet, when your skin is still slightly damp, to lock in moisture.
- Massage the oil into your cuticles and nails in a circular motion for better absorption.
- Use cuticle oil as a part of your nighttime self-care routine to deeply nourish your nails while you sleep.
- Look for cuticle oil with a convenient brush applicator for easy and mess-free usage.
By incorporating cuticle oil into your nail care regimen, you can ensure that your pedicure stays flawless, your nails remain healthy, and your confidence soars!

Essential Tools and Steps for DIY Pedicure At Home
If you prefer to do your pedicure at home, we’ve got you covered! With the right tools and following proper steps, you can achieve a salon-quality finish in the comfort of your own space. Here are the essential tools you’ll need:
- Nail polish remover
- Files
- Nail clippers
- Polish
- Cuticle oil
- Pumice stone or callus remover
- Lotion
Now that you have all the necessary tools, let’s walk through the step-by-step process for a DIY pedicure:
- Start by removing any old polish from your toenails using the nail polish remover.
- Next, soak your feet in warm water for about 10-15 minutes to soften the skin and nails.
- Trim and shape your nails using the nail clippers and files. Be sure to cut straight across and avoid rounded edges to prevent ingrown nails.
- Gently push back your cuticles using a cuticle pusher or an orangewood stick. Avoid cutting your cuticles as they protect your nails from infection.
- Exfoliate the skin on your feet and heels using a pumice stone or callus remover. This will help remove dead skin cells and leave your feet feeling smooth.
- Cleanse your feet with warm water and mild soap to remove any residue.
- Apply your chosen polish, starting with a base coat to protect your nails. Follow with two coats of colored polish, allowing each coat to dry before applying the next.
- Finish off your DIY pedicure with a top coat to seal in the color and add shine.
- Once your polish is completely dry, massage a small amount of cuticle oil into your cuticles and lotion onto your feet to keep them hydrated.
By following these steps and having the essential tools on hand, you can achieve a salon-quality pedicure in the comfort of your home. Sit back, relax, and enjoy pampering your feet!

Tips and Tricks for a Successful At-Home Pedicure
When it comes to pampering ourselves and achieving beautifully polished toes, an at-home pedicure can be a great option. But how can you ensure that your DIY pedicure turns out just as fabulous as a salon treatment? We’ve got some expert tips and tricks to help you achieve a successful at-home pedicure that will leave your feet looking and feeling amazing.
- Use a non-acetone polish remover: Before you begin your at-home pedicure, make sure to remove any old nail polish using a non-acetone polish remover. This will ensure a clean base for your new pedicure and prevent any unwanted discoloration.
- Give your feet a warm soak: Fill a basin with warm water and add a few drops of your favorite bath oil or Epsom salt. Soaking your feet for 10-15 minutes will help soften the skin and make it easier to remove any dead skin or calluses.
- Cut and shape your nails correctly: Use a nail clipper to trim your nails straight across, avoiding any curved or rounded edges. Then, use a nail file to shape the nails to your desired length and shape. This will ensure a neat and polished look.
- Properly deal with cuticles: Gently push back your cuticles using a cuticle pusher or a wooden stick. Avoid cutting your cuticles, as they serve as a protective barrier for your nails. If you have any hangnails, carefully trim them with a cuticle nipper.
- Gently buff away hard skin: Use a foot file or pumice stone to gently buff away any rough or hard skin on your feet, focusing on areas like the heels and balls of your feet. This will leave your feet feeling soft and smooth.
- Apply polish carefully: Choose your favorite nail polish color and apply it in thin, even coats. Start with a base coat to help the polish adhere better to your nails, then follow with two coats of your chosen color. Allow each coat to dry before applying the next one.
- Finish with a top coat and cuticle oil: Once your polish is completely dry, apply a top coat to seal in the color and add extra shine. This will also help protect your pedicure from chipping. Finally, apply cuticle oil to moisturize your cuticles and keep them looking healthy.
By following these tips and tricks for a successful at-home pedicure, you can achieve salon-quality results without leaving the comfort of your own home. With a little time and effort, your feet will look and feel amazing, giving you the confidence to show off your beautiful pedicure.

Maintaining Your Pedicure Between Appointments
To keep your pedicure looking fresh between salon appointments or DIY sessions, there are a few maintenance steps you can follow. These include:
- Use a foot file or pumice stone: Smooth out rough skin by gently exfoliating your feet with a foot file or pumice stone in the shower. This helps keep your feet soft and free from calluses.
- Regularly exfoliate with a scrub: Incorporate a foot scrub into your shower routine to exfoliate dead skin cells and reveal smoother, healthier-looking feet. Focus on areas prone to dryness, such as the heels and balls of your feet.
- Apply hydrating foot lotion and treatment: Keep your feet moisturized by regularly applying a hydrating foot lotion. Look for ingredients like shea butter or glycerin, which help lock in moisture and nourish your skin.
- Use a nourishing treatment: For extra care and nourishment, consider using a specialized foot treatment like JINsoon HyperRepair. This treatment helps repair dry, cracked skin, and promotes overall foot health.
By incorporating these maintenance steps into your routine, you can prolong the life of your pedicure and keep your feet in top shape. Remember, proper care and maintenance between appointments are essential for maintaining the beauty and longevity of your pedicure.
Tips for Long-Lasting Polish and Healthy Toenails
In addition to following proper pedicure techniques and maintenance, there are some extra tips you can incorporate into your routine to ensure long-lasting polish and maintain healthy toenails. By incorporating these habits, you can enjoy beautiful, vibrant nails and extend the life of your pedicure.
1. Apply Lotion and Cuticle Oil Daily
Keep your toenails and cuticles moisturized by applying lotion and cuticle oil daily. Hydrated nails are less likely to chip or peel, and well-nourished cuticles contribute to overall nail health. Massage the lotion and oil into your nails and cuticles to promote strength and flexibility.
2. Regularly Reapply Top Coat
Over time, the top coat of your pedicure may wear off, leaving your nails vulnerable to damage. To protect your polish and extend its longevity, regularly reapply a top coat. This will provide an extra layer of protection against chipping, cracking, and fading.
3. Avoid Activities That Can Damage Polish
Be mindful of activities that can potentially damage your pedicure. Avoid excessive exposure to water, harsh chemicals, and rough surfaces. If you’ll be engaging in activities that may compromise your pedicure, consider wearing protective footwear or applying a clear, strengthening polish to mitigate the risk of damage.
4. Use Products Specifically Designed for Toenails
When selecting nail care products, opt for those specifically designed for toenails. Toenails are typically thicker and more resilient than fingernails, so using products formulated for their specific needs can help ensure optimal results. Look for polishes, base coats, and top coats that are formulated to withstand the wear and tear unique to toenails.
5. Keep Your Feet Clean and Dry
Maintaining clean and dry feet is crucial for both the health of your toenails and the longevity of your pedicure. Clean your feet thoroughly, paying special attention to the area around the nails, to prevent the buildup of dirt, bacteria, and fungi. After washing, make sure to dry your feet completely, as moisture can lead to nail infections and premature polish damage.
By following these tips, you can enjoy long-lasting polish and maintain the health and beauty of your toenails. Incorporate these habits into your nail care routine and embrace the confidence of a fresh, flawless pedicure that lasts.
| Tips for Long-Lasting Polish and Healthy Toenails |
|---|
| Apply lotion and cuticle oil daily |
| Regularly reapply top coat |
| Avoid activities that can damage polish |
| Use products specifically designed for toenails |
| Keep your feet clean and dry |
Conclusion
Achieving a fresh and long-lasting pedicure doesn’t have to be a challenge. With our expert tips, techniques, and salon-quality products, you can enjoy a beautiful pedicure that lasts all summer long. Whether you prefer to visit a salon or do it yourself at home, these tips will ensure your pedicure stays stunning.
Start by scheduling your pedicure appointment on a chill day, so you have time to relax and allow your polish to dry properly. Bring a pair of sandals to your appointment to avoid damaging your fresh pedicure when putting on closed-toed shoes. Afterward, be mindful of heat and moisture for the first 12 hours, as they can compromise the longevity of your pedicure.
If you’re looking for a longer-lasting option, consider gel polish for a durable and chip-resistant finish. Protect your pedicure by wearing toe coverings when you’re not flaunting your toes, and reapply top coat regularly for added protection. Finally, follow proper maintenance steps like moisturizing daily with unscented lotion and using cuticle oil for nail health.
By following these fresh pedicure tips, you can have salon-quality nails that look beautiful and last throughout the summer. So go ahead and step into style with confidence!