Did you know that gel manicures can last up to two weeks without chipping, making them a popular choice for those who want salon-quality nails? Whether you want a long-lasting shine or are interested in trying a DIY manicure, this comprehensive tutorial has everything you need. Packed with expert tips and techniques, it will ensure that your gel manicure lasts, giving you beautiful nails that are sure to turn heads.
Key Takeaways:
- Proper prep work, including cuticle removal and nail surface buffing, is crucial for a long-lasting gel manicure.
- Choosing high-quality gel polish, like those from Kokoist, can greatly improve the durability and performance of your manicure.
- Applying thin coats of gel polish, capping the tips, and using a strong curing lamp are essential for proper application.
- Aftercare, such as using cuticle oil and hand cream, and avoiding activities that can damage the nails, is important for maintaining your gel manicure.
- By following the right techniques and tips, you can achieve salon-quality gel nails at home and enjoy long-lasting shine.
The Importance of Prep Work
Proper prep work is crucial for achieving a long-lasting gel manicure. To ensure the best results, we need to focus on the gel manicure prep, using the right prep tools, preparing the nail surface, and dehydrating the nails.
Gel Manicure Prep
Gel manicure prep sets the foundation for a successful and durable manicure. It involves various steps to prepare the nails for gel application.
- Start by removing the cuticles from the nail surface and surrounding areas. This step helps create a clean canvas for the gel polish.
- Next, lightly buff the nails to remove any natural shine. However, be cautious not to over-buff, as it can cause lifting or damage to the nail surface.
- Cleanse and dehydrate the nails using alcohol. This step removes any debris, oils, or residue that could affect the adhesion of the gel polish.
Prep Tools
Having the right prep tools can make the gel manicure prep process more efficient and effective. We recommend having the following tools:
| Prep Tool | Description |
|---|---|
| Cuticle Remover | A tool designed to gently push back and remove excess cuticles for a clean nail surface. |
| Alcohol Cleanser | An alcohol-based solution used to cleanse and dehydrate the nails before applying gel polish. |
These prep tools help facilitate the gel manicure prep process, making it easier to achieve salon-quality results.
Preparing the Nail Surface
Preparing the nail surface is a critical step in gel manicure prep. By following these steps, you can ensure optimal adhesion and longevity:
- Start by removing any nail polish or residue from the nails. A clean nail surface is essential for proper gel adhesion.
- Use a nail buffer to gently buff the surface of the nails. This step helps remove shine and create a slightly roughened texture, allowing the gel polish to adhere better.
This nail surface preparation step helps maximize the bond between the natural nail and the gel polish, resulting in better longevity.
Dehydrating the Nails
Dehydration is an important step in gel manicure prep as it removes any remaining oils or moisture from the nail surface. This ensures optimal adhesion and reduces the risk of lifting or peeling. Dehydration is typically done using an alcohol-based cleanser, ensuring a clean and dry surface for the gel polish application.
By focusing on gel manicure prep, utilizing the right prep tools, preparing the nail surface, and dehydrating the nails, you can establish a solid foundation for a long-lasting gel manicure.
Choosing the Right Products
When it comes to gel manicures, not all products are created equal. To achieve a long-lasting and salon-worthy result, it’s crucial to select high-quality gel polishes that are specifically designed for durability. One reputable brand that stands out in the market is Kokoist, known for its pure Japanese gel and commitment to using “better for you” ingredients.
Kokoist products are formulated with 5-free ingredients, which means they are free from harmful chemicals such as formaldehyde, toluene, DBP, formaldehyde resin, and camphor. By choosing gel polishes with these 5-free ingredients, you can protect your nails while enjoying a beautiful, long-lasting manicure.
Many users have reported excellent results with Kokoist products, praising their longevity and wear. Investing in reliable gel products like those from Kokoist can significantly enhance the durability and overall performance of your gel manicure.
Benefits of Choosing Kokoist Products:
- High-quality gel formula for long-lasting wear.
- Pure Japanese gel for superior performance.
- Formulated with 5-free ingredients for a safer application.
- Wide range of colors and finishes to suit any style.
- Trusted brand in the industry with a reputation for excellence.
With Kokoist products, you can confidently achieve a gel manicure that not only looks stunning but also lasts for an extended period. Whether you’re a professional nail technician or doing your nails at home, choosing the right gel polish is essential for a successful and long-lasting manicure.
Next, we will explore the proper application techniques to ensure your gel manicure stays flawless. By following these tips, you’ll be well on your way to achieving salon-quality results right in the comfort of your own home.
Proper Application Techniques
Applying gel polish correctly is crucial for achieving a long-lasting and salon-quality manicure. To ensure the best results, we recommend following these proper application techniques:
- Builder Gel: If you’re using builder gel, consider adding a structured apex to your nails. This technique provides additional strength and longevity to your manicure, ensuring it lasts longer.
- Cap the Tips: With each layer of gel polish, make sure to cap the tips of your nails. This means applying a thin layer of polish along the free edge and slightly underneath the nail. Capping the tips helps prevent lifting and extends the wear of your manicure.
- Thin Coats: When applying colored gel polish, it’s important to use thin coats. Thick layers can lead to uneven curing and may result in a less durable manicure. Apply multiple thin coats, ensuring each layer is fully cured before proceeding to the next.
- Clean Up: Before curing each layer of polish, thoroughly clean up any stray polish that gets on the cuticles or sidewalls. This ensures a clean and professional finish to your manicure.
- Strong Curing Lamp: To achieve optimal results, use a strong curing lamp with a mirrored base. The mirrored base helps reflect light and enhances the curing process. A lamp with sufficient curing power will ensure that your gel polish hardens properly, resulting in a durable and long-lasting manicure.

By following these proper application techniques, you can achieve a flawless and long-lasting gel manicure. Remember to invest in high-quality products and give each layer of gel polish enough time to cure properly. With the right techniques and a little practice, you can enjoy salon-worthy nails right from the comfort of your own home.
Aftercare for Long-Lasting Nails
Taking care of your nails after a gel manicure is crucial for maintaining their longevity. To ensure your gel manicure lasts as long as possible, it’s important to follow these aftercare tips:
Proper Gel Removal
When it’s time to remove your gel manicure, never peel or pick off the gel. This can weaken your nails and cause the next manicure to not last as long. Instead, opt for safe and gentle gel removal techniques. Here’s a step-by-step guide:
Step 1: Soak a cotton pad in acetone nail polish remover and place it on top of each nail.
Step 2: Wrap each finger in aluminum foil to secure the cotton pad and create a soak-off effect.
Step 3: Leave the cotton pads and foil wraps on for about 10-15 minutes to allow the gel polish to loosen.
Step 4: Gently push off the gel polish using a cuticle pusher or orangewood stick. If the gel doesn’t come off easily, repeat the soaking process for a few more minutes.
Step 5: Once all the gel polish is removed, gently buff the nails to smooth the surface.
Hydrating with Cuticle Oil
After removing your gel manicure, it’s important to replenish moisture to your nails. Apply cuticle oil daily to hydrate and nourish your nails and cuticles. Massage a small amount of oil into each nail and cuticle, focusing on the areas that tend to get dry. This will help keep your nails flexible and prevent them from becoming brittle or prone to breakage.
Nourishing with Hand Cream
In addition to cuticle oil, regular application of a hand cream is essential for maintaining the health and appearance of your nails. Choose a hand cream that is rich in moisturizing ingredients, such as shea butter or glycerin, to keep your skin and nails hydrated. Apply hand cream throughout the day, especially after washing your hands, to keep them soft and supple.
Avoid Using Nails as Tools
Your gel manicure may look fabulous, but remember that your nails are not invincible. Avoid using your nails as tools for opening cans, scratching surfaces, or anything that may put stress on them. Using your nails as tools can cause them to chip or break, compromising the longevity of your manicure. Instead, reach for a proper tool or utensil to perform these tasks.
Wear Gloves for Protection
If you regularly engage in activities that expose your hands to excessive water or chemicals, such as washing dishes or cleaning, consider wearing gloves. Gloves provide a barrier of protection for your nails and skin, preventing water and chemicals from weakening the gel polish or drying out your nails. Invest in a pair of durable, waterproof gloves for tasks that can potentially damage your manicure.

By following these aftercare tips and incorporating them into your nail care routine, you can extend the life of your gel manicure and enjoy beautiful, long-lasting nails.
Tips for Using Gel Polish at Home
Using gel polish at home is an excellent way to achieve a salon-quality job without the cost and inconvenience of going to a salon. Gel polish is known for its durability and chip-free formula, providing long-lasting results that can rival those of a professional manicure. To help you achieve the best results, we’ve compiled a list of tips and tricks for using gel polish at home.
Proper Preparation
Before applying gel polish, proper preparation is essential to ensure a flawless finish. Start by pushing back your cuticles using a cuticle pusher or an orangewood stick. This step helps create a clean canvas for the gel polish application. Next, gently buff the nail surface with a nail buffer to remove any shine and create a textured surface that improves adhesion. Lastly, cleanse your nails with alcohol or acetone to remove any oils or debris that may interfere with the bonding process.
Thin Layers
When applying gel polish, it’s crucial to apply thin, even layers. This allows for proper curing and optimal results. Start with a thin base coat, making sure to cover the entire nail surface. Follow up with two or three coats of your desired gel polish color, applying each coat in thin layers. Avoid applying thick coats, as they may not cure properly and can lead to chipping or lifting.
Capping the Free Edge
To enhance the durability of your gel manicure, be sure to cap the free edge of your nails with each layer of gel polish. This involves painting the gel polish along the edge of the nail, sealing it and providing extra protection against chips and peeling. Capping the free edge helps to extend the lifespan of your manicure, keeping it looking fresh and salon-worthy for longer.
Using Aftercare Products
After completing your gel nail application, it’s essential to use aftercare products to maintain the longevity of your manicure. Apply cuticle oil regularly to keep your cuticles moisturized and healthy. This helps prevent the gel polish from lifting and promotes overall nail health. Additionally, moisturize your hands with a nourishing hand cream to keep your nails and skin hydrated. By incorporating these aftercare steps into your routine, you can enjoy beautiful, chip-free nails for an extended period.
| Tips for Using Gel Polish at Home |
|---|
| Proper Preparation |
| Thin Layers |
| Capping the Free Edge |
| Using Aftercare Products |
By following these tips for using gel polish at home, you can achieve professional-looking results that are durable and chip-free. With proper preparation, thin layers, capping the free edge, and using aftercare products, you can enjoy a salon-quality gel manicure from the comfort of your own home.

The Importance of Preparation
Preparing your nails properly before applying gel polish is crucial for achieving long-lasting results. At our salon, we prioritize nail prep to ensure that our clients get the most out of their gel manicures.
Push Back and Trim Cuticles
One essential step in gel polish prep is pushing back and trimming the cuticles. By doing so, we create a clean canvas for the gel polish to adhere to. Removing any dead cuticle from the nail plate helps ensure proper adhesion, preventing lifting and chipping.
Gently Buff the Nail Surface
Buffing the nail surface is another important aspect of nail preparation. Using a nail buffer, we gently buff the nails to remove shine and create a slightly roughened surface. This provides a better grip for the gel polish, promoting better adhesion and longevity.
Cleanse with Acetone
Before applying gel polish, it’s crucial to cleanse the nails with acetone. Acetone helps remove any oils, debris, or creams that could prevent the gel polish from bonding effectively. By ensuring the nails are free from any residue, we create an optimal environment for the gel polish to adhere to, resulting in a longer-lasting manicure.
“Proper nail preparation is the foundation of a successful gel manicure. Taking the time to push back and trim the cuticles, gently buff the nail surface, and cleanse with acetone sets the stage for a flawless and long-lasting application.”
By prioritizing prep work and following these steps, you can achieve salon-quality results with your gel manicure. Remember, proper nail preparation is key for long-lasting, chip-free nails.

Applying Gel Polish
When it comes to applying gel polish, we believe that simplicity is key. By following a few important techniques, you can achieve a flawless and long-lasting manicure at home. Here’s what you need to know:
Thin Layers for a Perfect Finish
When applying gel polish, remember that less is more. It’s better to apply thin layers of gel polish rather than thick ones. This allows the polish to cure evenly and results in a smoother finish. So, don’t overload your brush with gel polish. Instead, use a small amount and spread it gently across your nails, ensuring a thin and even layer.
Capping the Free Edge
To enhance the longevity of your gel manicure, it’s important to cap the free edge of your nails. This means painting the gel polish all the way to the edge of each nail. Capping the free edge helps to prevent lifting and provides better protection against chips and scratches. It creates a seal that keeps the gel polish intact, ensuring a longer-lasting and more durable manicure.
Removing Wet Polish for a Clean Finish
Before curing your gel polish under the lamp, it’s crucial to remove any wet polish that may have accidentally ended up on your cuticles or nail edges. Wet polish that comes into contact with the skin can stick and cause lifting or peeling. To avoid this, simply use a clean brush or an orangewood stick to gently remove any wet polish around your nails. This ensures a clean and professional-looking finish.

By following these tips for applying gel polish, you can achieve a salon-quality manicure right at home. Remember, thin layers, capping the free edge, and removing any wet polish are the secrets to a flawless and long-lasting gel manicure.
Aftercare for Long-Lasting Results
Proper aftercare is crucial for maintaining the longevity of your gel manicure. We recommend following these essential steps to ensure your nails stay healthy and your manicure lasts:
1. Apply Cuticle Oil
To keep your nails and surrounding skin moisturized, apply cuticle oil regularly. Cuticle oil nourishes the nails and prevents them from becoming dry and brittle. Massage the oil into your cuticles and nails daily for best results. This simple step can help maintain the health and durability of your gel manicure.
2. Moisturize with Hand Cream
In addition to cuticle oil, using a nourishing hand cream is essential for keeping your hands and nails moisturized. The use of acetone during the gel polish application process can dehydrate the nails, so replenishing moisture is vital. Regularly applying hand cream throughout the day helps prevent dryness and maintains the flexibility of your nails.
3. Avoid Picking Off Gels
Resist the temptation to pick off your gel manicure. Picking or peeling off the gels can cause significant damage to your nails. It can weaken them and make them more prone to breakage. Instead, follow the proper gel removal process, ensuring the gels crumble off easily without the need for forceful scraping.
“Picking off gels can cause damage to your nails and weaken them.”
4. Safe Gel Removal
When it comes time to remove your gel manicure, it’s essential to do it safely and without causing harm to your nails. Avoid scraping or filing the gels forcefully, as these methods can damage the nail plate. Opt for a gentle gel removal process that involves soaking your nails in acetone or using gel removal wraps. This ensures the gels lift and crumble away easily, leaving your nails strong and healthy.
5. Take Care of Your Nails
Between gel manicures, it’s important to maintain good nail care habits. Avoid using your nails as tools, as this can lead to chips or breaks. When engaging in activities that expose your hands to excessive water or chemicals, consider wearing gloves for protection. Taking these extra precautions can help preserve the integrity of your gel manicure and prevent premature damage.
By following these aftercare tips, you can ensure the longevity of your gel manicure and enjoy beautiful, salon-worthy nails for weeks to come.
The History of Gel Nails
Since the 1980s, gel nails have been a popular choice for those seeking longer-lasting alternatives to traditional nail polish. In recent years, gel nails have become more accessible and widely adopted due to significant advancements in gel formula technology and the availability of UV lamps.
Gel nails offer a durable and chip-free finish that lasts significantly longer than regular nail polish. The key to their longevity lies in the curing process. Gel polish is applied to the nails and then cured under a UV or LED lamp, creating a hardened and long-lasting result.
Today, UV lamps are readily available, making gel nails accessible to anyone who wants to achieve salon-quality results in the comfort of their own home. This accessibility has revolutionized the nail industry, allowing individuals to enjoy the benefits of gel nails without the need for salon appointments.

Advancements in Gel Formula
The formula used in gel nails has evolved significantly over the years, leading to improved durability and performance. Modern gel formulas are designed to provide excellent adhesion, resulting in a longer-lasting manicure. These formulas have been developed to minimize chipping, cracking, and peeling, ensuring that your nails stay flawless for weeks.
UV Lamps for Curing
The introduction of UV lamps has been instrumental in the success of gel nails. UV lamps emit ultraviolet light that cures the gel polish, turning it from a liquid to a solid state. This process creates a bond between the gel polish and the natural nail, resulting in a strong and long-lasting manicure that can withstand daily activities without chipping or peeling.
Benefits of Gel Nails
There are several advantages to choosing gel nails over traditional nail polish. Some of the key benefits include:
- Long-lasting shine: Gel nails maintain their high-shine finish for weeks, with minimal fading or dullness.
- Durability: Gel nails are highly resilient and resistant to chips and scratches, making them ideal for individuals with a busy lifestyle.
- Versatility: Gel nail formulas come in a wide range of colors and finishes, allowing you to achieve a salon-quality look with ease.
- Extended wear time: Gel nails can last up to three weeks or more, depending on the individual’s nail growth.
- Minimal drying time: Unlike traditional nail polish that requires lengthy drying time, gel nails cure instantly under the UV lamp, saving you time and reducing the risk of smudging.
With the combination of advanced gel formulas and the availability of UV lamps, gel nails have become a game-changer in the beauty industry. Whether you prefer a classic glossy look or want to experiment with various nail art designs, gel nails can provide you with the durability and longevity you desire.
Best Practices for Gel Nails
Achieving long-lasting gel nails involves following a few best practices. By implementing these tips, you can ensure a beautiful and durable manicure that lasts for weeks.
1. Gel Nail Prep
Proper gel nail preparation is essential for optimal adhesion and longevity. Start by pushing back the cuticles using a cuticle pusher or a wooden stick. Gently buff the nails with a fine-grit buffer to remove the shine and create a roughened surface for better gel polish adhesion.
2. Cleansing with Acetone
Before applying gel polish, cleanse the nails with acetone to remove any oils, debris, or residue. This step ensures a clean surface for the gel polish to bond to, allowing for better adherence and longer-lasting manicures.
3. Applying Thin Layers
When applying gel polish, remember that thin layers are key. Apply multiple thin coats of gel polish rather than thick ones. Thin layers allow for proper curing and prevent the polish from wrinkling or lifting during the drying process.
4. Proper Curing Time
The curing time for gel polish can vary depending on the specific brand and the type of lamp you’re using. Always check the instructions provided by the gel polish manufacturer to determine the recommended curing time. Following the proper curing time ensures that the polish fully sets and maximizes its longevity.
5. Avoid Very Hot Water
After applying gel polish, it’s best to avoid exposing your nails to very hot water for the first few hours. Extremely hot water can cause the gel polish to lift or peel off prematurely. It’s recommended to wait at least a couple of hours before immersing your hands in hot water.
| Gel Nail Best Practices | |
|---|---|
| Gel Nail Prep | Push back cuticles and gently buff nails for better adhesion. |
| Cleansing with Acetone | Remove oils and debris to create a clean surface for the gel polish to bond to. |
| Applying Thin Layers | Apply multiple thin coats for proper curing and prevent wrinkling or lifting. |
| Proper Curing Time | Follow the recommended curing time for maximum longevity. |
| Avoid Very Hot Water | Avoid exposing nails to very hot water immediately after application. |
By following these best practices, you can enjoy long-lasting and stunning gel nails. Remember to choose high-quality products and take care of your nails with proper aftercare techniques to ensure beautiful salon-worthy results.
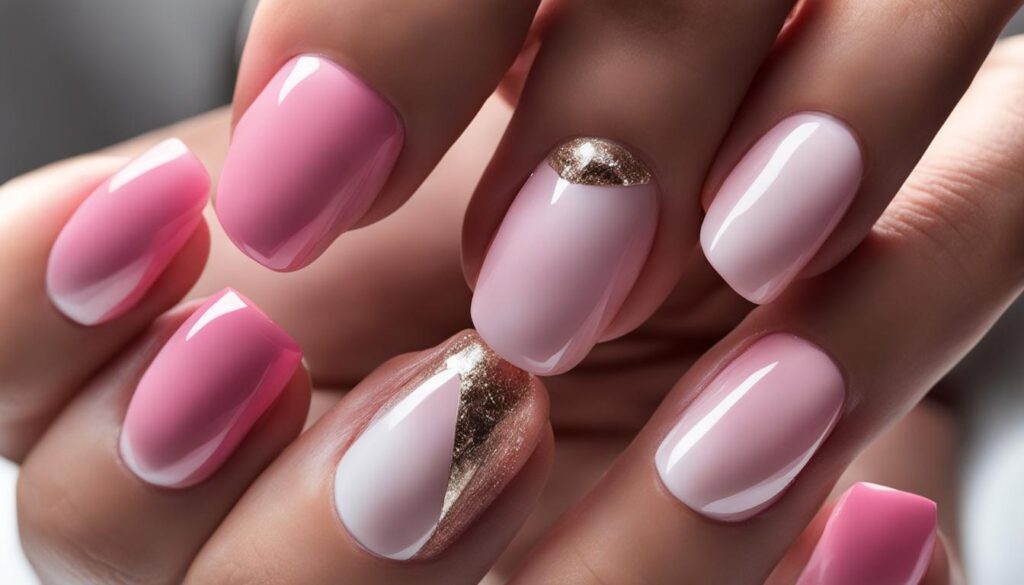
Tips for Gel Nail Longevity
To achieve longer-lasting gel nails, we need to pay attention to several important aspects. Let’s explore some key tips and techniques that can help enhance the longevity of your gel manicure:
1. Push Back and Maintain Cuticles
Properly pushing back the cuticles and keeping them well-maintained is crucial for preventing the gel polish from lifting. Use a cuticle pusher or an orange stick to gently push back the cuticles, ensuring that they do not come into contact with the gel polish during application.
2. Gently Buff the Nails
Gently buffing the nails helps remove the shine and any dead cuticle, creating a smooth and optimal surface for the gel to adhere to. Use a fine-grit nail buffer or a buffing block to lightly buff the surface of your nails, avoiding excessive pressure that can thin out the nails.
3. Cleanse the Nails with Acetone
Cleansing the nails with acetone is essential to ensure they are free from oils and debris. Use a cotton pad or a brush dipped in acetone to thoroughly cleanse the nails before applying the gel polish. This step creates a clean and ideal surface for the gel polish to bond with.
4. Apply Thin Layers of Gel Polish
When applying gel polish, remember that less is more. Applying thin layers allows for proper curing and helps prevent thick layers from hindering the curing process. Apply the gel polish in thin, even coats, ensuring that each layer is cured properly before applying the next.
5. Allow Proper Curing Time
Proper curing is essential for the longevity of your gel manicure. Follow the instructions provided by the gel polish brand to determine the appropriate curing time for each layer. Using a high-quality curing lamp with the recommended wattage and UV/LED settings ensures the gel cures fully and lasts longer.

By following these tips and techniques, you can achieve gel nails that last longer and maintain their shine. Remember, proper cuticle care, gentle nail buffing, thorough nail cleansing, thin layer application, and adequate curing time are the key factors for gel nail longevity.
The Role of Cuticles
When it comes to achieving long-lasting gel nails, cuticles play a crucial role. Properly pushing back and maintaining the cuticles is essential for the retention of gel manicures. By taking the time to remove excess cuticle and gently push them back, you can create a smooth nail bed for the gel polish to adhere to, minimizing the risk of lifting. In addition to promoting gel nail retention, maintaining healthy cuticles contributes to overall nail health and appearance.
Regular cuticle maintenance is key to ensuring the longevity of your gel manicure. Here are a few tips:
- Trim: Trim excess cuticle gently using a cuticle nipper. Be careful not to cut too close to the nail bed to avoid any potential discomfort or injury.
- Moisturize: Apply a nourishing cuticle oil or cream regularly to keep the cuticles hydrated and prevent dryness and cracking.
- Push Back: Gently push back the cuticles using a cuticle pusher or orangewood stick. This helps create a clean nail bed for the gel polish application.
By incorporating these cuticle maintenance practices into your nail care routine, you can achieve longer-lasting gel manicures with improved gel nail retention. Take the time to care for your cuticles, and you’ll enjoy beautifully maintained nails that are ready for any occasion.
The Importance of Cuticle Maintenance
| Benefits of Cuticle Maintenance | How to Achieve |
|---|---|
| Promotes gel nail retention | Regularly push back cuticles and moisturize with cuticle oil |
| Improves overall nail health | Trim excess cuticle and keep them well-maintained |
| Enhances the appearance of the nails | Ensure the cuticles are neatly trimmed and moisturized |
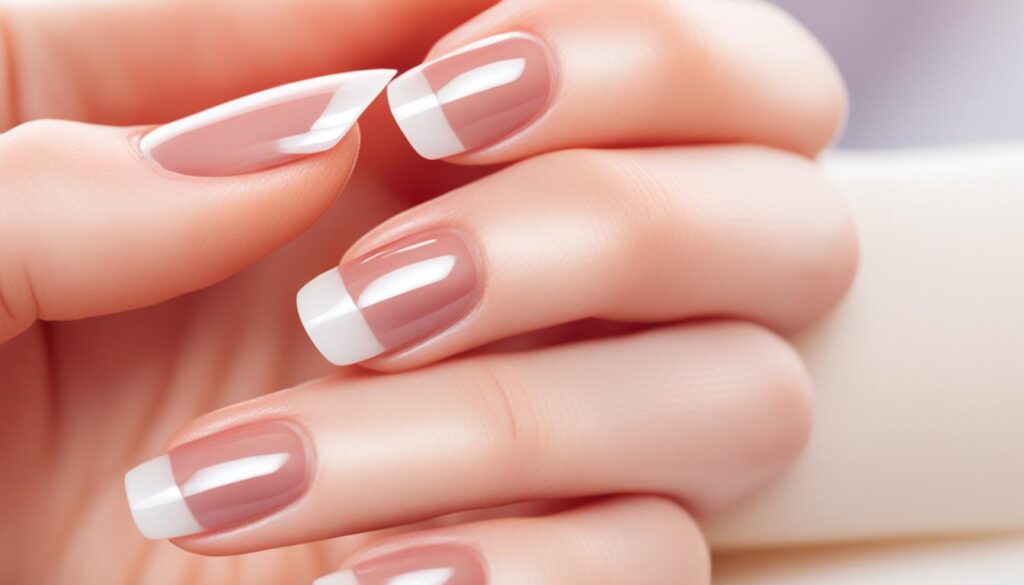
Buffing for Better Adhesion
Buffing the nails plays a vital role in achieving better adhesion for gel nails. A gentle buffing with a fine-grit nail file or buffer tool helps remove the shine and smooth the nail surface, allowing the gel polish to adhere more effectively. It’s important not to buff too aggressively, as this can thin out the nails. By creating a slightly roughened surface, the gel polish has more area to cling to, resulting in improved adhesion and longer-lasting manicures.
The Importance of Cleansing
Proper gel nail preparation is crucial for achieving a long-lasting and flawless manicure. One essential step in the preparation process is cleansing the nails with acetone before applying gel polish.
Acetone is a powerful solvent that helps remove any oils, debris, or dirt from the nail bed, ensuring a clean and pristine surface for the gel polish to bond to. By eliminating any contaminants, acetone creates an optimal environment for adhesion, allowing the gel polish to adhere better and last longer.
To cleanse the nails, dip a cotton pad or brush in acetone and gently wipe away any residue. Pay extra attention to the nail bed, cuticles, and sidewalls, as these areas can easily accumulate debris. Make sure to remove all traces of oil, lotion, or any other substances that could hinder the bond between the nail and the gel polish.
Cleansing the nails with acetone not only ensures better adhesion but also helps prevent lifting and premature chipping. It sets the foundation for a flawless and durable gel manicure, giving you confidence in your beautiful nails.
Remember, proper gel nail preparation, including the important step of acetone cleansing, is key to achieving salon-quality results at home.
Conclusion
Achieving a long-lasting gel manicure with a lasting shine is within reach when you follow these essential tips and techniques. From proper preparation to product selection, application techniques, and aftercare, each step plays a crucial role in attaining salon-quality results at home.
Start by giving your nails the attention they deserve. Properly prep the nail surface by removing cuticles and buffing away any shine. Choose high-quality gel products like Kokoist, known for their long-lasting wear and 5-free ingredients.
When applying gel polish, remember that less is more. Apply thin layers and cap the free edge for added protection against chips and scratches. Invest in a quality curing lamp with a mirrored base to ensure a strong and even cure.
Finally, don’t forget about aftercare. Regularly hydrate your nails with cuticle oil and hand cream, and avoid using your nails as tools. By following these gel manicure tips, you can achieve beautiful, salon-quality results that last.
