Connect with us

Nail Tips

Top 5 Long Coffin Nail Design Ideas

Uncover the most stylish long coffin nail design ideas, from Neon Nights to French Flair With a Twist, for a trendy nail makeover you won't want to miss.

Published

on

coffin nail design ideas

Elevate your style with the top choices for long coffin nail designs: Neon Nights, showcasing vibrant neon shades like lime green and hot pink for an electric energy. Animal Instinct, with animal print designs on a neutral base for a wild child vibe. Lilac Love, exuding romantic allure with lilac hues paired with white for sophistication. Pastel Paradise, blending dreamy ombre pastel colors like mint green and soft peach for a calming appearance. French Flair With a Twist, a modern take on the classic French manicure with bright neon or pastel tips. Discover more about these trendy designs.

Key Takeaways

  • Neon Nights: Long coffin nails with vibrant neon shades like lime green and hot pink for an electric, trendy look.
  • Animal Instinct: Long coffin nails featuring animal print designs on a neutral base for a wild child vibe.
  • Lilac Love: Long coffin nails in a romantic lilac hue paired with white for a feminine and charming style.
  • Pastel Paradise: Long coffin nails with dreamy ombre blends of soft pastel hues like baby pink and mint green for a delightful appearance.
  • French Flair With a Twist: Long coffin nails with a modern French manicure twist, incorporating bright tips in neon or pastel colors.

Neon Nights

Get ready to light up the night with your nails by embracing vibrant neon shades in the Neon Nights long coffin nail design trend. These eye-catching nail designs bring an electric energy to your fingertips with colors like lime green, hot pink, tangerine, and electric blue.

Perfect for any season, the Neon Nights trend is a surefire way to make a bold statement and turn heads with its energetic hues. As one of the most popular nail trends for 2024, neon nail colors are a must-try for those who love vibrant and striking manicures.

Animal Instinct
understanding natural animal behavior

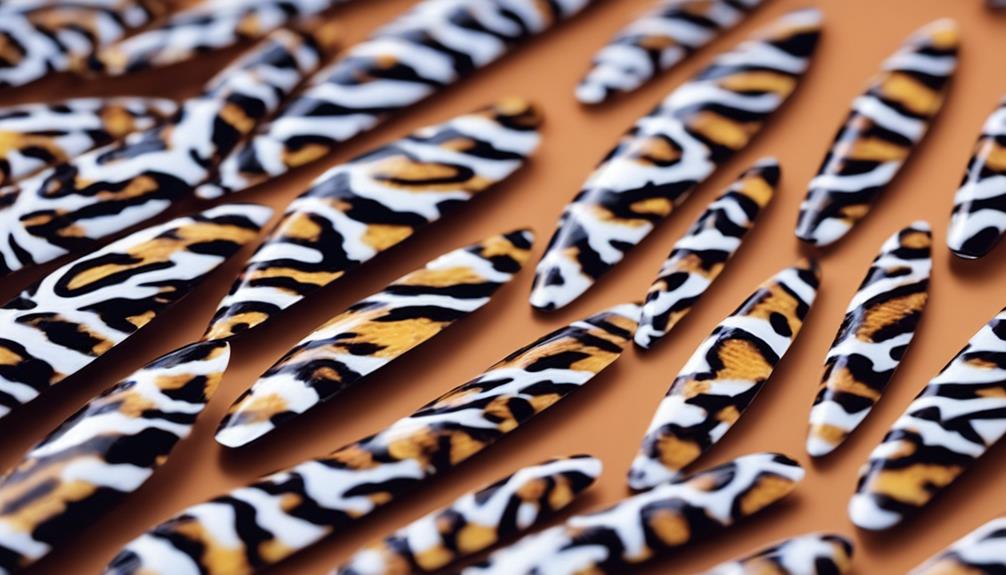
Embrace your fierce side and elevate your nail game with the trendy animal print designs of Animal Instinct. When opting for animal instinct nail art, consider starting with a neutral base to allow the animal prints to stand out. Popular choices include neutral colors like black, white, clear, and light beige, providing a sophisticated backdrop for the bold patterns.

To add a touch of mystery and allure, you may want to explore hand-painted Gothic elements in your animal instinct nail designs. For a striking look, try incorporating a black cat-eye effect, reminiscent of a feline's gaze, adding a subtle yet alluring detail to your nails.

Channeling your inner wild child through animal instinct patterns can bring a chic and edgy style to your overall appearance. These designs are versatile, allowing you to dress them up or down for any occasion, making them a go-to choice for those seeking a bold and adventurous nail look.

Lilac Love
lilac scented letters of affection

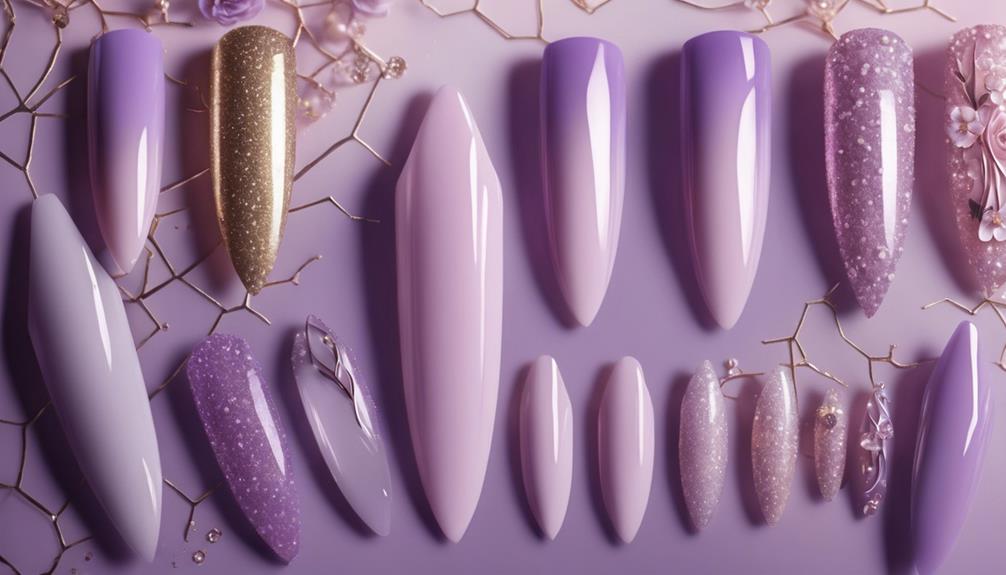
Indulge in the romantic allure of Lilac Love, a trendy nail art style featuring the enchanting lilac color. This elegant trend is perfect for adding a touch of femininity and springtime charm to your nails.

When opting for Lilac Love, consider pairing it with white for a sophisticated and charming look that's sure to turn heads. Whether you choose to go for full cover nail tips, acrylic false nails, or press on nails, Lilac Love is a versatile choice that suits various nail styles.

Advertisement

Embrace the natural brown undertones of lilac to create a dreamy and enchanting nail design that exudes romance and elegance.

  • Lilac Love is a must-try hue for 2024, perfect for those seeking a feminine and elegant manicure.
  • Pairing lilac nails with white creates a charming duo for a sophisticated look.
  • Full cover nail tips can enhance the beauty of Lilac Love nails.
  • Acrylic false nails are a great choice to achieve the dreamy and enchanting look of Lilac Love.
  • Press on nails offer a convenient way to rock the romantic allure of Lilac Love.

Pastel Paradise
dreamy pastel color palette

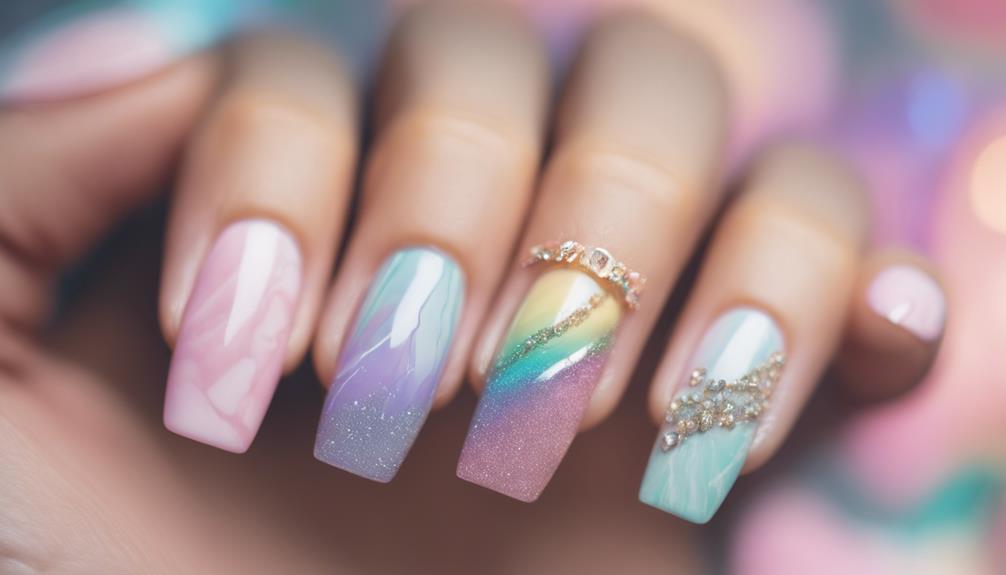
Let's explore the enchanting world of Pastel Paradise nail design, featuring dreamy ombre blends of soft pastel hues for a charming and soothing look.

Pastel Paradise nail designs incorporate a range of soft pastel colors like lilac, baby pink, mint green, light peach, and soft yellow, creating a dreamy and romantic aesthetic. These designs are particularly popular for 2024, offering a calming and delightful appearance that's perfect for any season.

By opting for Pastel Paradise fake nails with gel polish, you can achieve a feminine and springtime charm that adds a touch of elegance to your overall look. Embracing the trend of Pastel Paradise allows you to create a whimsical and enchanting nail art experience, showcasing the beauty of light pink and other pastel shades in a blend that exudes sophistication and grace.

French Flair With a Twist
sounds about right

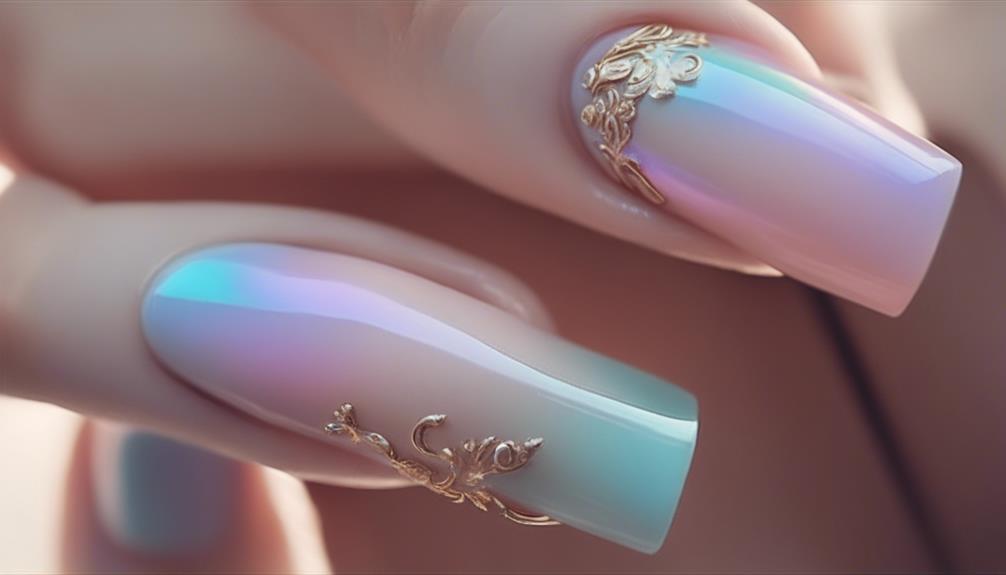
Discover a modern take on the classic French manicure with a twist that incorporates bright tips in neon or pastel colors for a fresh and trendy look. This style offers a unique blend of traditional elegance with a contemporary edge.

To achieve the French Flair With a Twist, consider the following:

  • Nails with Glue: Utilize nail glue to secure any additional elements like rhinestones or charms for an extra touch of glamour.
  • Goth Style: Experiment with darker hues like deep purple or black for a more gothic-inspired twist on the classic French design.
  • Classic French: Maintain the signature white or nude base of the French manicure while playing up the tips with vibrant colors for a fun contrast.
  • Length Coffin: Opt for long coffin-shaped nails to enhance the sophistication and elongate the fingers, perfect for showcasing this unique nail art.
  • Pop of Color: Add subtle pops of color under the nail tip or incorporate glitter accents to elevate the overall look and make a statement.

Frequently Asked Questions

What Are the Five 5 Basic Nail Designs?

To answer your question on the five basic nail designs, they include French manicure, solid color nails, glitter nails, nail art designs, and ombre nails.

French manicure features a natural base with white tips, while solid color nails are a classic choice with a single color.

Advertisement

Glitter nails add sparkle, and nail art designs allow for creative patterns.

Ombre nails blend colors for a trendy effect.

These designs lay the foundation for various nail styles.

What Color Looks Best on Coffin Nails?

When choosing a color for your coffin nails, consider pastel shades like lilac, baby pink, mint green, light peach, and soft yellow for a soft and elegant look.

Alternatively, opt for neon hues such as lime green, hot pink, tangerine, and electric blue to make a bold and eye-catching statement.

Advertisement

Nude tones like light beige, soft pink, and sheer milky colors offer a sophisticated touch.

French manicures with a twist or animal prints in neutral colors can also create unique and stylish designs.

What Nail Design Is Trending Right Now?

Neon Nights, Animal Instinct, Lilac Love, Pastel Paradise, and French Flair with a Twist are the current trending nail designs. These styles offer a range of choices from vibrant and bold to soft and romantic looks.

Embracing neon colors, animal prints, pastel shades, and modern twists on classic French designs, these options cater to various preferences and fashion aesthetics. Whether you seek eye-catching vibrancy or subtle elegance, these trending designs have you covered.

Are Coffin Nails in Style in 2024?

Yes, coffin nails are indeed in style in 2024. Their sleek and edgy look remains a favorite among nail enthusiasts, offering versatility with customizable designs and colors.

Advertisement

The long length of coffin nails allows for intricate nail art and embellishments, making them a popular choice for many. Celebrities and influencers continue to showcase coffin nails, keeping them on-trend this year.

Sources like Vogue and Harper's Bazaar confirm the enduring popularity of coffin nails in 2024.

Conclusion

As you experiment with these top 5 long coffin nail design ideas, don't be afraid to push the boundaries of your creativity. The possibilities are endless, and each design can be a unique expression of your personal style. Whether you opt for bold and colorful designs or subtle and elegant ones, long coffin nail designs allow you to showcase your individuality. From intricate patterns and 3D accents to minimalist designs and metallic finishes, there are countless ways to elevate your nails. So, go ahead and explore different long coffin nail designs to find the perfect fit for your style.

So go ahead, try something new, and see where your imagination takes you. Who knows, you may just discover a design that truly reflects the essence of who you are. If you’re feeling stuck, consider looking for inspiration from current trends or exploring different cultures for unique design elements. Embracing new year design ideas can lead to a fresh perspective and help you create something that feels completely authentic to you. Don’t be afraid to push the boundaries and mix and match styles to create a design that is as unique as you are.

The nail art world is your canvas, so paint it with confidence and flair.
Advertisement

Advertisement

Nail Tips

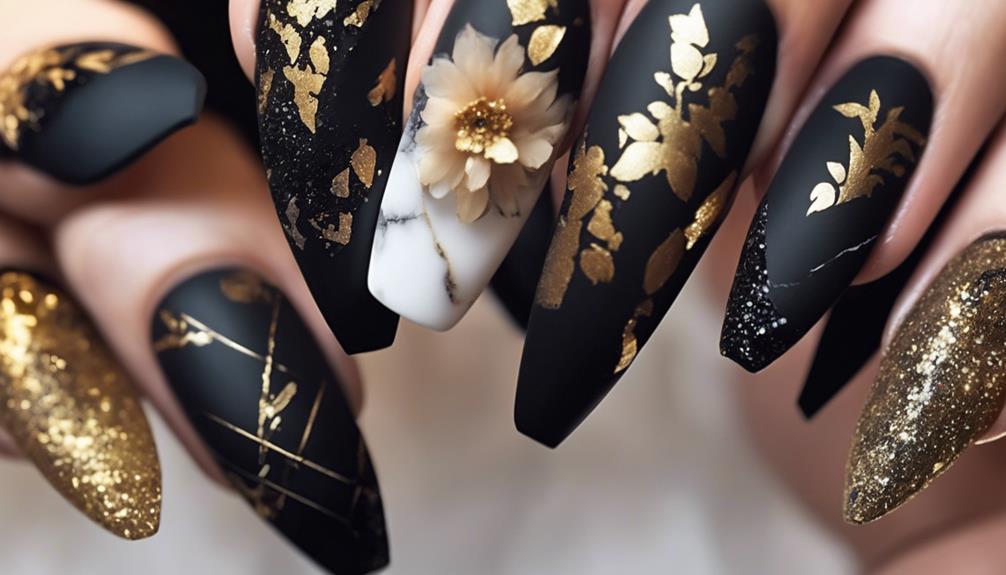
Black and Silver Nails: A Chic and Modern Combo

Get ready to elevate your nail game with stunning black and silver designs that blend boldness and elegance, but there’s so much more to discover!

Published

on

By

chic black silver nails

Black and silver nails are a fabulous combo that mixes boldness with elegance! This chic design is perfect for any occasion, whether you're at a party or just hanging out. You can get creative with fun patterns like ombre effects or cute geometric shapes. Just remember to use a base coat to protect your nails and a top coat for extra shine! Plus, don't skip the cuticle oil to keep everything healthy. With a little care and your special touch, you'll stand out in style. Keep exploring, and you'll discover even more dazzling ideas for your nail art!

Key Takeaways

  • Black and silver nails offer a striking contrast, symbolizing power and elegance for a chic look.
  • Versatile for any occasion, these designs can range from bold to subtle, suiting both casual and formal events.
  • Popular variations include classic French tips, ombre effects, and geometric patterns, allowing for personal style expression.
  • Adding glitter, rhinestones, or charms enhances the glam factor, perfect for festive celebrations.
  • Proper care, including base and top coats, ensures longer wear and maintains the nail design's integrity.

Introduction

beginning of a topic

When it comes to nail art, black and silver nails stand out as a striking choice that blends sophistication with modern flair. You'll love how the deep black nail polish symbolizes power and rebellion, while the shimmering silver accents add a touch of elegance. Together, they create a stunning contrast that makes your nails pop!

These eye-catching designs can be compared to the importance of creative expression in early childhood development, as both allow for personal style and individuality.

These nail designs aren't just pretty; they're versatile too! You can express your creativity with various styles, like ombre effects that fade from black to silver, or geometric patterns that look super trendy. Glitter accents can also make your nails sparkle, turning them into conversation starters at any event.

Plus, black and silver nails fit perfectly with seasonal themes! Whether it's a spooky Halloween design or a glamorous New Year's Eve look, you can customize your nails to match any holiday or special occasion throughout the year.

With their captivating beauty and modern aesthetics, black and silver nails are an exciting way to show off your unique style. So grab your polish and get ready to create some fabulous nail art that will have everyone asking about your chic, sophisticated look!

Advertisement

Versatile for Any Occasion

adaptable for every event

Black and silver nails offer incredible versatility, making them perfect for any occasion, whether you're heading to a casual brunch or a formal gala.

These eye-catching looks can be as bold and daring or as subtle as you like. With Black and Silver Nail Designs, you can create a sophisticated look that fits any mood. The striking contrast between black and silver enhances the visual appeal, giving you endless options.

Additionally, just like understanding credit card terms is essential for financial literacy, knowing how to style your nails can elevate your overall look.

For a more classic style, try classic French tips with a shiny silver twist, or go modern and edgy with intricate ombre effects. You can even incorporate seasonal themes, like adding subtle glitter for the holidays or floral elements for a spring vibe.

This versatile color combination remains trendy in 2024, appealing to all skin tones and allowing you to express your unique style.

Whether you're dressing up or keeping it casual, black and silver nails can adapt to your needs.

Advertisement

Popular Variations and Ideas

trending concepts and innovations

Exploring popular variations of black and silver nails can spark your creativity and help you discover unique styles that suit your personality. One fun idea is to try classic French tips with silver accents, which gives a chic twist to a timeless look.

If you're feeling adventurous, consider ombre effects blending both colors for a stunning gradient. You might also want to incorporate some best hair styling gels into your routine, as they can help keep your nails looking polished and fabulous.

Geometric patterns can also add a modern touch, making your nails stand out.

Don't forget about glitter accents! They can elevate your black and silver designs, bringing in sparkle and dimension, perfect for festive occasions.

For nail shapes, stiletto is fabulous, allowing for intricate designs and bold statements.

Customization options are endless! You can add rhinestones and charms, and choose between a glossy finish, a matte look, or even chrome for something extra special.

Advertisement

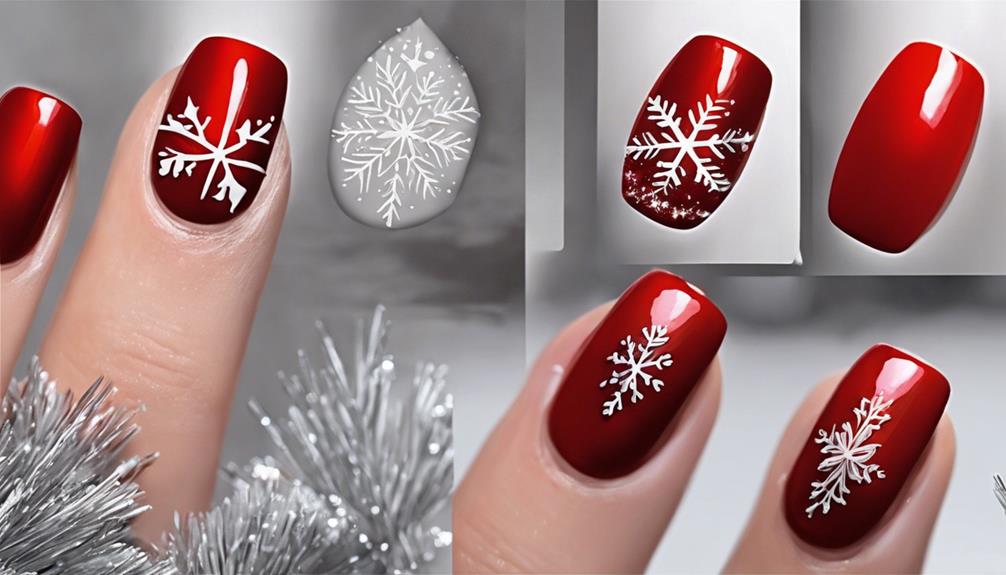
Seasonal themes can further personalize your nails—think snowflakes for winter or metallic leaves for fall, bringing your black and silver nail art to life.

With these ideas, you'll have plenty of inspiration to create a look that's uniquely you!

Tips and Tricks

helpful advice and strategies

Achieving a flawless black and silver manicure starts with a solid foundation. Begin by applying a base coat to protect your nails from staining and to make your design last longer. Once that's dry, it's time for the fun part!

Use a thin brush or nail tape to create clean lines and precise geometric patterns with your silver accents over the black polish.

Want to add some flair? Consider layering a matte top coat over the black polish before adding shiny silver details. This technique gives a striking contrast that's simply stunning!

If you're feeling extra glamorous, sprinkle on some glitter or add rhinestones for that special touch, perfect for parties or celebrations.

Advertisement

Don't forget about your nails' health! After all the fun, a little cuticle oil will keep your nails happy and healthy.

And to keep your design looking fresh, a clear top coat will seal everything in place. With these tips and tricks, you'll have the chicest black and silver nails around, ready to impress anyone who sees them!

Enjoy your fabulous manicure journey!

Care and Maintenance

proper upkeep techniques required

To keep your black and silver nails looking their best, regular care and maintenance are essential. Start by applying a base coat before you paint your nails. This protects your natural nails from staining and helps your manicure last longer.

After you've created your stunning nail art, don't forget to seal it with a top coat. This adds a glossy finish and helps prevent chipping, so your nails stay fabulous!

Moisturizing is super important too! Use cuticle oil regularly to keep your nails and cuticles hydrated. This prevents dryness, especially after using nail polish remover.

Advertisement

Remember, happy nails are pretty nails!

It's a good idea to schedule regular touch-ups every 1-2 weeks. This keeps your black and silver nails looking fresh and addresses any signs of wear or damage.

Also, be careful around harsh chemicals and excessive water, as they can weaken your nails and lead to peeling or chipping.

With these simple maintenance tips, you'll keep your black and silver nails looking chic and modern. You'll shine bright, and everyone will ask how you keep your nails so amazing!

Keep up the good work!

Advertisement

Common Mistakes to Avoid

avoid these common mistakes

Even with the best care, mistakes can happen when applying black and silver nails. One big mistake is skipping the base coat. It protects your nails from staining and makes that black polish last longer.

Also, avoid applying thick layers of polish! They might seem easier, but they can lead to uneven drying and smudging, ruining your fabulous look.

Don't forget to give each layer enough drying time. If you rush it, you might end up with bubbles or imperfections in your shiny silver design. After all that hard work, you definitely want it to look perfect!

Another common error is skipping the top coat. This final layer adds shine and helps prevent chipping, keeping your nails looking fresh and chic.

Frequently Asked Questions

Is Black Nail Polish Chic?

Absolutely, black nail polish is incredibly chic. It exudes sophistication and power, while offering versatility for any occasion. You can express your personal style with various designs, making it a timeless choice for nail fashion.

What Two Colors Go Together for Nails?

When choosing nail colors, you can't go wrong with combinations like red and white for vibrancy, or black and silver for elegance. Experiment with pastels or bold neons to express your unique style!

Advertisement

What Nails Match With Every Outfit?

When you're choosing nails that match every outfit, consider classic colors like nude, white, or black. These shades effortlessly blend with any style, ensuring your manicure complements both casual and formal looks seamlessly.

What Is the Most Popular Nail Style Today?

The most popular nail style today blends boldness with elegance. You'll find classic French manicures with modern twists, geometric patterns, and glitter accents that suit various occasions, ensuring your nails always look chic and stylish.

Conclusion

Now that you know all about black and silver nails, it's time to get creative! Whether you're dressing up for a party or just want to add some sparkle to your day, this color combo is perfect for you. Remember the tips and tricks we shared, and don't be afraid to try new designs. With a little care, your nails will look fabulous! So grab your polish and let your nails shine like stars!

Continue Reading

Nail Tips

Ocean-Themed Nails to Capture Vacation Vibes

Splash into ocean-themed nails that evoke summer vibes; discover fun designs and techniques that will leave you dreaming of seaside adventures!

Published

on

By

vacation inspired ocean nail art

Ocean-themed nails are a fantastic way to feel those vacation vibes all year long! Imagine vibrant shades of blue and green, playful seashells, or beautiful wave patterns dancing on your fingertips. You can even add some sparkle with glitter, mimicking the sun on water. Try techniques like water marbling for gorgeous wave effects, or stick on 3D seashells for extra fun. Don't forget a glossy top coat, so your nails shine like the ocean! With just a few tips, you'll create stunning looks that remind you of summer adventures, and there's even more helpful information waiting for you!

Key Takeaways

  • Choose vibrant shades of blue and green to reflect the essence of the ocean and summer fun.
  • Incorporate playful designs like wave patterns, seashells, and tropical motifs for a beachy vibe.
  • Use glitter and rhinestones to mimic sunlight shimmering on water for added sparkle.
  • Experiment with techniques like ombre effects and water marbling to recreate ocean depths and wave movement.
  • Maintain nail health with regular manicures and moisture to keep designs looking fresh and vibrant.

Introduction

begin your journey here

Ocean-themed nails are a fantastic way to express your love for the sea and its vibrant beauty. Imagine painting your nails in shades of blue and green, just like the ocean waves! You can create beach-inspired nails that bring tropical vibes right to your fingertips.

Popular nail designs include wave patterns that swirl like the tide, seashell motifs that sparkle, and intricate coral art that captures the magic of underwater life. To enhance your ocean-themed look, consider incorporating vibrant colors inspired by Indonesian Decorative Pillows that reflect the lively essence of coastal decor.

To make your ocean-themed nails even more special, try adding some glitter or rhinestones! These little gems can twinkle just like sunlight dancing on the water. You can also use cool techniques, like ombre effects, to blend different colors together, creating a beautiful gradient that reminds you of the ocean depths.

During summer, vibrant and bold colors are all the rage, so now's the perfect time to show off your ocean-inspired style. Whether you're heading to the beach or just want to feel like you're on vacation, these nail designs will surely make you smile.

Enhances Summer Vacation Aesthetics

elevates seasonal travel experience

Summer vacation aesthetics thrive on vibrant colors and playful designs, and ocean-themed nails fit perfectly into this vibe. When you think about a tropical getaway, those beautiful shades of blue and green come to mind, just like the sparkling sea!

Ocean-themed nails often feature these lively hues, capturing the essence of beachy fun and creating a delightful look. Incorporating elements of financial planning can also help you budget for those summer nail art supplies, ensuring you have the funds to express your creativity.

Advertisement

Imagine your nails adorned with fun designs like seashells and wave patterns! These designs evoke memories of sun-soaked beach adventures, making them super popular for summer nail art. You can also add some glitter accents to mimic the sunlight bouncing off the water, giving your nails a festive touch for vacation outings.

Techniques like ombre effects and water marbling can make your beachy nails even more dynamic, reflecting the gentle movement of waves. Want to add a luxurious feel? Consider using rhinestones to represent pearls or incorporate textured elements.

This adds an extra touch of charm, perfectly aligning with summer's playful and relaxed spirit. So, grab those nail polishes and let your creativity flow, making your ocean-themed nails the ultimate accessory for your summer vacation aesthetics!

Popular Variations and Ideas

trendy options and suggestions

There are countless ways to express your love for the ocean through nail art, and each variation brings a unique twist to the table. One popular choice is Oceanic Swirls, which uses a water marbling technique to create beautiful wave-like patterns.

If you're feeling adventurous, try the Deep Sea Set, featuring seahorses and coral against deep blue backgrounds that make you feel like you're exploring the ocean depths! Additionally, consider incorporating some calming scents through essential oils, like lavender oil to enhance your relaxation while pampering yourself with a nail art session.

For a trendy look, consider Chrome Seashells with their shiny chrome finish. These nails often have gradient colors and seashell motifs, perfect for summer.

Advertisement

Or, you might love Fresh Out of the Sea, which showcases lifelike seashell designs with 3D textures and pearl accents, bringing the beach right to your fingertips!

If you're heading to a beach party, check out Tropical Jelly Nails. These vibrant nails feature jelly finishes and cute hibiscus flowers, capturing the essence of summer vibes.

With so many ocean-themed options, you can find the perfect design to show off your love for the sea and add a splash of fun to your nails!

Tips and Tricks

helpful advice and strategies

Dive into creating stunning ocean-themed nails with a few helpful tips and tricks! Start by picking a mix of ocean-inspired colors like deep blues and turquoise. These shades perfectly encapsulate the sea.

Don't forget to add some white or sandy shades for that balanced beach vibe!

Next, get creative with nail art techniques. You can use water marbling or dotting tools to create fun wave patterns or water droplet effects. These little details make your nails look like they've just come from the ocean!

Advertisement

For extra flair, consider adding 3D elements like seashell decals or pearl embellishments. This adds texture and makes your design pop.

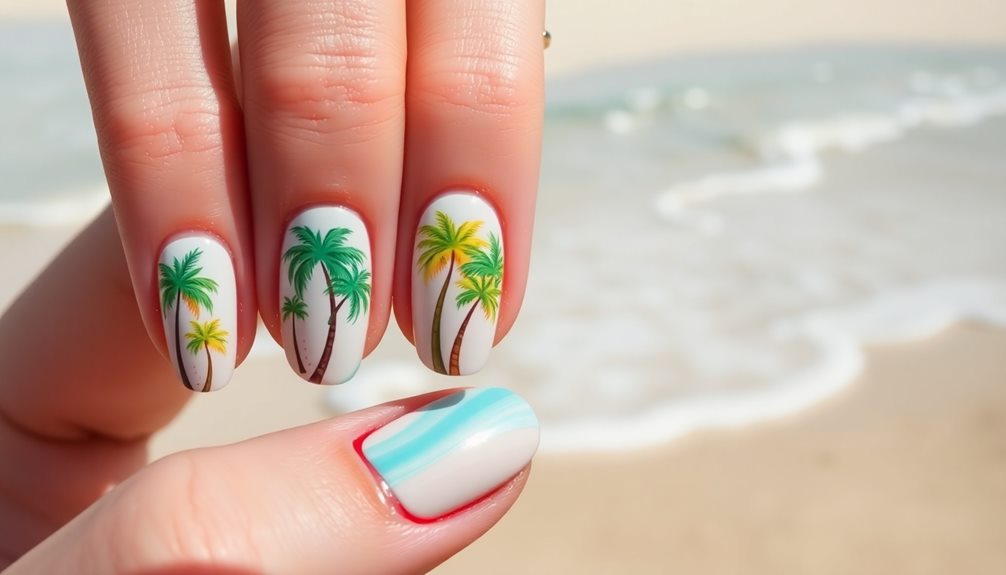
To take your beach-inspired nail ideas to the next level, think about accent nails featuring tropical motifs, like palm trees or a bright hibiscus flower. These playful touches bring a bit of paradise to your fingertips!

Lastly, apply a glossy top coat to give your nails a shiny finish, mimicking the sunlight's reflection on water.

With these tips, you'll be ready to show off your ocean-themed nails and feel those vacation vibes wherever you go!

Care and Maintenance

regular upkeep and preservation

To keep your ocean-themed nails looking vibrant and beautiful, regular care and maintenance are essential. Start by moisturizing your cuticles and nails daily. This helps prevent brittleness and breakage, ensuring your stunning designs stay intact.

Before you dive into applying colored polish, don't forget to use a base coat. It enhances adhesion and keeps your nails from staining, making your beach-inspired art last longer!

Advertisement

Be mindful of excessive exposure to water and harsh chemicals, as these can weaken your nail polish and cause chipping. Your intricate ocean designs deserve the best protection!

When it comes to shaping your nails, opt for gentle filing techniques instead of aggressive clipping. This keeps your nails looking neat while maintaining a perfect canvas for your oceanic nail art.

Lastly, aim for regular manicures at least every two weeks. Not only will this improve your nail health, but it'll also keep your nails looking fresh and fabulous.

Common Mistakes to Avoid

avoid these common mistakes

Many nail enthusiasts make common mistakes that can undermine their beautiful ocean-themed designs. First, don't skip the base coat! It protects your natural nails from staining, especially with vibrant colors like deep blues and greens.

Next, when you're doing nail stamping or creating detailed designs, avoid overloading your artwork with too many elements. A cluttered design can confuse the eye—stick to a few key features, like seashells or waves!

Another mistake is forgetting to seal your masterpiece with a top coat. This step is crucial, as it prevents chipping and fading, keeping your ocean vibes strong.

Advertisement

If you're using long nails, precision is key, so always use the right tools. Non-precision brushes can lead to uneven lines and messy patterns—yikes!

Lastly, prep is essential! Clean and buff your nails before applying nail polish. This ensures better adhesion, preventing peeling or lifting over time.

Frequently Asked Questions

What Are Some Ocean-Themed Nail Colors to Consider?

You can consider colors like deep navy, sandy beige, coral pink, and seafoam green. These shades evoke beach vibes and ocean beauty, making your nails a perfect summer accessory that reflects your love for the sea.

How Can I Incorporate Ocean Elements Into Nail Art?

You can incorporate ocean elements into your nail art by using wave patterns, seashell decals, and marine colors like turquoise and sandy beige. Add glitter for a shimmering effect, mimicking sunlight on water. Get creative!

Are There Specific Tools Needed for Ocean-Themed Nail Designs?

For ocean-themed nail designs, you'll need a few essential tools: nail polish brushes, dotting tools, sponges for blending, and nail art tape. These will help you create stunning waves and intricate sea-inspired patterns.

Advertisement

Can I Do Ocean-Themed Nails at Home or Should I Go to a Salon?

You can definitely create ocean-themed nails at home! With some basic tools, nail polish, and creativity, you'll achieve beautiful results. However, if you prefer a professional touch, visiting a salon is always an option.

What Are the Best Occasions to Sport Ocean-Themed Nails?

You can rock ocean-themed nails at beach parties, summer festivals, or vacations. They add a fun touch to poolside gatherings, birthday celebrations, or even casual outings. Just let your creativity flow and enjoy the vibe!

Conclusion

Now that you know how to create ocean-themed nails, you're ready to dive into summer fun! Whether you choose bright blue waves or sparkly starfish, your nails will totally capture those vacation vibes. Remember to take care of your designs, so they stay fabulous and fresh. And don't forget, practice makes perfect! So grab your nail polish and let your creativity flow like the tide. You'll be the star of the beach with those awesome nails!

Continue Reading

Nail Tips

Ombre Spring Nails for a Fresh and Fun Look

Keep your nails fresh and fun this spring with vibrant ombre designs that will brighten your look—discover how to create the perfect gradient!

Published

on

By

fresh ombre spring nails

Ombre spring nails are a fun way to brighten up your look! You can create beautiful gradient designs using soft pastels like baby pink or mint green. Start by shaping your nails and applying a base coat, then use a makeup sponge to blend two colors for that perfect ombre effect. Don't forget to finish with a shiny or matte top coat for a polished finish! Remember, keeping your nails hydrated is key, so use cuticle oil daily. With these tips, you'll have fresh nails that reflect the joys of spring. There's even more exciting inspiration just ahead!

Key Takeaways

  • Embrace vibrant pastel shades like baby pink and mint green for a refreshing spring ombre look.
  • Utilize sponging techniques to blend contrasting colors smoothly, creating a stunning gradient effect.
  • Incorporate floral designs or hearts in pastel hues to celebrate the season's joy and romance.
  • Maintain your ombre nails with regular manicures, cuticle oil, and a protective top coat.
  • Follow seasonal trends on social media for creative inspiration and unique color combinations.

Introduction

overview of the topic

As spring blooms around us, ombre nails emerge as a stylish choice that perfectly captures the season's essence. Imagine your fingertips adorned with soft hues, like Baby Pink or mint green, creating a sweet and cheerful look!

Ombre nail designs let you play with colors, blending them into a stunning gradient look that's as fresh as the flowers outside. You can easily create this look using fun techniques like sponging or brushing, making your nails stand out. With the rise of bold colors and highlights in fashion, top trends in grooming can inspire your nail art choices as well.

Spring is all about lightness and joy, so pastel nails are a perfect match. You might even try adding cute floral accents to your ombre nails, giving them a special touch just for the season. If you love the classic vibe, consider blending pastel shades with French tips for a unique twist!

To keep your ombre nails looking fabulous, remember to give them a little extra care. Regular maintenance and hydration are key to ensuring they stay fresh and healthy.

Seasonal Nail Trends Evolve

evolving seasonal nail trends

Seasonal nail trends are constantly evolving, and spring 2023 is no exception. This year, vibrant ombré nails are stealing the spotlight, especially in delightful pastel shades. Imagine your nails transitioning from a soft baby pink to a cheerful peach—it's like having a mini sunset on your fingers! These colorful combinations not only brighten your look but also perfectly match the fun, playful energy of spring.

For those looking for a refreshing twist, incorporating essential oils like lavender oil can provide calming effects that enhance your self-care routine while you pamper your nails. With the rising popularity of Japanese gel techniques, you can enjoy healthy nails while rocking intricate nail art. People are excited to try out unique designs for spring celebrations and festivals, and ombré styles are the perfect way to stand out.

Advertisement

You might even want to experiment with a modern twist on the classic French manicure, blending pastel colors for a fresh update. Social media is buzzing with inspiration for spring nails, with hashtags like #springnails and #ombrenails helping you discover new ideas.

Popular Variations and Ideas

creative concepts and alternatives

This spring, you'll find a range of popular variations for ombré nails that perfectly capture the season's essence. One fun idea is to try pastel ombré, blending colors like soft pinks, blues, and yellows. These shades create a delicate effect that feels just right for the season.

You can also incorporate nail styles for Valentine's Day by adding romantic designs like hearts in soft, pastel colors. If you're looking for something trendy, consider the "Peach Fuzz" ombre, which pairs beautifully with other spring shades and matches Pantone's Color of the Year!

Floral ombre designs are also super popular this time of year. Imagine lovely gradients that remind you of blooming flowers—what a lovely way to celebrate spring!

Plus, short nails can showcase intricate ombre patterns, making them both practical and stylish. You can play around with nail ideas like adding glitter accents or even negative space designs, giving your ombre nails a unique twist.

Tips and Tricks

helpful advice and strategies

Achieving a flawless ombré effect on your nails requires some handy tips and tricks to ensure a smooth and stunning finish. First, start by shaping and buffing your nails, then apply a base coat to create a nice foundation for your ombre nails.

Next, choose your colors—maybe a lovely pink gradient—and get ready to blend!

Advertisement

To achieve that beautiful ombre look, use a makeup sponge to dab and blend two contrasting polish colors. This will help you create a smooth transition between shades. If you want to keep things tidy, use liquid latex or nail tape around your nails to catch any polish that might go astray.

You can try different techniques, like the gradient brush method for more control or the reverse ombre for a fun twist!

Once you're happy with your design, finish off your gradient nails with a shiny top coat. This won't only make your nails sparkle but also protect your nail art from chipping. If you're feeling adventurous, a matte top coat can give your ombre nails a unique look.

Enjoy your fabulous spring nails!

Care and Maintenance

routine upkeep and monitoring

To keep your ombré nails looking fresh and vibrant, regular care and maintenance are essential. First, don't forget to apply cuticle oil daily! This helps keep both your nails and cuticles hydrated, which is super important for the health of your nails and the beauty of your ombré designs.

Next up, schedule regular manicures every 2-3 weeks. This isn't just a treat; it helps maintain the bright colors of your ombré nails and fixes any growth or chipping issues.

Advertisement

Speaking of protection, reapply a top coat every few days. This shiny layer protects your nails from wear and tear, making sure your ombré art stays fabulous!

Also, be mindful of the products you use. Avoid harsh chemicals and pick gentle removers instead; they'll help prolong the lifespan of your nail art.

Lastly, a balanced diet rich in vitamins and minerals supports strong and healthy nails. When your nails are healthy, your ombré designs will look even better!

Common Mistakes to Avoid

avoiding common mistakes

When it comes to creating the perfect ombré nails, there are several common mistakes you should steer clear of. First, don't apply too much polish at once! This can lead to uneven blending, making your nails look messy. Instead, use a makeup sponge to build the color gradually for a smoother ombré effect.

Another mistake is skipping the base coat. A base coat protects your natural nails from staining and damage, so always start with it!

Also, remember to allow enough drying time between layers. If you rush, you'll end up with smudged nails—yikes! Patience is key for achieving that flawless look.

Advertisement

Don't forget the top coat, either! Skipping it can leave your ombré nails vulnerable to chipping and looking dull. A top coat enhances shine and durability, making your nails pop for the perfect spring vibe.

Lastly, using the right tools is essential. A regular brush won't help in the blending process, so reach for a makeup sponge or gradient brush instead.

Avoid these common mistakes, and you'll be on your way to fabulous ombré nails everyone will admire!

Frequently Asked Questions

What Colors Are Best for Ombre Spring Nails?

When choosing colors for ombre spring nails, you'll want to consider soft pastels like lavender, mint green, and blush pink. These shades blend beautifully, creating a fresh, vibrant look perfect for the season.

Can I Do Ombre Nails Without Professional Help?

Absolutely, you can do ombre nails without professional help! With the right tools, practice, and a little patience, you'll create a stunning look. Just choose your colors, blend, and enjoy your beautiful DIY nails!

Advertisement

How Long Do Ombre Nails Typically Last?

Ombre nails typically last around two to three weeks, depending on your nail growth and care. If you keep them hydrated and avoid harsh chemicals, you'll enjoy your beautiful look longer.

Are Ombre Nails Suitable for Short Nails?

Absolutely, ombre nails can look fantastic on short nails! They create a stylish gradient effect that enhances your fingers' appearance. Just choose colors that complement each other, and you'll have a chic look in no time!

What Tools Do I Need for DIY Ombre Nails?

For DIY ombre nails, you'll need a makeup sponge, nail polish in two or more colors, a base coat, top coat, and a small brush for cleanup. You're ready to create your stunning design!

Conclusion

So, get ready to dazzle this spring with your fabulous ombre nails! With so many fun colors and styles to choose from, you can truly express yourself. Remember to take care of your nails and avoid common mistakes, like skipping the base coat. Whether you go for pastel shades or bold hues, you're sure to turn heads. So grab your nail polish and let your creativity shine! Happy painting, and may your nails be as bright as your smile!

Advertisement

Continue Reading

Trending