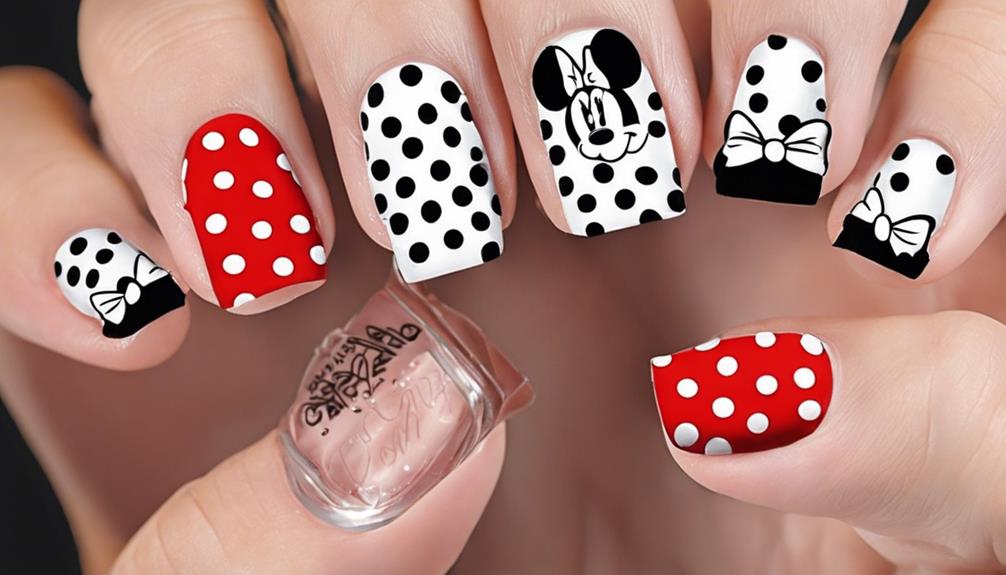
Embark on a nail art journey showcasing adorable Minnie Mouse designs! Incorporate black, white, and red nail polish along with acrylic paint to recreate Minnie’s iconic bow and timeless polka dots, capturing her timeless style. Don’t forget to finish off with a top coat for extra protection and long-lasting wear.
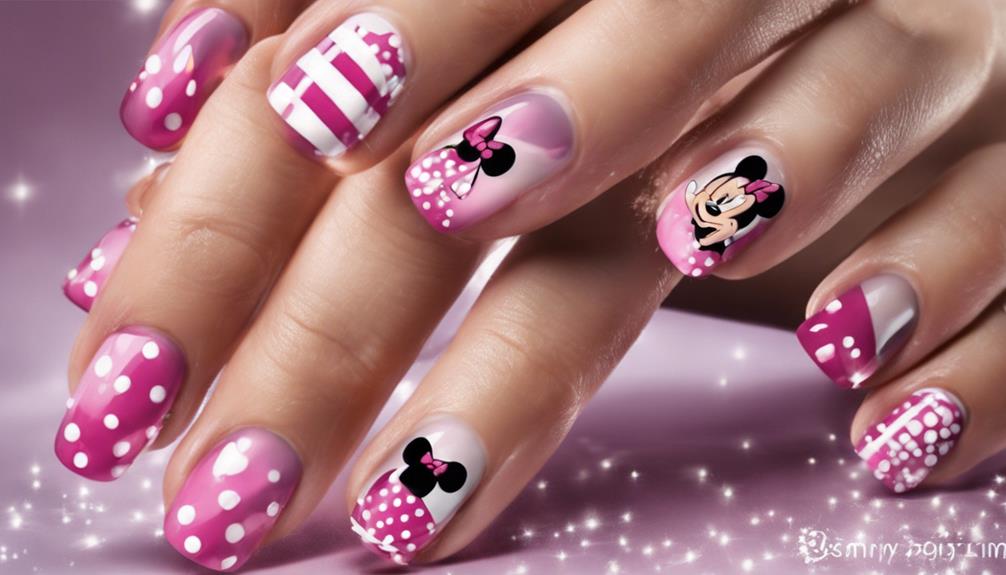
Personalize the design with unique color combos, shapes, and embellishments for a fabulous finish. Elevate your nail game with a touch of Minnie magic!
Key Takeaways
- Use red, white, and black polish for Minnie Mouse's iconic colors.
- Create Minnie's bow with red polish and white polka dots.
- Add polka dots with a dotting tool for a classic touch.
- Experiment with colors, shapes, and details for customization.
- Seal with top coat for longevity and personalize to showcase your style.
Required Tools and Materials
To create stunning Minnie Mouse nail designs, gather essential tools and materials such as black, white, and red polish, along with black, white, and yellow acrylic paint. These vibrant colors are key to capturing Minnie's classic look. Additionally, don't forget a reliable base coat and top coat to guarantee your masterpiece lasts.
When diving into this nail art tutorial, having the right tools is essential. Using a fine brush will allow for detailed work, especially when crafting Minnie Mouse's iconic polka dots. Dotting tools are also handy for achieving perfect circles, such as those needed for Minnie's ears.
Following a step-by-step guide will be your secret weapon in creating nail art that isn't only cute but also magical. Stay tuned for the upcoming steps on preparing your nails to make sure they're ready for the Minnie Mouse transformation. Let's bring some Disney charm to your fingertips!
Preparing Your Nails
If you're prepared to give your nails a touch of Disney magic, let's begin by prepping them for the Minnie Mouse nail design transformation. Here's how to get your nails ready for the adorable Minnie Mouse look:
- Clean and Shape: Start by removing any old nail polish and shaping your nails to your preferred length and style. This step guarantees a fresh canvas for your Minnie Mouse design.
- Apply Base Coat: Safeguard your nails by applying a base coat before beginning the design. This not only helps the Minnie Mouse nail art last longer, but it also protects your natural nails from potential staining.
- Hydrate Cuticles: Moisturize your cuticles with a nourishing oil or cream to keep them soft and healthy throughout the nail design process. Well-moisturized cuticles contribute to an overall polished look for your Minnie Mouse nails.
Applying the Base Coat
When applying the base coat for your Minnie Mouse nail design, we must select a high-quality product that will safeguard and ready our nails. Remember to apply a thin layer to avoid clumping and guarantee a smooth application of the nail polish.
Allow the base coat to dry completely before moving on to the enjoyable part of creating your Minnie Mouse-inspired nail art.
Choose Nail Polish
For a flawless Minnie Mouse nail design, start by choosing high-quality black, white, and red nail polish to apply as the base coat. Here's how to pick the perfect nail polish for your Minnie Mouse masterpiece:
- Black: Opt for a rich, opaque black polish to create Minnie's iconic ears with precision.
- White: Choose a vibrant white polish for Minnie's signature polka dots that pop against the black base.
- Red: Select a bold, glossy red polish for Minnie's classic bow that adds a touch of whimsy to your design.
These vibrant colors will lay the foundation for your Minnie Mouse nail art, ensuring a stunning and professional finish.
Apply Thin Layer
To achieve a flawless Minnie Mouse nail design, start by applying a thin layer of base coat to safeguard your nails and create a smooth foundation. The base coat acts as a protective barrier, preventing staining of your natural nails and helping the acrylic nail polish adhere better. By applying a thin, even layer, you guarantee that your nail art will last longer without chipping, maintaining its vibrant look.
This step is essential in providing a clean canvas for your Minnie Mouse design to shine. Remember to allow the base coat to dry completely before moving on to the next exciting step in creating your adorable Minnie Mouse nail art.
Allow to Dry
After applying the base coat for your Minnie Mouse nail design, the next step is to make sure it's allowed to dry thoroughly before proceeding further. Here are three essential tips to guarantee your base coat dries perfectly:
- Patience is Key: Give your nails ample time to air dry or use a quick-dry spray to speed up the process.
- Avoid Heat: Refrain from using hot air from a blow dryer to dry the base coat, as it can cause bubbling and uneven drying.
- Test for Dryness: Gently touch the surface of your nail with a finger that hasn't touched the wet polish. If it feels tacky, it's not dry yet. Wait a bit longer for a flawless finish.
Taking these steps will ensure a flawless base for your Minnie Mouse nail design.
Creating Minnie Mouses Signature Bow

Delicately painting Minnie Mouse's signature bow onto your nails can elevate your nail art to a playful and stylish level.
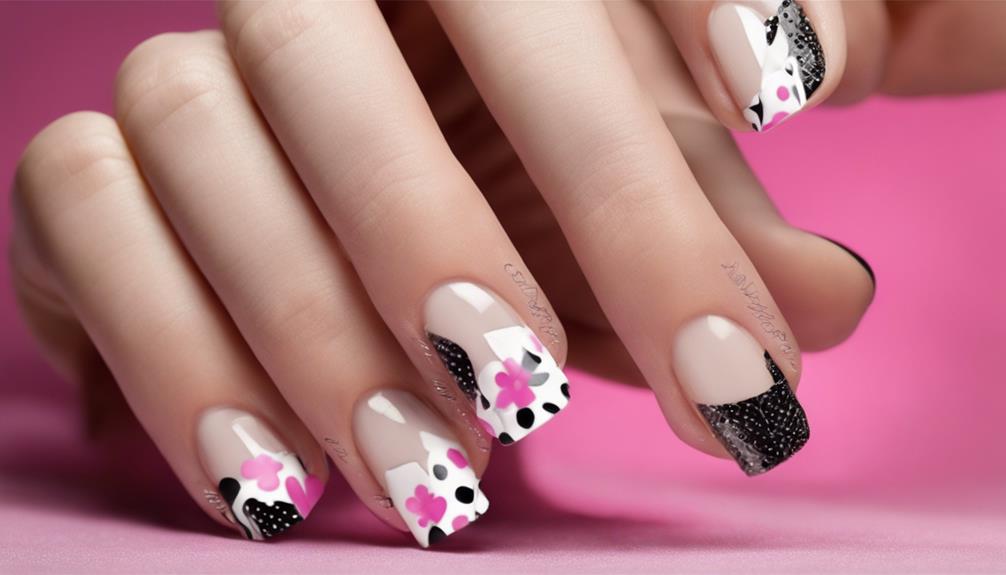
To create Minnie Mouse's iconic bow, start by using red nail polish to draw two curved lines that meet in the center of your nail, forming the shape of the bow. Next, add two smaller lines on each side to create the bow's loops. Fill in the bow with red polish, leaving a small gap between the loops.
Then, using white nail polish, carefully add tiny polka dots to the bow for that classic Minnie Mouse look. For an extra touch of sophistication, consider outlining the bow with black nail polish to make it pop.
Minnie Mouse's signature bow isn't only cute but also timeless, adding a touch of whimsy to your overall nail art. Get ready to showcase your love for Minnie with this adorable nail design!
Adding Polka Dots and Details
Let's talk about how to perfect the placement of polka dots to achieve Minnie Mouse's charming style on your nails.
We'll also explore how to add intricate details like Minnie's signature bow to enhance the overall design.
With a steady hand and some creativity, you can recreate Minnie Mouse's iconic look right at home.
Polka Dot Placement
To achieve Minnie Mouse nail art perfection, strategically place polka dots using a dotting tool to capture her iconic style with precision and charm.
Here are some tips to help you nail the polka dot placement:
- Start by dipping the dotting tool into your chosen nail polish color and gently press it onto your nail to create perfectly round polka dots.
- Space the polka dots evenly across your nail, ensuring they align well to mimic Minnie Mouse's classic look.
- Experiment with different sizes of polka dots to add depth and interest to your design, creating a playful and adorable finish that will surely make your nails stand out.
Detailing Minnies Bow
Detailing Minnie's iconic bow involves delicately accentuating it with carefully placed polka dots and intricate details to capture her signature style with precision and charm.
To achieve this look, use a fine brush dipped in white acrylic paint to add clean and detailed polka dots along the bow. Focus on creating precise lines and shapes to enhance the overall design.
Incorporate small black dots strategically to represent Minnie's classic style. By paying attention to these intricate details, you can bring Minnie Mouse's bow to life on your nails.
Seal the Design With Top Coat
Using a high-quality top coat is essential for preserving and enhancing your Minnie Mouse nail design. Here are three important reasons why sealing your design with a top coat is vital:
- Protection: A top coat acts as a shield for your Minnie Mouse nail art, preventing chips and cracks that can ruin your carefully crafted design.
- Longevity: By applying a top coat, you can extend the life of your Minnie Mouse nails, ensuring they look fresh and vibrant for longer periods.
- Enhanced Finish: Opting for a clear top coat adds a glossy finish to your Minnie Mouse design, enhancing its overall appearance and giving it a professional salon-like look.
Don't underestimate the power of a good top coat – it not only seals in your design but also adds that final touch of perfection to your Minnie Mouse nail art. Choose a fast-drying formula to speed up the drying process and keep your nails looking flawless.
Customization and Final Tips

After sealing your Minnie Mouse nail design with a top coat for added protection and longevity, let's explore how to customize and elevate your look with some final tips.
To personalize your Minnie Mouse nails, consider experimenting with different color combinations and designs that resonate with your unique style. Adding a touch of glitter or rhinestones can bring extra sparkle and dimension to your nails, making them stand out even more. For those looking to take it up a notch, try incorporating Minnie Mouse decals or stickers for a quick and easy way to achieve the iconic look.
When it comes to shaping your nails, consider trying almond, stiletto, or coffin shapes to enhance the Minnie Mouse theme further. Additionally, using a matte top coat can provide a modern twist on traditional Minnie Mouse nail art, giving it a chic and sophisticated edge.
Whether you're using polish or acrylic, these customization options and final tips will help you achieve Minnie Mouse nails that are as unique and fabulous as you are.
Frequently Asked Questions
How Do You Make Minnie Mouse Nails?
We create Minnie Mouse nails by using black, white, and red polish with acrylic paint. Incorporate Mickey Mouse ears and Minnie Mouse cupcake designs for a cute look. Follow step-by-step instructions, utilize tape for precision, and seal with a top coat for a lasting finish.
How to Make Minnie Mouse Step by Step?
We start by applying a base coat and painting specific fingers with red and white polish. Utilize a dotting tool to create Minnie Mouse ears and draw her iconic features. Use tape for clean lines and finish with acrylic paint details.
What Are the 5 Basic Nail Art Designs?
We adore nail art! Our top 5 basic designs are polka dots for whimsy, stripes for flair, florals for charm, geometry for edge, and French tips for elegance. Get creative with colors and tools for personalized perfection.
How Do You Draw Small Designs on Nails?
We use fine nail art brushes for precision in drawing small designs on nails. Acrylic paints work well for detailed art. Practice on paper or nail wheels. Nail stamping kits help create intricate designs easily. Add rhinestones for extra flair.
Can the Minnie Mouse Nail Designs be adapted for different nail lengths?
Yes, the Minnie Mouse nail designs can be adapted for different nail lengths. Whether you have short, medium length, or long nails, the iconic Minnie Mouse pattern can be customized to fit any size. With a little creativity, you can rock medium length nail designs inspired by Minnie Mouse.
Conclusion
Now, step back and admire your adorable Minnie Mouse nail design masterpiece!
The iconic bow, playful polka dots, and intricate details come together to create a look that's as charming as it's fun.
With your nails looking like they just stepped out of a Disney movie, you'll be sure to turn heads and spread a little magic wherever you go.
So go ahead, rock those Minnie Mouse nails with confidence and style!