
Mummy nails are a super fun way to get ready for Halloween! With their cool bandage patterns, they'll totally catch everyone's eye while you're out trick-or-treating. You can easily create this spooky look using white or beige polish for the wraps. Don't forget to add little dots for googly eyes to make them come alive! It's also a good idea to use a matte top coat for that eerie finish. Plus, if you're thinking about using decals, they'll save you time. Want more tips to make your mummy nails shine? Stick around for some awesome ideas!
Key Takeaways
- Mummy nails feature bandage-like patterns, perfect for achieving a spooky Halloween look with ease.
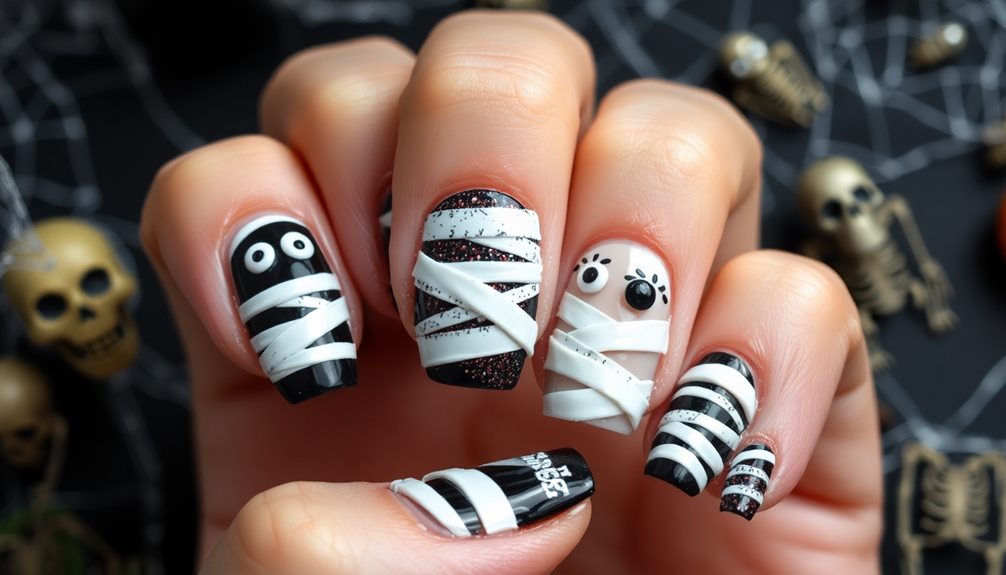
- Use white or beige gel polish with black lines to create textured mummy wraps.
- Incorporate 3D elements, like googly eyes, for an engaging and lively design.
- Nail decals simplify the process, allowing for impressive mummy designs without intricate painting.
- Regularly moisturize cuticles and apply a protective top coat to maintain nail health and durability.
Introduction

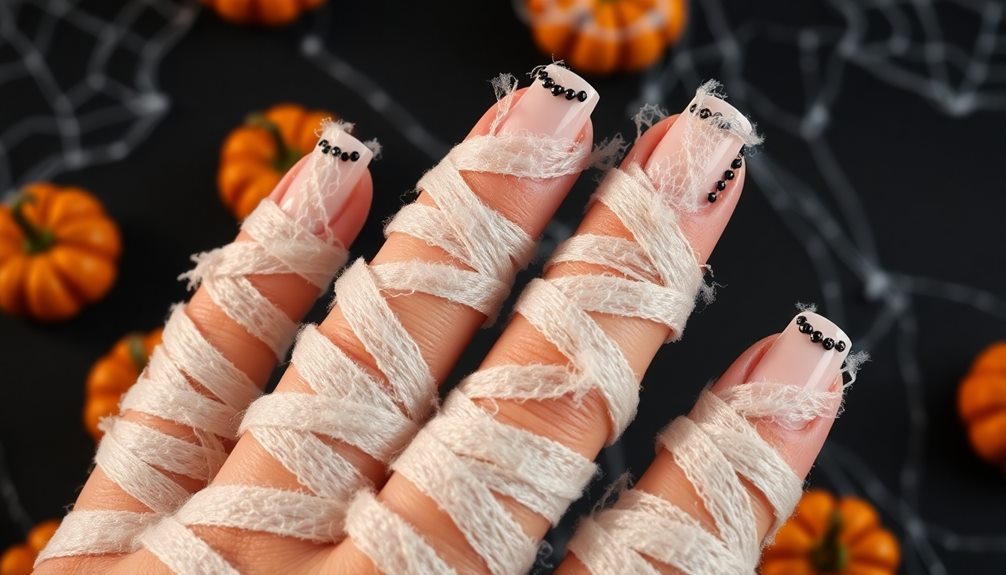
When Halloween rolls around, many of us look for fun and creative ways to celebrate, and mummy nails are a perfect choice. These spooky yet adorable designs feature bandage-like patterns that remind you of classic Halloween themes, like creepy mummies and Halloween pumpkins.
With 24 unique mummy-inspired designs to choose from, you can really let your creativity shine! To ensure your nails are in top shape for this festive look, consider prepping your skin with essential steps, such as essential skin prep for flawless tanning to enhance your overall appearance.
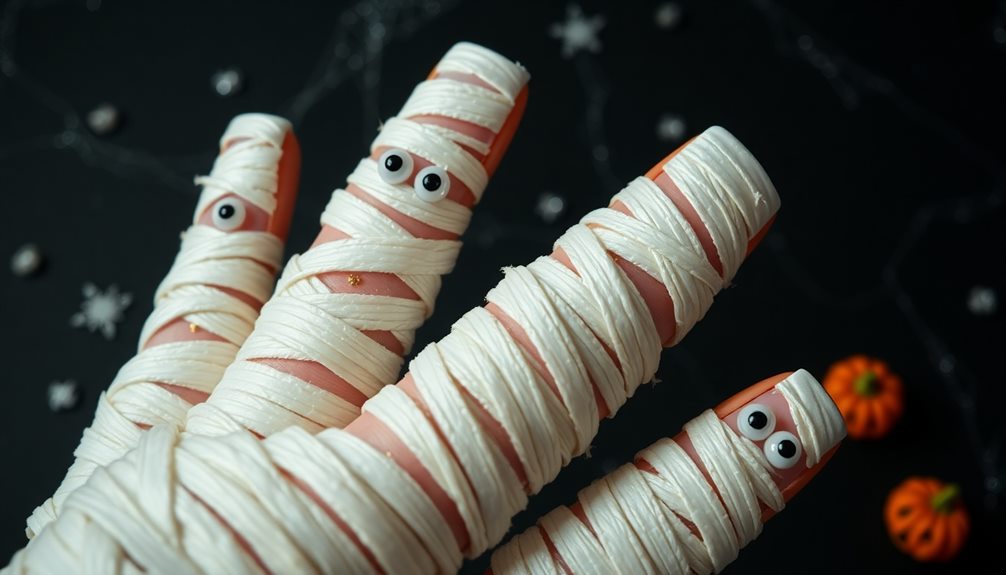
Creating mummy nails can be a fun DIY project. You can easily draw lines to simulate mummy wraps and add little dots for eyes, making your nails come alive.
If you're not into freehand art, don't worry! There are affordable options, like Mummy Wrap Nail Art Water Decals, which start at just $2.66. These decals make it super easy to get the perfect look without the hassle.
Not only do mummy nails enhance the spooky vibe of Halloween, but they also give you a chance to show off your artistic skills.
Halloween Nail Art Popularity

Halloween nail art has skyrocketed in popularity, with designs like mummy nails captivating enthusiasts everywhere. You might’ve noticed how creative and spooky looks are being shared on platforms like Pinterest, inspiring many to try them out. For those looking to take their Halloween nail art to the next level, there’s also a trend of nightmare before Christmas inspired nail art. These designs often feature iconic characters like Jack Skellington and Sally, along with spooky elements like bats and pumpkins. The intricate and detailed nature of these designs makes them a perfect choice for anyone wanting to showcase their love for the classic Tim Burton film.
One of the coolest trends is using a nail art brush to create intricate designs, making it easier for you to add those mummy wrappings right on your nails! Additionally, incorporating elements from stunning blue flower nail designs can add a unique twist to your Halloween look.
Black polish is also super popular during Halloween, especially when you mix it with festive colors like purple and orange. These colors not only look great together but also enhance that spooky vibe we all love.
Plus, custom press-on nails featuring Halloween motifs are becoming a hit! They're convenient and come in so many fun designs, including those adorable mummy nails.
Engagement in seasonal nail art contests and online challenges has really taken off! These events encourage creativity and let you showcase your unique style.
Social media fuels this excitement, as you get feedback from the community, which helps spark new ideas. So, grab your nail art brush, pick out some black polish, and get ready to join the Halloween nail art fun!
Popular Variations and Ideas
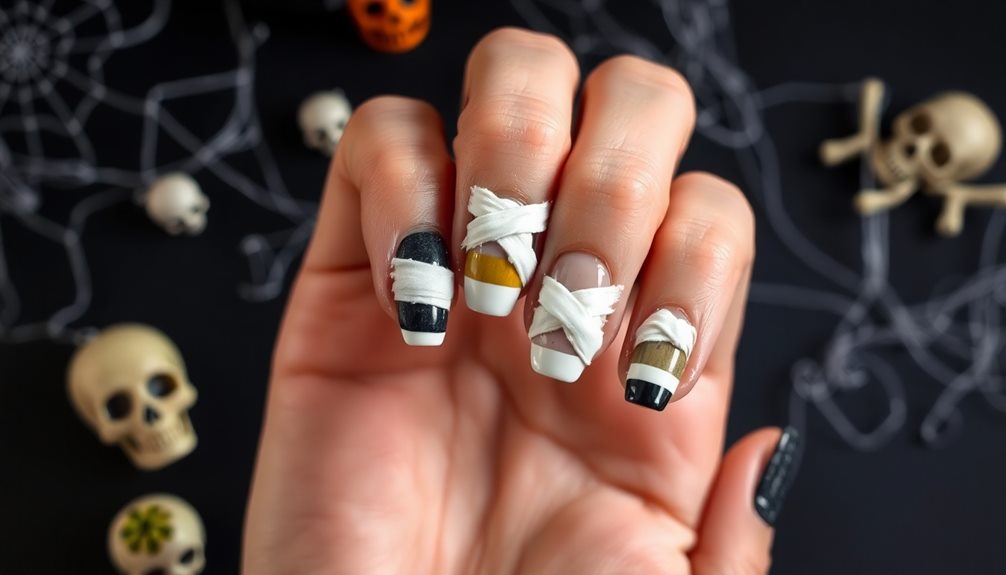
Mummy nails offer a range of exciting variations that let you express your Halloween spirit in style. You can start with a classic mummy look, using white or beige gel nail polish to create bandage-like patterns.
But why stop there? Spice things up by adding fun 3D elements like googly eyes that make your nails look like they're alive! For a creative twist, consider using educational and STEM toys as inspiration for unique designs that can spark your imagination. Nail decals can also give your mummies a special touch, making it easy to achieve that spooky vibe without needing to paint every detail.
If you're looking for convenience, custom press-on mummy nails are super popular right now. They come in various designs, so you can easily find a set that fits your Halloween theme. You might even choose a striking black background with white wraps to make your nails really pop!
Plus, keep an eye out for seasonal promotions on nail art products, like discounts on nail wraps and decals, which can help you save money while getting into the festive spirit. With so many fun ideas, your mummy nails will definitely be a hit at any Halloween celebration!
Tips and Tricks

Creating the perfect mummy nails requires a few essential tips and tricks to ensure your design stands out. First, grab some nail glue for secure application of your mummy nail wraps or decals. This'll help your spooky design last throughout all the Halloween fun!
For that textured mummy look, start with a white matte base coat. Then, use a fan brush to add black lines that mimic mummy wraps, giving your nails some serious depth.
Don't forget to add two little white dots for eyes on your mummy nails. It really brings your design to life and adds an extra spooky vibe! You can also layer different shades of white and beige to make those mummy wraps look even more realistic.
To finish off your masterpiece, apply a matte top coat. This'll give your nails a smooth, eerie finish that perfectly matches the Halloween theme.
And remember, using quality Nails Gel can make a big difference in achieving that flawless look. So, grab your supplies, and get ready to impress everyone with your fabulous mummy nails this Halloween! Happy decorating!
Care and Maintenance
To keep your spooky nails looking fresh and fabulous, regular care and maintenance are essential. First, don't forget to moisturize your cuticles! This simple step helps maintain their health and prevents dryness, which can lead to peeling around your mummy nails. You want those nails to shine, right?
When it's time to remove your nail wraps or press-ons, use a gentle nail polish remover. This will save your nails from damage and keep your mummy look intact. Plus, store your press-on nails in a cool, dry place to preserve their shape and quality for future use. Trust me, they'll thank you later!
Also, be mindful of harsh chemicals and excessive water. They can chip your fabulous mummy nail art faster than you can say "trick or treat!"
To keep that fresh look, apply a protective top coat every few days. It enhances shine and durability, making your spooky designs last longer.
With a little care and maintenance, your mummy nails will be the talk of the Halloween party! So, grab that moisturizer and top coat, and keep those nails looking spook-tacular!
Common Mistakes to Avoid
Neglecting the finer details can ruin your spooky nail art, so it's important to avoid common mistakes that can diminish your mummy nails.
First, always apply a base coat! It protects your nails and helps the polish go on smoothly. Without it, you might end up with nail damage or uneven colors.
Next, be patient! Allow each layer to dry completely before adding the next. If you rush, your design might smudge, and we don't want that!
Another mistake is overloading your brush with polish. This can create thick lines that don't look like mummy wraps at all. Instead, use a lighter hand for controlled, thin strokes.
And don't forget the top coat! Skipping this step can leave your design looking dull and less durable. A good top coat seals everything in and gives your nails that polished finish.
Lastly, tidy up any polish around your cuticles. You can use a clean-up brush or a small brush dipped in remover for a neat finish.
Frequently Asked Questions
Can I Use Regular Tape for Mummy Nail Designs?
You can use regular tape for nail designs, but it might not give you the perfect look. Consider using nail striping tape instead, as it's designed for precision and creates cleaner lines in your design.
How Long Do Mummy Nails Typically Last?
Mummy nails usually last about a week, depending on your daily activities and nail care. If you apply a good topcoat and avoid excessive wear, you might enjoy them for even longer.
Are Mummy Nails Suitable for Short Nails?
Absolutely, you can rock mummy nails on short nails! They can look just as stunning and spooky, giving your fingertips a fun, festive vibe. Don't hesitate to try them out for your next occasion!
What Colors Work Best for Mummy Nail Art?
For nail art, classic colors like white and black create a striking contrast. You could also try muted tones like beige or gray for a subtle look. Don't forget to add a touch of glitter for sparkle!
Can Children Wear Mummy Nails Safely?
Yes, children can wear mummy nails safely, but ensure you use non-toxic nail polish. Always supervise their application and removal, avoiding any products with strong chemicals. Remember, safety first makes for a fun experience!
Conclusion
Now that you've got all the tips and tricks for creating your very own mummy nails, it's time to get creative! Remember, Halloween is all about fun and spooky vibes, so don't be afraid to add your own twist. Whether you go for classic white bandages or add some googly eyes, your nails will be a hit! So grab your polish, get wrapping, and let your fingers join in the Halloween fun. Happy nail art!