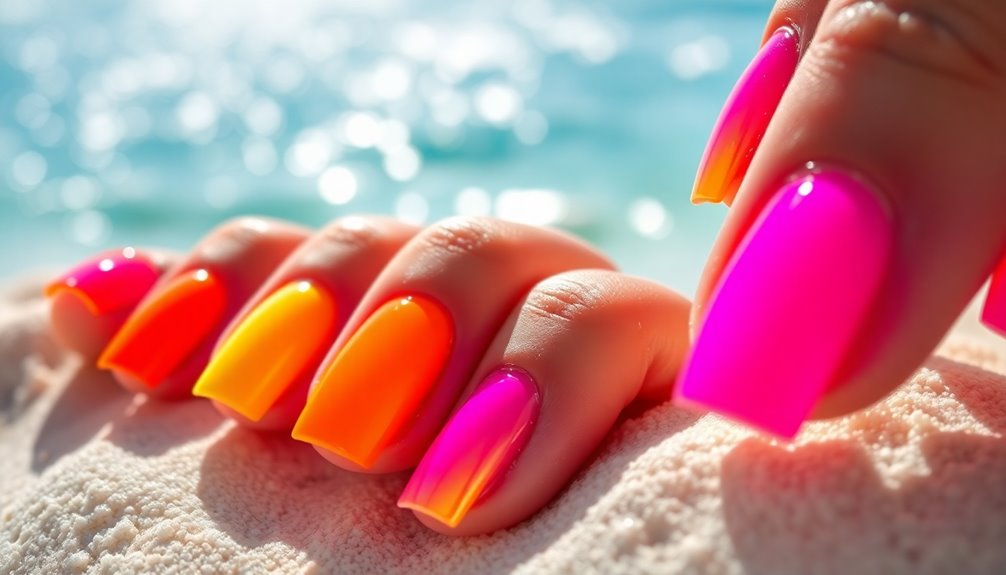
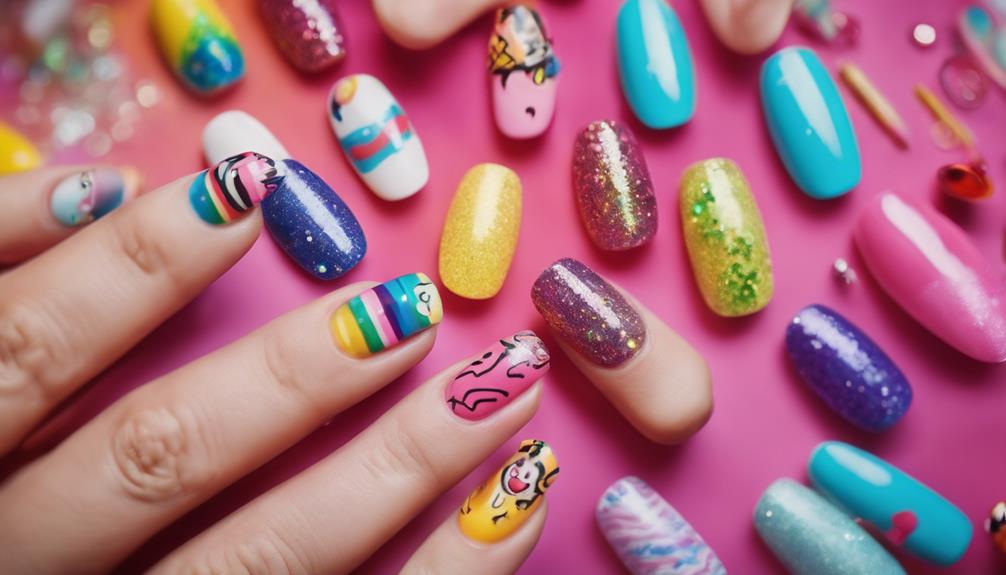
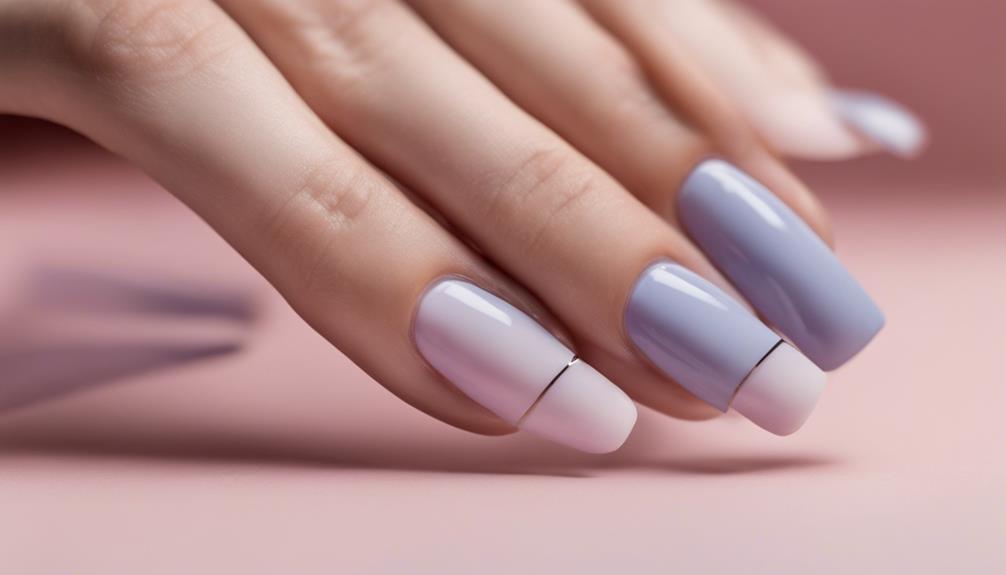
You're just a few simple steps away from mastering nail art, even if you're a complete beginner! From wavy red lines to shimmering gold tips, there are countless easy and stylish designs to try. Add a touch of elegance with simple white stripes or starry night sky inspiration. Mismatch pastel colors for a playful look or go bold with shimmering metallic shades. Try graphic neon patterns or diagonal periwinkle accents for a trendy twist. With these 10 simple nail art ideas, you'll be on your way to creating stunning, salon-quality looks in no time – and there's more where that came from! Elevate your nail art game with intricate lace designs or delicate floral patterns, perfect for any bride-to-be. Consider soft, pastel shades and elegant accents for a timeless bridal manicure. From glittering gemstones to classic French tips, there are endless nail art ideas for brides to choose from, ensuring your nails are as stunning as your wedding day.
Key Takeaways
• Start with simple designs like wavy red lines, white stripes, or starry night sky inspiration for a chic and effortless look.
• Experiment with bold and bright colors like neon green, hot pink, and electric blue for a playful vibe.
• Use easy techniques like dotting tools, nail painting brushes, and striping tape for clean lines and patterns.
• Try mismatched pastel colors or diagonal periwinkle accent nails for a unique and stylish look.
• Seal your design with a fast-drying top coat for a glossy finish and longevity.
Wavy Reds for a Chic Look
Create a chic, abstract look by applying a thin base coat and drawing random, wavy red lines that exude a sense of effortless style. With easy nail designs like this, you can achieve a stylish look without breaking a sweat.
To start, use a nail art brush to create abstract line designs that add a touch of whimsy to your wavy reds. Don't worry too much about perfection – the imperfections will actually add to the charm of your design.
When you're done with the wavy red lines, take it up a notch by adding some shimmering gold tips. This simple yet glamorous touch will elevate your classic red manicure and pair perfectly with your gold jewelry. The best part? This look is incredibly easy to achieve, even for a beginner.
Simple White Stripes Design
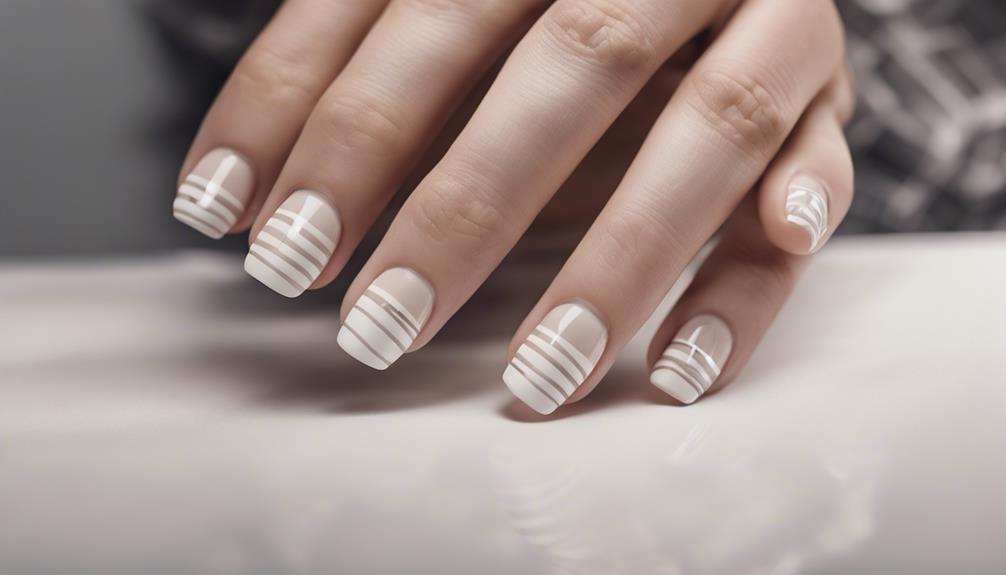
You can achieve a stylish and minimalistic design by adding a thin white stripe down the middle of a neutral base color. This simple yet elegant look is perfect for beginners looking to dip their toes into nail art.
Start by applying a neutral base color, such as beige or cream, to your entire nail. Once dry, use a nail striper or a small brush to paint a thin white stripe down the center of your nail. The result is a chic and modern design that adds a touch of sophistication to your manicure.
To guarantee your design lasts, seal it with a fast-drying top coat. This will give your nails a glossy finish and protect your design from chipping.
With this simple white stripes design, you can add a subtle touch of elegance to your look without going overboard. And the best part? It's easy to create, even for beginners! By following these simple steps, you can achieve a stylish and minimalistic design that's sure to turn heads.
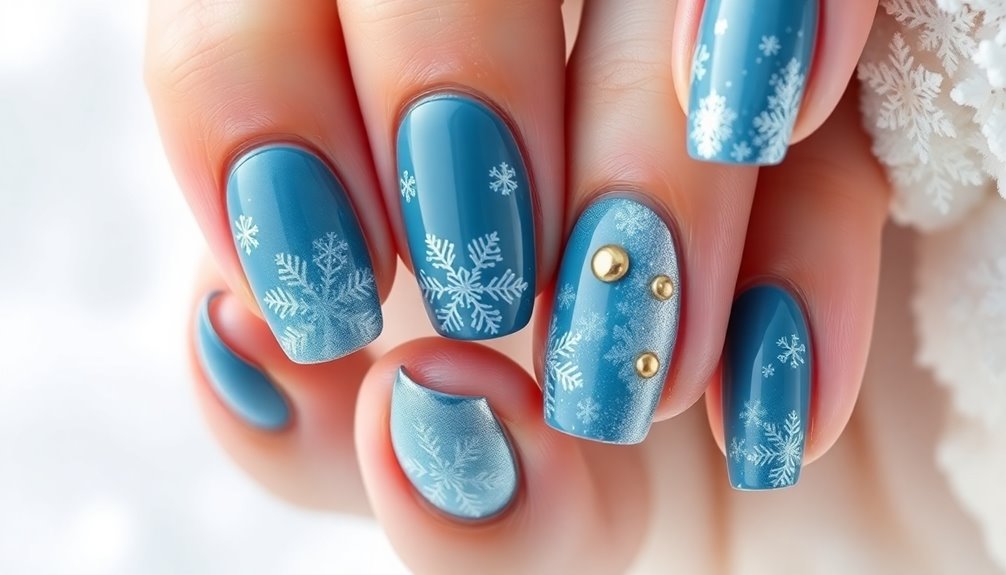
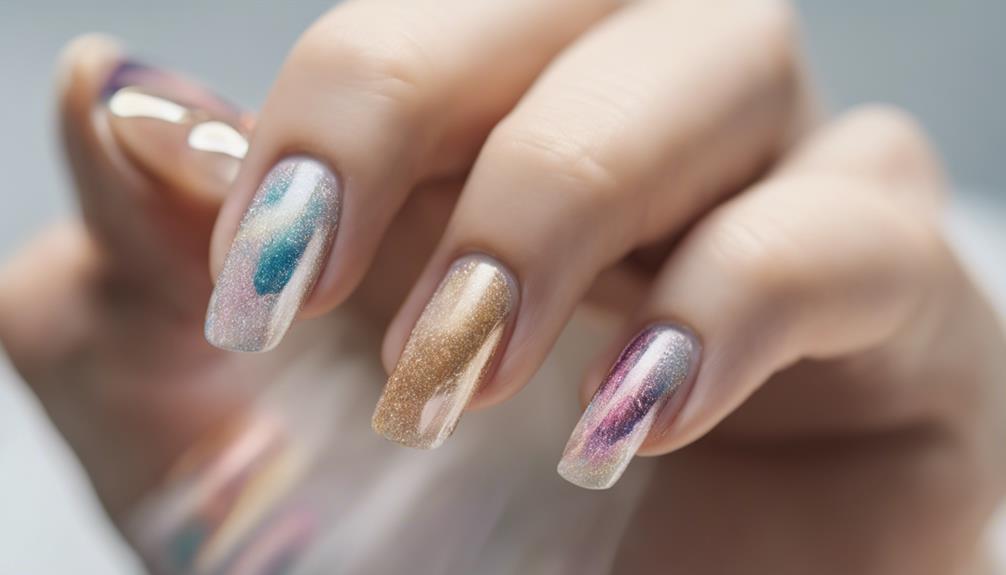
Starry Night Sky Inspiration

Take your nail art to new heights by painting a starry night sky on your nails, a design that's as mesmerizing as it's easy to achieve. You'll be amazed at how a few simple steps can transport you to a celestial world.
Start by painting your nails a deep, dark blue – the perfect canvas for your starry night sky. Next, use a fine brush or dotting tool to create constellations or a crescent moon for added detail. To give your design some extra sparkle, experiment with different shades of blue and silver glitter for a truly celestial effect.
Want to take it up a notch? Incorporate nail stickers or stencils to easily achieve intricate star patterns. Finally, seal your design with a top coat to protect and prolong your starry night sky nail art. With a little creativity, you'll be twinkling like the stars in no time!
Add some white dots to represent the stars, and you'll be gazing up at a miniature universe on your fingertips.
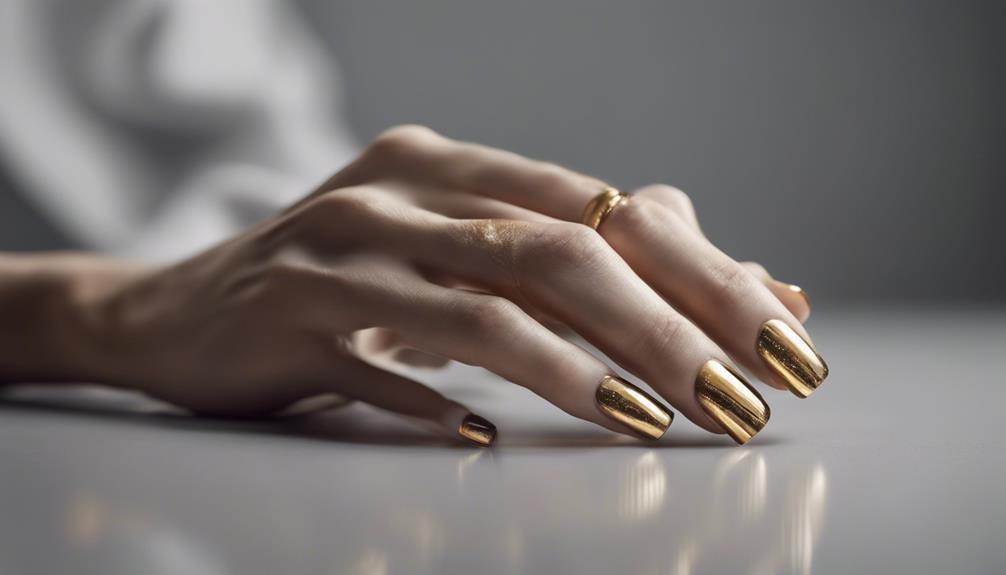
Shimmering Tips for a Bold Look
Give your nails a glamorous upgrade by adding a swipe of chunky metallic gold at the tips for a bold, eye-catching look. This simple yet glamorous design can be achieved with minimal effort and is perfect for beginners. By using a metallic shade for the tips, you'll create a striking contrast with the base color that's sure to turn heads.
| Tip | Benefit |
|---|---|
| Add chunky metallic gold | Glamorous and bold look |
| Pair with gold jewelry | Elevates overall look and creates cohesive style |
| Seal with fast-drying top coat | Long-lasting and glossy finish |
When you pair your shimmering tips with gold jewelry, you'll elevate your overall look and create a cohesive style. To guarantee your design lasts, seal the shimmering tips with a fast-drying top coat for a long-lasting and glossy finish. With these simple steps, you'll be rocking a glamorous, bold look that's perfect for any occasion. So go ahead, give your nails the glam treatment, and get ready to turn heads!
Pastel Colors Mismatched Fun

Now it's time to get creative with Pastel Colors Mismatched Fun!
You'll love experimenting with soft color combinations that add a playful twist to your nail art.
Soft Color Combinations
You can create a visually appealing and playful look by mismatching soft, pastel shades on each nail. This easy and trendy technique is perfect for beginners, as it doesn't require precise application.
To achieve a polished and stylish appearance, simply choose a few soft, pastel colors that complement each other. You can go for a mix of light blue, pale pink, and mint green, or try a combination of lavender, peach, and cream. The key is to have fun and be bold with your color choices!
Remember to mirror the color order on each hand for a sense of consistency in your mismatched look. This way, you'll create a cohesive and stylish design that's perfect for everyday wear.
With soft color combinations, you can't go wrong. They're easy to pair, and the results are always playful and trendy. As a beginner, you'll love how effortless it's to achieve a chic, mismatched nail art look.
Mismatched Nail Fun
Take your soft color combinations to the next level by intentionally mismatching pastel shades on each nail for a playful, trendy look that's full of fun and character. You'll achieve a polished and stylish appearance without the need for precision in application, which is perfect for beginners!
To create this look, simply opt for pastel shades in a mismatched order on each nail. To maintain consistency, mirror the color order on each hand, so your right and left hands have the same mismatched design. Don't be afraid to play around with different pastel colors to create a fun and unique nail art design that's all your own.
Embrace the charm of imperfection with mismatched pastel nails for a trendy and eye-catching look. Remember, the beauty of this design lies in its playfulness, so don't stress about perfection – just have fun with it! With this simple yet stylish technique, you'll be rocking a trendy nail art look in no time.
Golden Stripes for a Luxe Feel
As you explore the world of golden stripes, you'll discover a range of options to elevate your nail game.
You can choose from various golden hues, from subtle champagne shades to bold metallic tones, and pair them with striped nail designs that exude luxury.
Whether you're going for a chic, understated look or a glamorous, head-turning effect, golden stripes are the perfect way to add a touch of sophistication to your manicure.
Golden Hue Options
Golden hues can instantly elevate your nail art game, and adding a swipe of gold at the tips creates a glamorous and luxurious design. With golden hues, you can add a touch of sophistication to your look.
Consider using chunky metallic shades for a bold, eye-catching effect. Pair them with gold jewelry for a cohesive, put-together look. For a simpler option, try adding shimmering gold tips to your nails. This design is easy to achieve and perfect for beginners looking for an elegant nail art option.
To guarantee your design lasts, seal it with a fast-drying top coat. This will give your nails a glossy finish and protect them from chipping. Golden stripes are another great option to elevate your manicure. They add a chic, sophisticated touch to your look.
Striped Nail Designs
Create a luxe look on your nails by incorporating golden stripes into your striped nail design, adding a touch of glamour and sophistication to your overall style. Golden stripes are a great way to elevate a simple striped design, and the metallic color adds a level of sophistication that's hard to resist.
As a beginner, you'll love how versatile striped nail art is – you can customize it with different colors and patterns to suit your mood and style.
Golden stripes, in particular, provide a classic yet stylish look that's perfect for beginners to try out. The key to pulling off this look is to balance the boldness of the gold with a more subtle base color. You can opt for a neutral shade like beige or white, or go for a bold contrast with a darker color like navy or black.
Whatever you choose, golden stripes are sure to add a touch of glamour to your everyday look. So go ahead, give it a try, and experience the sophistication that comes with rocking golden stripes on your nails!
Luxury Nail Looks
You can instantly elevate your nail game with a luxurious touch by incorporating golden stripes into your nail art design. This chic and stylish option is perfect for those wanting a high-end look with minimal effort.
Golden stripes add a touch of luxury and sophistication to your nails, making them a great addition to easy nail art designs like a classic French Manicure. To take your design to the next level, pair your golden stripes with gold jewelry to enhance the overall luxe feel.
Chunky metallic shades create a glamorous and eye-catching effect that's sure to turn heads. The best part? This design is simple yet impactful, perfect for beginners looking to elevate their nail art.
With golden stripes, you can achieve a glamorous look that's perfect for a night out or special occasion. So why settle for a basic manicure when you can have a luxurious, high-end look with minimal effort? Give golden stripes a try and experience the luxury for yourself!
Party Dots for a Playful Vibe

With just a few dots, you can instantly add a playful vibe to your nails, perfect for any party or celebration. Party Dots nail art is a great way to add some fun and whimsy to your manicure.
To achieve this look, you'll need a dotting tool or even a bobby pin to create different sized dots. You can customize your Party Dots with various color combinations to match your party outfit or mood. Try pairing a bold, bright color with a softer, pastel shade for a French-inspired look.
Experiment with different dot patterns and spacing to create a unique and eye-catching design. With a dotting tool, you can create dots in different shades and sizes to add depth and dimension to your design.
The best part? This nail art design is beginner-friendly, so don't be afraid to get creative and have fun with it!
Colorful Lines for a Bright Look

Now it's time to get creative with colorful lines that'll add a pop of fun to your nails!
You can experiment with vibrant color choices, from bold brights to soft pastels, to create a unique look that's all yours.
From easy line techniques to summer nail inspiration, we'll explore it all to help you achieve a bright and playful manicure.
Vibrant Color Choices
Create a bold and eye-catching look by incorporating vibrant color choices, such as neon green, hot pink, and electric blue, into your nail art design. These bright colors will add a pop of personality to your nails and make them stand out.
You can use multiple bright colors in a striped design to add a fun and playful element to your nail art. Experimenting with contrasting hues like yellow and purple can result in a striking and dynamic manicure.
If you want to showcase your creativity and style, opt for a rainbow effect with a mix of different colors. You can achieve bold and vibrant nail art designs by incorporating colorful lines in various patterns and shapes.
Don't be afraid to get creative and try out different combinations of vibrant color choices. With a little practice, you'll be a pro at creating stunning nail art designs that turn heads.
Easy Line Techniques
You can achieve a bright and playful look by using a nail painting brush to draw colorful lines on your nails.
This easy line technique is perfect for beginners, and it's a great way to add some personality to your nail art.
To get started, choose 3-6 colors that you love, and use your brush to create alternating color stripes on your nails.
This will give your nails a fun and vibrant design that's sure to turn heads.
Summer Nail Inspiration
Summer's vibrant energy inspires a playful, colorful nail art design that's perfect for the season. Why not add some colorful lines to your nails to match the bright and cheerful vibe of summer? You can experiment with different shades to achieve a playful and eye-catching design. To create precise lines, use nail striping tape or a thin brush – it's easier than you think!
Incorporate neon or pastel colors to give your nails a fun and summery vibe. This nail art idea is perfect for beginners looking to add a pop of color to their manicure. Start by painting a base coat, then use tape or a brush to create colorful lines. You can go for bold and bright or soft and pastel – the choice is yours! With a little practice, you'll be rocking a summer-inspired nail art design in no time.
Graphic Neon for a Trendy Style
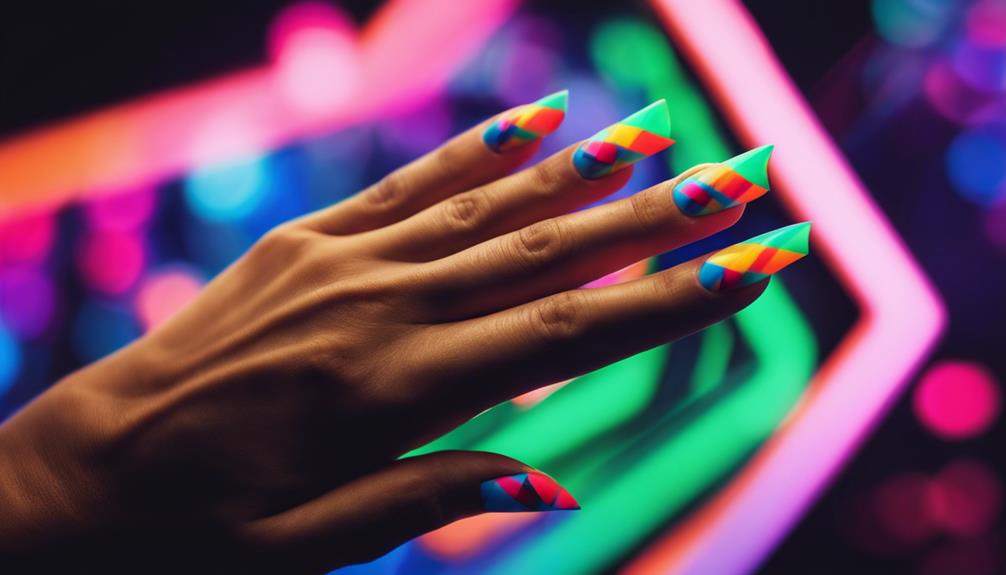
With graphic neon nail art, you can inject a bold dose of trendiness into your style by pairing vibrant neon hues with geometric patterns. This nail art trend is perfect for beginners, as it allows for creativity with simple shapes and vibrant colors. You can experiment with different neon colors, such as neon pink, green, and yellow, to create a unique look that's all your own.
To achieve a professional look, use nail art brushes and striping tape to create clean lines and intricate patterns. You can also customize your design with different geometric designs, such as chevrons or triangles, to add visual interest.
Here's a breakdown of the supplies you'll need to get started:
| Supply | Description |
|---|---|
| Nail art brushes | For creating intricate patterns and designs |
| Striping tape | For creating clean lines and geometric shapes |
| Neon nail polish | For adding vibrant color to your design |
Diagonal Periwinkle Accent Nails
For a more understated yet stylish approach, try painting a single nail with a diagonal periwinkle design to add a touch of sophistication to your everyday look. You'll love how this subtle accent nail creates a modern twist on a classic manicure.
Periwinkle is a soft, calming shade that complements a variety of skin tones, making it a great choice for anyone. To create this look, simply choose a periwinkle nail polish and paint a diagonal stripe on one nail. You can use nail tape to get a crisp, clean line or freehand it for a more whimsical feel.
The diagonal design adds visual interest without being too overpowering, making it perfect for beginners who want to experiment with nail art. By adding this subtle pop of color, you'll create a stylish look that's perfect for everyday wear.
Frequently Asked Questions
How to Make Simple Nail Art at Home?
You're excited to create simple nail art at home, and you're not alone! To get started, prep those nails by removing old polish and shaping them to your desired length.
Then, apply a base coat to protect your nails and help your art last longer.
Next, grab your nail art brushes or dotting tools and experiment with simple designs like polka dots or stripes.
What Are the 5 Basic Nail Designs?
You're wondering what the 5 basic nail designs are? Let's delve into it!
It's intriguing to explore the fundamental styles that form the foundation of nail art. You'll be excited to know that these basics include:
- French manicure variations
- Metallic nail art designs
- Abstract nail art designs
- DIY nail sticker designs
- Two-toned nail art designs
These styles are perfect for beginners, offering a range of creative possibilities to express yourself through nail art.
How to Do Minimalist Nail Art?
To master minimalist nail art, start with a neutral base coat. Then, get creative with thin, random lines or subtle stripes for a chic look. Embrace imperfections – they add character!
For a modern twist, add a star accent to a classic red manicure. Don't be afraid to experiment with shimmering gold tips or pastel mismatched nails.
What Counts as Simple Nail Art?
You're probably wondering what counts as simple nail art, and trust me, it's not as complicated as trying to solve world hunger!
Simply put, simple nail art is all about easy, beginner-friendly designs that require minimal tools and skills. Think basic techniques like dotting, striping, and stamping, and designs with fewer steps and elements.
These effortless looks are perfect for DIY newbies, and the best part? They still look amazing!
Conclusion
You've just discovered the secret to becoming a nail art rockstar! With these 10 simple designs, you're no longer a novice, but a master of your own nail destiny.
Like a painter with a blank canvas, you now hold the brush to create your own masterpiece. Remember, the world is your palette, and with every stroke, you're one step closer to revealing your inner artist.
So, go ahead, get creative, and make your mark – or should we say, your nail art?