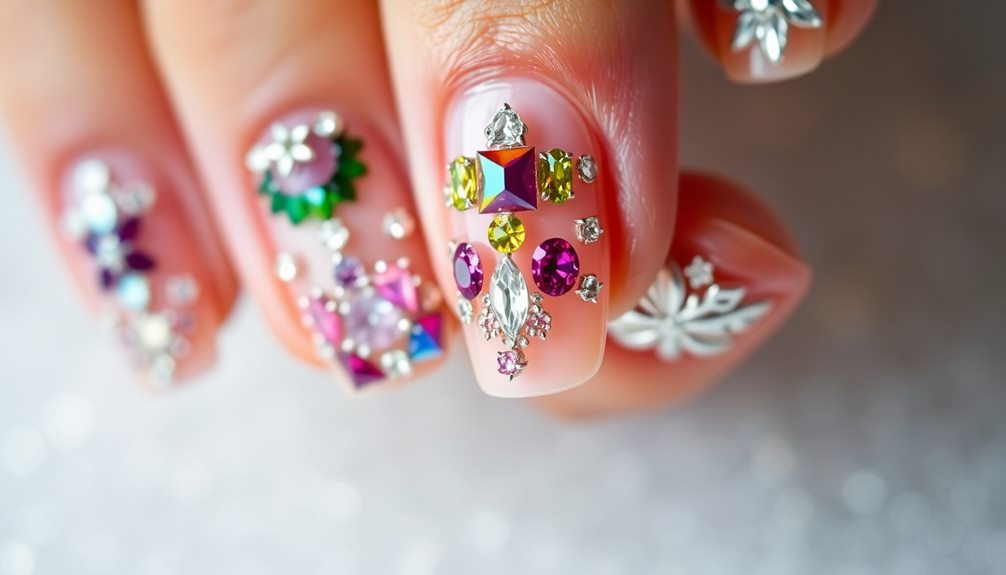
With short nails, you can still achieve salon-quality nail art at home with a little creativity and the right techniques. Try simple striped nail art with contrasting colors, or dotted floral patterns using a dotting tool. Ombre glitter polish looks are also easy to achieve with a makeup sponge. Geometric designs, negative space art, and glitter accents are other options that can elevate your look. If you're a beginner, start with minimalist designs or nail stickers for a hassle-free option. Pastel color block designs are also trendy and chic for short nails. Explore these ideas and discover more inspiration to take your nail game to the next level! Stylish nail art ideas don’t have to be complicated or time-consuming, especially with short nails. Embrace the natural shape of your nails and play around with different textures, finishes, and embellishments to create unique looks. Consider trying out metallic accents, marbling techniques, or even incorporating rhinestones for a touch of glamour. With a little experimentation and practice, you can become your own nail artist and show off your individual style with confidence. Don’t be afraid to mix and match different elements to create your own signature nail art looks.
Key Takeaways
• Use nail art stickers or guides for easy and precise designs, perfect for short nails.
• Opt for minimalist designs that don't require advanced skills or tools, such as simple stripes or dots.
• Choose pastel colors for a trendy and chic look that adds a pop of color to your nail art.
• Experiment with glitter accent nail art for a quick and easy way to add visual interest to your design.
• Consider using stamping plates for intricate designs that are easy to achieve, even for beginners.
Simple Striped Nail Art Design
With a few simple tools and some basic nail polish, you can create a chic and modern simple striped nail art design that's perfect for short nails. This design is great for those who want to add some visual interest to their nails without going over the top.
To get started, apply a base coat to your nails and let it dry completely. Then, choose two contrasting nail polish colors and apply the first color as a base. Once it's dry, use thin striping tape or a fine nail art brush to create straight lines across your nails. You can make the lines as thin or thick as you like, depending on the look you're going for.
Apply the second color to the taped-off sections, and carefully remove the tape to reveal clean, straight stripes. Finish with a top coat to seal in the design and add shine to your striped nail art. This design is easy to customize to your personal style and is a great way to add some flair to your short nails.
Dotted Floral Nail Art Pattern

Create a delicate and feminine look on your short nails by crafting a dotted floral nail art pattern that's both easy to achieve and visually stunning. This design is perfect for those who want to add a touch of elegance to their nail art designs for short nails.
To get started, paint your nails with a base color and then add small dots in a circular pattern to form flowers. Use a small dotting tool or the end of a bobby pin to create the flower petals with different colored dots. Add green dots around the flowers to represent leaves and stems for a complete floral design.
Here's a breakdown of the steps:
| Step | Action | Description |
|---|---|---|
| 1 | Paint base color | Choose a light color for the base coat |
| 2 | Create flower petals | Use a dotting tool or bobby pin to create flower petals |
| 3 | Add leaves and stems | Use green dots to complete the floral design |
| 4 | Finish with top coat | Seal your design with a glossy top coat |
Finish with a top coat for a glossy and long-lasting finish to showcase your beautiful dotted floral nail art. This nail art design is perfect for those who want to add a touch of elegance to their nail art designs for short nails.
Ombre Glitter Nail Polish Look

Get ready to take your nail game to the next level by blending two complementary glitter polishes together for a stunning ombre effect. This super easy DIY nail art idea is perfect for short nails, as it adds visual interest without requiring longer nails.
To achieve this look, start by applying a light base color to your entire nail. Then, blend a darker glitter polish onto a makeup sponge and dab it onto your nail in a gentle tapping motion, starting from the tip of the nail and working your way down. This will create a seamless gradient effect from one color to the other. Build up the intensity of the glitter polish as you go, adding more or less depending on your personal preference.
Easy Geometric Nail Art Tutorial

You can add some edge to your short nails with a geometric nail art design that's surprisingly easy to achieve. With just a few simple shapes like triangles, squares, and lines, you can create a chic and modern look that's perfect for short nails. No special tools needed, just your favorite nail polish colors and a steady hand.
Here's a breakdown of the design:
| Shape | Color | Placement |
|---|---|---|
| Triangle | Navy Blue | Index Finger |
| Square | White | Middle Finger |
| Line | Red | Ring Finger |
| Triangle | Yellow | Pinky Finger |
Follow these simple steps: paint a triangle on your index finger, a square on your middle finger, a line on your ring finger, and another triangle on your pinky finger. Experiment with different color combinations and patterns to make it your own. Finish off your design with a top coat like Seche Vite's dry fast top coat for a glossy and long-lasting finish. With these easy steps, you'll be rocking a trendy geometric nail art design in no time!
Negative Space Nail Art Idea

Now that you've mastered the easy geometric nail art tutorial, it's time to explore the world of negative space nail art, where less is more!
To get started, you'll need to choose a base color that will complement your design and then learn how to apply tape to create crisp, clean lines.
From there, the possibilities are endless, and you can experiment with different design variations to create a look that's all your own.
Base Color Options
When choosing a base color for negative space nail art, neutral shades like nude, white, or soft pastels provide an ideal backdrop for your design. These colors won't compete with your design, allowing it to take center stage. Plus, they're super versatile and can be paired with a variety of patterns and shapes.
Here are some popular base color options to take into account:
- Nude: A classic choice that complements most skin tones and adds a touch of elegance to your nail art.
- Soft Pink: A sweet and feminine option that's perfect for spring and summer.
- Mint Green: A soothing and calming shade that's great for a subtle, understated look.
- Cream: A warm and inviting color that works beautifully with bold, bright accents.
Tape Application Tips
Using tape to create crisp, clean lines and shapes is a game-changer for negative space nail art on short nails. You'll be amazed at how easily you can achieve professional-looking results with this simple technique.
To get started, apply the tape to your nails before painting to create the design you want. Make sure the tape is pressed firmly onto your nail to avoid any paint seeping underneath.
Once you've applied the tape, paint over it with your chosen color. Don't worry too much about getting it perfect – the tape will take care of that for you. When the paint is dry, carefully peel off the tape to reveal your crisp, clean design.
Experiment with different tape shapes and angles to create unique nail art that's all your own. Finally, finish with a top coat to protect and seal your design. With a little practice, you'll be a pro at creating stunning negative space nail art on your short nails!
Design Variations
Get creative with negative space nail art by experimenting with different design variations that add visual interest to your short nails. This modern and trendy technique is perfect for short nails as it creates the illusion of longer nails with minimal effort. By leaving parts of the nail bare, you can create unique and eye-catching designs that range from geometric patterns to intricate shapes.
Here are some design variations to try:
- Geometric patterns: Use negative space to create geometric patterns like chevrons, triangles, or hexagons that add visual interest to your nails.
- Floral designs: Create delicate floral patterns using negative space, adding a touch of elegance to your nails.
- Animal prints: Use negative space to create animal prints like leopard or zebra stripes, adding a fun and playful touch to your nails.
- Abstract art: Experiment with abstract designs using negative space, creating unique and modern nail art that's all about simplicity and elegance.
Quick and Easy Stamping Designs

With a few simple tools and a bit of practice, you can create stunning, intricate designs on your short nails using stamping nail art. This technique is perfect for those who want to achieve professional-looking designs with minimal effort. Stamping nail art involves using pre-designed images on stamping plates, which allows you to create precise and detailed patterns like flowers, geometric shapes, and more.
The best part? You don't need advanced nail art skills to master this technique. With a stamping tool and a few practice runs, you'll be creating beautiful designs in no time. Stamping plates offer a wide range of designs, from simple to intricate, so you can choose the one that suits your style.
Plus, the results are consistent, so you can achieve salon-quality nail art from the comfort of your own home. Whether you're a beginner or a seasoned nail artist, stamping nail art is a great way to add some flair to your short nails.
Glitter Accent Nail Art Tips

How can you add a touch of glamour to your short nails without going over the top? The answer lies in glitter accent nail art! By applying glitter polish or loose glitter to one nail as a statement piece, you can add a sparkly touch to your nail art designs.
Here are some tips to get you started:
- Choose a base color: Glitter accent nails work well with various base colors, from neutral shades to bold hues.
- Select the right glitter: Experiment with different glitter sizes and colors to customize your glitter accent nail art.
- Secure with a top coat: Secure a smooth and long-lasting finish by sealing the glitter accent nail with a top coat.
- Keep it simple: Remember, a glitter accent nail is meant to be a statement piece, so keep the rest of your nails simple to let the glitter shine.
Minimalist Nail Art for Beginners

You can create stunning minimalist nail art designs on your short nails without needing specialized tools or expertise, and we'll show you how. With simple designs like cute animal faces, colorful leopard print, sushi nails, and colorful dots, you can add some creativity and fun to your manicures.
As a beginner, you'll appreciate the easy step-by-step instructions that guide you through the process. Plus, you don't need to worry about investing in fancy tools or taking a nail art class – you can do it all from the comfort of your own home.
To get started, simply choose a design that catches your eye, gather your nail polish and a few basic tools, and follow the instructions. When you're done, seal and protect your nail art with a top coat like Seche Vite's dry fast top coat.
With these DIY nail art ideas, you can add a pop of personality to your short nails and show off your creativity. So, what're you waiting for? Get creative, have fun, and give minimalist nail art a try! You can experiment with geometric patterns, negative space, or even try out some trendy nail designs like marble or ombre. There are endless possibilities when it comes to nail art, so don’t be afraid to try something new and express yourself through your nails. With a little bit of practice and patience, you can easily master the art of DIY nail art and create unique looks that will make your short nails stand out.
Pastel Color Block Nail Art

Take your minimalist nail art skills to the next level by exploring the trendy world of pastel color block nail art, where soft, muted hues come together to create a chic and stylish look on your short nails. This versatile design is perfect for adding a pop of color to your overall look and is great for any occasion.
With pastel color block nail art, you can customize the design to suit your individual preferences by mixing and matching different pastel shades.
Here are some benefits of trying pastel color block nail art:
- Easy to create: No professional tools or skills are required to achieve this look.
- Versatile: You can customize the design with different color combinations to suit your style.
- Trendy and chic: Pastel color block nail art is a stylish and sophisticated design that's perfect for any occasion.
- Suits short nails: This design is ideal for short nails, making it a great option for those who struggle to grow their nails.
With these benefits, it's no wonder pastel color block nail art is a popular choice for nail art enthusiasts. So, get creative and give it a try!
Nail Sticker Art Design Inspiration

What's great about nail stickers is that they can instantly elevate your nail game with minimal effort, offering a vast array of designs to suit your unique style.
Whether you're into florals, geometric patterns, or glitter accents, there's a sticker design out there for you. And the best part? You don't need to be a nail art pro to achieve a polished look. Nail stickers are perfect for those with short nails, as they require no painting skills or intricate designs.
Simply peel off the design, place it on your nail, and seal it with a top coat for long-lasting wear.
With nail stickers, you can easily add creativity and flair to your nails without the need for intricate painting or drawing skills. You can mix and match different designs to create a unique look that's all your own.
Plus, they're a convenient way to update your nail game without committing to a full-on nail art session. So, go ahead and get creative with nail stickers – your short nails will thank you!
Frequently Asked Questions
What Nail Art Looks Good on Short Nails?
You're wondering what nail art looks good on short nails? Well, you're in luck! Cute designs like animal faces, leopard print, sushi nails, and colorful dots are perfect for short nails.
These fun and playful designs are easy to achieve at home with basic nail polish, and they'll add a pop of personality to your look. Plus, they're super customizable to fit your personal style!
How to Do Nail Art on Small Nails?
Can you really create stunning nail art on small nails? Absolutely! To get started, prep your nails with a base coat, then choose a design that suits your style.
For small nails, opt for simple, bold designs like dots, stripes, or cute faces. Use nail polish and a nail art brush to bring your design to life.
Don't forget to seal your masterpiece with a top coat, like Seche Vite's dry fast top coat, to make it last.
How to Make Simple Nail Art at Home?
You're enthusiastic to create simple nail art at home, and that's totally doable!
Start by prepping your nails with a base coat, then get creative with nail polish colors and designs.
Try using dotting tools or even toothpicks to create patterns and shapes.
You can also use nail stickers or guides for more intricate designs.
Don't forget to seal your masterpiece with a top coat, like Seche Vite's dry fast top coat, for a long-lasting finish.
With practice, you'll be a pro in no time!
How Do You Make Short Nails Look Cute?
You're wondering how to make short nails look cute? It's easier than you think!
Start by embracing simplicity – short nails are perfect for small, delicate designs. Try adding a few colorful dots or a tiny animal face to give your nails some personality.
You can also experiment with bold, bright colors to make a statement. The key is to keep it simple and have fun with it!
Conclusion
You've made it to the finish line! You've got the skills, and now it's time to get creative!
With these 10 easy DIY nail art ideas, you can transform your short nails into masterpieces. From simple stripes to ombre glitter, you've got a world of possibilities at your fingertips.
So go ahead, get experimenting, and show off your newfound talent to the world!


