With a nail art pen, you can access a world of creative possibilities. Master basic strokes and lay a foundation for intricate designs. Explore pastel color schemes for soft, feminine elegance or bold color blocking for striking, modern looks. Geometric patterns and floral inspiration can add modern sophistication and beauty to your nail art. From ombre effects to advanced techniques like shading and stippling, the possibilities are endless. With practice, patience, and the right guidance, you can achieve salon-quality nail art at home. And, with the right tips and inspiration, your creativity is just about to take off!
Key Takeaways
• Master basic strokes with a nail art pen to create precise lines and curves for intricate designs.
• Combine pastel colors for soft, feminine elegance or bold colors for striking, modern looks.
• Experiment with geometric patterns and shapes to add modern sophistication to your nail art.
• Draw inspiration from nature with floral designs, incorporating petals, leaves, and stems in various colors and styles.
• Practice advanced techniques like shading, stippling, and layering colors to create depth, dimension, and texture in your nail art. Additionally, experimenting with different types of brushes and tools can also help you achieve intricate designs. You can also explore tape nail art ideas to add geometric patterns and clean lines to your nail art. Remember to have fun and be patient with yourself as you develop your skills and techniques. Practice makes perfect, so keep practicing and trying out new ideas to elevate your nail art to the next level.
Essential Nail Art Pen Techniques
To master the art of nail art, start by perfecting your basic strokes with the pen, as this will lay the foundation for more intricate designs. With a nail art pen, you'll be amazed at how easily you can create stunning designs.
As you begin, remember to start with simple shapes and gradually move on to more complex ones. Use light pressure to achieve precise lines and gentle curves. Don't worry if you make mistakes – a nail polish remover is your best friend when it comes to correcting errors.
To take your nail art to the next level, follow step-by-step instructions for each design. Practice makes perfect, so don't be discouraged if your first attempts don't turn out as expected.
With a nail art pen, the possibilities are endless, and you'll soon find yourself experimenting with different colors and effects. As you become more confident in your skills, you'll be able to express your personality and style through unique, personalized nail designs.
Nail Polish Color Combination Ideas

As you explore the world of nail polish color combinations, you'll discover endless possibilities to express your personal style.
You can opt for soft, whimsical looks with pastel color schemes, or make a bold statement with color blocking that's sure to turn heads.
From subtle to striking, the right color combination can elevate your nail art to the next level.
Pastel Color Schemes
What draws you to pastel color schemes in nail art, besides their obvious charm, is the effortless way they evoke a sense of soft, feminine elegance. You can't help but be captivated by the delicate, subtle hues that scream spring and summer. Think baby pink, lavender, mint green, and pale yellow – these soft, light shades are perfect for creating a nail art look that's both understated and stunning.
When it comes to incorporating pastel color schemes into your nail art, the possibilities are endless. You can use ombre designs, geometric patterns, or even floral motifs to create a look that's uniquely yours. Mixing pastel shades with white or metallic accents can add depth and interest to your design, taking it from simple to show-stopping.
The best part? Pastel color palettes are incredibly versatile, adapting to suit various nail art styles and preferences. Whether you're going for a bold statement or a subtle touch, pastel color schemes are the perfect way to add a touch of whimsy to your nail art.
Bold Color Blocking
You can create a striking, modern look with bold color blocking, a nail art technique that involves combining contrasting hues to form geometric patterns on your nails. This technique is perfect for those who want a modern and eye-catching look with minimal effort. With bold color blocking, you can experiment with different color combinations to create unique and personalized nail art designs.
Here are some popular color combinations to try:
| Color Combo | Description |
|---|---|
| Black & White | Classic and chic, perfect for a minimalist look |
| Pink & Red | Bold and playful, great for a statement look |
| Blue & Yellow | Bright and cheerful, ideal for a summer vibe |
| Purple & Green | Rich and bold, perfect for a dramatic look |
Using a nail art pen, you can create precise lines and shapes to achieve a crisp, geometric design. Don't be afraid to experiment with different colors and patterns to make your nail art truly stand out. With bold color blocking, the possibilities are endless, and you're sure to turn heads with your striking nail art design.
Geometric Patterns and Shapes Designs

With geometric patterns and shapes designs, you can tap into your creativity and add a touch of modern sophistication to your nail art. These designs are super popular among nail art enthusiasts, and it's easy to see why. Geometric patterns and shapes feature clean lines, triangles, squares, and other geometric elements that can be mixed and matched to create unique nail art designs.
Nail art pens are perfect for creating precise geometric patterns on your nails. You can customize your design with different colors and sizes of shapes to make it truly one-of-a-kind. Whether you're going for a bold, eye-catching look or a subtle, understated design, geometric patterns and shapes can help you achieve it.
If you're new to nail art, don't worry! Step-by-step guides can help you achieve stunning geometric nail art designs. With a little practice and patience, you'll be creating intricate geometric patterns like a pro.
Floral Inspiration for Nail Art

Now that you've mastered geometric patterns, it's time to awaken your inner florist! In this section, you'll learn how to create petal-perfect designs that will make your nails bloom with beauty.
From delicate petals to lush leaves, get ready to ignite your creativity and make a statement with these stunning floral nail art ideas.
Petal Perfect Designs
One of the most delicate and charming nail art designs is the Petal Perfect Design, which incorporates flower petals, blooms, and floral patterns to create a fresh and elegant look. With nail art pens, you can achieve intricate and precise detailing, making it easy to create beautiful floral designs. You can choose from various colors and styles to suit your personal preferences, from soft pastels to bold brights.
To create a Petal Perfect Design, start by selecting your favorite nail polishes and nail art pens. You can use a combination of light and dark shades to add depth and dimension to your design. Use the nail art pen to draw delicate petals and blooms, adding intricate details like centers and stamens. You can also experiment with different patterns, such as stripes or dots, to add texture and interest.
With step-by-step instructions, you can easily achieve a stunning Petal Perfect Design. Don't be afraid to experiment and try out new ideas – with nail art pens, the possibilities are endless!
Blooming Beauty Tips
You can draw inspiration from nature's blooming beauty by incorporating elements like delicate petals, lush leaves, and intricate stems into your nail art design. With a nail art pen, you can create intricate floral patterns that add a touch of elegance and femininity to your look.
From simple daisies to intricate roses and lilies, the possibilities are endless. Experiment with pastel colors for a soft, romantic look or bold hues for a vibrant floral design. Floral nail art is a versatile and timeless choice that suits various occasions and styles.
Using a nail art pen allows for precise outlining and filling of flower petals and stems, giving you the freedom to get creative with your design. You can create a subtle, understated look or go all out with bold colors and intricate details. Whatever your style, floral nail art is a great way to add some personality to your look.
Ombre Nail Art Effects Tutorial

To create an ombre nail art effect, start by applying a light base color to your entire nail, guaranteeing a smooth, even coat. This is the foundation of your gradient design, so take your time to get it right.
Next, use a sponge or a nail art brush to layer on darker shades of the same color, gradually building up towards the tip of your nail. The key to a seamless ombre effect is blending, so don't be afraid to experiment and get creative!
Try pairing bold colors like pink and white or blue and silver for a unique, eye-catching look.
Once you're happy with your design, seal it with a top coat to protect the colors and enhance the overall look of your ombre nail art. This will give your design a glossy finish and ensure it lasts longer.
With a little patience and practice, you'll be creating stunning ombre nail art effects that'll turn heads. So go ahead, get creative, and show off your nail art skills!
Advanced Nail Art Pen Designs

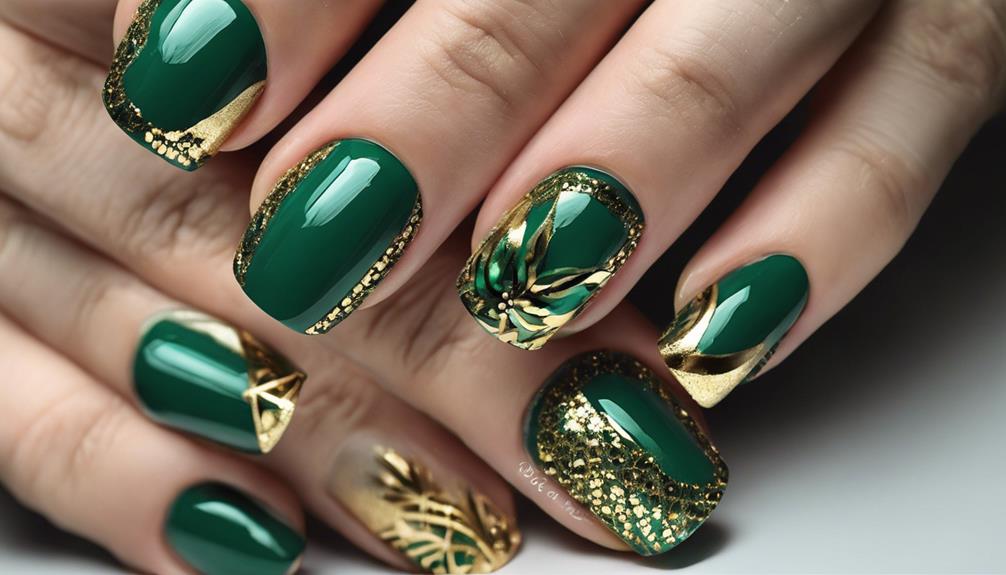
With ombre effects mastered, it's time to take your nail art skills to the next level with advanced designs that showcase the full potential of nail art pens. You're ready to tackle intricate patterns, geometric shapes, and floral motifs that require more precision and detail work with the nail art pen. Advanced nail art pen designs often involve layering colors, creating gradients, and incorporating 3D effects, taking your DIY nail art to new heights.
| Advanced Technique | Description | Example Design |
|---|---|---|
| Shading | Create depth and dimension with gradual color changes | Ombre sunset design |
| Stippling | Use tiny dots to create intricate patterns and textures | Geometric pattern on a single nail |
| Freehand Drawing | Express your creativity with loose, expressive strokes | Whimsical floral design on a full set |
As you experiment with advanced techniques, remember to have fun and be patient with yourself. Advanced nail art pen designs showcase the versatility and creativity that can be achieved with this tool. With practice, you'll be creating stunning, one-of-a-kind nail art that's sure to impress.
Frequently Asked Questions
How to Use Nail Art Pens?
You're excited to express your creativity with nail art pens!
To get started, prepare your nails with a base coat and shape them to your liking.
Next, shake the pen well to distribute the color evenly.
Hold the pen at a slight angle for better control and start with simple shapes, gradually adding details to create intricate designs.
How Do I Set up a Nail Art in Home Complete Guide Step by Step?
You're ready to set up a nail art studio at home!
First, prepare your workspace by gathering essential tools like nail polish, a nail art pen, and a nail polish remover. Clean and shape your nails, then apply a base coat to protect them.
Now, shake your nail art pen well and get ready to express your creativity!
What Are the 5 Basic Nail Art Designs?
You're curious about the basics of nail art designs! Let's jump right in!
The 5 fundamental designs include dots, stripes, flowers, animals, and letters. These classic designs are perfect for beginners, as they're easy to create and require minimal tools.
With a nail art pen, you can experiment with different colors and techniques to add intricate details. Start with simple shapes and gradually build up to more complex designs.
How to Write Words on Nails?
You're ready to take your nail game to the next level by writing words on your nails!
To get started, grab a nail art pen in your favorite color and prepare your nails with a base coat.
Hold the pen at a slight angle and use light pressure to make sure smooth, clear lettering.
Don't forget to seal your design with a top coat to make it last.
With a little practice, you'll be a pro at writing words on your nails in no time!
Conclusion
As you master these creative nail art pen ideas, you'll coincidentally find yourself exploring new techniques and designs, awakening your inner artist.
Your friends will be green with envy (or should we say, nail polish green?) when they see your ombre masterpieces and geometric patterns.
Remember, practice makes perfect, so don't be afraid to try, try again! With these step-by-step guides, you'll be a nail art pro in no time, and who knows, maybe you'll even start your own nail art business!
The possibilities are endless, and it all starts with a stroke of creativity.


