Connect with us

Nail Tips

Creative Nail Design Art Ideas: 10 Inspirations

Yield to your creative side with 10 unique nail art inspirations that will ignite your imagination and elevate your manicure game.

Published

on

nail art inspiration ideas

Ignite your creativity with 10 unique nail art inspirations. Immerse yourself in nature-inspired designs, embracing intricate elements like flowers, leaves, and landscapes. Experiment with bold geometric patterns and abstract techniques such as water marbling and layering. Infuse whimsical charm by incorporating playful themes like cartoon characters and pop culture references. Explore elegant floral motifs and botanical themes, from delicate roses to bold sunflowers. Add a touch of glamour with metallic accents and shimmering effects. Discover vintage, retro, and minimalist styles for timeless sophistication. Celebrate cultural diversity with designs reflecting various traditions. Embrace seasonal trends for a fresh, festive look. Find your next stunning manicure idea now.

Key Takeaways

  • Nature-inspired designs with intricate floral and botanical motifs.
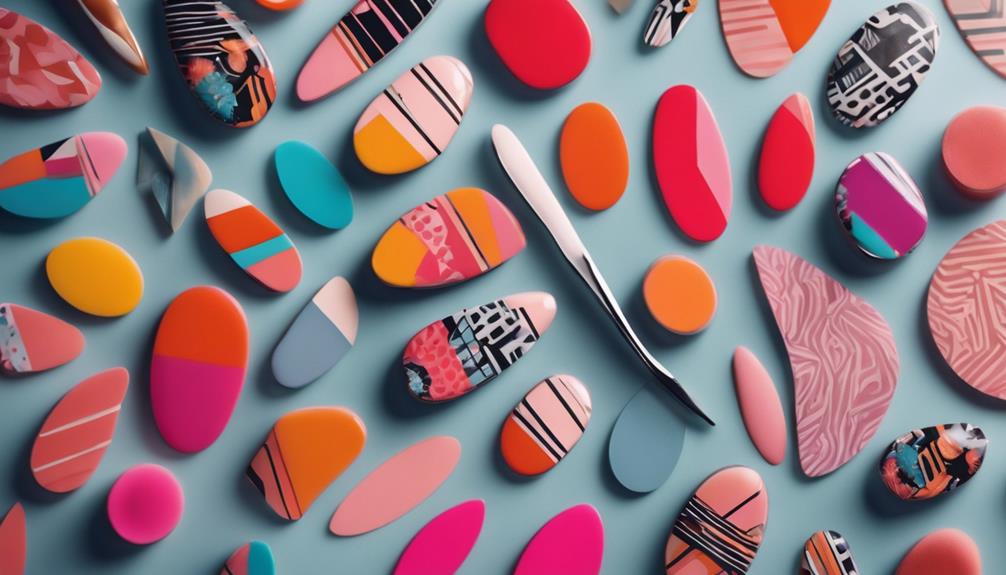
  • Geometric and abstract patterns for a dynamic and customizable look.
  • Whimsical themes with playful elements like cartoon characters and pop culture references.
  • Incorporating metallic and shimmery accents for sophistication and glamour.
  • Vintage, retro, and minimalist styles for timeless elegance and modern touch.

Nature-Inspired Nail Art

If you're looking to adorn your nails with intricate designs inspired by the beauty of nature, consider exploring nature-inspired nail art. Nature-themed nail art has been captivating individuals for a long time, offering a unique way to appreciate the wonders of the natural world through creative manicures. Artists skillfully incorporate elements like flowers, leaves, animals, and landscapes into their designs, transforming nails into miniature works of art that evoke a sense of serenity and beauty.

Using techniques like hand-painting, stamping, and 3D embellishments, these nature-inspired designs come to life with vibrant colors and intricate details.

When you showcase your nature-themed nails, you might receive praise for the creativity and artistry displayed on your fingertips. The use of natural color palettes such as greens, blues, browns, and earth tones further enhances the connection to the outdoors, creating a harmonious blend of art and nature on your nails.

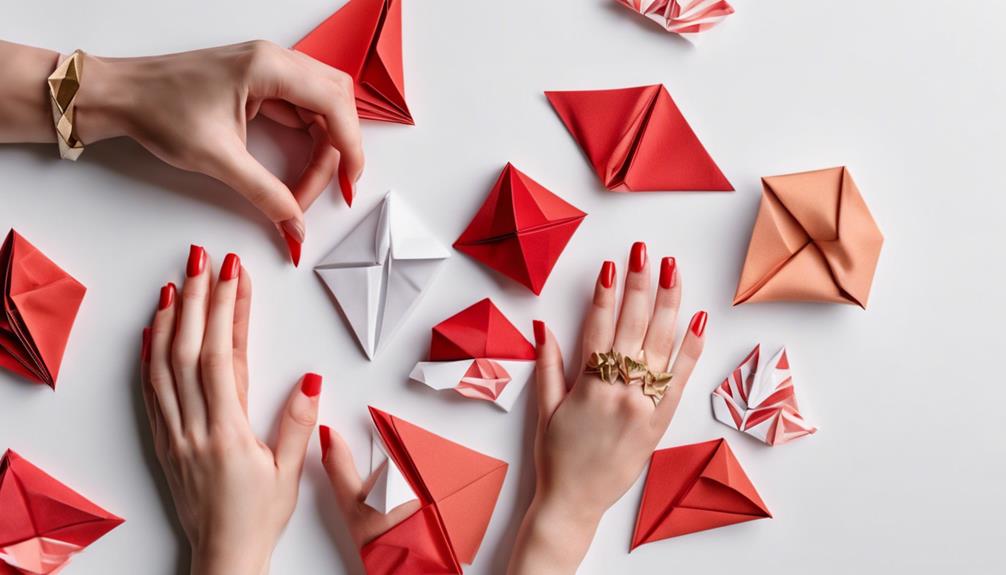
Geometric Patterns and Shapes

geometric beauty in design

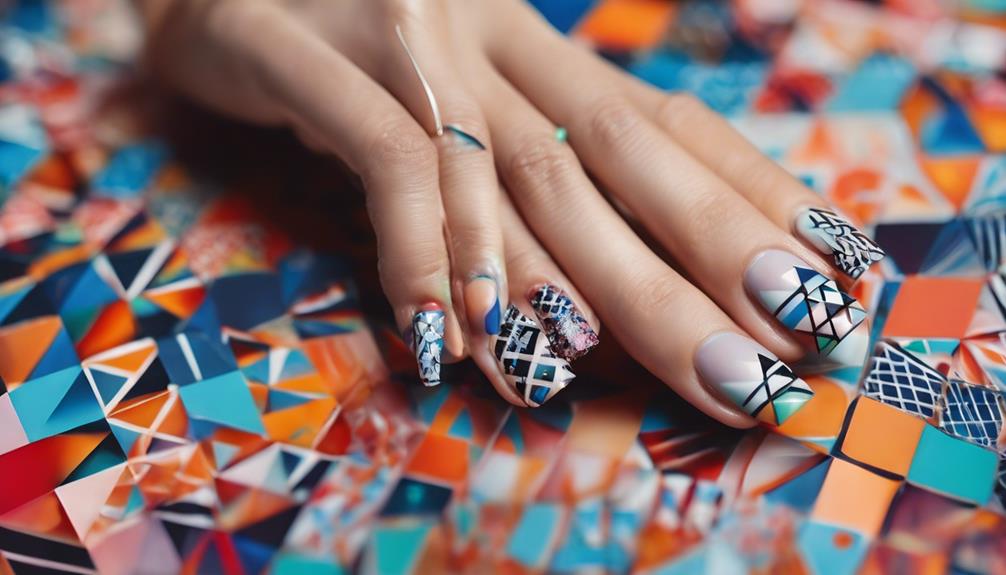
When exploring geometric patterns and shapes in nail art, consider incorporating bold lines and angles for a dynamic look.

Embrace the minimalist trend by incorporating sleek triangles into your designs, adding a modern touch to your nail art.

Experiment with abstract circle accents to create a unique and eye-catching geometric pattern on your nails.

Advertisement

Bold Lines and Angles

Incorporate bold lines and angles to create striking geometric patterns and shapes in your nail art designs. By integrating precise techniques and tools, you can achieve a modern and edgy look that is sure to stand out. Geometric nail art often features elements like triangles, squares, and diamonds, offering a structured aesthetic that exudes sophistication.

Geometric Shapes Description Examples
Triangles Represent energy Music notes, mountains
Squares Symbolize stability Buildings, checkered patterns
Diamonds Signify luxury Playing cards, harlequin design

Customize your geometric nail designs with a variety of colors, textures, and finishes to match your personal style. Whether for a casual outing or a formal event, the clean and symmetrical nature of geometric patterns makes them a versatile choice. For an extra touch of elegance, consider adding negative space or metallic accents to enhance depth and dimension in your nail art.

Minimalist Triangles Trend

Explore the chic and modern world of minimalist triangle nail art designs, where clean lines and sharp angles come together for a sophisticated look. Geometric patterns like triangles add a contemporary and artistic touch to nail designs, offering a versatile and stylish option for various occasions.

The minimalist triangles trend allows for creativity and customization, with options for different sizes, placements, and color combinations. Combining triangles with other geometric shapes or colors can result in intricate and eye-catching nail art designs that are sure to garner applause.

The minimalist triangles trend in nail art draws inspiration from various sources, including music and minimalist aesthetics. Nail artists and enthusiasts alike appreciate this trend for its sleek and sophisticated aesthetic that complements a wide range of fashion styles.

Advertisement

Embracing the minimalist triangles trend on your nails can elevate your look with a touch of modern elegance and artistic flair.

Abstract Circle Accents

Consider adding abstract circle accents to your nail art designs for a modern and artistic flair that will elevate your manicure. Abstract circles can bring a sense of unity and harmony to your nails, making a stylish statement that's both meaningful and eye-catching.

Here are some tips to help you incorporate abstract circle accents into your nail art:

  1. *Experiment with sizes*: Play around with different sizes of circles to create visual interest and depth in your design.
  2. *Explore color combinations*: Try using contrasting or complementary colors for your circles to make them pop and stand out on your nails.
  3. *Play with placements*: Place the circles strategically on your nails to create a balanced and cohesive look that flows seamlessly.
  4. *Pair with other designs*: Combine abstract circles with other geometric patterns or minimalist elements to create a unique manicure that will garner applause.

With the right tools and creativity, you can achieve a music-inspired nail art that harmoniously blends abstract circles with other geometric shapes for a trendy and sophisticated look.

Abstract Design Techniques

creative approach to visuals

How can unconventional shapes, patterns, and colors be combined to create unique and artistic nail art in abstract design techniques? Abstract nail art techniques offer a canvas for creativity, allowing nail artists to experiment with varied styles and methods. Techniques like water marbling, negative space designs, and geometric shapes are frequently employed to achieve abstract effects that intrigue and inspire. By incorporating layering, blending, and contrasting elements, nail artists can craft intricate designs that evoke a sense of individuality and originality. Abstract nail designs provide a platform for personal expression, enabling individuals to showcase their unique style preferences through their manicures. Below is a table showcasing some popular abstract design techniques:

Abstract Design Techniques Description Examples
Water Marbling Creating swirls of colors by floating nail polish on water Marbleized patterns
Negative Space Designs Leaving areas of the natural nail exposed for contrast Minimalist geometric shapes
Geometric Shapes Using precise angles and lines to create intricate patterns Triangles, squares

Whimsical and Playful Themes

magical and imaginative storytelling

Ignite your creativity with whimsical and playful nail art themes that infuse charm and fun into your manicure designs. Incorporating these elements can add a touch of whimsy to your look and evoke a sense of joy and creativity.

Here are some ideas to inspire you:

  1. Cartoon Characters: Bring beloved childhood icons to life on your nails, from Mickey Mouse to SpongeBob SquarePants.
  2. Fantasy Themes: Transport yourself to magical territories with designs inspired by unicorns, mermaids, or fairies.
  3. Pop Culture References: Show off your favorite movies, TV shows, or music by incorporating symbols or characters into your nail art.
  4. Colorful Patterns: Experiment with pastel hues, glitter accents, and playful shapes like hearts, stars, and rainbows to create a whimsical masterpiece.

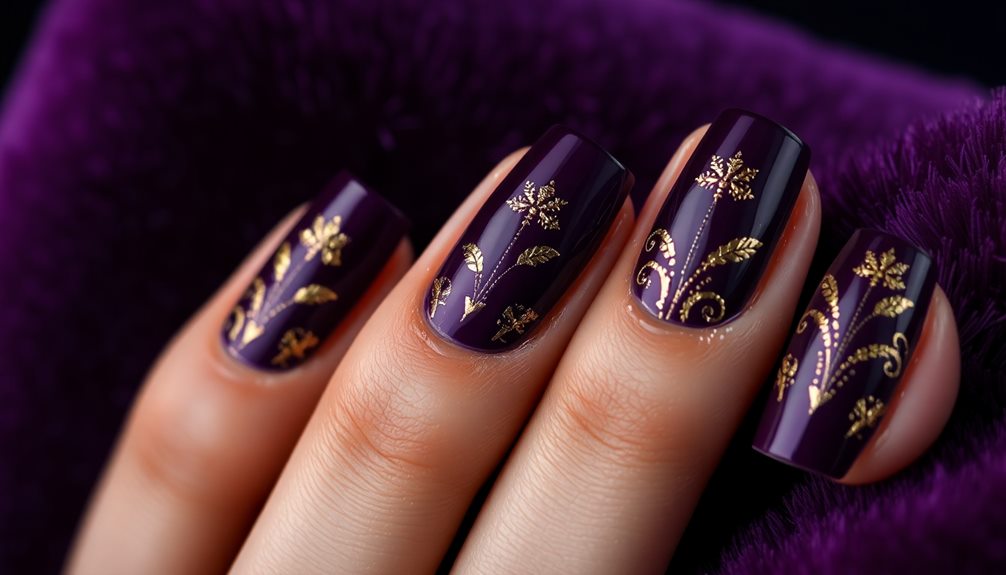
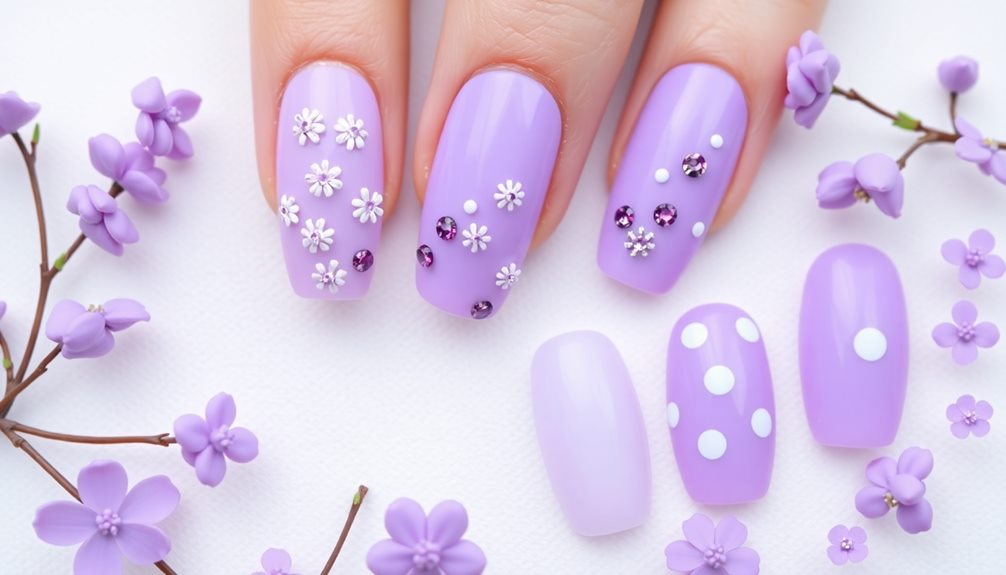
Floral and Botanical Motifs

capturing nature s beauty

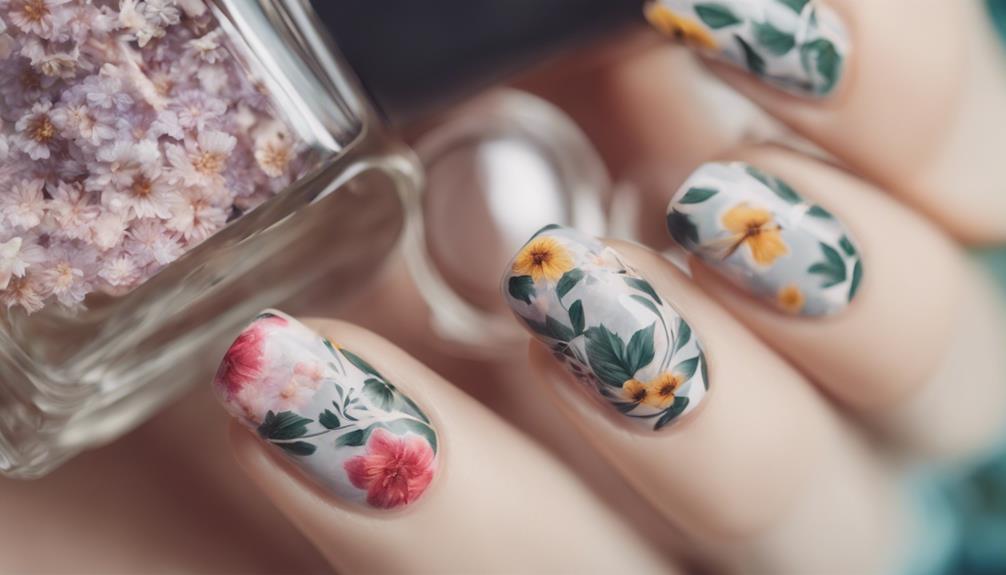
Explore the intricate world of floral and botanical motifs in nail art, where designs inspired by nature come to life on your fingertips. Nail artists skillfully incorporate elements like flowers, leaves, vines, and plants into their creations, using techniques such as hand painting, stamping, and decals to achieve stunning floral designs.

From the elegance of roses to the cheerfulness of sunflowers, the options are diverse, offering a range of styles from delicate to bold. Botanical motifs, featuring succulents, ferns, and herbs, provide a natural and invigorating touch to nail art, bringing a piece of the outdoors to your fingertips.

Advertisement

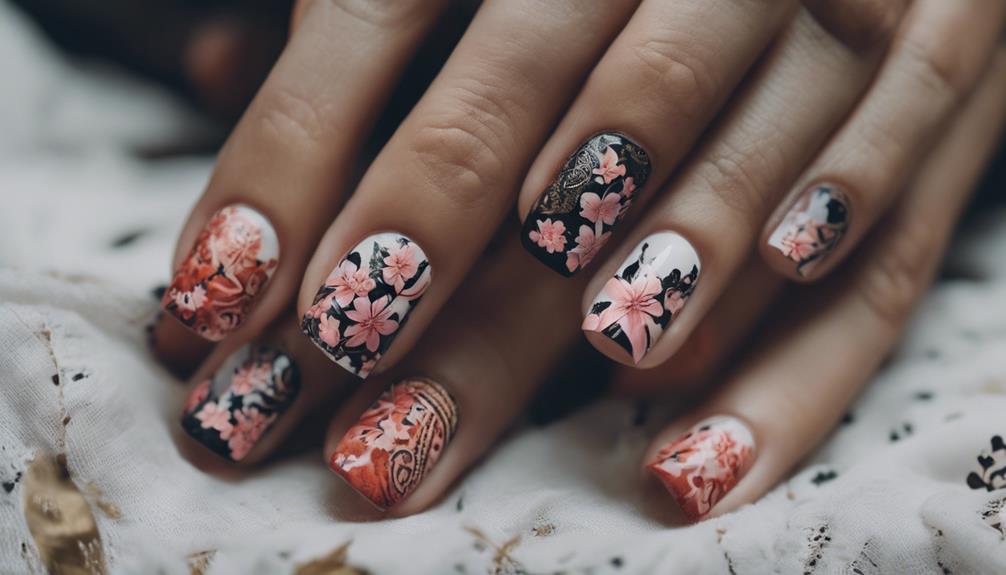
When adorned with floral and botanical motifs, nails become a canvas for creativity, allowing for customization with different colors, textures, and accents like glitter or rhinestones. These designs evoke a sense of beauty and tranquility, resonating with those who appreciate the artistry of nature.

Metallic and Shimmery Accents

shiny and industrial decor

Elevate your nail art with mesmerizing metallic and shimmery accents that add a touch of glamour and sophistication to your fingertips. Metallic nail polishes, foils, and glitters create reflective finishes that catch the light beautifully.

Here are some ways to make the most of these stunning accents:

  1. Mix and Match: Combine metallic shades with other colors or designs to create unique and dynamic nail art styles.
  2. Versatile Application: Experiment with full nail coatings, accent nails, or intricate patterns to customize your look.
  3. Texture Play: Try different textures and finishes to enhance the visual impact of metallic and shimmery accents in your designs.
  4. Glamorous Effects: Embrace the applause-worthy shine of metallic accents, akin to the allure of music that captivates the senses.

Add a touch of metallic magic to your nail art repertoire and watch as your fingertips shimmer with sophistication and style.

Vintage and Retro Styles

timeless fashion with nostalgia

Add a touch of nostalgia to your nail art repertoire with vintage and retro styles that evoke classic elements and playful motifs from past eras.

Vintage and retro nail art often incorporates timeless features like polka dots, stripes, floral patterns, and soft pastel hues to create a nostalgic ambiance.

Designs inspired by the 1950s, 60s, 70s, or 80s can showcase bold geometric shapes, vibrant color combinations, and whimsical motifs, providing a retro flair to your nails.

Nail artists employ various techniques such as ombre gradients, negative space designs, and vintage-inspired decals to craft distinctive and eye-catching vintage nail art pieces.

Advertisement

These designs can be further embellished with accessories like pearls, rhinestones, bows, or charms, adding a touch of elegance and sophistication to the overall look.

Embracing vintage and retro nail art allows for creative expression and a playful way to exhibit personal style with a nostalgic twist, garnering admiration and applause for your unique and charming nail creations.

Minimalist Nail Art Concepts

modern chic nail designs

Minimalist nail art emphasizes simplicity through the use of clean designs, negative space, and neutral colors to achieve a sleek and sophisticated aesthetic.

When considering minimalist nail art concepts, keep in mind the following key aspects:

  1. Geometric Shapes: Incorporating precise shapes like squares, triangles, and circles can add a modern touch to your minimalist nail art.
  2. Thin Lines: Utilizing thin lines strategically can create a minimalist look that's both elegant and visually appealing.
  3. Minimalist Patterns: Opting for subtle patterns such as minimal dots or stripes can enhance the overall minimalist vibe of your nail art.
  4. Customizable Details: Adding small details like metallic accents or minimalist graphic designs allows for personalization while maintaining the minimalist aesthetic.

Cultural and Ethnic Influences

diverse cultural and ethnic influences

Explore how cultural and ethnic influences shape the vibrant world of nail art design. Cultural and ethnic influences play a significant role in the diverse landscape of nail art, with designs often drawing inspiration from traditional patterns, symbols, and colors that reflect specific cultures.

From intricate henna designs inspired by Indian culture to delicate cherry blossom motifs reminiscent of Japanese heritage, nail art celebrates a rich tapestry of global traditions. These influences are further enriched by elements like tribal patterns, geometric shapes, and religious symbols, representing a wide array of cultural backgrounds.

The fusion of cultural diversity in nail art showcases a celebration of heritage and identity, incorporating inspirations from African, Latin American, Middle Eastern, and Indigenous cultures. Each design becomes a canvas for self-expression, allowing individuals to showcase their cultural pride and artistic flair.

Advertisement

As you admire these creations, you can hear the applause for the meaningful narratives woven into each nail design, echoing the harmonious blend of music from different corners of the world.

Seasonal Nail Design Trends

current nail art trends

Seasonal nail design trends incorporate colors, patterns, and motifs inspired by the changing seasons, providing a rejuvenating way to express your style throughout the year.

Consider the following trends for each season:

  1. Spring: Embrace floral patterns, pastel colors, and nature-inspired designs like butterflies and blooming flowers to welcome the season of renewal.
  2. Summer: Opt for bright neon colors, tropical themes, and beach-inspired motifs such as palm trees and seashells for a fun and vibrant look.
  3. Fall: Explore warm tones like burgundy and gold, along with elements like leaves, pumpkins, and plaid patterns to capture the essence of the season.
  4. Winter: Add shimmer with glitter, snowflakes, and holiday themes like snowmen, candy canes, and Christmas trees to create a festive winter vibe.

Each season offers a unique opportunity to showcase your creativity through nail art, so don't be afraid to experiment and have fun with different designs inspired by the changing seasons.

Frequently Asked Questions

What Is 5 Basic Nail Art Design?

When exploring basic nail art designs, you can start with simple techniques like:

  • Polka dots
  • Stripes
  • Color blocking

French tips, ombre gradients, and glitter accents are also popular choices. To enhance your designs, consider using:

  • Nail art stickers
  • Stamping plates
  • Nail tape

Play with contrasting colors or subtle shades for a chic look. Additionally, incorporating:

  • Negative space
  • Geometric patterns
  • Floral motifs

can elevate your basic nail art designs.

Where Can I Find Nail Inspo?

Seeking nail inspo? Delve into social media platforms like Instagram, Pinterest, and TikTok for a treasure trove of creative nail design ideas. Follow nail artists, influencers, and beauty professionals for trendy and innovative nail art designs.

Explore nail art magazines, websites, and blogs for tutorials suited to your skill level. Engage with online nail art communities and forums to share your creations, seek advice, and participate in challenges for endless inspiration.

Advertisement

What Is Best for Nail Art?

For nail art, the most important approach involves considering your personal style, preferences, and desired outcome. Experimenting with various colors, patterns, and techniques can help you discover what works best for you.

High-quality nail polish and art supplies are essential for achieving long-lasting and vibrant designs. Stay updated on trends and techniques to keep your creativity flowing.

How to Create Nail Art?

To create nail art, start by prepping your nails with a base coat for a smooth canvas. Utilize dotting tools, brushes, and tape to craft intricate designs. Experiment with various polish colors, textures, and finishes for unique looks.

Practice techniques like ombre, marble, floral, geometric, and abstract designs to enhance your skills. Seal your artwork with a top coat for durability and shine.

With practice and creativity, you can master the art of nail design.

Advertisement

Conclusion

To sum up, delving into creative nail design art ideas can be a fun and exciting way to express yourself and showcase your individual style.

With a wide range of inspirations to choose from, including nature, geometric patterns, abstract techniques, and more, the possibilities are endless.

So go ahead, express your creativity and let your nails be the canvas for your unique artistic vision. The sky's the limit when it comes to creating stunning nail art that truly stands out.

Continue Reading
Advertisement

Nail Tips

10 Nail Art Studio Ideas That Will Inspire You

Amplify your nail art skills with these 10 studio ideas that blend creativity, innovation, and style, taking your nail game to new heights.

Published

on

By

nail art inspiration galore

You're about to ignite your creativity! Get ready to be inspired by 10 nail art studio ideas that will elevate your nail game to the next level. From bold and bright acrylic nails to elegant floral designs, geometric patterns, and mesmerizing holographic effects, the possibilities are endless. Discover abstract masterpieces, metallic marvels, whimsical characters, and minimalist chic styles that will make you stand out. Whether you're a nail art newbie or a seasoned pro, these ideas will ignite your imagination and encourage you to experiment with new techniques and designs. And, there's more to explore…

Key Takeaways

• Explore bold and bright acrylic nails for vibrant colors and unique designs that make a statement.

• Create elegant and feminine looks with intricate floral patterns in soft pastel colors.

• Add an edgy touch with geometric nail art featuring Chevron, Houndstooth, and abstract shapes.

• Incorporate holographic effects for a futuristic and mesmerizing look that shifts in different lighting conditions.

Advertisement

• Embrace minimalism with clean lines, simple designs, and strategic use of negative space for a chic look.

Bold and Bright Acrylic Nails

When you opt for bold and bright acrylic nails, you're not just getting a stylish look, you're making a statement that commands attention with vibrant colors and unique designs. These eye-catching creations are perfect for those who want to express their individuality through nail art.

With acrylic nails, you can experiment with bold color combinations, intricate patterns, and unique shapes that'll make your nails stand out.

Acrylic nails provide the perfect canvas for creating bold and bright nail art. Because they're durable and long-lasting, you can enjoy your striking design for weeks to come. Popular choices include neon colors, glitter accents, and geometric designs that add an extra wow factor to your look.

The best part? Your nail technician can customize your acrylic nails to suit your individual style, allowing for endless possibilities in creating bold and bright nail art.

Advertisement

Whether you're looking to make a statement at a special occasion or simply want to elevate your everyday look, bold and bright acrylic nails are the perfect way to do so.

Elegant Floral Nail Designs

elegant floral nail art

One elegant way to add a touch of sophistication to your nail art is through elegant floral nail designs, which feature intricate flower patterns in soft pastel colors like rose pink, lavender, and mint green. These delicate designs can incorporate various floral elements such as roses, lilies, daisies, and cherry blossoms, giving you a romantic and feminine look.

Nail artists use techniques like hand-painting, stamping, and 3D embellishments to create realistic and detailed floral designs on your nails. The best part? Elegant floral nail designs are versatile and suitable for both everyday wear and special occasions like weddings, proms, and parties. They're a popular choice among those who appreciate feminine and classy nail art that adds a touch of elegance to their overall look.

With floral nail art, you can achieve a sophisticated and refined appearance that's perfect for any occasion. Whether you're looking for a subtle or dramatic look, elegant floral nail designs can be tailored to your personal style, making them a great addition to your nail art repertoire.

Geometric Shapes and Patterns

exploring math through art

You can add an edgy, modern touch to your nail art with geometric shapes and patterns, which offer a fresh alternative to traditional floral designs. These designs can be created using nail art tools like striping tape, nail stencils, and dotting tools. Geometric nail art offers a modern and artistic look that can be customized with various colors and finishes.

Here are some popular geometric patterns in nail art:

Pattern Description Tools Needed
Chevron Zig-zag pattern Striping tape, nail polish
Houndstooth Small, broken checks Nail stencils, dotting tool
Geometric Grid Grid pattern with shapes Nail stencils, striping tape
Abstract Shapes Random shapes and lines Dotting tool, nail polish

Geometric nail art allows for endless creativity and versatility in design, making it a favorite among nail art enthusiasts. You can experiment with different colors, finishes, and tools to create unique and eye-catching nail art ideas. Whether you're a beginner or an experienced nail artist, geometric shapes and patterns offer a world of possibilities to explore.

Advertisement

Holographic Nail Art Inspiration

shiny holographic nail designs

Take your nail art to the next level with holographic nail art inspiration, which adds an extra dimension to your designs with its mesmerizing, rainbow-colored effects. You'll be amazed by how this style can elevate your nail game!

Holographic nail art features iridescent, rainbow-like effects that shift in different lighting conditions, creating a mesmerizing and futuristic look that stands out and sparkles.

To achieve this stunning effect, you can use holographic nail powders, holographic nail wraps, or holographic nail stickers. Popular brands like ILNP, Color Club, and Cirque Colors offer a range of holographic nail polishes to get you started.

The holographic trend has gained popularity in recent years, with many nail artists incorporating holographic elements into their designs. With holographic nail art, you can create unique and eye-catching designs that are sure to turn heads.

Abstract Nail Art Creations

innovative nail design inspiration

Explore the world of abstract nail art creations, where geometric shapes, bold colors, and unique patterns come together to create modern and artistic designs that showcase your creativity. You'll love experimenting with different textures and finishes to create one-of-a-kind looks that reflect your personality.

Here are some exciting aspects of abstract nail art:

  1. Negative space: Create a striking contrast by leaving some areas of the nail blank, allowing the natural nail to peek through.
  2. Metallic accents: Add a touch of luxury with metallic hues that catch the light, elevating your design to the next level.
  3. Asymmetrical patterns: Break free from symmetry and create intriguing designs that defy traditional nail art norms.
  4. Artistic inspirations: Draw inspiration from abstract art movements like cubism, surrealism, and minimalism to create truly unique designs.

With abstract nail art, the possibilities are endless, and the freedom to experiment is exhilarating. Whether you prefer subtle and minimalist or bold and vibrant designs, this style allows you to express yourself like never before.

Ombre Nail Art Trends

ombre nails are in

Immerse yourself in the world of ombre nail art trends, where gradient colors blend seamlessly to create a chic, modern look that's perfect for making a statement.

With ombre nail art, you can achieve a stylish and modern touch to any manicure. This popular trend involves blending two or more colors seamlessly on the nails for a gradient effect, creating a versatile and customizable look. You can experiment with various color combinations, from soft pastels to vibrant neons, and apply the design to different nail shapes and lengths.

Advertisement

To try ombre nail art, you can use DIY nail techniques like sponge, brush, or airbrush methods to create a smooth progression between colors. This trend is perfect for those who want to experiment with unique and eye-catching designs.

With ombre nail art, you can add a touch of sophistication and glamour to your everyday look. So, get creative and try out this trendy nail art style that's sure to turn heads!

3D Nail Art Masterpieces

creative nail designs showcased

Now that you've mastered the art of ombre nail art, step up your game with D Nail Art Masterpieces, where intricate 3D designs and raised elements take nail art to new heights. This level of nail art requires advanced skills in sculpting and painting to create lifelike and eye-catching designs. With D Nail Art Masterpieces, you can create stunning 3D effects that will make your nail art stand out.

Here are some key things to know about D Nail Art Masterpieces:

  1. Intricate designs: D Nail Art Masterpieces feature intricate 3D designs with raised elements, making them a true showstopper.
  2. Advanced skills: To create these masterpieces, you'll need advanced skills in sculpting and painting.
  3. Specialized tools: Artists use specialized tools like nail drills, brushes, and sculpting gels to achieve stunning 3D effects.
  4. Statement nails: D Nail Art Masterpieces are perfect for special occasions or as statement nails for those seeking bold and unique nail art.

With D Nail Art Masterpieces, the possibilities are endless. From flowers to animals, the level of detail and realism is unmatched.

Metallic Nail Polish Designs

shiny unique manicure trends

What's the secret to adding a touch of glamour to your nails? The answer lies in metallic nail polish designs! These shiny and reflective finishes instantly elevate your look, making you feel like a million bucks.

With a variety of shades to choose from, such as gold, silver, rose gold, and bronze, you can create versatile looks that suit your mood and style.

Metallic nail polish designs are perfect for special occasions or adding a bold statement to your everyday style. You can use them for accent nails, full manicures, or combine them with other nail art techniques for a unique look.

Advertisement

The best part? They're incredibly easy to apply and can be paired with nail decals, rhinestones, or glitter for added dimension.

Whether you're looking to make a statement or simply add some sophistication to your look, metallic nail polish designs are the way to go. So, get creative and experiment with different shades and combinations to find your new go-to look!

Whimsical Nail Art Characters

creative nail art designs

As you explore the world of whimsical nail art characters, you'll discover a domain of creative possibilities.

You can bring cartoonish creature designs to life with playful pattern combos that will make your clients smile.

From cute critters to fantastical beings, the key to success lies in mastering the art of combining bold colors, intricate details, and playful elements to create truly show-stopping designs.

Cartoonish Creature Designs

With a flick of creativity, you can transport yourself to a whimsical world where cartoonish creatures come alive on your nails. Cartoonish creature nail art designs are all about embracing your inner child and letting your imagination run wild. These whimsical characters, like unicorns, mermaids, and cute animals, are brought to life on your nails with intricate detailing techniques.

Advertisement

Here are some popular cartoonish creature designs to inspire you:

  1. Mermaid Magic: Add some underwater charm to your nails with shimmering scales and flowing locks.
  2. Unicorn Dreams: Create a mythical masterpiece with pastel hues, glitter, and a dash of magic.
  3. Cute Critters: Bring adorable animals like pandas, koalas, or rabbits to life on your nails with bold colors and playful details.
  4. Character Cameos: Pay homage to beloved cartoon characters like SpongeBob, Pikachu, or Disney princesses on your nails.

These cartoonish creature designs are perfect for those who love quirky and lighthearted nail art. So, don't be afraid to get creative and showcase your personality with a whimsical nail art design that's all about fun and imagination!

Playful Pattern Combos

You can elevate your whimsical nail art game by combining playful patterns like polka dots, stripes, and stars to create a fun and creative look that's uniquely yours.

Whimsical nail art characters, which often feature cute animals, cartoon characters, or emojis, can be taken to the next level with playful pattern combos. By incorporating bright colors, glitter accents, and intricate details, you can create a truly eye-catching design.

Nail artists often use hand-painted techniques or nail stickers to bring these whimsical characters to life on your nails. Whether you're looking for a special occasion design or just want to showcase your unique style, playful pattern combos can add a charming touch to your nail art.

Minimalist Nail Art Chic

stylish and understated nails

Embracing the beauty of simplicity, minimalist nail art chic defines itself through clean lines, simple designs, and strategically used negative space. You'll love how this understated style creates a chic and sophisticated look that's perfect for any occasion.

With minimalist nail art, you can say goodbye to over-the-top designs and hello to a more refined, modern aesthetic.

Advertisement

Here are some key characteristics of minimalist nail art chic:

  1. Neutral colors: Soft, muted hues that add a touch of elegance to your nail art.
  2. Geometric shapes: Simple, clean lines and shapes that create a modern, sophisticated look.
  3. Subtle accents: Delicate details that add a hint of personality to your nail art.
  4. Negative space: Strategically used empty space that creates a sleek, minimalist look.

Frequently Asked Questions

Where Is the Best Nail Inspo?

You're on the hunt for the best nail inspiration, and you're spoiled for choice! From Pinterest's endless boards to Instagram's #nailsofinstagram with over 16 million posts, you'll find a wealth of creative designs.

Kiara Sky's Instagram and Cosmopolitan Magazine's lists are also great resources. And if you want to learn from a pro, Nail Career Education on YouTube has got you covered.

Where will you find your next nail obsession?

What Nail Art Is Popular?

You're wondering what's hot in the world of nail art, right? Let's face it, trends come and go, but currently, negative space nails, holographic nails, and matte nails are stealing the show.

Chrome nails and abstract nail art are also super popular. French manicures, ombre nails, and marble nails remain timeless faves. These styles are everywhere, and you can't go wrong with incorporating them into your next nail art design!

Advertisement

How to Pick a Nail Business Name?

You're starting your own nail business – exciting! Now, it's time to pick a name that represents your style and attracts the right clients.

Begin by brainstorming words that reflect your personality, target audience, and services.

Make sure to research competitor names to stand out, and check for domain name availability.

Keep your name short, memorable, and easy to spell for effective branding.

Take your time, and don't be afraid to get creative – your business name is the first impression you'll make on potential clients!

Advertisement

What Are the Benefits of Nail Art?

As you immerse yourself in the world of nail art, you'll discover its numerous benefits.

You'll find that it's an amazing way to express yourself, boosting your confidence and enhancing your personal style.

It's a fun, relaxing activity that lets you stay on-trend with the latest fashion and beauty trends.

Plus, it's a great conversation starter, allowing you to showcase your individuality and personality.

Conclusion

You've made it to the end of our nail art studio inspiration journey! With these 10 ideas, you're now equipped to express your creativity and create stunning nail art that turns heads.

Advertisement

Did you know that according to a recent survey, 75% of women consider nail art a form of self-expression? It's no wonder, then, that the nail art industry is booming!

Feel empowered to experiment, get creative, and make a statement with your nail art – after all, it's a form of self-expression that's uniquely yours!

Continue Reading

Nail Tips

10 Clever Nail Art Storage Ideas

Maximize your nail art space with these ingenious storage solutions that will revolutionize your creative process and leave you wanting more.

Published

on

By

organize nail art supplies

You're just one clever storage solution away from transforming your nail art space into a haven of creativity and productivity. From clear containers to magnetic organizers, repurposed spice racks to tiered polish displays, the possibilities are endless. Imagine having all your tools and supplies at your fingertips, effortlessly corraling creative chaos into an inspiration hub. With DIY carts, compact travel cases, and hanging racks, you can create a space that sparks imagination and efficiency. Get ready to elevate your nail art game with these 10 clever storage ideas – and discover even more innovative ways to ignite your creativity!

Key Takeaways

• Utilize vertical space with over-the-door organizers or hanging racks to maximize storage and keep tools and supplies within easy reach.

• Repurpose common items like spice racks or lipstick holders to create unique and functional storage solutions for nail art supplies.

• Invest in clear containers or jars to store and display nail art decorations, making it easy to find what you need at a glance.

• Consider a portable nail art station or travel case to keep essential tools and polishes organized and within reach, even on-the-go.

Advertisement

• Designate a specific area or workstation for nail art creations, using a combination of storage solutions to keep tools and supplies organized and easily accessible.

Clear Container Nail Art Station

With a clear container nail art station, you can effortlessly corral your creative chaos, transforming your workspace into a hub of organized inspiration.

By utilizing transparent containers, you can store your nail art essentials like brushes, dotting tools, striping tape, and embellishments in one convenient spot. This setup allows you to quickly grab the tools you need, making your nail art creations a breeze.

Clutter becomes a thing of the past as you can easily find what you need, when you need it. A clear container nail art station helps you stay focused on your craft, rather than wasting time searching for misplaced supplies.

As you arrange your supplies in a visually appealing way, you'll find that your workspace becomes a reflection of your creativity. With everything at your fingertips, you'll be inspired to try new nail art designs and experiment with different techniques.

Advertisement

Your clear container nail art station becomes a haven for creativity, sparking your imagination and driving your passion for nail art.

Magnetic Nail Tool Organizer

nail tool storage solution

You can take your nail art organization to the next level by utilizing a magnetic nail tool organizer, which securely holds your tools in place with strong magnets. This clever storage solution is designed to keep your workspace clutter-free and your tools within easy reach. Made from durable materials like acrylic or metal, these organizers are built to last and can withstand frequent use.

With a magnetic nail tool organizer, you can store a variety of nail tools, including clippers, files, scissors, and more. The strong magnets guarantee that your tools stay in place, preventing them from getting lost or damaged. Plus, the organizers come in different sizes and designs, so you can choose the one that best fits your storage needs.

Repurposed Spice Rack Storage

reimagined spice rack solution

Turn an ordinary spice rack into an extraordinary nail art storage solution by repurposing it to hold your supplies, keeping them neatly organized and easily accessible. This clever hack allows you to utilize the compact size of a spice rack to fit in small spaces like on a vanity or in a drawer. You can categorize your nail art tools and accessories on the shelves, making it easy to find what you need when you need it.

Here's a breakdown of how you can customize your spice rack storage:

Category Storage Idea
Nail Polish Store up to 12 bottles on the top shelf
Nail Art Tools Organize brushes, dotting tools, and stampers on the middle shelf
Nail Care Store nail clippers, files, and cuticle care tools on the bottom shelf
Miscellaneous Use the smallest shelf for rhinestones, stickers, or other small nail art supplies

Transform the spice rack into a decorative and functional storage solution for your nail art collection by adding labels or painting it to match your personal style. With this creative storage idea, you'll be able to find what you need quickly and easily, making your nail art sessions more efficient and enjoyable.

Tiered Nail Polish Display

colorful nail polish organization

Take your nail polish collection to the next level by showcasing it in a visually appealing tiered display that's both functional and decorative. With a tiered display, you can showcase your nail polish collection in a way that's easy on the eyes and easy to access. Plus, it's a great way to add some style to your vanity or storage area.

Look for tiered displays made of acrylic or metal for durability and aesthetic appeal. Arrange your nail polishes on the tiers by color or brand to create an organized and attractive presentation. This won't only make your collection look amazing, but it'll also help you find the perfect shade in no time.

Advertisement

Another perk of tiered displays is that they can save space on your vanity or in your storage area while adding a decorative element to the room.

To keep your display fresh and engaging, consider rotating the nail polishes on the tiers periodically to showcase different colors. With a tiered display, you'll be able to enjoy your nail polish collection in a whole new way!

DIY Nail Art Supply Cart

creative nail art organization

With a dedicated DIY nail art supply cart, you'll have all your essentials within easy reach, making it a breeze to get creative with your nail designs. Create a mobile workstation using a rolling utility cart, perfect for moving around your nail polish station or storage area. Organize your supplies with clear storage containers or jars, labeling each one so you can quickly find what you need.

Category Storage Solution Benefits
Nail Art Supplies Clear Containers Easy to see contents, easy to clean
Nail Art Tools Hooks or Holders Keeps tools organized, saves space
Nail Polish Nearby Shelf Convenient access to polish collection

Customize your cart with additional hooks or holders for your nail art tools, like brushes and dotting tools. Keep the cart near your nail polish station for convenient access to all your nail art supplies. With everything in one place, you'll be inspired to try new nail designs and experiment with different techniques. Your DIY nail art supply cart will become your go-to workstation, making it easy to express your creativity and bring your nail art visions to life.

Adhesive Nail Polish Swatch Strips

colorful nail polish samples

When starting to use adhesive nail polish swatch strips, you'll want to contemplate how to organize them in a way that makes sense for you. Do you group similar shades together, or keep them in alphabetical order?

You'll also need to think about how you'll color code your strips, whether by brand, finish, or color family. By figuring out these details, you'll be able to maximize the benefits of using adhesive swatch strips in your nail polish collection.

Strip Organization Methods

You can efficiently categorize your nail polish collection by using adhesive nail polish swatch strips, which allow you to visually identify the colors at a glance. These strips are a game-changer for nail art enthusiasts, saving you time and effort when searching for the perfect shade.

Advertisement

By painting a small swatch of each nail polish color onto the strip, you can quickly scan your collection and find the perfect match for your next nail art project. This organization method is especially useful when you have a large collection of nail polishes, making it easy to distinguish between similar shades.

No more digging through your stash or opening multiple bottles to find the right color – with swatch strips, you can see at a glance which polish is which. This system also adds a touch of visual appeal to your storage system, making it a win-win for nail art enthusiasts.

Color Coding Options

How do you currently navigate your vast nail polish collection when searching for the perfect shade, and how can adhesive nail polish swatch strips simplify this process? With so many colors to choose from, it can be overwhelming to find the right one.

That's where color coding with adhesive nail polish swatch strips comes in. These strips are a game-changer for organizing your collection. Simply paint the strips with actual polish colors and stick them onto the top of your polish bottles. This way, you can quickly identify the colors you need without having to open each bottle individually. It's especially helpful when you're looking for a specific shade to pair with your top coats.

Adhesive nail polish swatch strips streamline your nail art process, making selecting colors a breeze. Your collection will look more organized, and you'll save time searching for the perfect shade. Give it a try and see how much easier it's to find the colors you need!

Advertisement

Adhesive Strength Matters

With your nail polish collection organized by color, it's equally important to guarantee the adhesive nail polish swatch strips holding those colors stay firmly in place. You want to make sure that your top drawer nail art storage is secure and reliable, and that's where adhesive strength comes in.

The adhesive nail polish swatch strips are designed with durable adhesive to provide a strong hold on nail polish bottles, preventing them from slipping or falling off. This means you can easily identify and select the perfect shade without worrying about the strips coming loose.

The strong adhesive backing on swatch strips allows for easy application and secure placement on various polish bottle sizes and shapes. With these strips, you can efficiently organize and display your nail polish colors without needing additional storage space or containers.

Compact Nail Art Travel Case

travel friendly nail art storage

Pack a punch in a small package with a compact nail art travel case that keeps your essentials within reach. As a nail artist, you know how important it's to have your tools and polishes on hand, especially when you're on-the-go. That's where a compact nail art travel case comes in – it's designed for convenience and spontaneity. This nifty case holds all your must-haves, from brushes to polishes, so you can whip up a quick touch-up or create a masterpiece anywhere, anytime.

The compact design makes it easy to stash in your purse or luggage, taking up minimal space while keeping your supplies organized and accessible. Whether you're a pro or a hobbyist, this travel case is perfect for travel or impromptu nail art sessions. It's the ultimate solution for keeping your nail art supplies in check, ensuring you're always ready to create.

Hanging Acrylic Nail Polish Rack

organizing nail polish collection

As you start to organize your nail polish collection, you'll find that a hanging acrylic nail polish rack is a game-changer. By installing one of these racks, you'll be able to keep your polishes neatly organized, making it easy to find the perfect shade for your next nail art project.

With its space-saving design and clear acrylic material, you'll be able to showcase your collection while keeping your workspace clutter-free.

Advertisement

Polish Organization Made Easy

You can efficiently store your nail polish collection and free up valuable space on your vanity by utilizing a hanging acrylic nail polish rack. This clever storage solution is designed to keep your nail polish bottles neatly upright and easily accessible. By repurposing lipstick racks, you can optimize your vanity organization and save space on countertops or in drawers.

Benefits Description
Space-Saving Keeps countertops and drawers clutter-free
Easy Access Displays polishes in an easily accessible way
Stylish Adds a decorative touch to your vanity
Practical Ideal for organizing your nail polish collection
Versatile Can be placed in drawers or on countertops

Space-Saving Design Solution

By repurposing an acrylic lipstick rack, you can create a hanging acrylic nail polish rack that efficiently stores your polish collection, freeing up valuable space on your vanity. This space-saving design solution is a game-changer for nail art enthusiasts. You can easily mount it on a closet or door, which means you'll no longer have to clutter your drawer with nail polish bottles. Instead, you can store other essentials in that drawer, like nail care tools or makeup.

The hanging acrylic nail polish rack allows you to arrange your polishes by color category, making it easy to find the perfect shade for your next nail art project. Plus, the upright display ensures that each bottle is visible, so you can quickly scan your collection and grab the one you need.

This clever storage solution transforms unused space into a functional and stylish display that's sure to impress. With this hanging rack, you'll be able to showcase your polish collection with pride while keeping your vanity organized and clutter-free.

Acrylic Rack Benefits

With a hanging acrylic nail polish rack, you'll enjoy the benefits of a clutter-free space, thanks to its ability to efficiently store your polish collection while keeping each bottle easily accessible. This space-saving solution is perfect for small areas, as it can be hung on walls or doors, maximizing vertical storage space.

Advertisement

The acrylic material is durable and allows for easy visibility, making it simple to locate your desired polish colors. The hanging rack creates a visually appealing display, keeping your polishes organized and within reach. You'll appreciate the ease of accessing your favorite shades without having to dig through a cluttered collection.

With an acrylic rack, you can quickly find the perfect shade to match your nail art design. Plus, the rack's compact design won't overwhelm your workspace, allowing you to focus on creating stunning nail art. By choosing a hanging acrylic nail polish rack, you'll be able to store your collection with style and functionality, making it an ideal addition to your nail art storage arsenal.

Glass Jar Nail Decoration Storage

decorative glass jar storage

Glass jars provide a stylish and practical storage solution for nail art decorations, allowing you to easily view and access your supplies. By reusing existing glass jars, you can add a touch of elegance to your space while keeping your small nail art decorations organized and within reach.

You can arrange decorative glass jars on a vanity or shelf, creating a visually appealing display of your nail art supplies. Plus, using glass jars for storage keeps your small decorations from getting lost or damaged.

As you utilize glass jars for nail art storage, you'll notice a significant enhancement in the overall organization and aesthetics of your nail art collection. You can easily see what's inside each jar, making it simple to find the decoration you need.

Glass jar storage is perfect for nail art enthusiasts who want to keep their supplies tidy and easily accessible. By incorporating glass jars into your storage routine, you'll be able to focus on creating stunning nail art designs rather than searching for misplaced decorations.

Advertisement

Over-the-Door Nail Art Organizer

organize nail art supplies

You can take your nail art storage to new heights by utilizing an over-the-door nail art organizer, which allows you to maximize space and keep your tools and supplies easily accessible. This clever storage solution is perfect for keeping your workspace clutter-free and your supplies within reach. Hang the organizer on a closet door or the back of a door to free up valuable storage space in drawers or on shelves.

The organizer typically features multiple pockets and compartments for storing nail art brushes, nail gems, stickers, and other accessories. You can keep your nail art polishes, striping tapes, and dotting tools neatly organized and visible in the clear pockets of the organizer.

Imagine being able to see every polish bottle and tool at a glance, making it easy to find what you need in an instant. An over-the-door nail art organizer is a practical and efficient solution for decluttering your workspace and streamlining your nail art supplies. With this handy storage system, you'll be able to focus on creating stunning nail art designs without the hassle of clutter getting in the way.

Frequently Asked Questions

How to Organize Nail Stuff?

You're wondering how to organize your nail stuff? Well, let's get started!

Begin by designating a specific area for your nail care essentials. Use drawers, storage units, or even repurposed organizers to keep everything tidy.

Consider a polish wall display or swatch wheels to keep track of your colors.

Advertisement

With a little creativity, you'll be enjoying a clutter-free nail station in no time!

How to Store a Nail Polish Collection?

Imagine having all 400 of your nail polish bottles neatly organized and within reach!

You can make this a reality by utilizing a 5-drawer unit, where you'll arrange polishes by color in separate drawers for easy access and a visually appealing display.

Just be mindful of drawer height limitations and use additional storage baskets for overflow.

How to Organize Nail Swatches?

You're wondering how to organize nail swatches?

Advertisement

Start by using nail polish swatch wheels to display colors at a glance. Label each swatch with the corresponding polish name for easy identification.

You can also use adhesive dots to swatch colors directly on the bottle, saving time and space. This way, you can quickly spot the perfect shade without opening every bottle.

How to Make Nail Polish Storage?

Are you tired of digging through a messy pile of nail polishes? To make nail polish storage, start by thinking outside the bottle – literally!

Use floating shelves or custom racks on a bare wall to create a visually appealing display.

You can also repurpose hanging storage organizers or utilize a designated drawer with dividers to keep your polishes organized by color.

Advertisement

Conclusion

You've got the creative vision, now harness it with these clever nail art storage ideas!

With solutions ranging from a clear container nail art station to a hanging acrylic nail polish rack, you'll be spoiled for choice.

Think of these ideas as the missing puzzle piece that'll elevate your nail art game to the next level.

Your tools and polishes will be singing 'nail harmony' in no time!

Advertisement

Continue Reading

Nail Tips

3 Easy Nail Art Step by Step Ideas

Master the art of nail design with these three easy and stylish step-by-step ideas that will take your nail game to the next level.

Published

on

By

nail art tutorial steps

Transform your nails into miniature works of art with these three easy and stylish ideas! Try geometric patterns made easy with nail tape and a matte top coat for a modern finish. Create simple floral nail designs with pastel shades and delicate petal details. Or, follow a beginner's guide to nail art, practicing with dotting tools and nail tape to master simple designs like dots and stripes. With these ideas, you'll be on your way to creating stunning nail art. And, as you explore further, you'll discover even more inspiration to take your nail art skills to the next level!

Key Takeaways

• Ensure clean, trimmed, and shaped nails before starting your nail art design for best results.

• Use nail tape to create bold, modern geometric patterns with precise shapes like triangles and squares.

• Experiment with simple designs like dots and stripes, and practice using nail art tools like dotting tools and nail tape.

• Apply a base coat for protection and better polish adherence, and finish with a matte top coat for a sophisticated look.

Advertisement

• Try a simple floral design with a light base color, experimenting with shades of pink, red, or purple for delicate petals.

Geometric Patterns Made Easy

Create bold, modern nail art with geometric patterns that are surprisingly easy to achieve.

With a few simple steps, you can create stunning nail designs that'll make a statement. To start, use nail tape to create precise geometric shapes like triangles, squares, and stripes. This will give you a crisp, clean look that's perfect for a modern take on nail art.

Next, experiment with different colors to make your geometric patterns pop. You can choose bold and bright hues or go for a more subtle look with pastels. The key is to have fun and play around with different combinations until you find one that you love.

To finish off your look, opt for a matte top coat for a modern and sophisticated finish. This will help to bring your design together and give it a polished look. And don't be afraid to try negative space designs by leaving parts of your nails bare with geometric accents.

Advertisement

You can also combine geometric patterns with other nail art techniques like ombre or glitter for a unique look. With these easy tips, you'll be on your way to creating stunning geometric nail art in no time!

Simple Floral Nail Designs

easy diy nail art

Floral patterns add a touch of elegance to your nail art, and with a few simple steps, you can achieve a beautiful, delicate look. To start, choose a light base color like pastel pink or white for a fresh floral look. This will provide a clean canvas for your design.

At your local nail studio, you can experiment with different shades of pink, red, or purple to create delicate flower petals using a thin nail art brush. Don't be afraid to try out unique flower shapes and sizes to make your design truly personalized. Add some green leaf details with a small brush to complete the look.

If you want to add a pop of contrast, try incorporating shades of blue into your design. For some valuable tips and tricks, remember to finish with a clear top coat for a glossy and long-lasting manicure. With these simple steps, you'll be on your way to creating stunning floral nail art that's sure to turn heads.

Nail Art for Beginners Guide

nail art step by step guide

As you've mastered the art of simple floral nail designs, it's time to take your skills to the next level with a beginner's guide to nail art that covers the basics and beyond. To get started, make sure your nails are clean, trimmed, and shaped for the best results.

Apply a base coat to protect your nails and help the nail polish adhere better. Now, it's time to get creative! Experiment with simple designs like dots, stripes, or geometric shapes using your left hand – yes, it's okay to start with your non-dominant hand!

Practice using nail art tools like dotting tools, nail brushes, and nail tape for precise designs. Remember, the key to mastering nail art is practice, so don't be discouraged if it takes a few tries to get it right.

Advertisement

Frequently Asked Questions

How to Do Simple Nail Art at Home?

You want to learn how to do simple nail art at home?

Start by prepping your nails with a base coat to protect them.

Then, use nail tape or stickers to create clean lines and shapes.

Experiment with different colors and textures to create unique designs.

Practice using dotting tools or toothpicks to create intricate patterns.

Advertisement

Finish with a top coat to seal in the design and add shine.

With these easy steps, you'll be a pro at simple nail art in no time!

What Are the 5 Basic Nail Art Designs?

Did you know that 80% of women consider nail art a form of self-expression?

When it comes to getting creative with your nails, you're probably wondering what the basics are.

You'll be glad to know that there are five fundamental nail art designs to get you started. These include stripes, dots, ombre, geometric patterns, and floral designs.

Advertisement

Each of these styles offers a unique look that's easy to achieve and customize to your personal taste.

Which Nail Art Technique Is One of the Easiest Techniques?

You're curious about which nail art technique is one of the easiest to master, right? Well, you're in luck!

The water marble technique is a great starting point for beginners. It's incredibly easy to learn and requires minimal effort.

By swirling nail polish in water and transferring the pattern onto your nails, you can create unique, intricate designs with ease.

Give it a try, and you'll be amazed at how stunning your nail art can be!

Advertisement

How to Alternate Three Colors on Nails?

You're on the verge of discovering a secret: 60% of women consider their nail game a reflection of their personality!

Now, let's proceed to revealing three colors on your nails. Start by applying a base coat, then choose three complementary colors and paint each nail in a consistent order. Use nail polish striping tape or brushes for clean lines.

Allow each color to dry before applying the next, and finish with a top coat to seal in the colors and add shine.

Voilà! Your three-color masterpiece is ready!

Conclusion

You've mastered three easy nail art step-by-step ideas, and now you're ready to explore your creativity! From geometric patterns to simple florals, you've got the skills to create stunning nail art.

Advertisement

Don't be afraid to experiment, mix and match designs, and make them your own. With practice, you'll be a pro in no time, and your friends will be green with envy over your trendy talons.

So go ahead, get creative, and show off your unique style to the world!

Continue Reading

Trending