Connect with us

Nail Tips

10 Fun Nail Designs for 11-Year-Olds

Get ready for 10 vibrant nail designs for 11-year-olds that will add a touch of whimsy and fun to their look.

Published

on

creative nail art ideas

Explore 10 vibrant nail designs suitable for 11-year-olds. Embrace whimsy with Cartoon Character Nail Art; spruce up with Rainbow Ombre Nails blending colors on a white base coat. Discover playful Animal Print Designs and add sparkle with Glitter Party Nails. Delight in the intricate Floral Garden Manicure or opt for the cosmic allure of Galaxy Nail Art. Stand out with Neon Brights Nail Designs or show emoji love with Emoji Nail Decals. Revel in Tie-Dye Nail Patterns or go fruity with Fruit Slice Nail Art. Your creativity knows no bounds with these fun nail designs.

Key Takeaways

  • Cartoon Character Nail Art: Bring favorite characters to life with colorful designs using polish or stickers.
  • Rainbow Ombre Nails: Achieve vibrant, blended colors with a sponge on a white base coat.
  • Animal Print Designs: Express individuality with easy and cute animal print patterns.
  • Glitter Party Nails: Add sparkle with festive glitter in various colors for fun nail art.
  • Floral Garden Manicure: Create intricate floral patterns with pastel shades for a summery look.

Cartoon Character Nail Art

If you want to add a touch of fun and whimsy to your nails, cartoon character nail art is a delightful choice for 11-year-olds. These nail ideas involve creating colorful designs inspired by popular animated characters like Mickey Mouse, SpongeBob SquarePants, Hello Kitty, and more.

Using nail polish or nail art stickers, you can bring beloved cartoon characters to life on your nails, showcasing your favorite animated icons in a playful and creative way.

Whether you prefer hand-painted designs or easy-to-use stickers, cartoon character nail art offers a wide range of options for expressing your love for cartoons through your manicure. These designs are perfect for kids who enjoy watching animated shows and want to incorporate their favorite characters into their nail art creations.

Rainbow Ombre Nails
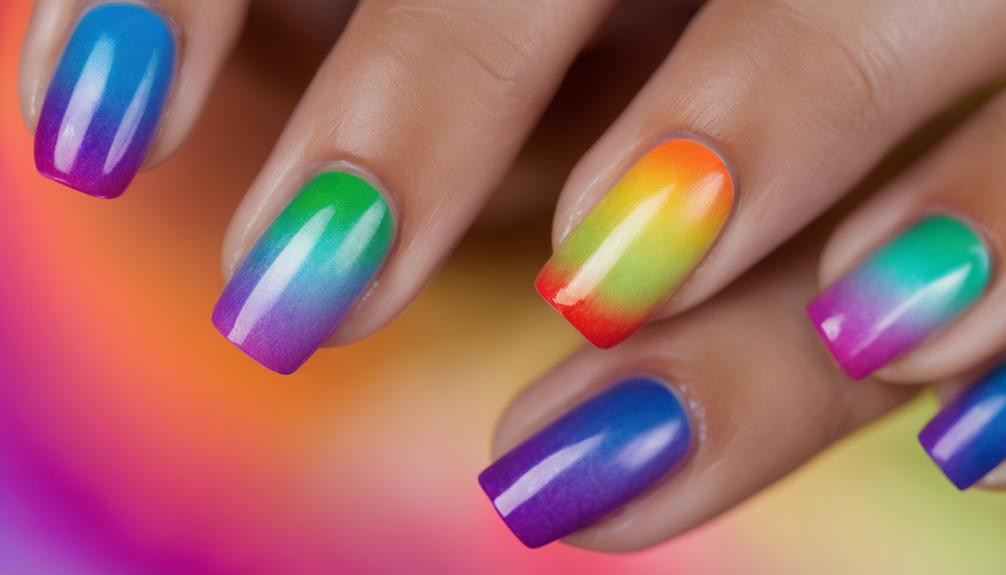
colorful gradient nail design

When creating rainbow ombre nails, the colorful gradient technique involves layering different hues to achieve a seamless shift. Tips for blending colors smoothly can help you achieve a professional-looking manicure.

Colorful Gradient Technique

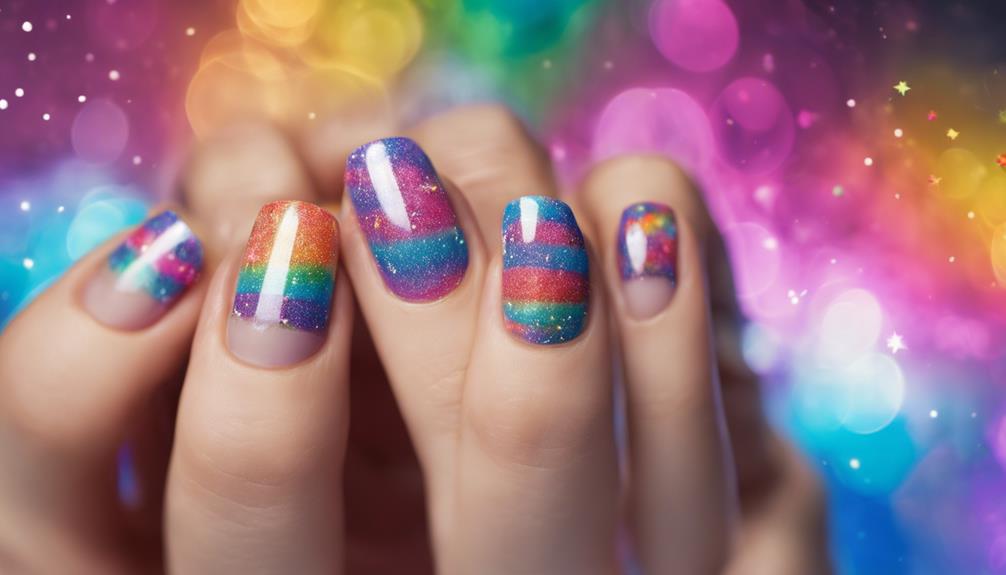
To achieve vibrant rainbow ombre nails, blend multiple colors in a gradient effect on each nail using a makeup sponge. This technique involves layering bright colors of nail polish to create a seamless shift from one hue to the next.

Start by applying a white base coat to make the colors pop and blend easily. Using the makeup sponge, dab on each color in layers, starting from the lightest shade to the darkest, to achieve the desired rainbow effect.

Advertisement

This colorful gradient technique is perfect for 11-year-olds looking to add a fun and eye-catching design to their nails. Once the colors are applied, finish off the look with a clear top coat to seal in the design and add a glossy finish.

With a little practice and creativity, you can easily master the art of rainbow ombre nails and showcase your unique style with this fun nail design.

Layering Different Hues

For a vibrant and playful nail design, blend multiple hues seamlessly to create stunning rainbow ombre nails that are perfect for 11-year-olds. This nail art technique involves layering different colors in a gradient effect, starting from lighter tones and shifting to darker shades.

Colors like red, orange, yellow, green, blue, and purple can be used to achieve the rainbow ombre look, allowing tweens to experiment with various combinations for a unique design. Rainbow ombre nails offer a fun and engaging way for 11-year-olds to express their creativity and personalize their manicures.

Tips for Blending

Start by preparing your supplies and workspace for blending colors to create enchanting rainbow ombre nails.

Advertisement

To achieve a flawless blend, follow these tips:

  • Use a makeup sponge: The key to creating a seamless shift between colors is by using a makeup sponge. This allows for a smooth gradient effect on your nails.
  • Start with a white base coat: Applying a white base coat before layering the rainbow colors helps make the hues pop and blend more seamlessly.
  • Gently dab with a rolling motion: After layering different colors of polish onto the sponge in stripes, gently dab the sponge onto the nail in a rolling motion. This technique helps blend the colors together for a beautiful ombre effect.

Animal Print Designs
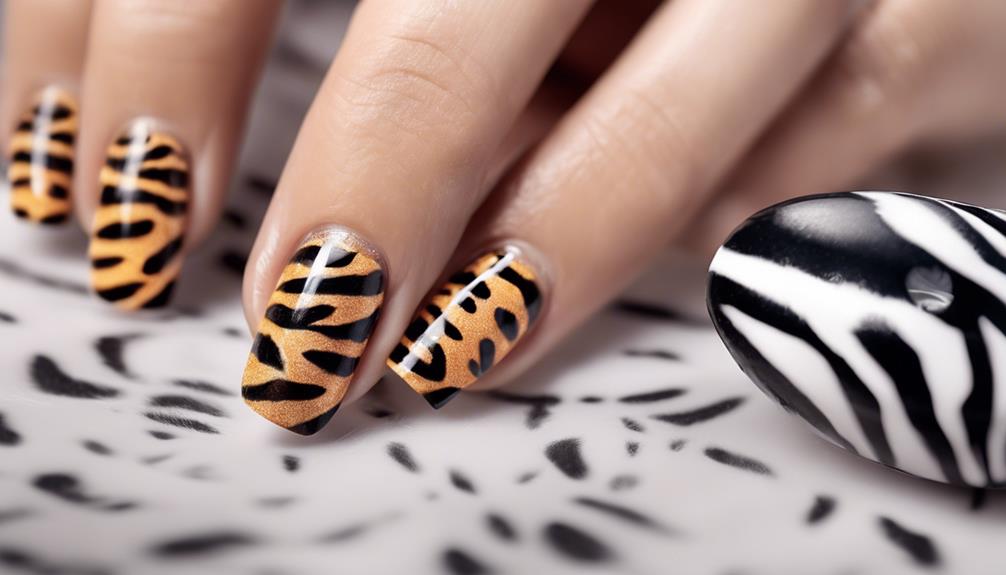
fashionable animal print patterns

Explore the playful and sassy world of animal print nail designs for 11-year-olds, unlocking a touch of trendiness to your nail art repertoire. Easy nail art can be achieved with cute animal prints like leopard, zebra, and tiger patterns, allowing you to express your individuality with style.

Using nail polish, stickers, or art pens, creating these designs at home is a breeze. Animal print nails offer a versatile option for kids seeking a wild and creative look, from subtle accents to bold patterns. These designs not only showcase your personality but also provide a fun way to experiment with different styles.

Incorporating animal prints into your nail art collection can be a great way to add some excitement and flair to your overall look. Whether you prefer a more understated design or something bold and eye-catching, animal print nails offer a wide range of options for customization and creativity.

Glitter Party Nails
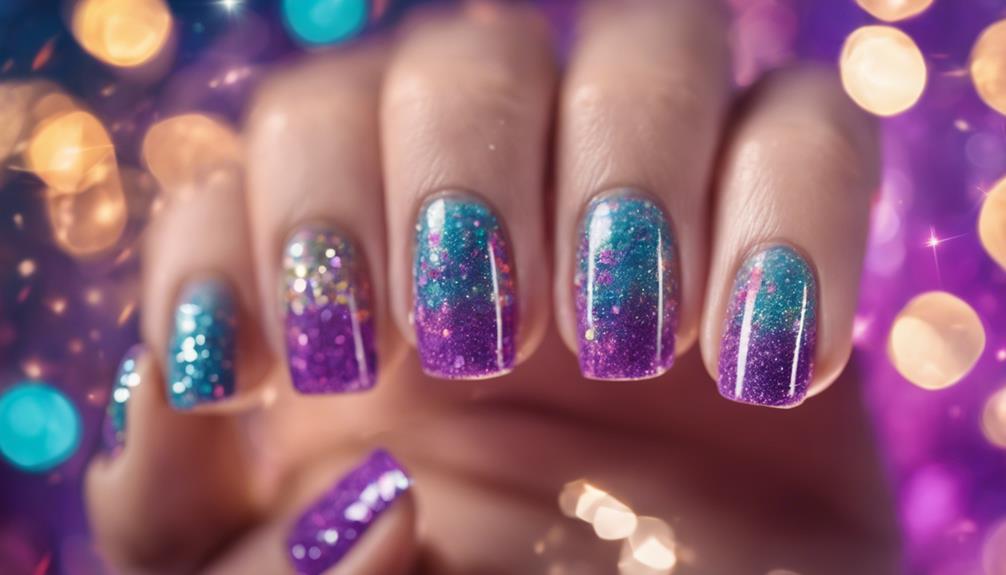
sparkling nails for party

Discover your inner sparkle with dazzling Glitter Party Nails, adding a festive touch to your nail art repertoire. These nails are perfect for 11-year-olds who love sparkle and shine, offering a fun and festive design with glitter accents for a party-ready look.

Using a nail art brush, you can easily apply these nails, allowing for creativity and experimentation. Here are some key points to keep in mind when trying out Glitter Party Nails:

  • Glitter Party Nails provide a pop of color and glam to your overall look.
  • They're available in a variety of colors, allowing you to choose the shade that best suits your style and preferences.
  • Easy to remove, making them ideal for kids who enjoy changing up their nail designs frequently.

Whether for special occasions or to add some sparkle to your everyday outfits, Glitter Party Nails are a fun and versatile option for young nail art enthusiasts.

Floral Garden Manicure
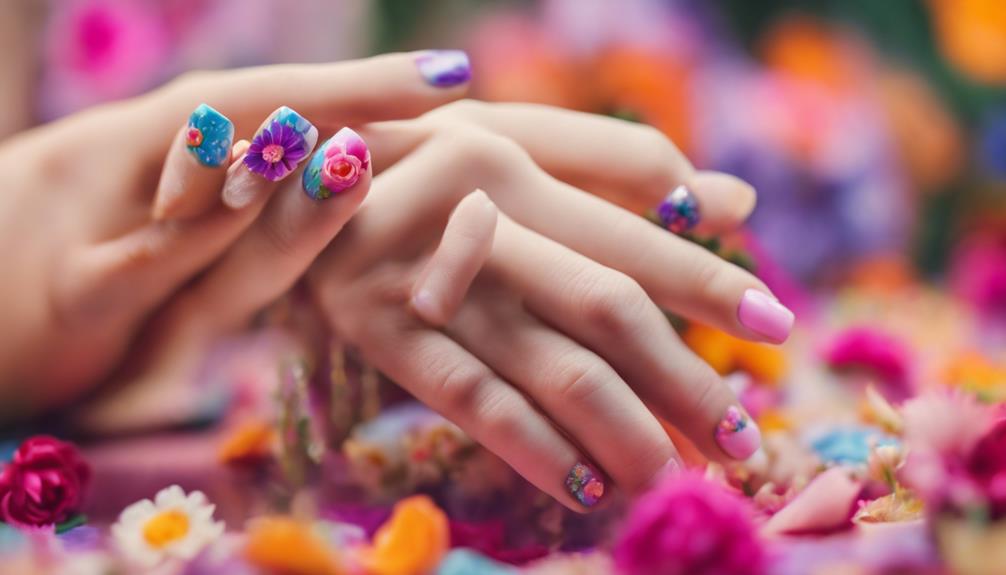
gardening with a twist

When it comes to the Floral Garden Manicure, you can expect colorful flower patterns that bring a touch of whimsy to your nails.

This easy DIY nail art style allows you to create intricate floral designs using pastel shades like pinks, greens, and yellows.

Advertisement

Get ready to embrace the beauty of a garden-inspired look right at your fingertips.

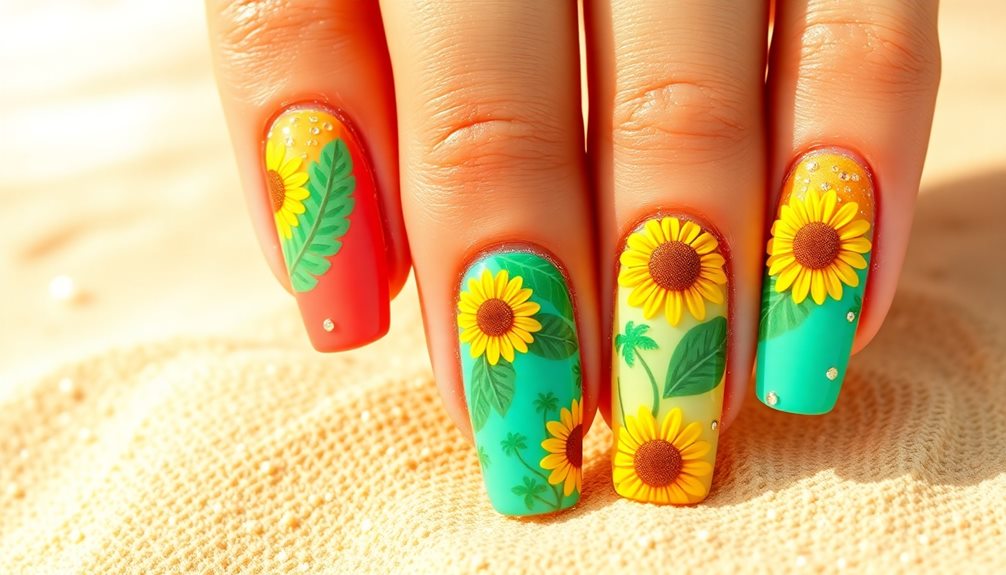
Colorful Flower Patterns

Colorful flower patterns are a delightful choice for 11-year-olds looking to add a vibrant and fun touch to their nails. Incorporating different flower designs such as daisies, roses, and sunflowers can create a beautiful floral garden manicure that stands out with its bright and pastel colors.

To achieve a stunning look with colorful flower patterns, consider the following:

  • Mix and Match: Experiment with a variety of colors for the petals and leaves to create a playful and eye-catching design.
  • Detailing: Enhance the flower patterns by adding small details like dots or stripes to bring depth and intricacy to the nail art.
  • Seasonal Appeal: This design is perfect for spring and summer, bringing a burst of color and nature-inspired beauty to your nails.

Easy DIY Nail Art

For an effortlessly charming nail art look, try creating your own floral garden manicure using pastel shades like pink, purple, and green. Utilize a small brush to delicately draw simple flower designs, leaves, and stems on each nail.

Enhance the floral theme by adding polka dots in contrasting colors to mimic flower centers and create a 3D effect. To seal in the design and provide a glossy finish, remember to apply a clear top coat.

This easy DIY nail art is a perfect way for 11-year-olds to showcase their creativity with a fun and colorful manicure. By following these simple steps and incorporating pastel hues and floral elements, you can achieve a whimsical and vibrant nail design that's sure to impress.

Advertisement

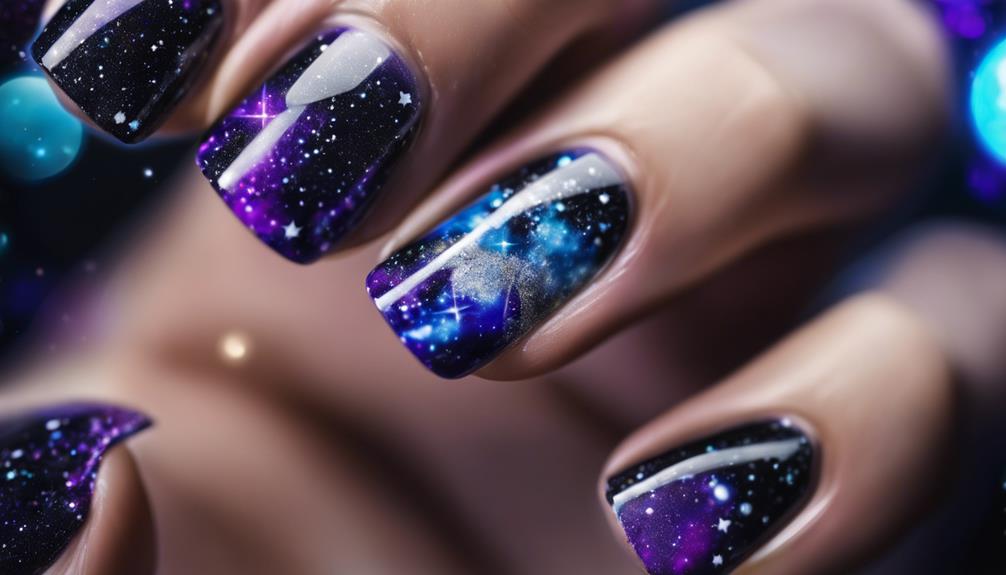
Galaxy Nail Art

innovative space themed manicures

To create enchanting galaxy nail art, consider using dark blue, purple, black, and silver nail polishes to achieve a cosmic design on your nails. Start with a dark base color and then use a thin nail art brush to create swirling patterns representing galaxies.

Add silver accents to mimic stars and depth to the design. For an extra touch of sparkle, consider incorporating glitter or small rhinestones to give your galaxy nails a twinkling, starry effect.

Galaxy nail art offers a popular and mesmerizing look that tweens and teens often adore for its uniqueness. It allows for creativity and experimentation with different color combinations and techniques to achieve a personalized galaxy appearance.

Neon Brights Nail Designs
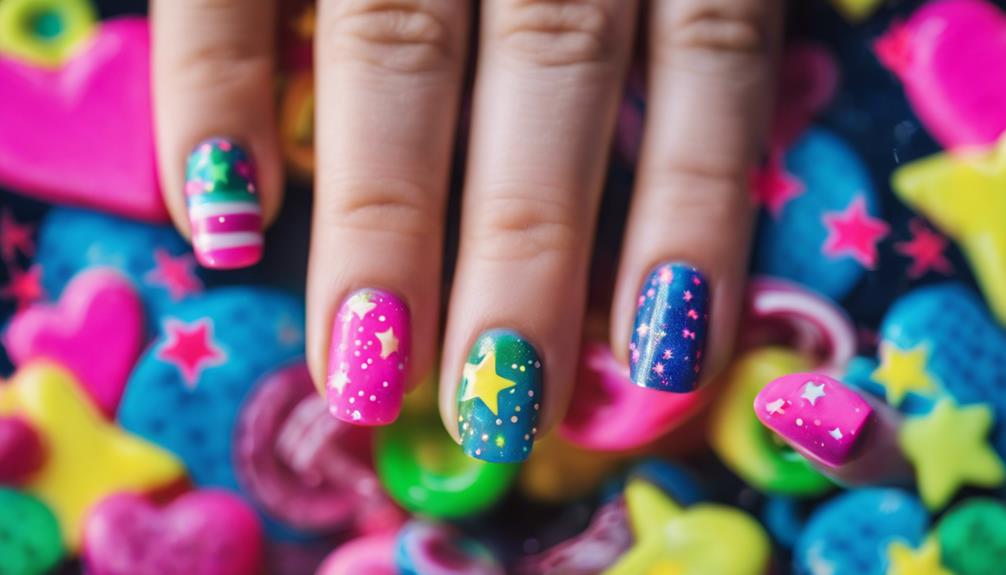
vibrant neon nail art

Consider incorporating vibrant neon shades like hot pink, electric blue, and neon green to create exciting and eye-catching nail designs that add a pop of color and fun to your nails.

Neon bright nail designs are a popular choice among tweens and teens for their bold and eye-catching appeal. To achieve this look, start by applying a base coat to protect your nails. For longer-lasting neon nail designs, you may opt for gel nail polishes that offer a shiny and durable finish.

Experiment with different neon shades and patterns to create a unique and playful nail design that suits your style. Whether you choose to use nail polish, nail stickers, or nail wraps, neon bright nail art is a fantastic way to express your creativity and add a vibrant touch to your overall look.

Emoji Nail Decals
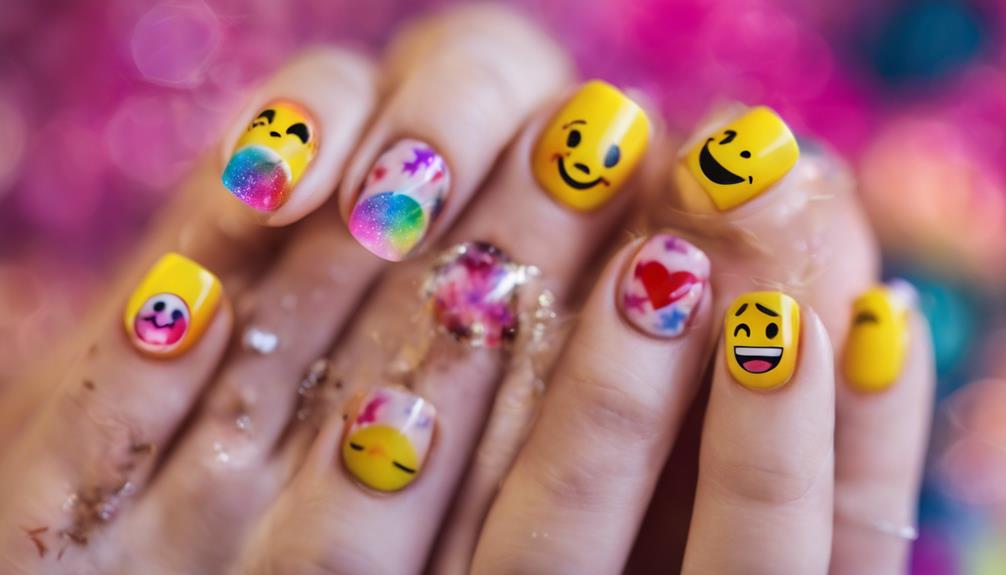
nail art with emojis

Get ready to express your love for emojis with easy-to-apply nail decals featuring a variety of popular emoticons! Emoji nail decals are a fun and simple way to add a playful touch to your nail designs, especially if you're a fan of hearts, smiley faces, or cute animals. These stickers offer a range of designs and sizes, allowing you to get creative and customize each nail according to your preferences.

Emoji nail decals are easy yet versatile, offering a quick and mess-free solution for creating trendy and adorable nail art.

Advertisement

Perfect for tweens who enjoy emojis, these decals provide a convenient option to add charm and personality to your nails without requiring intricate painting skills.

With emoji nail decals, you can effortlessly achieve a cute and stylish look that showcases your love for these popular symbols.

Tie-Dye Nail Patterns
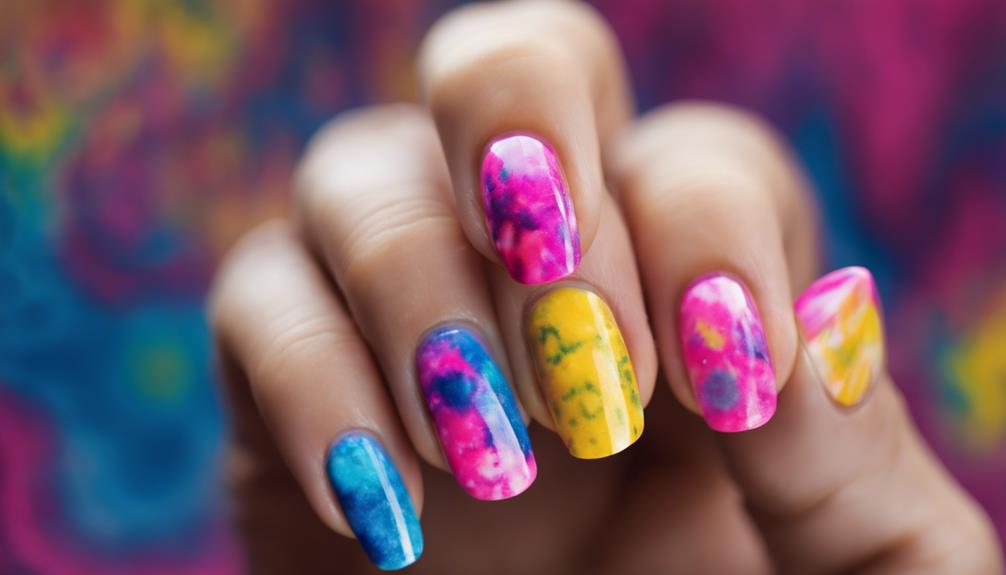
funky nail art trend

Achieving tie-dye nail patterns involves swirling multiple colors together, creating a vibrant and eye-catching design.

This technique mimics the trendy fabric trend, adding a fun and unique look to your nails.

Colorful Swirls Technique

To achieve a vibrant and fun tie-dye nail pattern with the Colorful Swirls Technique, begin by blending different nail polish colors in a swirling pattern. Use a small brush or toothpick to create thin lines that swirl across each nail, mimicking the look of tie-dye fabric.

Experiment with various color combinations to create a different design on each nail, allowing your creativity to shine through. Once you have achieved the desired swirling effect, finish off the nails with a clear top coat. The top coat not only seals in the design but also adds a beautiful shine to the nails, making your tie-dye pattern stand out even more.

Advertisement
  • Blend different nail polish colors in a swirling pattern.
  • Use a small brush or toothpick to create thin lines.
  • Experiment with various color combinations for a unique look.

Spiral Design Tutorial

For creating enchanting tie-dye nail patterns, mastering the Spiral Design Tutorial is the next step after experimenting with Colorful Swirls.

Spiral designs involve swirling different colors together in a spiral shape, creating a vibrant and eye-catching look on your nails. To achieve this design, start with a white base coat and then use a thin nail art brush to carefully draw spirals with contrasting colors of nail polish.

The key to making your spiral design pop is to select colors that contrast well with each other, ensuring that the spirals stand out beautifully. These unique designs can add a fun and creative touch to your nails, making them perfect for tweens who enjoy experimenting with nail art.

Remember that practice and patience are essential when attempting a spiral design, as precision in brush strokes and color placement is vital for a successful outcome. So, gather your favorite nail polish colors and get ready to create mesmerizing spiral designs on your nails!

Fruit Slice Nail Art
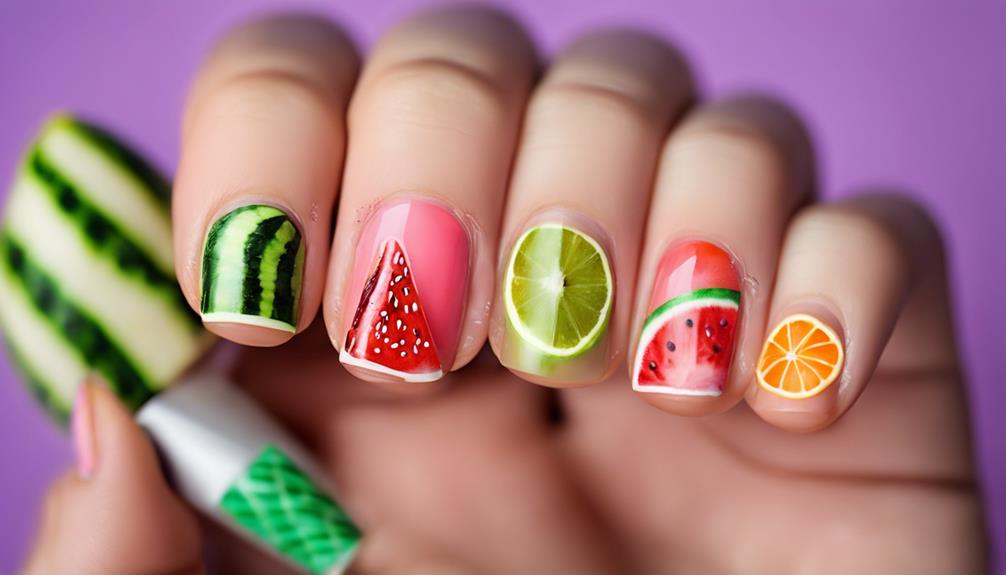
colorful and creative designs

Creating fun fruit slice nail art designs is a popular and vibrant choice for 11-year-olds looking to add a playful touch to their manicures. This creative nail art involves replicating fruits like strawberries, lemons, and watermelons on nails, bringing a burst of color and whimsy to your fingertips.

To achieve the best nail art results, consider using a dotting tool for precise detailing and intricate designs. Whether opting for nail art stickers or hand-painting the fruity details, the possibilities are endless to express your individual style.

Mix and match different fruit designs to create a unique and eye-catching nail art look that showcases your creativity. Fruit slice nail art not only allows you to experiment with various colors and patterns but also provides a fun way for 11-year-olds to showcase their personality through their manicures.

Advertisement

Frequently Asked Questions

Can 11 Year Old Girls Wear Fake Nails?

Yes, 11-year-old girls can wear fake nails safely if applied and removed correctly. It's important to select the right size and shape for comfort. Fake nails offer a fun way for 11-year-olds to explore various designs.

Parental supervision during application and removal is essential to protect natural nails. Taking regular breaks from fake nails can help maintain nail health. Remember, proper care is key to enjoying fake nails at this age.

Can 11 Year Olds Get French Tips?

Yes, 11-year-olds can definitely get French tips. This classic and chic nail design is versatile and can be customized with various colors and patterns to suit younger individuals. French tips offer a sophisticated and polished look that's perfect for special occasions or for those seeking an elegant style.

Many nail salons provide French tip manicures for kids, offering a professional and stylish option for 11-year-olds looking to elevate their nail game.

Are Gel Nails Ok for 11 Year Olds?

Gel nails can be suitable for 11-year-olds if applied and removed correctly to prevent any harm to their natural nails. It's important to use them in moderation to avoid potential issues like nail damage or allergic reactions.

Advertisement

Adult supervision is recommended during the application process to guarantee proper care. Gel nails offer a longer-lasting manicure, ideal for active kids who want their nail designs to last.

Consulting with a professional nail technician or dermatologist can address any concerns you may have.

Are Fake Nails Safe for 12 Year Olds?

Fake nails can be safe for 12-year-olds if applied and removed correctly to prevent harm to natural nails. It's important to use them in moderation to allow your nails to breathe and avoid weakening.

Some options are child-friendly, made with safe materials and smaller sizes for younger users. Parental supervision is recommended to make sure proper application and removal techniques are followed.

Taking regular breaks from fake nails can help maintain nail health and strength over time.

Advertisement

Conclusion

To sum up, exploring different nail designs can be a fun and creative way for 11-year-olds to express themselves. From cartoon characters to rainbow ombre nails, the possibilities are endless. Additionally, trying out trendy nail design ideas such as marble nails or metallic accents can help young individuals develop their own unique sense of style. Experimenting with different colors, patterns, and techniques can also be a great way for 11-year-olds to develop their artistic skills and boost their confidence. Overall, exploring different nail designs is a great way for kids to have fun and express their creativity.

So, grab your favorite nail polish and let your imagination run wild! Just like painting on a blank canvas, your nails can be a reflection of your unique personality and style. There are endless possibilities when it comes to creating beautiful designs on your nails. From intricate floral patterns to bold geometric shapes, handpainted nail art ideas can truly make a statement. Whether you’re a fan of simple, minimalist designs or you love to experiment with bright colors and textures, there’s a nail art style that’s perfect for you. So, next time you’re feeling creative, why not try your hand at some stunning handpainted nail art?

Let your creativity shine through your fingertips with these playful and colorful designs.
Advertisement

Nail Tips

Most Popular Nail Shapes: Find Your Perfect Fit

Align your style with the most popular nail shapes; discover which one complements your look and enhances your fingers’ allure. Explore your options now!

Published

on

By

discover your ideal nail

Choosing the perfect nail shape can really show off your style! Some popular options are square, round, oval, almond, and the trendy coffin shape. If you want to make your fingers look longer, go for almond or oval. For a bold look, try stiletto nails! Remember, each shape has its own care needs, so think about that too. For lower maintenance, round and squoval shapes are super easy! And don't forget to match your nail polish to your shape for a fantastic finish. Curious to find out more tips on how to pick the best one for you?

Key Takeaways

  • Popular nail shapes include square, round, oval, almond, and coffin, each offering unique aesthetics and suitability for different hand types.
  • Almond and oval shapes elongate fingers, while square nails enhance the appearance of longer fingers, making them versatile choices.
  • Coffin and ballerina shapes provide dramatic flair with tapered designs, perfect for making a bold statement.
  • For low-maintenance options, round and squoval shapes are easier to care for and suit various hand types.
  • Consider your hand shape and lifestyle when choosing a nail shape to ensure the best fit and maintenance level.

Introduction

beginning of a discussion

Nail shapes often play a crucial role in how your hands are perceived, affecting everything from your overall appearance to the way your fingers look. Choosing the right nail shape can make a big difference!

There are popular nail shapes like square nails, round nails, oval nail shape, almond nails, and coffin nails, each with its own unique flair. For those looking to add some flair to their nail design, exploring nail styles for Valentine's Day can offer romantic and festive options.

When you're on the hunt to find the best shape for your hands, consider how different styles complement your fingers. For instance, if you have wider hands, you might want to try the elegant almond or oval nail shape. On the flip side, square nails are perfect for longer fingers, giving them a strong, stylish appearance.

Don't forget about nail care! Some shapes, like round and squoval, are easier to maintain, while coffin nails and stiletto shapes require a bit more effort to keep looking sharp.

With a little practice and creativity, you can enjoy experimenting with nail art and polish combinations that match your perfect shape. So, get ready to discover which nail shape will bring out the best in your hands!

Advertisement

Enhances Personal Style Expression

elevates individual fashion choices

Choosing the right nail shape can significantly enhance your personal style and expression. Nail shapes, like almond and oval, can make your fingers look longer and more elegant. To add some flair to your look, consider incorporating bold colors and dramatic eyes to match your nails.

If you love a bold look, stiletto and coffin shapes are perfect for showing off a dramatic flair! Each shape has its own charm, and experimenting with them can help you discover your signature style.

Think about how your nail shape complements your outfits and different occasions. For instance, a chic oval might pair well with your favorite dress, while a striking stiletto could make a statement at a party.

Plus, you can get creative with nail art designs that match your shape, adding even more personality to your look!

It's important to consider your hand type and lifestyle too. A shape that enhances your self-expression while being easy to maintain can make a world of difference.

Popular Variations and Ideas

creative concepts and alternatives

There are countless popular nail shapes that cater to different styles and preferences, each offering unique flair and personality.

For instance, coffin nails and ballerina nails share a tapered design with a flat tip, giving you a chic and modern look that's perfect for showcasing bold nail designs. If you're feeling adventurous, lipstick nails mimic the angled cut of a lipstick bullet, adding an avant-garde touch to your style! You can even draw inspiration from something as cultural as traditional Italian bread to find a nail design that captures a warm, rustic feel.

Advertisement

If you prefer a softer vibe, the almond shape is a fantastic choice, while stiletto shape nails bring a fierce and edgy feel, ideal for dramatic nail designs. Squoval nails, which blend square and oval shapes, are super versatile and easier to maintain, making them a go-to for many.

On the other hand, flare nails, often called "duck nails," feature gradually widening tips that create an eye-catching style.

With so many popular variations, you can mix and match to find the perfect fit for your personality. Whichever shape you choose, each nail design can help you express yourself in fun and exciting ways!

Tips and Tricks

helpful hints and techniques

When it comes to finding the perfect nail shape, keep your hand type in mind for the best results. If you have short fingers, consider opting for an oval shape or almond nails. These shapes can help elongate the appearance of your fingers, making them look longer and more elegant.

For stunning nails, regular maintenance is key! If you choose shapes like coffin or stiletto, remember they need careful filing to keep their form and avoid breakage. A glass file is your best friend here; it gives a smoother finish and helps prevent splits.

When it comes to nail polish, be adventurous! Bold colors will pop beautifully on almond or oval nails, while softer, neutral shades can complement natural or round shapes perfectly.

Advertisement

And don't forget to treat your nails to some quality cuticle oil after shaping. This little step hydrates and protects your nails, keeping them looking healthy and shiny.

With these tips and tricks, you'll be well on your way to rocking your perfect nail shape! So grab that glass file, pick your favorite polish, and let your nails shine!

Care and Maintenance

regular upkeep required

Nail care is essential for keeping your chosen shape looking sharp and healthy. Regular maintenance helps prevent breakage and keeps nails looking their best. If you've got round or square shapes, you're in luck—they're typically low-maintenance!

But if you prefer stiletto or coffin shapes, make sure to file them more often to keep their fabulous form.

Don't forget about cuticle oils! Applying them regularly promotes nail health and prevents dryness, especially for longer shapes like almond and oval. A glass file is your best friend; it reduces nail damage and gives a smoother finish, which is super important for pointed shapes like stiletto or mountain peaks.

Also, let's talk about exfoliation and moisturizing! By giving your hands a little extra love each week, you'll enhance the appearance of your nails and boost nail strength. This is particularly helpful for longer or more delicate shapes.

Advertisement

Common Mistakes to Avoid

avoid these common mistakes

Often, people make mistakes when selecting and maintaining their nail shapes that can lead to frustration and dissatisfaction. One common mistake is choosing a nail shape that doesn't flatter your hand type. For instance, square nails may not look great on short fingers, while oval or almond shapes can be much more flattering!

Another pitfall is ignoring the maintenance requirements of certain shapes. Stiletto and coffin nails, while stylish, need more upkeep than natural or round shapes. You don't want to spend all your time worrying about your nails!

Also, be careful when filing your nails. Neglecting to file in one direction can cause nail damage and make your nails split. Ouch!

It's essential to consider the length of your natural nails too. If you have short nails, opting for a dramatic shape might result in an impractical shape.

Lastly, think about your nail polish! Bold colors look fabulous on almond shapes, but softer tones are perfect for round nails.

Avoid these common mistakes, and you'll find the perfect nail shape that makes you feel confident and happy!

Advertisement

Frequently Asked Questions

What Nail Shape Is Most Flattering?

The most flattering nail shape for you often depends on your hand type. Oval and almond shapes can elongate your fingers, while squoval offers a stylish balance, making it versatile for various nail lengths.

What Is the Most Popular Among the Nail Shape?

When it comes to nail shapes, coffin nails are trending now with their unique style and versatility. However, you might find that classic square or elegant oval shapes also suit your personality and lifestyle well.

What Nail Shape Is Popular Right Now?

Right now, almond and coffin nails are popular choices. Almond shapes elongate your fingers elegantly, while coffin nails make a bold statement. If you prefer low maintenance, consider square or squoval shapes for a modern look.

What Nail Shape Makes Fingers Look Skinnier?

If you want your fingers to look skinnier, consider opting for almond or oval shapes. Their tapered ends create an elongating effect, making your hands appear more delicate and refined without the bulk of square or round shapes.

Conclusion

So, now you know all about the most popular nail shapes and how they can show off your unique style! Whether you love the classic round look or want to rock a sharp stiletto, there's a perfect shape just for you. Remember, keeping your nails healthy is super important, too! So, grab your favorite polish, have fun experimenting, and don't forget to share your fabulous nail designs with your friends. Happy nail shaping!

Advertisement

Continue Reading

Nail Tips

Black and Silver Nails: A Chic and Modern Combo

Get ready to elevate your nail game with stunning black and silver designs that blend boldness and elegance, but there’s so much more to discover!

Published

on

By

chic black silver nails

Black and silver nails are a fabulous combo that mixes boldness with elegance! This chic design is perfect for any occasion, whether you're at a party or just hanging out. You can get creative with fun patterns like ombre effects or cute geometric shapes. Just remember to use a base coat to protect your nails and a top coat for extra shine! Plus, don't skip the cuticle oil to keep everything healthy. With a little care and your special touch, you'll stand out in style. Keep exploring, and you'll discover even more dazzling ideas for your nail art!

Key Takeaways

  • Black and silver nails offer a striking contrast, symbolizing power and elegance for a chic look.
  • Versatile for any occasion, these designs can range from bold to subtle, suiting both casual and formal events.
  • Popular variations include classic French tips, ombre effects, and geometric patterns, allowing for personal style expression.
  • Adding glitter, rhinestones, or charms enhances the glam factor, perfect for festive celebrations.
  • Proper care, including base and top coats, ensures longer wear and maintains the nail design's integrity.

Introduction

beginning of a topic

When it comes to nail art, black and silver nails stand out as a striking choice that blends sophistication with modern flair. You'll love how the deep black nail polish symbolizes power and rebellion, while the shimmering silver accents add a touch of elegance. Together, they create a stunning contrast that makes your nails pop!

These eye-catching designs can be compared to the importance of creative expression in early childhood development, as both allow for personal style and individuality.

These nail designs aren't just pretty; they're versatile too! You can express your creativity with various styles, like ombre effects that fade from black to silver, or geometric patterns that look super trendy. Glitter accents can also make your nails sparkle, turning them into conversation starters at any event.

Plus, black and silver nails fit perfectly with seasonal themes! Whether it's a spooky Halloween design or a glamorous New Year's Eve look, you can customize your nails to match any holiday or special occasion throughout the year.

With their captivating beauty and modern aesthetics, black and silver nails are an exciting way to show off your unique style. So grab your polish and get ready to create some fabulous nail art that will have everyone asking about your chic, sophisticated look!

Advertisement

Versatile for Any Occasion

adaptable for every event

Black and silver nails offer incredible versatility, making them perfect for any occasion, whether you're heading to a casual brunch or a formal gala.

These eye-catching looks can be as bold and daring or as subtle as you like. With Black and Silver Nail Designs, you can create a sophisticated look that fits any mood. The striking contrast between black and silver enhances the visual appeal, giving you endless options.

Additionally, just like understanding credit card terms is essential for financial literacy, knowing how to style your nails can elevate your overall look.

For a more classic style, try classic French tips with a shiny silver twist, or go modern and edgy with intricate ombre effects. You can even incorporate seasonal themes, like adding subtle glitter for the holidays or floral elements for a spring vibe.

This versatile color combination remains trendy in 2024, appealing to all skin tones and allowing you to express your unique style.

Whether you're dressing up or keeping it casual, black and silver nails can adapt to your needs.

Advertisement

Popular Variations and Ideas

trending concepts and innovations

Exploring popular variations of black and silver nails can spark your creativity and help you discover unique styles that suit your personality. One fun idea is to try classic French tips with silver accents, which gives a chic twist to a timeless look.

If you're feeling adventurous, consider ombre effects blending both colors for a stunning gradient. You might also want to incorporate some best hair styling gels into your routine, as they can help keep your nails looking polished and fabulous.

Geometric patterns can also add a modern touch, making your nails stand out.

Don't forget about glitter accents! They can elevate your black and silver designs, bringing in sparkle and dimension, perfect for festive occasions.

For nail shapes, stiletto is fabulous, allowing for intricate designs and bold statements.

Customization options are endless! You can add rhinestones and charms, and choose between a glossy finish, a matte look, or even chrome for something extra special.

Advertisement

Seasonal themes can further personalize your nails—think snowflakes for winter or metallic leaves for fall, bringing your black and silver nail art to life.

With these ideas, you'll have plenty of inspiration to create a look that's uniquely you!

Tips and Tricks

helpful advice and strategies

Achieving a flawless black and silver manicure starts with a solid foundation. Begin by applying a base coat to protect your nails from staining and to make your design last longer. Once that's dry, it's time for the fun part!

Use a thin brush or nail tape to create clean lines and precise geometric patterns with your silver accents over the black polish.

Want to add some flair? Consider layering a matte top coat over the black polish before adding shiny silver details. This technique gives a striking contrast that's simply stunning!

If you're feeling extra glamorous, sprinkle on some glitter or add rhinestones for that special touch, perfect for parties or celebrations.

Advertisement

Don't forget about your nails' health! After all the fun, a little cuticle oil will keep your nails happy and healthy.

And to keep your design looking fresh, a clear top coat will seal everything in place. With these tips and tricks, you'll have the chicest black and silver nails around, ready to impress anyone who sees them!

Enjoy your fabulous manicure journey!

Care and Maintenance

proper upkeep techniques required

To keep your black and silver nails looking their best, regular care and maintenance are essential. Start by applying a base coat before you paint your nails. This protects your natural nails from staining and helps your manicure last longer.

After you've created your stunning nail art, don't forget to seal it with a top coat. This adds a glossy finish and helps prevent chipping, so your nails stay fabulous!

Moisturizing is super important too! Use cuticle oil regularly to keep your nails and cuticles hydrated. This prevents dryness, especially after using nail polish remover.

Advertisement

Remember, happy nails are pretty nails!

It's a good idea to schedule regular touch-ups every 1-2 weeks. This keeps your black and silver nails looking fresh and addresses any signs of wear or damage.

Also, be careful around harsh chemicals and excessive water, as they can weaken your nails and lead to peeling or chipping.

With these simple maintenance tips, you'll keep your black and silver nails looking chic and modern. You'll shine bright, and everyone will ask how you keep your nails so amazing!

Keep up the good work!

Advertisement

Common Mistakes to Avoid

avoid these common mistakes

Even with the best care, mistakes can happen when applying black and silver nails. One big mistake is skipping the base coat. It protects your nails from staining and makes that black polish last longer.

Also, avoid applying thick layers of polish! They might seem easier, but they can lead to uneven drying and smudging, ruining your fabulous look.

Don't forget to give each layer enough drying time. If you rush it, you might end up with bubbles or imperfections in your shiny silver design. After all that hard work, you definitely want it to look perfect!

Another common error is skipping the top coat. This final layer adds shine and helps prevent chipping, keeping your nails looking fresh and chic.

Frequently Asked Questions

Is Black Nail Polish Chic?

Absolutely, black nail polish is incredibly chic. It exudes sophistication and power, while offering versatility for any occasion. You can express your personal style with various designs, making it a timeless choice for nail fashion.

What Two Colors Go Together for Nails?

When choosing nail colors, you can't go wrong with combinations like red and white for vibrancy, or black and silver for elegance. Experiment with pastels or bold neons to express your unique style!

Advertisement

What Nails Match With Every Outfit?

When you're choosing nails that match every outfit, consider classic colors like nude, white, or black. These shades effortlessly blend with any style, ensuring your manicure complements both casual and formal looks seamlessly.

What Is the Most Popular Nail Style Today?

The most popular nail style today blends boldness with elegance. You'll find classic French manicures with modern twists, geometric patterns, and glitter accents that suit various occasions, ensuring your nails always look chic and stylish.

Conclusion

Now that you know all about black and silver nails, it's time to get creative! Whether you're dressing up for a party or just want to add some sparkle to your day, this color combo is perfect for you. Remember the tips and tricks we shared, and don't be afraid to try new designs. With a little care, your nails will look fabulous! So grab your polish and let your nails shine like stars!

Continue Reading

Nail Tips

Ocean-Themed Nails to Capture Vacation Vibes

Splash into ocean-themed nails that evoke summer vibes; discover fun designs and techniques that will leave you dreaming of seaside adventures!

Published

on

By

vacation inspired ocean nail art

Ocean-themed nails are a fantastic way to feel those vacation vibes all year long! Imagine vibrant shades of blue and green, playful seashells, or beautiful wave patterns dancing on your fingertips. You can even add some sparkle with glitter, mimicking the sun on water. Try techniques like water marbling for gorgeous wave effects, or stick on 3D seashells for extra fun. Don't forget a glossy top coat, so your nails shine like the ocean! With just a few tips, you'll create stunning looks that remind you of summer adventures, and there's even more helpful information waiting for you!

Key Takeaways

  • Choose vibrant shades of blue and green to reflect the essence of the ocean and summer fun.
  • Incorporate playful designs like wave patterns, seashells, and tropical motifs for a beachy vibe.
  • Use glitter and rhinestones to mimic sunlight shimmering on water for added sparkle.
  • Experiment with techniques like ombre effects and water marbling to recreate ocean depths and wave movement.
  • Maintain nail health with regular manicures and moisture to keep designs looking fresh and vibrant.

Introduction

begin your journey here

Ocean-themed nails are a fantastic way to express your love for the sea and its vibrant beauty. Imagine painting your nails in shades of blue and green, just like the ocean waves! You can create beach-inspired nails that bring tropical vibes right to your fingertips.

Popular nail designs include wave patterns that swirl like the tide, seashell motifs that sparkle, and intricate coral art that captures the magic of underwater life. To enhance your ocean-themed look, consider incorporating vibrant colors inspired by Indonesian Decorative Pillows that reflect the lively essence of coastal decor.

To make your ocean-themed nails even more special, try adding some glitter or rhinestones! These little gems can twinkle just like sunlight dancing on the water. You can also use cool techniques, like ombre effects, to blend different colors together, creating a beautiful gradient that reminds you of the ocean depths.

During summer, vibrant and bold colors are all the rage, so now's the perfect time to show off your ocean-inspired style. Whether you're heading to the beach or just want to feel like you're on vacation, these nail designs will surely make you smile.

Enhances Summer Vacation Aesthetics

elevates seasonal travel experience

Summer vacation aesthetics thrive on vibrant colors and playful designs, and ocean-themed nails fit perfectly into this vibe. When you think about a tropical getaway, those beautiful shades of blue and green come to mind, just like the sparkling sea!

Ocean-themed nails often feature these lively hues, capturing the essence of beachy fun and creating a delightful look. Incorporating elements of financial planning can also help you budget for those summer nail art supplies, ensuring you have the funds to express your creativity.

Advertisement

Imagine your nails adorned with fun designs like seashells and wave patterns! These designs evoke memories of sun-soaked beach adventures, making them super popular for summer nail art. You can also add some glitter accents to mimic the sunlight bouncing off the water, giving your nails a festive touch for vacation outings.

Techniques like ombre effects and water marbling can make your beachy nails even more dynamic, reflecting the gentle movement of waves. Want to add a luxurious feel? Consider using rhinestones to represent pearls or incorporate textured elements.

This adds an extra touch of charm, perfectly aligning with summer's playful and relaxed spirit. So, grab those nail polishes and let your creativity flow, making your ocean-themed nails the ultimate accessory for your summer vacation aesthetics!

Popular Variations and Ideas

trendy options and suggestions

There are countless ways to express your love for the ocean through nail art, and each variation brings a unique twist to the table. One popular choice is Oceanic Swirls, which uses a water marbling technique to create beautiful wave-like patterns.

If you're feeling adventurous, try the Deep Sea Set, featuring seahorses and coral against deep blue backgrounds that make you feel like you're exploring the ocean depths! Additionally, consider incorporating some calming scents through essential oils, like lavender oil to enhance your relaxation while pampering yourself with a nail art session.

For a trendy look, consider Chrome Seashells with their shiny chrome finish. These nails often have gradient colors and seashell motifs, perfect for summer.

Advertisement

Or, you might love Fresh Out of the Sea, which showcases lifelike seashell designs with 3D textures and pearl accents, bringing the beach right to your fingertips!

If you're heading to a beach party, check out Tropical Jelly Nails. These vibrant nails feature jelly finishes and cute hibiscus flowers, capturing the essence of summer vibes.

With so many ocean-themed options, you can find the perfect design to show off your love for the sea and add a splash of fun to your nails!

Tips and Tricks

helpful advice and strategies

Dive into creating stunning ocean-themed nails with a few helpful tips and tricks! Start by picking a mix of ocean-inspired colors like deep blues and turquoise. These shades perfectly encapsulate the sea.

Don't forget to add some white or sandy shades for that balanced beach vibe!

Next, get creative with nail art techniques. You can use water marbling or dotting tools to create fun wave patterns or water droplet effects. These little details make your nails look like they've just come from the ocean!

Advertisement

For extra flair, consider adding 3D elements like seashell decals or pearl embellishments. This adds texture and makes your design pop.

To take your beach-inspired nail ideas to the next level, think about accent nails featuring tropical motifs, like palm trees or a bright hibiscus flower. These playful touches bring a bit of paradise to your fingertips!

Lastly, apply a glossy top coat to give your nails a shiny finish, mimicking the sunlight's reflection on water.

With these tips, you'll be ready to show off your ocean-themed nails and feel those vacation vibes wherever you go!

Care and Maintenance

regular upkeep and preservation

To keep your ocean-themed nails looking vibrant and beautiful, regular care and maintenance are essential. Start by moisturizing your cuticles and nails daily. This helps prevent brittleness and breakage, ensuring your stunning designs stay intact.

Before you dive into applying colored polish, don't forget to use a base coat. It enhances adhesion and keeps your nails from staining, making your beach-inspired art last longer!

Advertisement

Be mindful of excessive exposure to water and harsh chemicals, as these can weaken your nail polish and cause chipping. Your intricate ocean designs deserve the best protection!

When it comes to shaping your nails, opt for gentle filing techniques instead of aggressive clipping. This keeps your nails looking neat while maintaining a perfect canvas for your oceanic nail art.

Lastly, aim for regular manicures at least every two weeks. Not only will this improve your nail health, but it'll also keep your nails looking fresh and fabulous.

Common Mistakes to Avoid

avoid these common mistakes

Many nail enthusiasts make common mistakes that can undermine their beautiful ocean-themed designs. First, don't skip the base coat! It protects your natural nails from staining, especially with vibrant colors like deep blues and greens.

Next, when you're doing nail stamping or creating detailed designs, avoid overloading your artwork with too many elements. A cluttered design can confuse the eye—stick to a few key features, like seashells or waves!

Another mistake is forgetting to seal your masterpiece with a top coat. This step is crucial, as it prevents chipping and fading, keeping your ocean vibes strong.

Advertisement

If you're using long nails, precision is key, so always use the right tools. Non-precision brushes can lead to uneven lines and messy patterns—yikes!

Lastly, prep is essential! Clean and buff your nails before applying nail polish. This ensures better adhesion, preventing peeling or lifting over time.

Frequently Asked Questions

What Are Some Ocean-Themed Nail Colors to Consider?

You can consider colors like deep navy, sandy beige, coral pink, and seafoam green. These shades evoke beach vibes and ocean beauty, making your nails a perfect summer accessory that reflects your love for the sea.

How Can I Incorporate Ocean Elements Into Nail Art?

You can incorporate ocean elements into your nail art by using wave patterns, seashell decals, and marine colors like turquoise and sandy beige. Add glitter for a shimmering effect, mimicking sunlight on water. Get creative!

Are There Specific Tools Needed for Ocean-Themed Nail Designs?

For ocean-themed nail designs, you'll need a few essential tools: nail polish brushes, dotting tools, sponges for blending, and nail art tape. These will help you create stunning waves and intricate sea-inspired patterns.

Advertisement

Can I Do Ocean-Themed Nails at Home or Should I Go to a Salon?

You can definitely create ocean-themed nails at home! With some basic tools, nail polish, and creativity, you'll achieve beautiful results. However, if you prefer a professional touch, visiting a salon is always an option.

What Are the Best Occasions to Sport Ocean-Themed Nails?

You can rock ocean-themed nails at beach parties, summer festivals, or vacations. They add a fun touch to poolside gatherings, birthday celebrations, or even casual outings. Just let your creativity flow and enjoy the vibe!

Conclusion

Now that you know how to create ocean-themed nails, you're ready to dive into summer fun! Whether you choose bright blue waves or sparkly starfish, your nails will totally capture those vacation vibes. Remember to take care of your designs, so they stay fabulous and fresh. And don't forget, practice makes perfect! So grab your nail polish and let your creativity flow like the tide. You'll be the star of the beach with those awesome nails!

Continue Reading

Trending