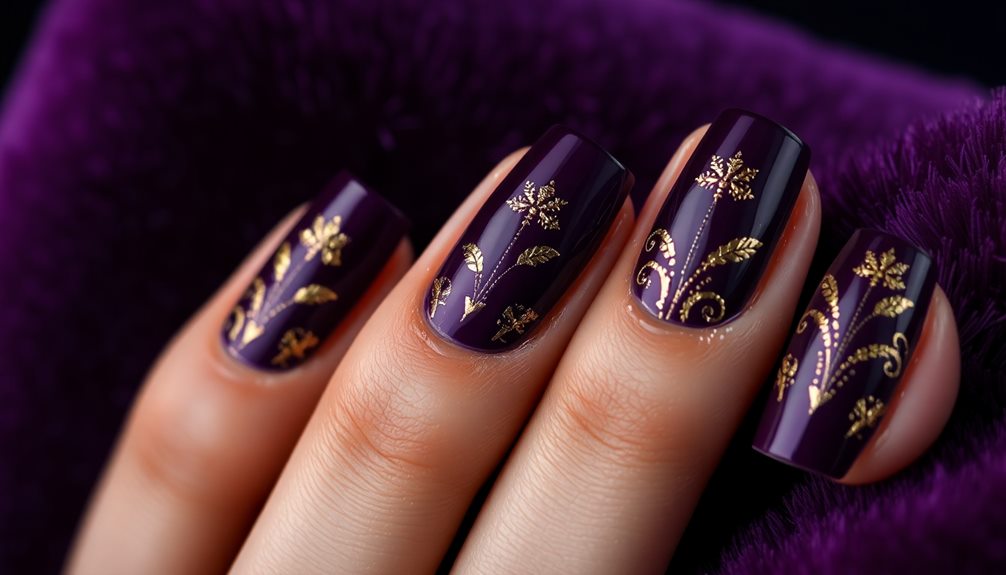
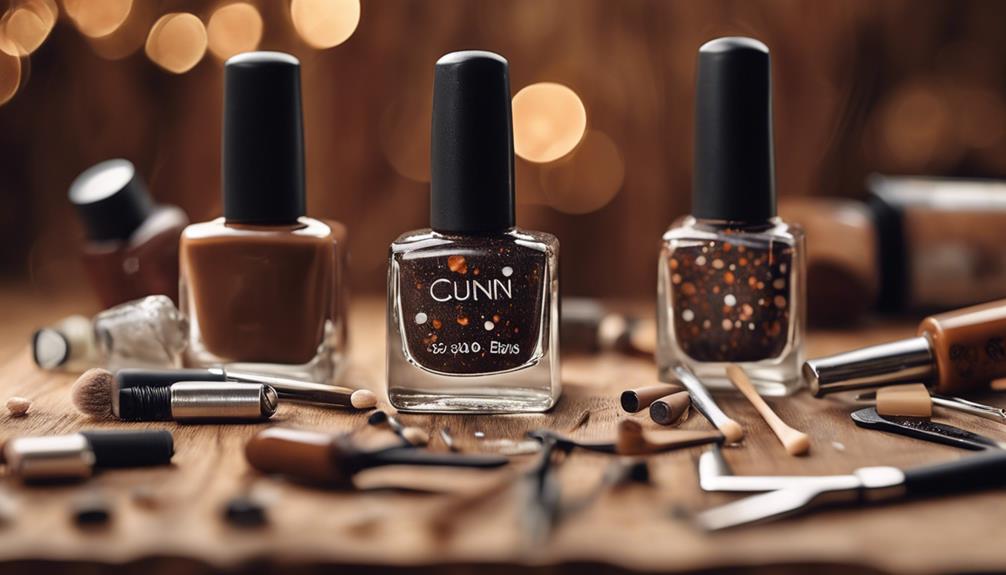
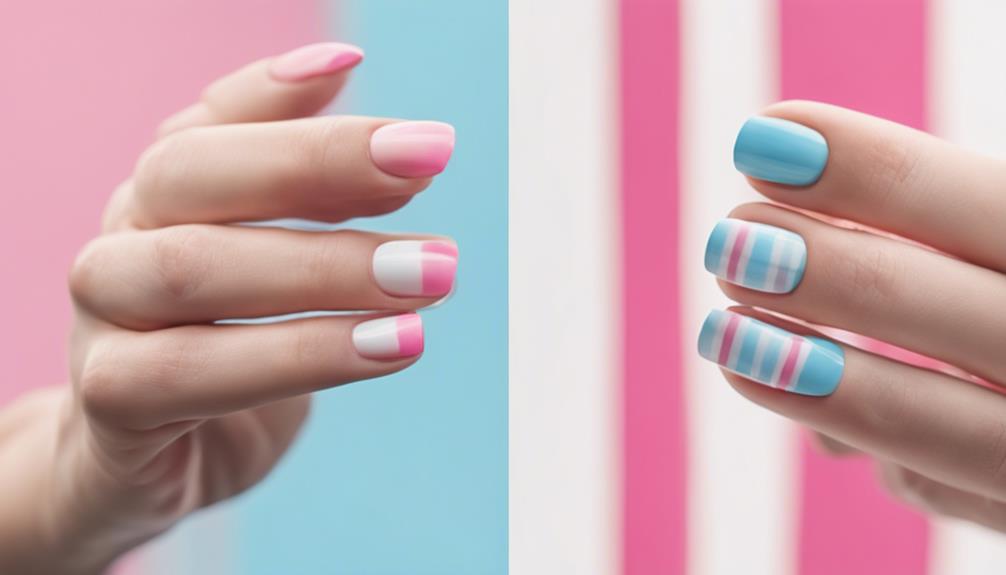
You're ready to awaken your inner nail artist! Start with simple striped nail designs using striping tape for clean lines and patterns. Experiment with easy geometric patterns like triangles and squares. Try two-tone nail art ideas that combine bold colors. Create custom nail stickers by dropping polish onto wax paper. Use guide stickers for a classic French manicure. Add playful polka dots for a pop of color. With these easy nail design ideas, you'll be on your way to creating salon-quality looks that will impress! And, the best part? You're just getting started on this nail art journey, with plenty more designs and techniques waiting to be discovered.
Key Takeaways
• Achieve precise lines and patterns using striping tape or nail stencils for a professional-looking finish.
• Create custom nail stickers by dropping nail polish onto wax paper for a unique design.
• Use guide stickers for clean French tip lines and add a playful pop of color with vibrant polka dots.
• Experiment with multi-colored stripes, criss-cross French manicures, and bold gradient effects for a stylish look.
• Opt for light colors, pastels, or neutrals to create the illusion of longer nails and complement your skin tone.
Simple Striped Nail Designs
How easy is it to create a chic striped nail design, and what makes it a great starting point for beginners like you? The answer is, it's incredibly easy! With the help of striping tape, you can achieve precise lines and patterns that'll make your nails look like a pro did them.
Want to take it up a notch? Experiment with multi-colored stripes or criss-cross French manicures for a unique look that's all yours. Once you've got your design in place, seal it with a top coat for a polished and long-lasting finish.
Don't worry if things get a little messy – a small brush dipped in polish remover can help clean up any edges for a professional-looking finish. The best part? Striped nail art is a great way for beginners like you to practice nail design techniques and create stylish manicures that'll turn heads.
Easy Geometric Patterns

You can add some edge to your nail art with easy geometric patterns that require minimal tools and basic polish colors. Geometric patterns are simple and stylish nail designs that are perfect for beginners. To achieve clean lines and shapes, use striping tape or nail stencils. Experiment with triangles, squares, or diamonds in different colors for a modern look.
| Geometric Pattern | Tips and Tricks |
|---|---|
| Triangles | Use a nail stencil to create a triangle shape, then fill with a bold color. |
| Squares | Alternate between two colors to create a checkerboard effect. |
| Diamonds | Use striping tape to create a diamond shape, then fill with a metallic color. |
| Chevrons | Create a chevron pattern using striping tape and a bold color. |
| Herringbone | Alternate between two colors to create a herringbone pattern. |
Geometric patterns can be easily achieved with basic nail polish colors and minimal tools. Finish your geometric nail art with a top coat for a polished and professional finish. With these easy nail art ideas, you can create stunning geometric patterns that are simple and easy to achieve.
Two-Tone Nail Art Ideas
You're ready to elevate your nail game to the next level with two-tone nail art ideas! Now, let's explore some trendy options that are easy to recreate:
a Classic Color Combo that's perfect for making a statement,
a Bold Gradient Effect that adds depth to your nails,
and a Simple Diagonal Divide that's perfect for adding a touch of sophistication.
Get ready to ignite your creativity and try out these stylish two-tone nail art ideas!
Classic Color Combo
Immerse yourself in the world of two-tone nail art, where combining two colors creates a classic and sophisticated look that's perfect for any occasion.
You can create a timeless French design by pairing two contrasting colors on either side of your nail. This simple yet elegant look is easy to achieve with a swipe of a nail polish brush. For a classic French twist, try using two stone-esque tones on either side of your nail. This subtle contrast adds depth to your nails without being too bold.
To add some glamour to your look, pair a dark color with glitter or metallic polish for a stylish contrast. The best part? Two-tone nail designs are easy to create and versatile for any occasion. Whether you're heading to a formal event or just want to elevate your everyday look, a classic color combo is the way to go.
Bold Gradient Effect
Blending two contrasting colors on each nail creates a bold gradient effect that adds a pop of personality to your two-tone nail art design. You can achieve this stunning look by using a makeup sponge to dab and blend the colors seamlessly for a smooth shift. Start with a light base color and gradually build up the darker shade for a striking look.
Don't be afraid to experiment with different color combinations like blue and purple or pink and orange – the possibilities are endless! To take your gradient effect to the next level, seal the design with a glossy top coat for a polished finish. This won't only add shine but also help your nail art last longer.
With a little practice, you'll be a pro at creating bold, eye-catching gradient effects that are sure to turn heads. So go ahead, get creative, and rock that two-tone nail art design like a pro!
Simple Diagonal Divide
What's the simplest way to create a stylish two-tone nail art design that's perfect for beginners? The answer lies in a simple diagonal divide! This easy-peasy design requires only two nail polish colors and a steady hand. Create a clean and sharp diagonal line across your nails using nail striping tape or a steady brush stroke. Then, paint one half of your nail with a light color and the other half with a contrasting shade. The result is a chic and modern two-tone manicure that's sure to impress.
Here are some color combinations to try:
| Light Shade | Contrasting Shade | Result |
|---|---|---|
| Pastel Pink | Bold Red | Sweet and Sassy |
| Mint Green | Deep Navy | Fresh and Chic |
| Soft Peach | Rich Gold | Elegant and Glam |
Seal your design with a top coat for a polished finish and long-lasting wear. Experiment with different color combinations to add a fun twist to this two-tone nail art idea. With this simple diagonal divide, you'll be rocking a stylish and easy-to-create nail design in no time!
DIY Nail Sticker Designs

Create your own custom nail stickers by dropping nail polish onto wax paper, swirling the colors together, and letting them dry, then cut out shapes that fit your nail beds for a unique and personalized design.
With DIY nail stickers, you can achieve intricate designs without advanced artistic skills. The application process is surprisingly easy – simply apply the stickers on a sticky nail base, smooth out the edges with acetone, and seal with a top coat for a professional finish.
As a beginner, you'll love how convenient and cost-effective this method is. Want to add an extra touch of creativity? Peel off the stickers, punch out heart shapes, and apply them to your nails for a fun and personalized look.
With DIY stickers, the possibilities are endless, and the best part is that anyone can do it! So, get creative, experiment with colors, and have fun with it. Who knows, you might just discover your new favorite nail art technique!
Beginner-Friendly French Mani

With a few simple tricks up your sleeve, you can master the timeless French manicure, a classic nail design that's both elegant and versatile. This easy manicure is perfect for beginners, and with a few simple tips, you can achieve a salon-quality look from the comfort of your own home.
Here are some beginner-friendly tips to get you started:
- Use guide stickers to easily create a clean French tip line.
- Experiment with different colored tips for a modern twist on the classic French manicure.
- Practice freehand French tips if guide stickers aren't available.
- Seal your French manicure with a top coat for a long-lasting finish.
A French manicure is a simple nail art design that's suitable for all occasions. It's a great DIY nail option for beginners, and with a little practice, you can achieve a beautiful, professional-looking finish.
Glittery Nail Art Inspirations

Now that you've mastered the classic French manicure, add some sparkle to your nails with glittery nail art designs that are easy to achieve and sure to turn heads.
Glitter nail art is a simple yet effective way to elevate your nail game, and the best part is that it's incredibly easy to achieve. You can use loose glitter or glitter polish to create a variety of effects, from subtle shimmer to full-on bling. Mix glitter with clear polish to create custom shades and textures that are all your own.
To guarantee your design lasts, seal it with a thick top coat for a smooth finish. And don't worry about the cleanup – removing glitter is a breeze with foil and acetone.
With these easy nail designs, you can add a touch of glamour to your everyday look. Try pairing glitter with simple yet elegant nail art ideas, like stripes or dots, for a look that's both playful and sophisticated.
Whatever your style, glitter nail art is the perfect way to add some sparkle to your life.
Colorful Polka Dot Designs

Add a playful pop of color to your nails with vibrant polka dots that dance across a neutral or pastel base, guaranteed to brighten up your day.
Colorful polka dot designs are a fun and easy way to add a playful touch to your nails. To create this look, start by applying a flawless foundation gel base coat. Then, use a dotting tool to create the dotted smile line. You can experiment with different sizes and colors of dots for a dynamic and eye-catching nail art look.
Here are some tips to take your polka dot design to the next level:
- Use multiple bright colors to create a vibrant and playful look
- Experiment with different dot sizes and placements to add depth and interest
- Try overlapping dots for a fun and playful touch
- Don't be afraid to mix and match different colors and patterns to make your design truly unique
With a little creativity and practice, you can create a colorful polka dot design that's sure to turn heads.
Nail Art With Minimal Tools

Now it's time to get creative with minimal tools!
You'll be surprised at how simple nail art tools, like a base color and a nail striper, can help you achieve stunning designs.
Simple Nail Art Tools
Get creative with minimal tools, like toothpicks, scotch tape, and bobby pins, to produce stunning nail art designs without breaking the bank. You don't need to invest in expensive supplies to create simple yet impressive nail art. With a little creativity, you can achieve professional-looking results with everyday items.
Here are some essential tools to get you started:
- Nail art brushes for precise strokes and details
- A toothpick or nail for creating fine lines and dots
- Striping tape for crisp, clean lines
- Dotting tools for adding perfect dots and accents
With these simple tools, you can create a wide range of designs, from subtle accents to bold statements.
The best part? You can experiment and customize your designs without breaking the bank. So, don't be afraid to get creative and try out new ideas. With a little practice, you'll be a nail art pro in no time!
Essential Design Elements
With your basic toolkit in hand, you can start building your nail art designs around a few key elements, including bold colors, striking patterns, and clever uses of negative space.
One essential design element is geometric designs, which can be easily achieved with a nail striper. Simply start with a base color and use the striper to create simple shapes like triangles or stripes.
For a more intricate look, use ring stickers to create a half-moon manicure effect without needing artistic skills. Don't be afraid to experiment with different color combinations to create unique and personalized nail art designs.
If you want to add some crisp lines and precise patterns, nail striping tape is your best friend. Remember, the key to stunning nail art is to keep it simple and have fun with it!
With minimal tools like dotting tools, nail striper brushes, and stickers, you can create stunning nail art with ease. So, get creative and start building your nail art designs around these essential elements!
Easy Nail Designs for Short Nails

You can still achieve cute and stylish nail designs even with short nails, and it's easier than you think! Short nails don't mean you can't rock cute designs. Opt for light colors, pastels, or neutrals to create the illusion of longer nails. French tips or half-moon designs are great options for short nails. They're simple to recreate and add a touch of elegance to your look.
Here are some easy design ideas for short nails:
- Try a classic French tip or half-moon mani for a chic look
- Use nail stickers or decals to add intricate designs with minimal effort
- Go for negative space designs or minimalistic nail art for a trendy vibe
- Create a fun and playful look with polka dots, stripes, or simple geometric shapes
Quick and Easy Nail Art Tips

Master quick and easy nail art techniques to elevate your nail game without breaking a sweat. With a few simple tricks up your sleeve, you'll be a pro in no time!
Start by investing in a good nail art brush, which will make all the difference in your designs. When it comes to choosing a base color, opt for a nude shade that will complement your skin tone. From there, experiment with simple shapes like triangles or dots using nail striping tape for precise lines. French tips are also a great way to add some elegance to your look.
Remember, the key to quick and easy nail art is to keep it simple. Try adding a pop of color with a bold accent nail or experimenting with DIY nail stickers for a fun, playful look. And don't be afraid to get creative with ombre blending or polka dots – the possibilities are endless!
With these quick and easy nail art tips, you'll be well on your way to becoming a nail art pro in no time.
Frequently Asked Questions
What Are the 5 Basic Nail Designs?
You're wondering what the 5 basic nail designs are, huh? Well, let me tell you – they're not as elusive as you think!
You can easily master polka dots, stripes, French tips, ombre, and simple geometric shapes.
These designs are perfect for beginners like you, requiring minimal tools and effort.
With a little practice, you'll be a pro in no time!
How to Do Simple Design on Nails?
You're ready to immerse yourself in simple nail design! Start by prepping your nails with a base coat.
Then, grab some nail striping tape or stickers to create crisp lines and geometric patterns.
Now, get creative with different polish colors, textures, and finishes. Try easy designs like polka dots or stripes to build your skills.
Don't forget to seal it all with a top coat! With practice, you'll be a pro in no time.
How to Do Nail Art at Home Without Tools for Beginners?
You're just a few steps away from becoming a nail art pro! You can create stunning designs at home without any fancy tools.
Try using toothpicks or bobby pins to create dots and lines, or scotch tape for geometric shapes.
You can even experiment with water marbling or the sponge technique for a gradient effect.
With a little creativity, you'll be rocking salon-quality nail art in no time!
Where Do I Start With Nail Art?
You're enthusiastic to explore the world of nail art, but where do you even start? Don't worry, it's normal to feel overwhelmed!
Begin by identifying your personal style – do you like bold and bright or soft and subtle? Browse Pinterest or Instagram for inspiration, and make a mental note of the designs that catch your eye. This will help you narrow down your options and get a sense of what you want to achieve with your nail art.
Conclusion
You've made it to the end of this nail design journey! Who would've thought that creating stunning nail art could be so easy?
You've mastered simple stripes, geometric patterns, and even two-tone designs – and you didn't even need to be a pro!
With these beginner-friendly ideas, you’re now a nail art rockstar. Go ahead, get creative, and show off those gorgeous nails to the world! Enlist your friends for a fun nail art party and exchange tips and designs. You can also look up simple nail art ideas online for inspiration and tutorials. Remember, the key is to have fun and express yourself through your nail art creations.