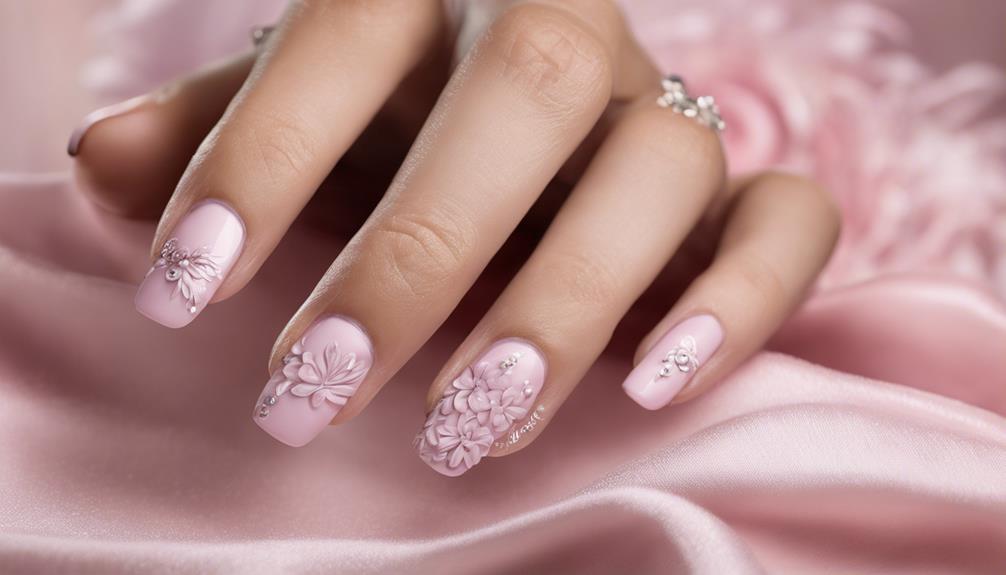
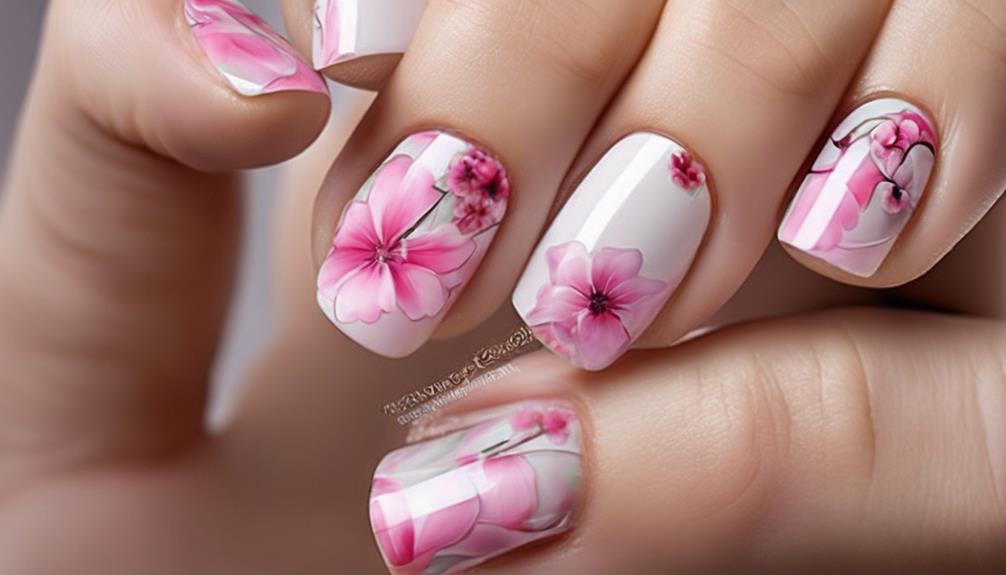
Join us in crafting beautiful pink floral nails through our straightforward step-by-step tutorial. Begin with nail preparation, shaping, and applying a primer. Then, select an attractive shade of pink polish, embellish with intricate floral patterns, and incorporate green foliage details for a captivating end result.
Seal it all with a top coat, clean up any excess, and add embellishments for a unique touch. Don't forget to protect your masterpiece with a clear top coat. Master this process for beautiful, blooming nails!
Key Takeaways
- Choose a pink shade that complements your style and skin tone for a personalized look.
- Create delicate flower designs using a small nail art brush for precision.
- Enhance flowers with detailed pink dots, a white center, and green leaf accents.
- Seal the design with a high-quality top coat for added shine and longevity.
- Experiment with embellishments like rhinestones or glitter for a unique, dimensional finish.
Nail Preparation
To prepare our nails for the Pretty Pink Flower Nail Designs, we should start by removing any existing nail polish with acetone-free nail polish remover. This step guarantees a clean canvas for our intricate design.
Next, using a nail file, we gently shape our nails, smoothing out any rough edges for a polished look. Soaking our hands in warm, soapy water not only relaxes us but also softens our cuticles, making it easier to push them back.
With a cuticle pusher or orangewood stick, we carefully push back the cuticles to create a neat appearance. Finally, we buff the surface of our nails to perfection, creating a smooth base that will enhance the beauty of our Pretty Pink Flower Nail Designs.
This meticulous nail preparation sets the foundation for a stunning and long-lasting manicure.
Base Coat Application
We must first prepare our nails by ensuring they're clean and dry before applying a thin, even layer of base coat.
This step creates a smooth canvas for our pink flower nail design and protects our natural nails from potential damage.
Remember to allow the base coat to fully dry to guarantee a professional finish and maximize the longevity of our manicure.
Prep Nails for Application
Using a high-quality clear base coat on clean, dry nails is crucial to create a smooth and protective foundation for your Pretty Pink Flower nail design. Here are some key steps to prep your nails for application:
- Clean Nails: Start by removing any old polish and washing your hands thoroughly to guarantee your nails are clean and free from oils.
- Dry Nails: Make sure your nails are completely dry before applying the base coat to prevent any moisture from interfering with the polish.
- Proper Application: Apply a thin layer of base coat, starting from the base of your nails to the tips, ensuring uniform coverage.
- Allow Drying Time: Let the base coat dry completely before moving on to the next steps to avoid smudging or chipping.
Apply Even Coat
For a flawless and long-lasting Pretty Pink Flower nail design, guaranteeing an even application of the base coat is essential. Applying a base coat before nail art helps safeguard the natural nail and provides a sleek surface for the design.
The base coat serves as an adhesive, assisting the nail polish in adhering better and lasting longer. It also prevents discoloration of the nails from colored polishes and fortifies the nails. A transparent base coat is commonly used, but tinted base coats can also enhance the final look of the nail design.
Allow the base coat to dry completely before proceeding to the next steps to ensure a flawless finish.
Pink Nail Polish Application
When applying pink nail polish, we must make sure our nails are clean and dry to achieve a flawless finish.
Using a base coat is essential for protecting our nails and extending the lifespan of our manicure.
Selecting the perfect shade of pink that complements our style and skin tone is vital for a polished look.
Nail Prep Essentials
To achieve flawless pink nail polish application, begin by applying a protective base coat to your nails. Here are some nail prep essentials to help you achieve a stunning pink manicure:
- Protective Base Coat: Apply a base coat to protect your nails and help the polish adhere better.
- Choose Your Favorite Pink: Select a pink nail polish color that you love and apply a thin, even layer to each nail.
- Allow Drying Time: Wait for the first coat to dry completely before applying a second coat for a smooth, opaque finish.
- Seal and Shine: Finish off with a top coat to seal in the color and add a beautiful shine to your pretty pink flower nail design.
Smooth Application Technique
Smoothly glide the flat brush of your quality pink nail polish over your nails, ensuring even coverage and a professional finish. Start by applying a base coat to create a smooth surface.
Opt for thin layers of pink polish to prevent streaks and promote a polished look. Allow each layer to dry fully before adding the next to avoid smudges. Choosing a high-quality polish with a flat brush will offer better control during application.
If any mistakes occur, use a small brush dipped in nail polish remover to clean up the edges for a flawless appearance. By following these steps, you can achieve a beautifully smooth application of your pretty pink nail polish.
Flower Petal Design

For a delicate and charming flower petal design, delicately brush five petal shapes onto each nail in a soft circular arrangement after applying a light pink base coat.
- Use a small nail art brush: This tool will help you create precise petal shapes with ease.
- Create five petal shapes: Guarantee each nail has a consistent and balanced floral design.
- Fill in the petals with a slightly darker pink: This technique adds depth and dimension to your petals.
- Add a tiny dot of yellow in the center: Mimicking the natural look of a flower, this detail enhances the realism of your design.
Adding Flower Details

When adding flower details to your pink nail design, utilize a small dotting tool to create five pink dots in a circular pattern as the foundation of the flower. These dots will serve as the petals of your flower.
Next, add a smaller white dot in the center of each pink dot to create a realistic flower effect. This simple step enhances the overall look and adds a touch of detail to your design.
Using a thin nail art brush, carefully draw small green lines extending from the pink dots to represent the flower stems. These delicate lines bring the flower to life and complete the floral design on your nails.
Green Leaf Accents

When incorporating green leaf accents into your pretty pink flower nail design, remember to place them strategically around the flowers for balance.
Experiment with different shades of green to create depth and dimension in your nail art.
Using a thin nail art brush will help you achieve detailed and delicate leaf shapes with precision.
Leaf Placement Tips
Strategically placing vibrant green leaf accents amidst the delicate pink flower designs adds a rejuvenating touch of nature-inspired elegance to your nail art. To master the art of leaf placement, consider these tips:
- Contrast and Balance: Guarantee the green leaves create a harmonious contrast with the pink flowers, enhancing the overall design.
- Precision is Key: Utilize a thin nail art brush to paint detailed and realistic green leaves on your nails for a polished look.
- Shades of Green: Experiment with different hues of green to find the perfect color that complements the pink flowers beautifully.
- Enhance, Don't Overpower: Make certain the green leaves accentuate the nail design without overpowering the delicate pink flowers, maintaining a balanced composition.
Leaf Color Combinations
To create alluring pink flower nail designs, harmoniously integrate verdant leaf accents in diverse shades to enhance the overall aesthetic appeal. When selecting green leaf colors, opt for shades that complement the pink flowers for a cohesive and balanced look. Using a thin nail art brush, delicately paint the green leaves alongside the pink blooms to achieve a refined finish. Experiment with various leaf shapes and sizes to introduce depth and visual interest to your nail art. Green leaf accents not only elevate the floral theme of your nails but also contribute to making the design more visually enchanting.
| Green Leaf Shades | Description |
|---|---|
| Mint Green | Soft and delicate |
| Olive Green | Earthy and rich |
| Forest Green | Deep and vibrant |
| Sage Green | Subtle and calming |
| Lime Green | Bright and lively |
Top Coat Application
For optimal results and longevity of your nail design, applying a top coat is a crucial step that seals in the art and protects it from chipping. Here are some tips for a flawless top coat application:
- Wait for Your Design to Dry: Make sure your nail art is completely dry before applying the top coat to prevent smudging or ruining the design.
- Choose a High-Quality Top Coat: Select a top coat that dries quickly and provides a smooth, even finish to save time and enhance the overall look of your nail design.
- Seal in the Shine: Applying a top coat not only protects your nail art but also adds shine and depth, making your design appear more vibrant and professional.
- Maintain the Gloss: The top coat acts as a barrier against daily wear and tear, helping your nail design maintain its glossy finish for an extended period.
Nail Art Cleanup

After ensuring your top coat has been applied flawlessly, the next step in perfecting your nail design is mastering the art of Nail Art Cleanup. Using a small brush dipped in nail polish remover, gently swipe along the edges of your nails to eliminate any excess polish or smudges.
It's important to take your time and maintain a steady hand for precise cleanup, ensuring a polished and professional finish. For more intricate designs or smaller areas, consider using a Q-tip for added precision.
After cleaning up the mistakes, wipe off any remaining nail polish remover with a clean cotton pad to reveal beautifully clean and polished nails. This step is essential in achieving a flawless nail art look, so don't rush through it.
Attention to detail during the cleanup process will elevate the overall appearance of your pretty pink flower nail design.
Final Touches and Embellishments
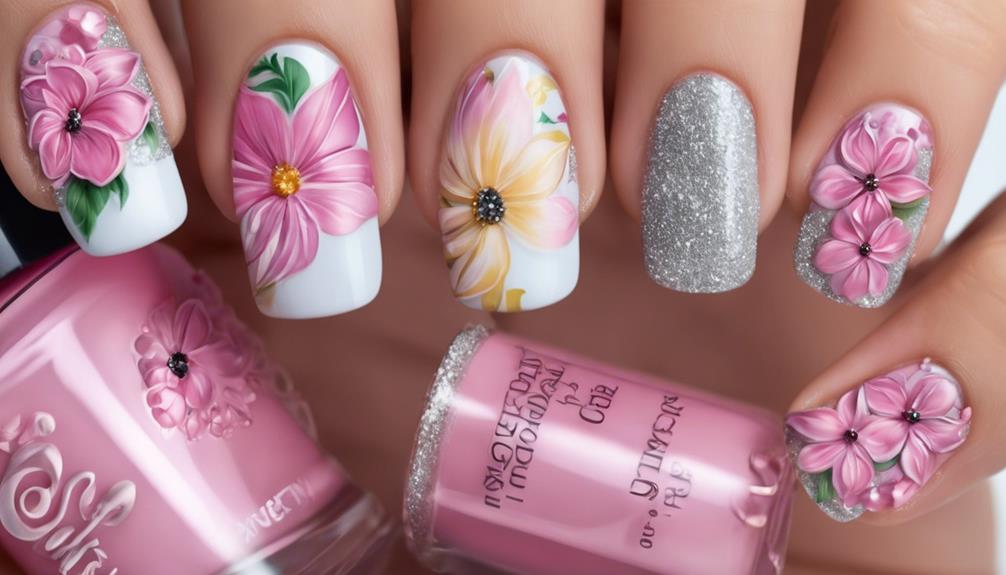
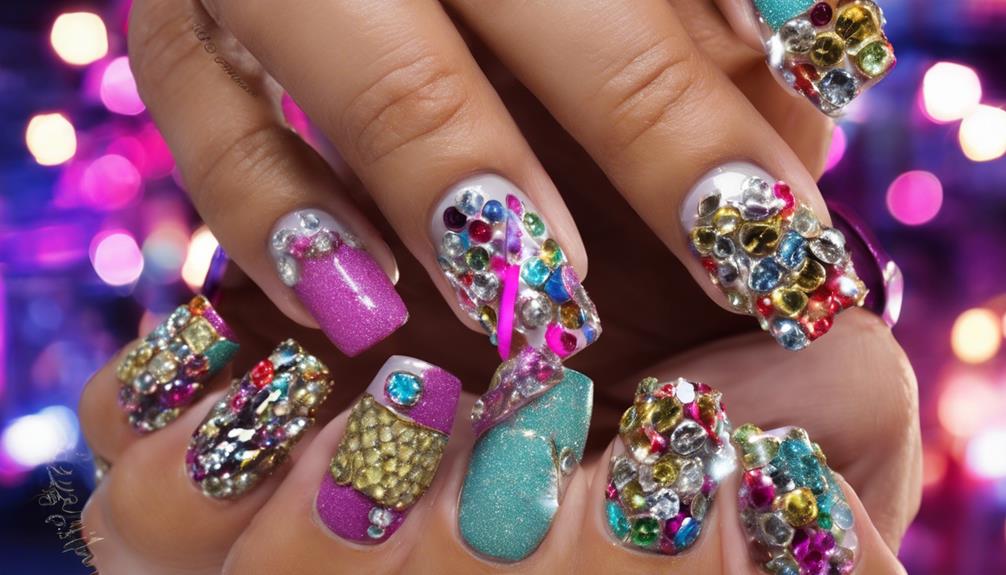
Delicately place small rhinestones or glitter at the center of the flowers to add a sparkling effect to your pretty pink flower nail design. This simple addition can elevate your nail art and make it stand out.
To further enhance your design, consider the following final touches and embellishments:
- Use a thin nail art brush to create delicate lines or swirls around the flowers. This intricate detailing adds a touch of sophistication and elegance to your overall look.
- Apply a clear top coat to safeguard the design and protect it from chipping. This step not only guarantees the longevity of your nail art but also gives it a glossy finish.
- Experiment with different color combinations for the flowers. Mixing and matching shades can help you create a unique and personalized nail art design that reflects your style and creativity.
- Consider adding tiny pearls or beads as additional accents. These subtle elements can enhance the beauty of your pink flower nail design and give it a more dimensional look.
Seal and Protect the Design

Applying a clear top coat over the pink flower design guarantees protection from chipping or smudging while adding a glossy finish to enhance the overall look of the nail art. This final step not only seals and safeguards your delicate design but also assures its longevity.
To make sure your nail art stays flawless, allow an adequate amount of time for the top coat to dry completely. By reapplying the top coat every few days, you can maintain the freshness and durability of the pretty pink flower design.
Opting for a high-quality top coat is essential as it provides better protection and longevity for your nail art. A durable top coat not only shields your intricate design but also adds a professional touch to your manicure.
Frequently Asked Questions
How Do You Design Nails Step by Step?
We start with a base coat for protection and polish adhesion. Apply light pink as the base color, then create a flower with darker pink dots and green leaves. Finish with a top coat for a glossy look.
How Do You Draw Cherry Blossoms on Your Nails?
Drawing cherry blossoms on our nails is a delicate art. We dip a thin brush in white polish to craft elegant petals and use a dotting tool for the centers. Branches in brown polish add a realistic touch, making our nails bloom beautifully.
How to Do Easy Daisy Nail Art?
We start with a light pink base coat, then use white polish for petals in circular strokes. A yellow dot at the center completes the daisy design. Seal with a clear top coat for a cute, floral manicure.
How to Make Pink Nails?
We love making our pink nails pop! Start with a base coat for protection. Apply a light pink color, create darker petals, add a contrasting dot for the center, seal with a top coat. Voila, gorgeous pink flower nails!
Can I Use the Step-by-Step Guide for Pink Flower Nail Designs to Create Blue and Yellow Nail Designs?
Yes, you can use the stepbystep nail design tutorial for pink flower nail designs to create blue and yellow nail designs. Simply switch out the pink polish for blue and yellow, and follow the same steps to achieve a beautiful new look.
Conclusion
After following these simple steps, your nails will blossom with gorgeous pink flower designs that are guaranteed to make a statement. By taking the time to meticulously craft each petal and incorporate detailed accents, you can achieve a breathtaking and attention-grabbing nail art look.
Remember to secure and safeguard your design to guarantee it lasts longer. Get ready to flaunt your beautiful pink flower nail designs and let your creativity flourish!