Nail Tips
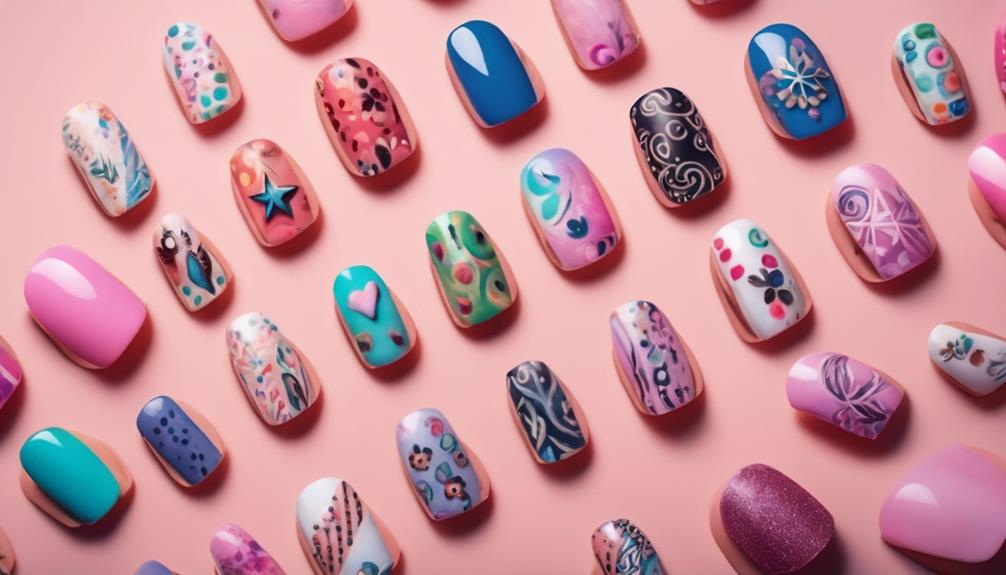
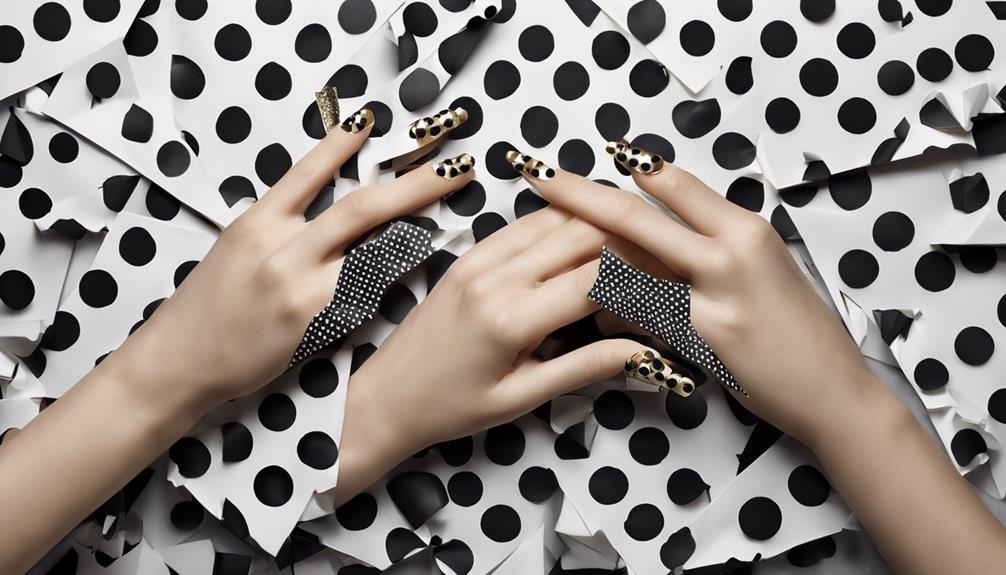
10 Chic Polka Dot Nail Design Ideas
Add a touch of whimsy to your nail game with these awe-inspiring polka dot designs that will leave you wanting more.
You're about to discover the ultimate collection of chic polka dot nail design ideas that will elevate your nail game and make you stand out from the crowd. From classic black and white dots to whimsical colorful combinations, bold and bright polka dots, and ombre polka dot nail art, the possibilities are endless. Get ready to experiment with geometric dot patterns, pastel hues, glittering accents, and negative space designs. Whether you're looking for timeless sophistication or playful whimsy, these 10 chic polka dot nail design ideas will inspire you to try something new and take your nail art to the next level – and there's even more to explore ahead! Looking to add a modern twist to your polka dot nail designs? Try incorporating trendy round nail designs into your manicure for a contemporary and stylish look. Experiment with different sizes and placements of the dots to create a unique and eye-catching nail art. Whether you opt for a minimalist approach or go all out with a bold and vibrant design, these trendy round nail designs will add a fashionable touch to your overall look.
Key Takeaways
• Classic black and white dots add timeless sophistication to any look, making them a versatile choice for any occasion.
• Whimsical colorful dot combinations create a playful look by experimenting with dot sizes and contrasting colors.
• Bold and bright polka dots make a statement with vibrant colors, adding a fun and playful element to nail art.
• Ombre polka dot nail art blends a modern gradient effect with playful polka dots, creating a trendy and sophisticated look.
• Accent colors like metallic, pastel, or bold brights add personality and contrast to traditional polka dots, making them customizable for any occasion.
Classic Black and White Dots
With classic black and white polka dot nails, you can effortlessly add a touch of timeless sophistication to your look, perfect for any occasion. This chic combination is a versatile choice that complements any outfit, from casual to formal.
The contrasting black and white colors create a striking visual effect, making your nails stand out in a crowd. What's more, you can customize your polka dot design with different dot sizes and patterns to give your look a unique twist.
Whether you're heading to a wedding, a job interview, or just a night out with friends, black and white polka dot nails are a stylish and elegant choice. This classic color combination is a popular choice among nail art enthusiasts, and for good reason – it's a look that never goes out of fashion.
Whimsical Colorful Dot Combinations
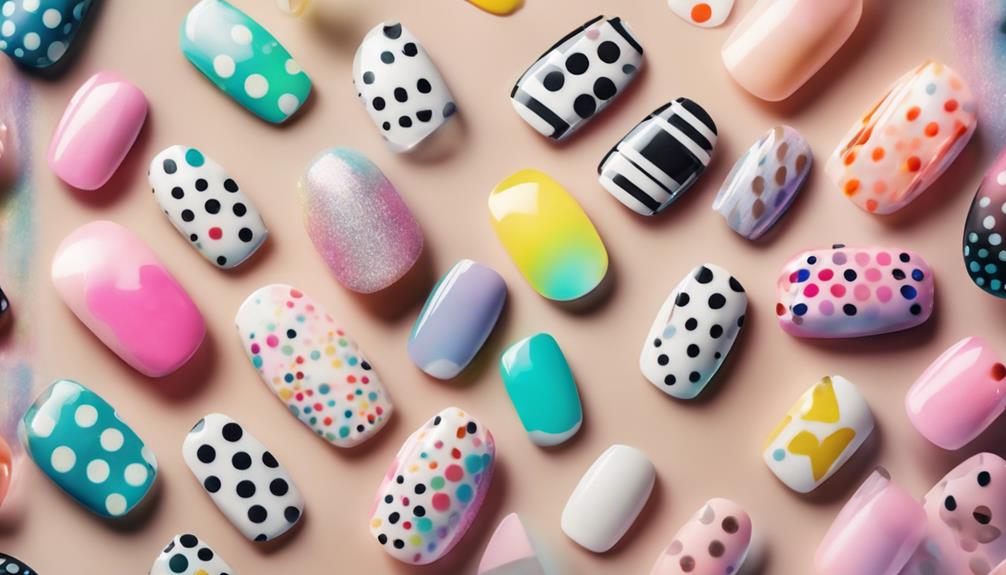
Now that you've mastered the classic black and white dot look, it's time to get creative with whimsical colorful dot combinations!
When it comes to making a statement with your polka dot nails, you'll want to take into account two key factors: the size of your dots and the boldness of your color combos.
Dot Size Matters
By experimenting with different dot sizes, you can create a whimsical and playful look on your nails that's uniquely yours.
When it comes to polka dot nail design, dot size matters! Mixing different dot sizes can add depth and dimension to your nail art, making it more visually appealing.
Try combining small, delicate dots with larger, bold ones to create a dynamic, eye-catching effect. You can also experiment with varying dot sizes within a single color palette to create a cohesive, yet interesting look.
For a more whimsical vibe, combine small dots in contrasting colors to create a fun, playful feel.
Bold Color Combos
You can ignite your creativity with bold color combos that elevate polka dot nail art to the next level, featuring vibrant pairings like hot pink and turquoise or purple and yellow. These whimsical colorful dot combinations will add a playful twist to your nail design.
Experiment with unexpected color pairings, such as coral and teal, lavender and mustard, or peach and emerald green, to create a unique polka dot look. You can also mix and match pastel shades like mint green and baby pink for a soft, romantic vibe or bold contrasts like navy blue and bright yellow for a playful look.
Don't be afraid to play with different color intensities to make your polka dot nail design pop, whether it's with bold primary colors, rich jewel tones, or subtle pastels for a fashion-forward statement. By incorporating metallic polka dots in shades like gold, silver, rose gold, or copper against a colorful background, you can create eye-catching nail art that's modern and chic.
Mini Dot Accent Nails
Now that you've gotten a taste of whimsical colorful dot combinations, it's time to focus on the finer details that make mini dot accent nails truly special.
You'll want to contemplate the size of your dots – are you going for tiny and delicate or slightly larger and more statement-making?
Where you place these tiny accents on your nails can also make or break the overall look, so think strategically about which nails will get the mini dot treatment.
Dot Size Matters
With mini dot accent nails, your subtle yet chic touch is just a small brushstroke away. These tiny polka dots add a delicate charm to your manicure, perfect for those who prefer a more understated nail art style. To create mini dots, you can use a fine nail art brush or a small dotting tool for precision.
Here are some benefits of incorporating mini dot accent nails into your nail design:
- Versatility: Mini dot accent nails can be paired with various nail designs and colors to create a unique look.
- Subtlety: These tiny dots add a touch of elegance without overpowering your overall nail design.
- Precision: Using a dotting tool allows you to place the dots strategically, creating a sophisticated and trendy nail design.
Accent Nail Placement
When deciding on accent nail placement, strategically positioning mini dot accent nails on one or two nails can create a chic, eye-catching look that adds visual interest to your overall manicure.
By incorporating mini dot accent nails, you can create a balanced and eye-catching manicure that stands out while maintaining a sophisticated appearance.
You can choose to place them on your ring fingers for a subtle touch or on your index fingers for a bolder statement.
The versatility of mini dot accent nails allows you to customize them with different colors, sizes, and patterns to suit your personal style.
Whether you prefer subtle or bold designs, mini dot accent nails offer a playful and stylish way to elevate your nail art.
For a classic polka dot look, you can pair white dots on a bold background or go for a reversed look with colored dots on a neutral base.
The possibilities are endless, and with mini dot accent nails, you can add a touch of whimsy to your nail design without overpowering the look.
Bold and Bright Polka Dots
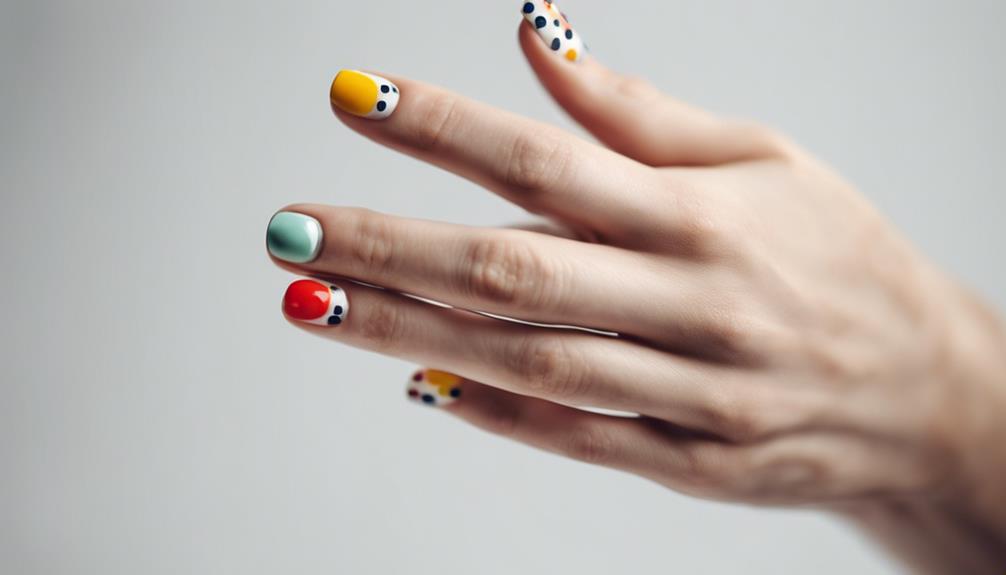
You'll make a bold statement with bold and bright polka dot nail designs that feature vibrant colors like hot pink, neon yellow, and electric blue. These eye-catching designs are perfect for making a statement and standing out from the crowd. With bold and bright polka dots, you can add a fun and playful element to your nail art.
Here are a few ways to make the most of bold and bright polka dots:
- Mix and match bold colors: Combine hot pink and electric blue for a dynamic and energetic look.
- Use contrasting colors: Pair neon yellow with a deep blue or purple for a striking contrast.
- Get creative with size: Alternate between large and small polka dots for a visually interesting design.
Ombre Polka Dot Nail Art
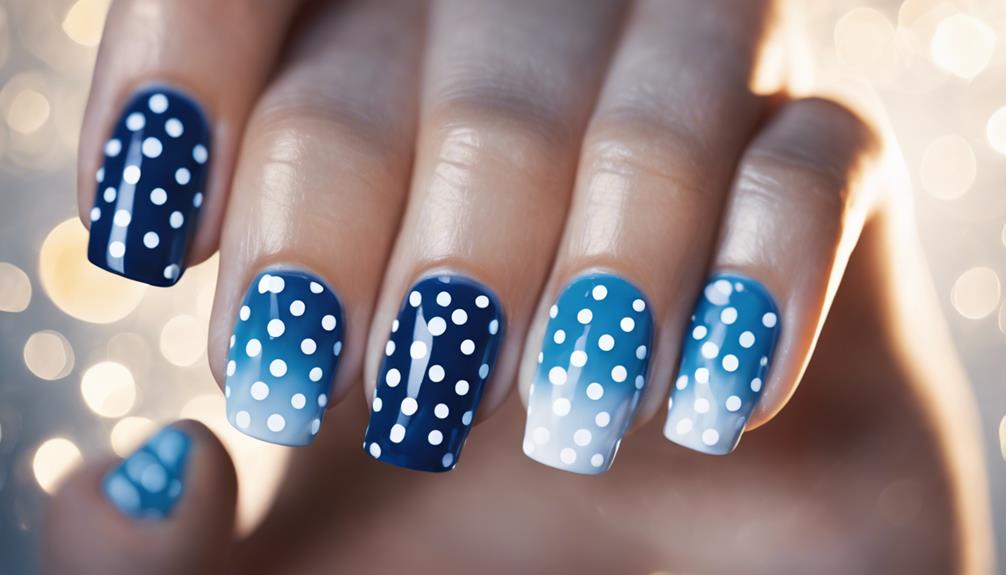
Create a unique, eye-catching look by blending ombre's gradient effect with playful polka dots, adding a touch of modern sophistication to your nail art. Ombre polka dot nail art is a trendy twist on the classic polka dot design, offering a fresh and exciting way to update your nail game.
To create this look, start by selecting two or more nail polish colors that shift smoothly from light to dark or vice versa. Apply a base color and gradually blend it into a different shade for a gradient effect. Once you've achieved the ombre effect, use dotting tools or toothpicks to add polka dots in varying sizes and colors over the background.
This style adds depth and dimension to your nails, making it perfect for those who want to make a statement. With ombre polka dot nail art, you can experiment with different color combinations and dot sizes to create a look that's truly one-of-a-kind.
Polka Dot French Tips
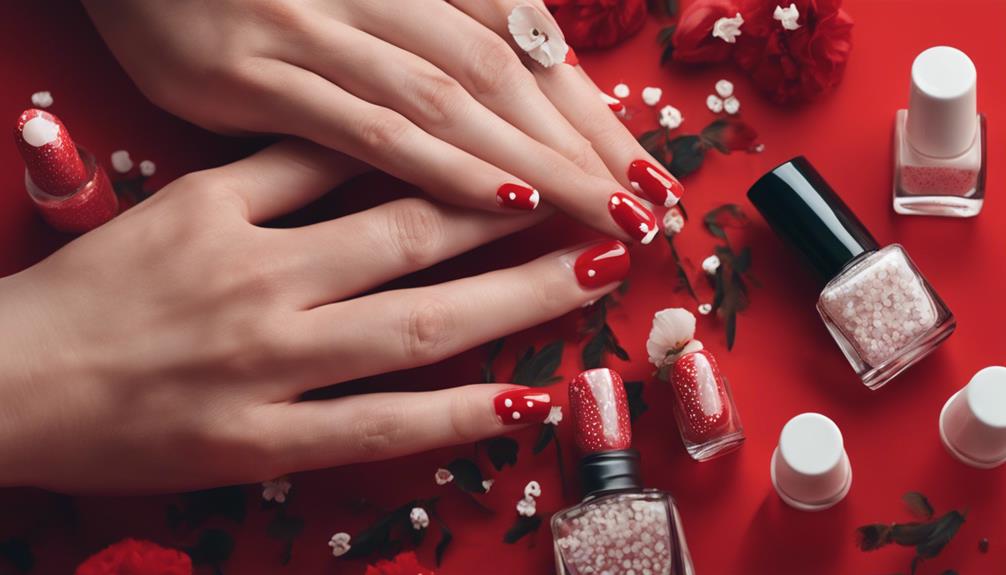
As you start designing your Polka Dot French Tips, you'll quickly realize that the details make all the difference.
You'll need to decide on the perfect dot size, tip shape, and accent colors to bring your look together.
Dot Size Matters
When it comes to polka dot French tips, dot size is an important consideration, as it can dramatically alter the overall look and feel of your nail design. You can create a delicate and subtle look with smaller dots or make a bold statement with larger ones. The key is to experiment and find the perfect balance for your style.
Here are a few tips to keep in mind when it comes to dot size:
- Smaller dots can add a touch of whimsy and playfulness to your design.
- Mixing small and large dots can create a visually interesting and dynamic look.
- Larger dots can make a bold statement and add a touch of glamour to your nails.
Tip Shape Options
You can choose from a variety of tip shapes to give your Polka Dot French tips a unique twist, from classic square tips to trendy oval or round shapes. This flexibility allows you to customize your nail design to fit your personal style and preferences.
For instance, if you want a more elegant look, opt for square tips that exude sophistication and glamour. On the other hand, oval or round tips can add a touch of whimsy and playfulness to your Polka Dot Nails.
When it comes to Polka Dot French tips, the tip shape you choose can greatly impact the overall aesthetic of your nail design. By combining the right tip shape with colorful polka dots, you can create a truly eye-catching look that's sure to turn heads.
Whether you're going for a chic and sophisticated vibe or a fun and playful atmosphere, the tip shape you choose can help you achieve your desired look. So don't be afraid to experiment with different shapes and find the one that works best for you and your Polka Dot Nails.
Accent Colors
By incorporating accent colors into your French tip polka dot nail design, you can add a bold touch of personality to this classic look. Accent colors can add a pop of contrast to traditional polka dot French tips, making your nails stand out from the crowd.
When it comes to selecting accent colors, the possibilities are endless! Here are a few popular options to explore:
- Metallic accents: Add a touch of glamour with gold or silver accents that complement the polka dots.
- Pastel hues: Soft pastel shades like pale pink, baby blue, or mint green can add a whimsical touch to your French tip polka dot nails.
- Bold brights: If you want to make a statement, try pairing your polka dots with bold, bright accent colors like red, orange, or yellow.
Geometric Dot Patterns
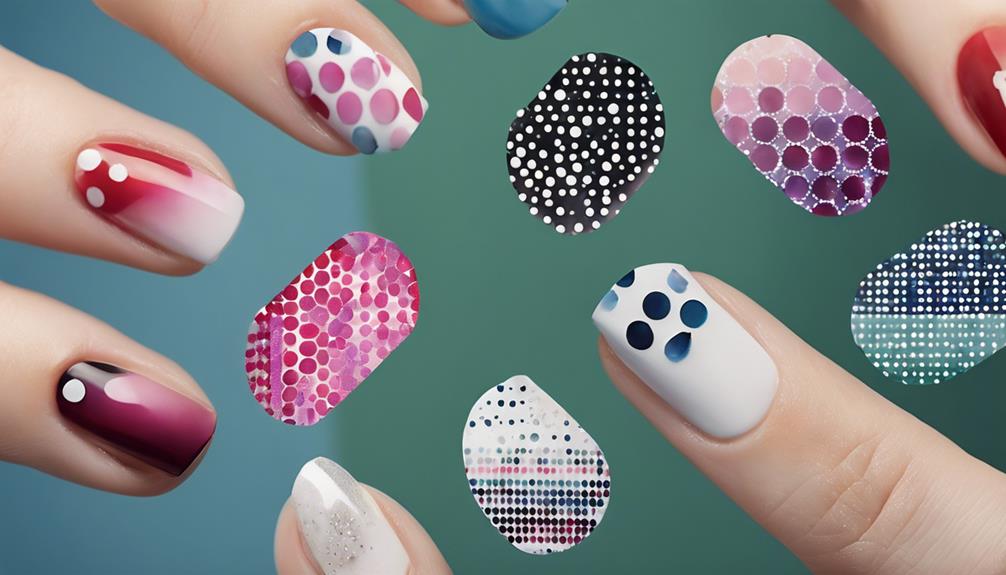
Geometric dot patterns add a touch of modern sophistication to your nail art, thanks to the precise placement of dots in geometric shapes like squares, triangles, or rectangles. With a polka dot nail art design, you can create a chic and structured look that's perfect for those who prefer clean and minimalist designs.
To achieve this look, you can use dotting tools or nail art brushes to precisely place the dots, ensuring clean lines and accuracy.
Feel free to experiment with different color combinations and dot sizes to create unique geometric patterns on your nails. The versatility of geometric dot patterns allows you to adapt them to suit different nail shapes and lengths, ensuring a sophisticated look that's all your own.
Whether you're going for a bold statement or a subtle accent, geometric dot patterns offer endless possibilities for self-expression. So, get creative and have fun with it!
Pastel Polka Dot Nails
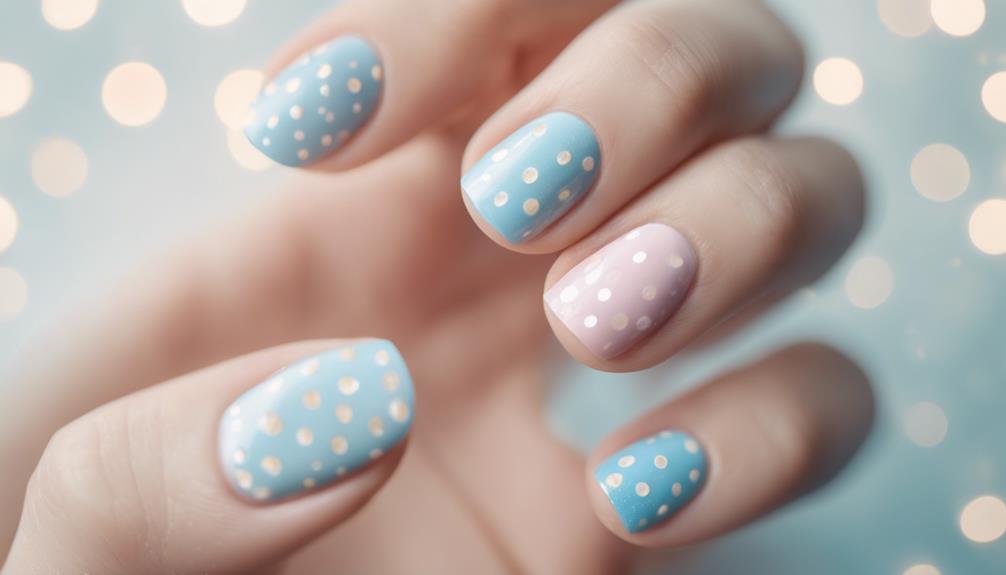
Soft, delicate, and oh-so-feminine, pastel polka dot nails are the perfect way to add a touch of sweetness to your manicure, especially during the spring and summer months. These adorable nails feature soft, light colors like baby pink, mint green, lavender, and sky blue for a delicate and subtle look. You can create a fresh and airy appearance by pairing pastel polka dot nails with white or nude base colors.
Here are some tips to keep in mind when trying out pastel polka dot nails:
- Experiment with dot sizes and arrangements to add some personality to your design.
- Add some sparkle with glitter or metallic accents for a more glamorous finish.
- Keep it simple by pairing your pastel polka dots with a classic white or nude base color for a chic, understated look.
With pastel polka dot nails, you can't go wrong. They're perfect for spring and summer, and they add a touch of sweetness and femininity to your manicure. So, go ahead and give them a try – you won't regret it!
Glittering Polka Dot Accents
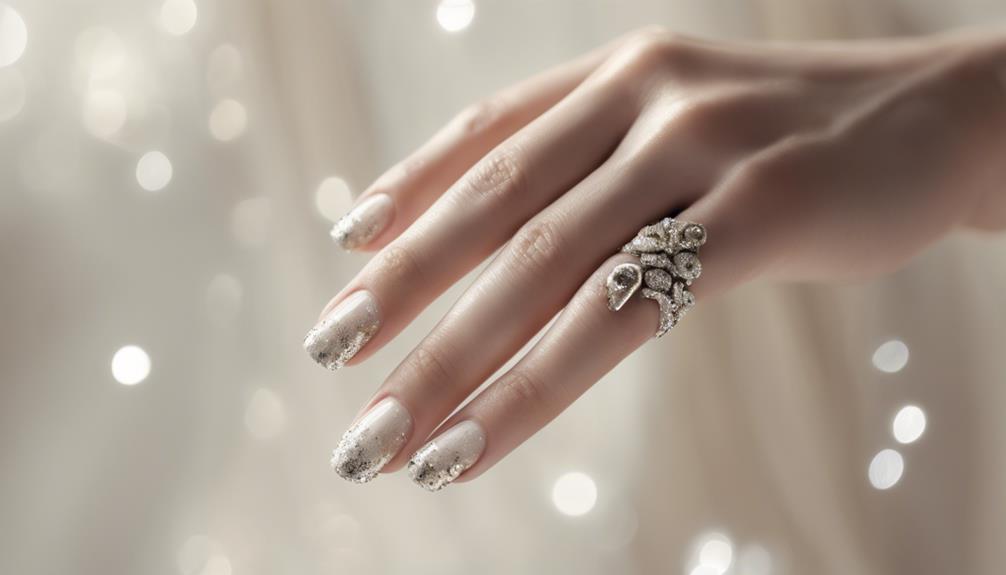
To add a dash of glamour to your polka dot nail design, you can incorporate glittering accents that instantly elevate your look. Glittering polka dot accents add a touch of sparkle and glam to your nail design, making it perfect for a night out or a special occasion. You can create these accents using glitter nail polish or glittery nail art supplies, allowing you to customize the level of sparkle to your taste.
Glitter polka dots can be applied on a solid color base or incorporated into a more elaborate nail art design. The versatility of glittering polka dot accents lies in their ability to match any color scheme or theme, making them perfect for any occasion.
Whether you're going for a festive and eye-catching look or a subtle yet sophisticated vibe, glittering polka dot accents are the perfect addition to your manicure. With their ability to add a touch of glamour and whimsy, glittering polka dot accents are sure to take your nail game to the next level.
Negative Space Dot Designs
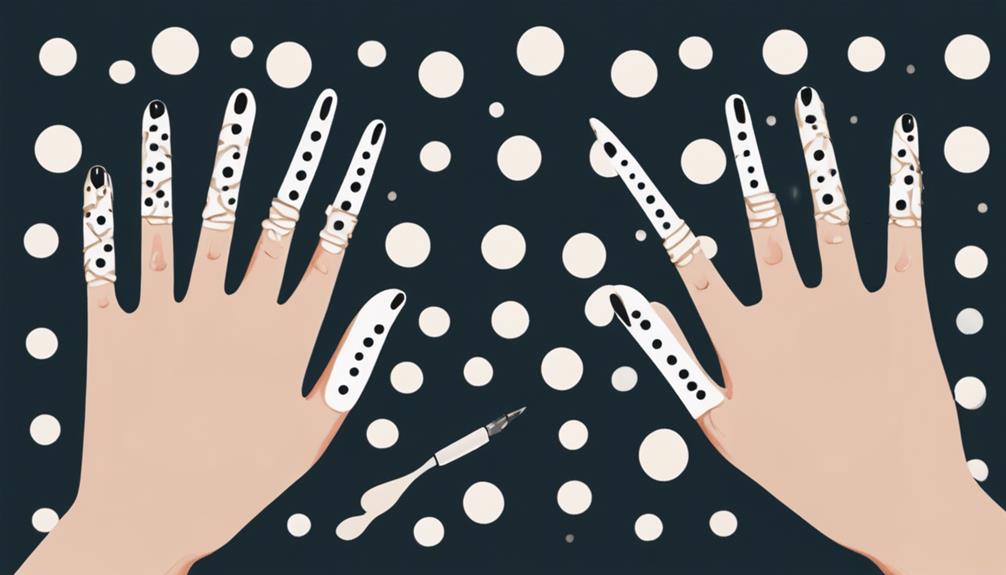
By strategically playing with negative space, you can create a trendy and modern look that showcases your natural nail color. Negative space dot designs are a unique twist on traditional polka dot nail art, featuring strategically placed dots to reveal the bare nail in between. This technique allows for creativity with dot sizes, shapes, and patterns while maintaining a minimalist aesthetic.
Here are three ways to customize your negative space dot design:
- Color combinations: Experiment with various color combos to suit your style and preferences.
- Dot patterns: Play with different dot sizes, shapes, and arrangements to create a look that's all yours.
- Accent nails: Add some glamour by incorporating glitter or metallic accents to your negative space design.
Negative space dot designs are versatile and can be customized for any occasion, making them a popular choice in nail art trends. Whether you're looking for a subtle, everyday look or a bold, statement-making design, negative space dot designs have got you covered.
With endless possibilities, you can get creative and make this trend your own!
Frequently Asked Questions
What Nail Design Is Trending Right Now?
You're wondering what's hot in the nail design world right now? Well, let me tell you – gradient designs are killing the game! They're trendy, stylish, and oh-so-chic.
But that's not all – celestial-themed nail art is also having a major moment, with its whimsical and eye-catching vibes.
And, of course, pastel hues and negative space designs are still going strong. It's all about making a statement with your nails, and these trends are leading the way!
How Do You Do Polka Dot Nails?
You're wondering how to master the art of polka dot nails? Start with a base color, then grab a dotting tool or toothpick and get creative!
Alternate colors for a pop of fun, and don't forget to clean that tool between hues for precision. Fluid polish makes it a breeze to apply dots evenly.
Now, go wild with different combos and dot sizes to create your unique design!
How Do You Make a Dot in Nail Art?
To make a dot in nail art, you'll need a trusty dotting tool or a blunt toothpick! Simply dip the tool in nail polish, picking up the perfect amount of color.
Then, gently touch the tool to your nail to create a dot. Experiment with different dot sizes by adjusting the pressure and amount of polish on the tool.
Clean the tool between colors to keep your design crisp and vibrant!
What Are the Different Basic Nail Designs?
You've probably seen those trendy ombre nails on Instagram, where the color gradates from dark to light. That's just one of the many basic nail designs out there!
You've also got classic polka dots, French tips with their signature white tips, stripes created with nail polish or tape, and color blocking that makes a statement with bold contrasts.
Each style has its own unique charm, and there's one that's sure to match your personal style!
Conclusion
You've just stumbled upon the perfect inspiration for your next nail art adventure – and what a coincidence that you're due for a manicure!
With these 10 chic polka dot nail design ideas, you'll be spoiled for choice.
From classic black and white to whimsical colorful combos, bold and bright to ombre and geometric patterns, there's a look that's sure to match your unique style.
Get ready to dot your way to nail art stardom!
Khetoli is an expert in hair and nail care and brings her knowledge and creativity to Nightingale Studio. As a skilled writer, she creates informative and engaging content that covers a wide range of beauty topics. Whether you need advice on nail art, hair treatments, or overall beauty maintenance, Khetoli’s expertise ensures that our content is informative and inspiring.
Nail Tips
Coral Nails With Glitter for a Fun, Sparkling Look
Jump into the vibrant world of coral nails with glitter for a dazzling look that will turn heads—discover the secrets to perfecting this trend!
Coral nails with glitter are seriously fun and will make your fingers sparkle like stars! Start with a lovely coral polish as your base, then layer on some gold or silver glitter. You can sprinkle it at the tips for a cool gradient look, or randomly scatter it for a whimsically playful feel. Don't forget a clear topcoat—this seals your design and keeps it shiny. With proper care, like using cuticle oil and gentle removers, your nails will stay fabulous! Want to make your coral glitter nails even more exciting? There's plenty more to explore!
Key Takeaways
- Coral nails paired with gold or silver glitter create a vibrant, eye-catching design perfect for summer events.
- Layering glitter polish over a solid coral base enhances sparkle and adds dimension to your manicure.
- Experiment with glitter application techniques, like tips or gradients, for a fun and sophisticated look.
- Regularly apply a high-shine topcoat to maintain sparkle and protect your coral glitter nails.
- Avoid common mistakes, such as applying glitter too thickly, to ensure a balanced and polished finish.
Introduction
When you want to make a statement with your nails, coral with glitter is the perfect choice. This dazzling design combines a vibrant coral base with sparkling glitter, making your nails pop—perfect for summer events and parties!
You can easily achieve this fun look by applying a layer of glitter polish over your solid coral base. The result? A beautiful, eye-catching effect that's sure to turn heads. Incorporating a little creativity can make your manicure even more special, just like supporting a partner ready for parenthood involves thoughtful communication and shared experiences.
Gold or silver glitter works wonderfully with coral, but don't hesitate to experiment with other colors for a personal touch! Whether you're a nail art expert or just starting, this design is easy and enjoyable. You'll be amazed at how quickly you can transform your nails into a stunning masterpiece!
Don't forget to finish with a clear topcoat. This step seals in the glitter and ensures your manicure lasts longer, keeping your nails looking fresh and fabulous!
Summer's Vibrant Color Choice
Coral nails with glitter perfectly embody the vibrancy of summer, making them a standout choice for any warm-weather occasion. These playful shades bring a burst of fun that brightens your day!
When you think of summer, nothing says "sunshine" quite like a coral base adorned with sparkling glitter, reminiscent of the lively spirit often portrayed by celebrities like K. Michelle in their personal lives insights about K. Michelle's love life. This eye-catching combo captures the lively spirit of summer outfits, whether you're rocking a cute sundress or beachwear.
Adding glitter to your coral nails gives them that extra sparkle that's sure to turn heads. You might want to try pairing gold or silver glitter with your coral nails because they really elevate the overall look.
Imagine how dazzling your nails will look while you're sipping a refreshing drink by the pool or dancing at a summer party!
This fun, sparkling combination doesn't just shine during the summer; it transitions beautifully into fall too! So, if you want to keep that sunny vibe alive, coral nails with glitter are the perfect choice.
Embrace the vibrant color and let your nails reflect the warmth of the season, reminding everyone of the joy and excitement that summer brings!
Popular Variations and Ideas
Whether you're prepping for a summer bash or a casual day out, there are plenty of popular variations for coral nails with glitter that can elevate your look. One fun idea is layering glitter polish over your favorite coral shade. This adds a playful sparkle and makes your nails shine like the sun! You can choose gold or silver glitter to create an elegant touch, perfect for formal occasions.
Additionally, you might consider pairing your coral nails with trending hairstyles, like the sleek undercuts or textured styles of 2024, for a cohesive and stylish appearance. This way, you can stay on top of the latest top trends in men's grooming.
Another exciting option is to try a chic gradient effect. By applying glitter only to the tips of your nails, you create a smooth transition from the coral base to the sparkling tips. This eye-catching look can be super classy or casual, depending on your outfit.
If you're feeling adventurous, scatter the glitter randomly for a more whimsical feel—think of it like confetti on your nails!
Coral nails with glitter are truly versatile colors that suit any occasion. Whether you're going to a party or just hanging out, these ideas will surely give your nails a pop of color and make them stand out. So grab that glitter polish and let your creativity shine!
Tips and Tricks
To achieve stunning coral nails with glitter, start with a solid base coat of your favorite coral polish—this vibrant foundation enhances the glitter's appearance beautifully.
Next, choose glitter in complementary colors like gold or silver. These shades will add a festive touch while keeping your look cohesive and fun!
For a sophisticated effect, try applying the glitter only to the tips of your nails or in a glitter gradient. You can blend it into the coral base for a gorgeous ombre effect. This technique not only looks amazing but also adds unique textures and visual interest to your nail art.
Don't forget to experiment with different glitter sizes and shapes! Fine glitter gives a smooth look, while chunky glitter creates a more playful vibe.
Care and Maintenance
Maintaining your coral nails with glitter requires a few simple steps to keep them looking fresh and vibrant. First, don't forget to regularly apply nourishing cuticle oil! This keeps your cuticles hydrated and prevents dryness, which can lead to peeling or chipping. You want your nails to sparkle, not flake!
When it's time to remove your polish, use a gentle, acetone-free nail polish remover. This way, you won't damage the glitter or the coral polish underneath. After removing the polish, make sure to apply a high-shine top coat every few days. This not only enhances the glitter's sparkle but also provides a protective layer against chipping, making your nails last longer.
Also, be careful with exposure to water and harsh chemicals, as these can weaken the glue holding the glitter on and cause it to wear out quickly.
Lastly, consider scheduling regular touch-ups or reapplications every two weeks. This ensures your coral glitter nails stay fresh and vibrant, ready to dazzle everyone around you!
With these tips, your nails will shine bright like a diamond, or at least like a really fabulous coral glitter!
Common Mistakes to Avoid
When applying coral nails with glitter, avoiding common mistakes can make all the difference in achieving a stunning manicure.
First, make sure your base coat is fully dry before adding glitter polish. If it's not, you might see some lifting or bubbling, and we don't want that!
When you apply glitter, remember to use a thin layer. Too thick a layer can lead to uneven application and longer drying times, which can result in smudges—yikes!
After applying your glitter, don't skip the clear topcoat! This shiny layer seals your design and helps prolong the life of your gorgeous manicure.
Also, cap the free edge of your nails with polish to prevent chipping; it's like a little protective coat for your nails!
Lastly, while glitter is super fun, avoid excessive sparkle. Too much can overwhelm your beautiful coral base color. Instead, aim for a balanced design that highlights both the glitter and the coral.
With these tips in mind, you'll be well on your way to dazzling, coral nails that shine bright! Happy polishing!
Frequently Asked Questions
What Are the Best Base Coats for Coral Nails With Glitter?
To achieve the best results with coral nails and glitter, you should use a strong, clear base coat like a gel or a ridge-filling formula. It'll enhance the color and help the glitter adhere better.
Can I Use Gel Polish for a Coral Glitter Manicure?
Yes, you can absolutely use gel polish for your coral glitter manicure! It provides a long-lasting finish and enhances the shimmer. Just make sure to apply a good base coat for the best results.
How Long Does a Coral Glitter Manicure Typically Last?
A coral glitter manicure typically lasts about two to three weeks. However, it depends on your nail care routine and activities. You can extend its life by applying a top coat and avoiding harsh chemicals.
Are There Specific Glitters That Work Better With Coral Nails?
When choosing glitters for your coral nails, opt for warm-toned shades like gold or rose gold. These complement coral beautifully, creating a stunning contrast. Experiment with textures, too, for added depth and sparkle in your manicure.
Can I Mix Different Shades of Coral With Glitter?
Absolutely, you can mix different shades of coral with glitter! Experimenting with various tones creates depth and dimension. Just ensure the glitter complements your chosen coral shades for a cohesive, beautiful finish. Enjoy the creative process!
Conclusion
Now that you know how to rock coral nails with glitter, it's time to get creative! Whether you go for a simple sparkle or a dazzling design, your nails can be a fun summer accessory. Remember to follow the tips and care advice to keep them looking fabulous. So grab your favorite polish and let your personality shine—after all, who doesn't love a little glitter? Happy decorating, and may your nails sparkle like a summer sunset!
Khetoli is an expert in hair and nail care and brings her knowledge and creativity to Nightingale Studio. As a skilled writer, she creates informative and engaging content that covers a wide range of beauty topics. Whether you need advice on nail art, hair treatments, or overall beauty maintenance, Khetoli’s expertise ensures that our content is informative and inspiring.
Nail Tips
Purple Fall Nails That Add a Pop of Color to Your Look
Discover how purple fall nails can transform your style with vibrant shades and chic designs that will leave you wanting to explore more creative options.
Purple fall nails can truly add a striking pop of color to your look. From deep plum to soft lavender, the vibrant shades capture autumn's essence beautifully. You can mix and match with chic designs like glitter accents, floral patterns, or trendy marble effects to showcase your creativity. Pair your purple nails with neutral tones or rich autumn colors for a balanced style. Plus, with a bit of nail care, you can keep them looking fresh longer. If you're curious about more artistic nail ideas and tips to make your manicures last, keep exploring.
Key Takeaways
- Deep plum to vibrant lavender shades capture autumn's essence, adding a chic pop of color to any look.
- Incorporate gold accents or glitter designs for a luxurious and eye-catching manicure.
- Experiment with marble effects and floral patterns to bring a whimsical touch to purple nail designs.
- Pair purple nails with neutral or rich autumn colors for a cohesive and stylish appearance.
- Regular nail care, including a base coat and moisturization, ensures longevity and maintains the striking look of purple nails.
Introduction
As the crisp air of autumn settles in, the allure of purple fall nails captures our imagination and creativity. This season, purple nails are perfect for adding a touch of elegance and warmth to your look. You'll find a stunning array of shades of purple, ranging from deep plum to soft lavender, that beautifully complement the vibrant colors of fall foliage.
Incorporating gold accents, whether through glitter or metallic detailing, enhances the richness of your purple nails, making them suitable for both casual outings and formal events. Popular designs this autumn include floral patterns, abstract French tips, and marble effects, allowing you to express your artistic side while embracing the seasonal aesthetic.
Opting for deep purple hues symbolizes creativity and luxury, making a bold statement that's sure to turn heads. Nail shapes like almond, stiletto, or coffin further enhance the overall look, providing versatility and sophistication that align with autumn fashion trends.
Royalty's Association With Purple
Throughout history, purple's deep association with royalty has made it a symbol of power and prestige. This connection stems from the rarity and cost of purple dye, especially in ancient times when it was derived from the Murex snail. Because of its luxurious origins, emperors and kings in ancient Rome and Byzantium often donned purple garments, showcasing their wealth and dominance.
In various cultures, purple represents not just luxury but also ambition and creativity, reinforcing its royal associations. When you see purple in royal regalia—like robes and crowns—you're witnessing a color that has long been reserved for the elite.
This historical significance continues to resonate today, as purple evokes a sense of sophistication and richness.
As you explore fall nail trends, consider how incorporating purple into your manicure can elevate your look. Whether you choose a deep plum or a vibrant violet, you're not just adding color; you're embracing a shade that embodies the essence of royalty.
With purple on your nails, you'll carry a hint of that majestic sophistication wherever you go, making a stylish statement this season.
Seasonal Color Trend Spotlight
Fall 2023 is bursting with vibrant purple hues, perfect for refreshing your nail game this season. You'll find a stunning array of shades, from deep plum to soft lilac, all capturing the essence of autumn.
This year, purple nail designs are trending, with popular styles featuring floral patterns, marble effects, and geometric shapes that evoke the seasonal aesthetic.
Deep purple nails, especially when paired with glossy or glitter finishes, elevate your look and add depth to your autumn wardrobe. The luxurious combination of purple and gold foil accents is a standout choice, providing a chic touch that suits both casual outings and formal events.
Engage with the trend by exploring creative interpretations on platforms like Lemon8, where users showcase their unique takes on this seasonal color trend. You'll see a variety of designs featuring lilac and deep purple that reflect the rich, warm colors of fall.
Embrace this vibrant palette and let your nails be the statement piece of your seasonal style. With these captivating purple hues, you'll definitely add a pop of color to your overall look!
Choose Complementary Outfit Colors
Choosing the right outfit colors to complement your purple fall nails can elevate your entire look. If you're sporting a stunning purple nail design, consider pairing it with neutral shades like beige, white, or gray. These colors create a balanced, sophisticated vibe that lets your nails stand out beautifully.
For deeper purple hues, rich autumn colors such as burgundy, mustard yellow, or forest green will enhance the seasonal aesthetic of your outfit.
If you've opted for bright purple nails, think about matching them with cool-toned colors like navy blue or teal. This combination offers a chic contrast, resulting in a modern and vibrant aesthetic. You can also incorporate metallic accents, like gold or bronze, which harmonize well with purple nails, adding an elegant touch to your appearance.
Don't shy away from patterns! Layering your purple nails with plaid or floral prints in complementary colors can create a stylish and coordinated fall look that reflects current seasonal trends.
Nail Care Tips for Longevity
To keep your purple fall nails looking fresh and vibrant, it's essential to prioritize nail care. Start by always applying a base coat before your purple nail polish. This creates a protective barrier that prevents staining and extends the life of your manicure.
Hydration is key, especially during the dry fall months. Regularly moisturize your nails and cuticles with a nourishing oil or cream to maintain their health and prevent brittleness.
It's also important to avoid excessive exposure to water and harsh chemicals. Wearing gloves while doing household chores can protect your nails from chipping and weakening.
Scheduling regular touch-ups for chips or wear can help maintain a polished look. Addressing small issues promptly prevents further damage, keeping your nails looking fresh for longer.
Lastly, store your nail polish in a cool, dark place. This prevents it from thickening or losing its effectiveness, ensuring it remains usable for future applications.
Pros and Cons of Purple
When it comes to nail colors, purple stands out with its unique blend of creativity and luxury, making it a go-to choice for many. The versatility of purple shades allows you to find the perfect hue that complements your skin tone, enhancing your overall look, especially during the fall season.
Rich purple tones like plum and deep lilac are trending, adding a sophisticated touch to any outfit.
However, there are a few considerations to keep in mind. Some darker purple shades can be challenging to remove and may stain your nails if you skip the base coat.
If you love intricate designs or glitter accents, be prepared for more maintenance and touch-ups, as these styles can require extra care to keep them looking fresh.
Ultimately, choosing purple nails offers a striking aesthetic that reflects seasonal vibes, but it's essential to weigh these pros and cons. By doing so, you can enjoy the beauty of purple while minimizing any potential drawbacks.
With the right approach, your purple fall nails can truly shine!
Artistic Purple Nail Designs
Unleashing your creativity with artistic purple nail designs can transform your manicure into a stunning canvas. You can experiment with various techniques like marble effects and abstract patterns, allowing your unique expression to shine through different shades of purple.
Dark purple nails can create a striking backdrop for these designs, enhancing their impact. Combining glossy and matte finishes elevates your nail art, adding depth and visual interest that's perfect for special occasions.
You might also consider incorporating floral patterns featuring purple hues on a nude base. This look beautifully blends seasonal themes with artistic flair, making it a favorite for fall.
For a more modern vibe, geometric designs using dark purple tones can give your nails a chic, contemporary edge. If you're aiming for glamour, sprinkle in some glitter or rhinestones to your artistic purple nail designs.
These elements not only enhance sophistication but also make your nails pop for festive celebrations or evening events. With so many options, your purple nails will surely turn heads and showcase your creative spirit this fall!
Embrace Your Purple Passion!
Why not embrace your purple passion this fall? With shades like deep plum and lilac trending for 2023, it's the perfect time to showcase your love for this vibrant color.
Consider exploring various purple nail ideas that can truly elevate your look. A dark purple nail can add a bold statement, while softer hues can bring a chic, understated elegance.
Don't stop there—get creative! Incorporating gold accents or glitter designs can add a touch of luxury and sophistication to your manicure. Techniques like marble effects or floral patterns can further enhance the uniqueness of your purple nails, making your style stand out.
When choosing your nail shape, think about options like almond, stiletto, or coffin styles, each offering a different aesthetic appeal to complement your purple passion.
Brands like Essie and OPI provide a wide range of purple hues, making it easy to find the perfect shade to match your autumn wardrobe.
Frequently Asked Questions
Is Purple a Good Fall Nail Color?
Absolutely! Purple's rich tones and versatility make it a fantastic fall nail color. Whether you choose deep plum or soft lavender, you'll effortlessly enhance your autumn aesthetic while showcasing your unique style and creativity.
What Do Purple Nails Symbolize?
Purple nails symbolize creativity and luxury, reflecting your individuality and self-expression. They evoke feelings of tranquility or mystery, depending on the shade, allowing you to showcase your boldness and confidence in any setting.
What Is the Nail Trend for Fall?
This fall, you'll notice rich purple hues dominating nail trends. Think deep plum and lilac shades, often enhanced with glitter or metallic finishes, plus abstract designs that let you express your unique style effortlessly.
What Nail Color Is Best for Fall?
For fall, deep shades like burgundy, dark purple, and rich plums are your best bets. They add warmth and sophistication, easily transitioning from casual outings to formal events, perfectly reflecting the season's cozy vibe.
Ken is our in-house hair expert, committed to sharing his knowledge and passion for hairstyling with our audience. With a sharp eye for trends and techniques, Ken offers insightful articles, tips, and tutorials to help our visitors achieve their desired hair looks. Whether you’re looking to master the latest hairstyle or learn how to care for your locks, Ken’s expertise will guide you every step of the way.
Nail Tips
How to Clean Nail Clippers the Right Way
Perfectly clean nail clippers can prevent infections and ensure smooth cuts—discover the simple steps to achieve that shine!
Cleaning your nail clippers the right way is super easy and fun! First, take them apart and give all the parts a gentle scrub using a soft brush and mild soap to get rid of dirt. After that, soak them in rubbing alcohol or hydrogen peroxide for at least 30 minutes—this helps zap any germs! Once that's done, rinse them off and let them air dry completely to stop rust from forming. Now, you've got shiny, clean clippers ready for action! Curious about more tips to keep them in great shape? There's plenty to discover about nail clipper care!
Key Takeaways
- Disassemble nail clippers and clean them with a soft brush and mild soap to remove debris.
- Soak clippers in rubbing alcohol or hydrogen peroxide for at least 30 minutes for effective disinfection.
- Rinse thoroughly and ensure clippers are completely dry to prevent rust and moisture-related issues.
- Store clippers in a dry, dust-free container with silica gel packets to minimize contamination risks.
- Schedule monthly cleaning sessions to maintain optimal hygiene and prolong the lifespan of your clippers.
Introduction
Have you ever thought about how often you clean your nail clippers? You mightn't realize it, but nail clippers can hide harmful bacteria, fungi, and viruses! That's why it's super important to sanitize them regularly.
Just like with dental tools, maintaining cleanliness is crucial to prevent infections and ensure overall health. To start, take a moment to disassemble your clippers if you can. Grab a soft brush and some mild soap, then scrub all parts to get rid of dirt and debris.
Once they're nice and clean, it's time to disinfect! Soak your nail clippers in rubbing alcohol or hydrogen peroxide for at least 30 minutes. This step is key to kicking those pesky pathogens to the curb, much like how flossing can prevent bad breath by eliminating food particles.
But wait, there's more! Proper drying is essential, too. After disinfecting, let your clippers air dry completely. This helps prevent rust and moisture-related problems.
Finally, when it's time for storage, keep your clean nail clippers in a dry, dust-free container. This way, they stay hygienic and won't contaminate your other tools.
Preventing Nail Infections
Cleaning your nail clippers isn't just about hygiene; it's also a key step in preventing nail infections. When you clean and sanitize your clippers after each use, you help stop harmful microorganisms from hanging around. This means less chance of getting nail fungus or bacterial infections!
You can easily do this by disinfecting your nail clippers with rubbing alcohol or hydrogen peroxide for at least 30 minutes. Additionally, be mindful of essential oils that can be used for their antimicrobial properties, such as tea tree oil, which may further aid in preventing infections.
If you share your clippers with friends or family, it's super important to clean them every time. This helps prevent the spread of infections and keeps everyone's nails healthy.
Remember, maintaining clean tools is part of proper nail care and personal hygiene. Storing your high-quality nail tools in a dry, dust-free spot also makes a difference! It reduces the risk of contamination and helps keep your nails happy and healthy.
Popular Variations and Ideas
Nail clippers come in various popular designs, each offering unique features that cater to different needs. You've got standard clippers, electric ones, and even special toenail clippers! Each type requires its own cleaning tricks to keep them in tip-top shape.
For standard clippers, you can soak them in soapy water, scrub them gently, and then rinse thoroughly for proper sanitization. If you're using electric nail clippers, just wipe the blades down with a disinfectant to maintain clean cutting surfaces.
Maintaining a clean grooming routine is essential for overall financial health and hygiene, just like managing your budget can improve your financial well-being.
Some fancy clippers, like the Advance Self-Collecting Nail Clipper from Nghia Nipper, even have removable parts. This means you can take them apart for a deeper cleaning, which is super important for nail health!
Regular maintenance of all your nail clippers helps prolong their lifespan and ensures that your clipping experience is always hygienic and safe.
Tips and Tricks
To keep your nail clippers in prime condition, incorporating some smart tips and tricks can make all the difference. First, make sure to soak your nail clippers in rubbing alcohol or hydrogen peroxide for at least 30 minutes. This helps to sanitize them by killing pesky bacteria and fungi.
After soaking, grab a soft-bristle brush to scrub away any stubborn debris. This little step is key for optimal hygiene!
Don't forget about storage! Place your clean nail clippers in a dry, dust-free container, and toss in some silica gel packets. They'll absorb moisture and help prevent rust.
If your clippers can be disassembled, do it! Cleaning each part, including the blades, handles, and springs, ensures a thorough disinfecting session.
To maintain cleanliness and keep infections at bay, schedule monthly cleaning sessions. Think of it as a spa day for your clippers!
Care and Maintenance
Regular maintenance of your nail clippers is essential for ensuring they stay effective and safe for use. To keep your nail clippers clean and ready, start by inspecting them regularly for any signs of wear or damage. If you notice anything off, it might be time to get a new pair!
After each use, remember to clean and dry your clippers thoroughly. This helps minimize the risk of bacteria and fungal growth—yikes!
Once a month, it's a great idea to disinfect your nail clippers using rubbing alcohol or hydrogen peroxide. This cleaning solution will help eliminate harmful microorganisms, giving you those healthy nails you want.
To maintain the cleanliness, store your clippers in a dry, dust-free container. Throw in some silica gel packets to absorb excess moisture and prevent rust.
Oh! And don't forget to designate separate clippers for your hands and feet. This helps prevent the spread of germs and keeps your personal hygiene practices in check.
Common Mistakes to Avoid
When it comes to cleaning nail clippers, avoiding common mistakes can make a big difference in maintaining their effectiveness and hygiene.
One mistake you might make isn't soaking your nail clippers in a disinfectant solution for at least 30 minutes. This step is key to ensuring they're thoroughly cleaned and sanitized, preventing infections. Remember, before you sanitize your nail clippers, always clean them first to remove dirt and debris; otherwise, you're just trapping germs!
Another common mistake is reusing porous nail files and buffers. It's better to replace them regularly to keep your tools safe and promote healthy nails.
Also, don't forget to dry your clippers completely before putting them away. If they're left wet, they can rust or grow mold, which is a big no-no!
Lastly, avoid using harsh chemicals like bleach—yikes! Instead, stick to rubbing alcohol or hydrogen peroxide for safe disinfection.
And please, avoid sharing your nail clippers; it's a simple way to keep your nails happy and healthy.
Frequently Asked Questions
What Is the Best Way to Clean Nail Clippers?
To clean nail clippers effectively, you should disassemble them, scrub with warm soapy water, and rinse well. Then, soak in rubbing alcohol or hydrogen peroxide for at least 30 minutes to disinfect thoroughly.
What Kills Fungus on Nail Clippers?
To kill fungus on nail clippers, soak them in 70% rubbing alcohol for at least 30 minutes, use hydrogen peroxide for 5 minutes, or boil them for 30 minutes for thorough disinfection.
Can You Disinfect Nail Tools With Alcohol?
Yes, you can disinfect nail tools with alcohol. Just soak them in rubbing alcohol for at least 30 minutes. It kills germs effectively and helps prevent infections, ensuring your tools stay clean and safe to use.
How to Clean Rust off Nail Clippers?
To clean rust off nail clippers, mix equal parts baking soda and water into a paste. Apply it, scrub gently with a cloth, and rinse thoroughly. Consider soaking in vinegar for tougher rust spots.
Conclusion
Now that you know how to clean your nail clippers the right way, you can keep them sparkling and safe! Regular cleaning helps prevent pesky nail infections and keeps your nails looking neat. Remember to avoid common mistakes, and follow the tips to maintain your clippers like a pro! With a little care, you'll have tools that are ready for action, making nail trimming a breeze. So, get to it and keep those clippers shining!
Khetoli is an expert in hair and nail care and brings her knowledge and creativity to Nightingale Studio. As a skilled writer, she creates informative and engaging content that covers a wide range of beauty topics. Whether you need advice on nail art, hair treatments, or overall beauty maintenance, Khetoli’s expertise ensures that our content is informative and inspiring.
-
Entertainment News3 months ago
Monopoly Go Net Worth Upgrades List: Boost Your Game and Your Wealth!
-
Entertainment News3 months ago
Net Worth of Michael Corleone Blanco: Inside the Real-Life Narco Empire!
-
Entertainment News2 months ago
Cristiano Ronaldo’s Net Worth: How Much Is the Football Superstar Worth?
-
Entertainment News3 months ago
James Best Net Worth: How Much Was He Worth at His Peak?
-
Entertainment News3 months ago
James Best Net Worth at Death: How Much Was the TV Star Worth?
-
Entertainment News3 months ago
Drake Vs Justin Bieber: Who Has the Higher Net Worth?
-
Entertainment News3 months ago
Free Spirit Equestrian Net Worth: How She Built an Empire on Horseback!
-
Entertainment News2 months ago
Pete Best Net Worth in 2023: How Much Is the Former Beatle Worth Now?