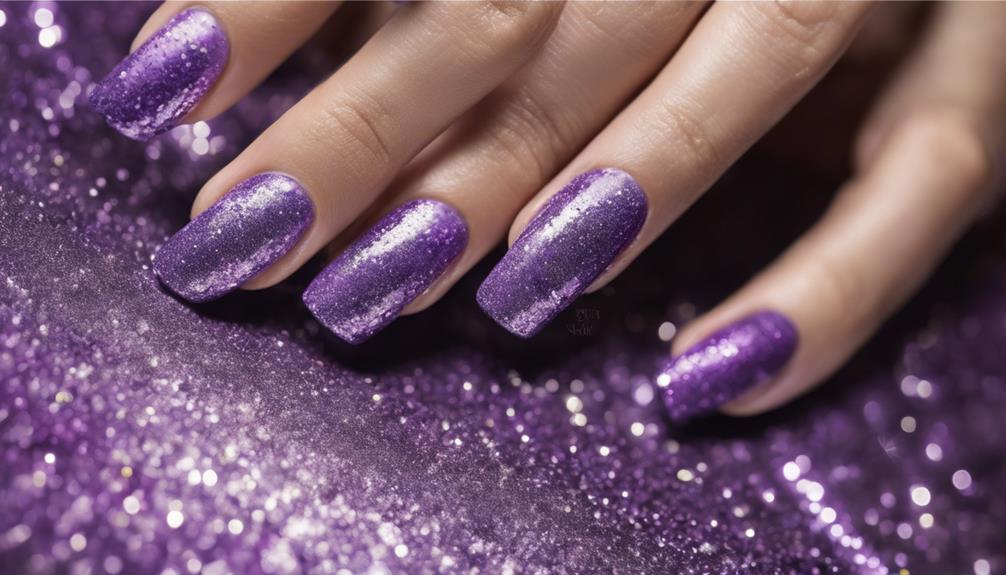
Let’s get our nails ready by shaping and smoothing them to our preferred length, putting on a clear base coat for improved stickiness, and carefully pushing the cuticles back. When prepared, we can smoothly apply a rich purple base coat, making sure it completely covers and letting it thoroughly dry.
Next, we add a dazzling glitter gradient effect using various glitter sizes and seal it with a glossy top coat. Finally, don't forget to mix different glitter particles for depth and finish with a top coat to protect and enhance the design. Master these steps and watch your nails sparkle with purple glamour and sophistication!
Key Takeaways
- Choose a deep, pigmented purple base coat for intensity.
- Apply multi-shaped glitter from tips to base for a gradient effect.
- Mix small and large glitter particles for depth and dimension.
- Seal the design with a glossy top coat for a lasting finish.
- Experiment with glitter placement for a unique and eye-catching design.
Purple Glitter Nail Prep
For a flawless application of sparkly purple nails, we start by preparing our nails with precision and care. Shaping and filing our nails to the desired length and shape is the first step in achieving a stunning look. Next, we apply a clear base coat to help the glitter polish adhere better to our nails. Using a cuticle pusher, we gently push back the cuticles for a clean nail bed, ensuring a polished finish.
When creating a purple glitter gradient, it's crucial to prep our nails correctly. After shaping and applying the base coat, we carefully choose the nail shapes that suit our style. Applying a thin layer of base coat before the glitter polish helps the gradient blend seamlessly. Once the glitter polish is applied, we finish off with a top coat for a long-lasting and glossy effect. Remember to fix any mistakes or excess polish around the nails with a nail polish remover for a clean and professional finish.
Applying Base Purple Coat

Gently gliding the rich purple polish brush along our nails, we create a flawless and vibrant base for the upcoming glitter design. The base purple coat serves as the canvas for our glitter nails, providing a solid foundation for the sparkle to come. It's vital to guarantee full coverage with the purple nail polish to ensure a smooth backdrop that enhances the vibrancy of the glitter. Opting for a deep and pigmented purple shade intensifies the overall effect, making the glitter stand out even more against the background.
As we carefully apply the base coat, we pay close attention to detail, making sure each nail is coated evenly to prevent any patchiness. Patience is key here; allowing the purple polish to dry completely is essential before moving on to the next step. This step sets the stage for our dazzling glitter nail designs, promising a stunning and long-lasting manicure that will surely turn heads.
Adding Glitter Gradient Effect
As we progress in enhancing our lively purple base, the next step involves creating a captivating glitter gradient effect using Nicole by OPI polishes like Am I Making Myself Claire? and Inner Sparkle.
To achieve this stunning look, follow these steps:
- Begin by selecting multi-shaped glitter in shades of pink, purple, and gold to add depth and dimension to your blend.
- Apply the glitter starting from the tips of the nails and gently blend it towards the base for a seamless shift.
- Experiment with different placement techniques to create a unique and attention-grabbing design that suits your style.
- Once you're content with the gradient effect, seal it in with a high-quality glossy top coat for a durable and shiny finish.
Incorporating Different Glitter Sizes

Integrating various sizes of glitter into your nail designs can elevate the overall look by adding depth and dimension. When you mix small and large glitter particles, it creates visual interest and a dynamic finish to your manicure.
Incorporating larger glitter sizes strategically can make certain areas pop, providing a bold and eye-catching effect. On the other hand, using smaller glitter particles to fill in gaps between the larger ones helps achieve a cohesive and polished look.
By experimenting with different glitter sizes, you have the opportunity for customization and personalization of your nail art, making it unique to your style. Whether you prefer a subtle touch of sparkle or a more dramatic flair, playing with glitter sizes allows for endless creativity in your designs.
Finalizing With Top Coat
To achieve a flawless and long-lasting glitter nail design, sealing it with a top coat is imperative. Here are some important points to keep in mind when finalizing your purple nail design with a top coat:
- Protection: The top coat acts as a safeguarding barrier, shielding your glitter design and manicure from daily wear and tear.
- Enhanced Shine: By applying a top coat, you can boost the shine of your purple nail design, making the glitter particles sparkle even more.
- Longevity: A top coat helps prolong the life of your manicure by preventing chipping and fading, keeping your nails looking fresh for longer.
- Smooth Finish: It smooths out any rough texture from the glitter particles, ensuring a uniform and smooth finish to your nails.
Frequently Asked Questions
How Do You Draw Sparkles on Your Nails?
We draw sparkles on our nails by using a fine detail brush or nail art pen. Starting with small dots or star shapes, we experiment with different sizes and shapes for a dynamic look. Adding glitter polish or rhinestones enhances the effect. A clear top coat seals and shines.
How Do You Apply Nail Polish With Sparkles?
Applying nail polish with sparkles is a fun way to add glam! Start with clean nails, swipe on a base coat, layer on the glitter, and seal with a topcoat for a lasting look. Try different tools for precision!
What Nail Color Looks Good With Purple?
We love how silver, gold, pink, and white complement purple nails. For a bold statement, try green or yellow. Neutrals like nude or gray offer a subtle touch. Metallic shades add luxury. Experiment with matte, glossy, or metallic finishes for a chic look.
How to Do Glitter Gradient Nails?
We start with clean, dry nails and apply a clear base coat for a smooth canvas. Dab on layers of glitter polish from the base towards the tip for a gradient effect. Finish with a top coat for shine and durability.
Can I Use Glitter in My Nail Designs Featuring Purple Hues?
Yes, you can use glitter in your stunning purple nail designs. Glitter adds a touch of sparkle and glamour to your nail art, especially when paired with purple hues. Whether it’s a full glitter accent nail or subtle glitter accents, it can elevate your purple nail designs to the next level.
Conclusion
After following these steps, your nails will be so dazzling and sparkly that they'll practically blind anyone who looks at them!
The combination of the rich purple color and the glitter gradient effect will make your nails the envy of everyone around you.
So go ahead and show off your fabulous nails, because you deserve to shine like a star!
