Spider web nail designs are a spooktacular way to get ready for Halloween! You can start with a black base for that eerie backdrop, then grab a fine-lining brush and white polish to create your own creepy webs. If you want a little extra fun, add tiny spiders using black and red paint! There's also the option of press-on nails for quick and easy Halloween styles. Just remember to seal your masterpiece with a top coat to keep it shiny and safe. Get ready to impress your friends, and there's even more you can explore to amp up your nail art!
Key Takeaways
- Black and white polish, along with a fine-lining brush, are essential for creating intricate spider web designs.
- Negative space spider web French manicures offer a stylish yet subtle Halloween nail art option.
- Press-on nails featuring spider web motifs provide a convenient way to achieve festive looks without the hassle of painting.
- Hand-painted spider web designs can add a unique, personalized touch to your Halloween nail art.
- Incorporate tiny spiders or glitter accents for added detail and a glamorous effect on your spider web nails.
Introduction

When it comes to nail art, spider web designs stand out as a fun and creative option, especially around Halloween. You can easily transform your nails into spooky masterpieces with just a bit of practice!
These eye-catching black spider webs can be created using regular nail polish, making them perfect for everyone, even if you're a beginner. Grab some black and white polish, and a fine-lining brush, and you're ready to start. Engaging in this type of creative expression can also contribute to your overall personal development journey, enhancing your mental and emotional well-being.
There are so many ways to make your spider web nails unique. If you prefer a more subtle approach, try a negative space spider web French manicure. Just use a nude-pink base for an elegant yet spooky twist!
You can also find press-on nails featuring spider web motifs that are super convenient and come in various styles. They cater to all tastes, whether you want something simple or shimmering.
With a little creativity and some practice, you’ll be the star of any Halloween party with your fabulous Halloween nail art! So roll up those sleeves, and get ready to show off your spooky style! And the fun doesn’t have to stop at your fingertips. You can also elevate your spooky style with some spooky halloween pedicure ideas! Whether it’s creepy cobwebs or eerie eyeballs, there are endless possibilities to transform your nails and toes into the ultimate Halloween accessory. So get creative and unleash your inner nail artist this Halloween season!
Seasonal Nail Art Trends

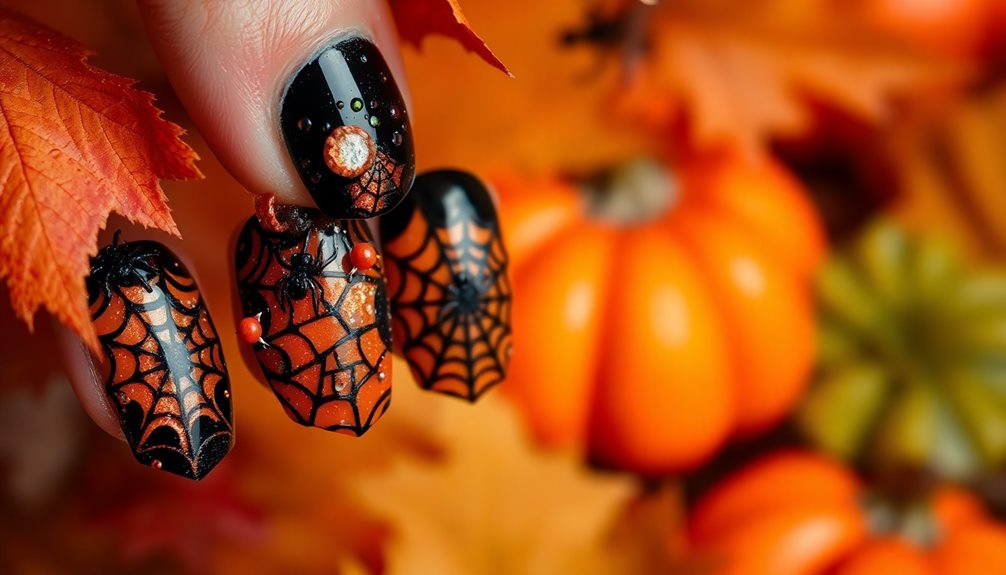
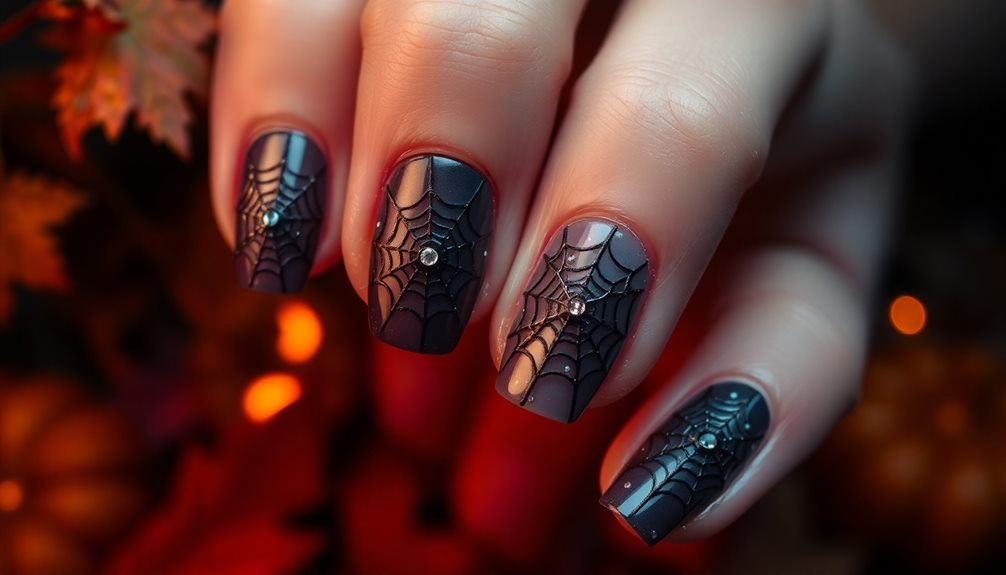
Embrace the spooky season with seasonal nail art trends that highlight the beloved spider web design! This Halloween, you can create Cute Halloween nails that really stand out. Think about using a black base for your nails, which makes those spider web designs pop!
You can choose from different styles, like classic accent webs or even negative space French tips that look super cool.
If you're looking for something easy, press-on nails are a fantastic option. You can find Gothic black spider webs or colorful bat motifs at prices ranging from $11.06 to $30, so it's easy to get in on the fun.
Hand-painted nail art is also super popular. Imagine intricate designs featuring creepy crawly webs that you can get for around $29.00, and sometimes with free shipping!
Don't forget to check out the sales! Discounts on Halloween-themed nail products can be as much as 70% off, making it a great time to grab your favorites.
Popular Variations and Ideas
Halloween nail art offers a fantastic canvas for creativity, and there are plenty of popular variations to try that can elevate your spider web design.
If you like a classic look, go for Classic Accent Webs! Using black and white polish, these DIY spider web nails are simple and effective, perfect for beginners. For those looking to achieve a polished finish, using a nourishing styling cream can give your nails a healthy sheen, much like how best men's hair styling creams enhance hair texture.
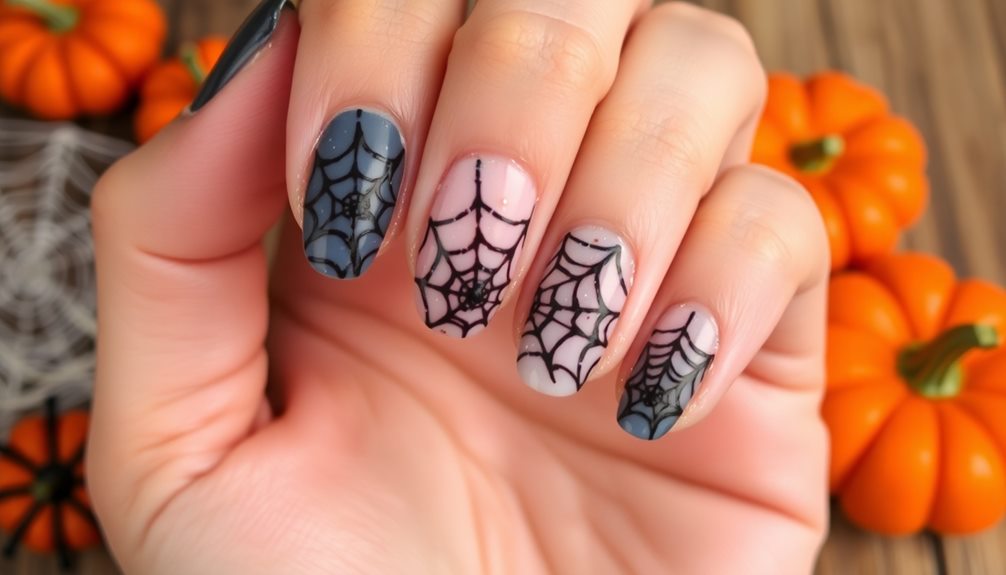
Want something a little more elegant? Try Negative Space Spider Web Frenchies. With a nude-pink base, these designs look subtle yet stylish, making your nails stand out without screaming Halloween!
For those who want to be bold, Creepy Crawly Web Nails feature hyper-realistic spiders that add a thrilling twist to your nail game. If you enjoy comic styles, the Amazing Spider-Web Nails are just for you. They showcase playful, round spiders and stitched patches, giving your nails a fun, cartoonish vibe!
Finally, for a touch of glamour, consider Shimmering Spider Webs. These designs feature glittery webs over neutral white nails, perfect for sophisticated Halloween gatherings.
With so many variations, you'll have a blast creating your unique spider web nail art this Halloween!
Tips and Tricks

To achieve stunning spider web nails, start by prepping your canvas with a solid foundation. Apply two coats of a black nail polish, like OPI – Never Have Too Mani Friends, to give your nails depth and opacity.
Once your base is dry, grab a fine-lining brush and white acrylic paint to carefully draw intricate spider webs. Engaging in creative activities like nail art can enhance fine motor skills, similar to how balance bikes and scooters help develop coordination and balance.
Don't worry if it's not perfect; it adds character!
For a playful touch, why not incorporate tiny spiders into your nail art? Use black and red acrylic paint to make them pop! You can create little spiders that seem to crawl across your nails, adding a fun, spooky vibe to your look.
Once you've finished your masterpiece, seal the design with a glossy top coat. This not only enhances the visual appeal but also protects your artwork, ensuring it lasts longer.
Lastly, experiment with different nail shapes, like stiletto or almond, for a trendy Halloween-themed look that perfectly complements your spider nail design.
With these tips and tricks, you're all set to impress everyone with your creative Halloween nails! Happy painting!
Care and Maintenance
After creating your stunning spider web nails, it's important to focus on care and maintenance to keep them looking fresh. Start by applying a quality top coat every few days. This helps preserve the glossy finish and prevents chipping, so your intricate design stays fabulous!
Be careful to avoid exposure to harsh chemicals, like those found in cleaning products. These can ruin your nail art faster than you can say "Boo!"
To keep your nails happy and healthy, regularly apply cuticle oil. This keeps them hydrated, preventing dryness and brittleness, and ensures your spider web design lasts longer.
If you've opted for press-on nails, gently remove them by soaking your fingers in warm water. This way, you'll avoid any damage to your natural nails or the dazzling design you've created.
Lastly, remember to store your nail art tools and polishes in a cool, dry place. This helps maintain their quality, so you'll be ready for your next fun design!
With these simple steps, you'll keep your spider web nails looking spooktacular throughout Halloween and beyond!
Common Mistakes to Avoid
When crafting your spider web nails, avoiding common mistakes can make all the difference in achieving a stunning look.
First things first, always apply a base coat! This magical layer not only keeps your nails from staining, but it also makes your design last longer.
Next, when you start painting your spider webs, remember to use thin strokes with a fine-lining brush. Thick layers can smudge and turn your beautiful webs into a messy tangle, and we definitely don't want that!
When adding glitter or other shiny bits, think sparingly. Too much sparkle can take away from the detailed web design. Stick with just a touch to keep things balanced and classy.
Also, have fun experimenting with different base colors! While black and white are classic, a fun color can really make your web pop without stealing the show.
Frequently Asked Questions
What Materials Do I Need for Spider Web Nail Design?
To create a spider web nail design, you'll need black nail polish, a clear top coat, a thin nail art brush or toothpick, and optional glitter for added flair. Gather these materials before you start!
How Long Does Spider Web Nail Art Typically Last?
Typically, nail art lasts about one to two weeks, depending on your daily activities and how well you care for your nails. Regular touch-ups or a top coat can extend the design's lifespan.
Can I Use Gel Polish for Spider Web Designs?
Yes, you can definitely use gel polish for spider web designs! It adheres well and provides a glossy finish. Just make sure to cure each layer properly to ensure your design lasts longer. Enjoy creating!
Is Spider Web Nail Art Suitable for Beginners?
Absolutely! Spider web nail art is perfect for beginners. You can easily achieve the look with a thin brush or nail art pen. Just practice a bit, and you'll create stunning designs in no time!
Are There Any Specific Color Combinations for Spider Web Nails?
When choosing colors for spider web nails, you can't go wrong with classic black and white. For a twist, try deep purple and silver or orange and black. It'll make your design pop beautifully!
Conclusion
Now that you know how to create a spooky spider web nail design, it's time to unleash your creativity! With so many fun variations and tips to try, you'll be the star of any Halloween party. Remember to take care of your nails, and avoid those common mistakes, so your designs stay looking fabulous. So grab your nail polish, channel your inner artist, and let's make this Halloween the best one yet—because who wouldn't want a little nail magic?