If you're looking for a natural bronze, DIY self-tanning formulations are the way to go. You can use ingredients like cocoa powder, coffee grounds, and beet juice to create a safe and effective self-tanner that nourishes your skin. To guarantee even application, always exfoliate beforehand and use gloves to avoid staining your hands. Experiment with different recipes, like cocoa and olive oil mixes or coffee-infused coconut oil, to achieve the perfect shade. These natural options not only give you that sun-kissed glow but also benefit your skin. Stick around to discover more tips and tricks for your homemade concoctions!
Key Takeaways
- Use natural ingredients like cocoa powder, coffee grounds, and beet juice to create effective DIY self-tanners that nourish the skin.
- Exfoliate your skin 24 hours prior to application to ensure an even and smooth tanning experience.
- Apply self-tanner in circular motions using gloves or a mitt for controlled and streak-free coverage.
- Layer the tanner gradually, allowing each layer to dry for 10-15 minutes to achieve your desired intensity.
- Store homemade self-tanners in a cool, dark place and reapply every 5-7 days for optimal results.
Commercial Self-Tanners Overview
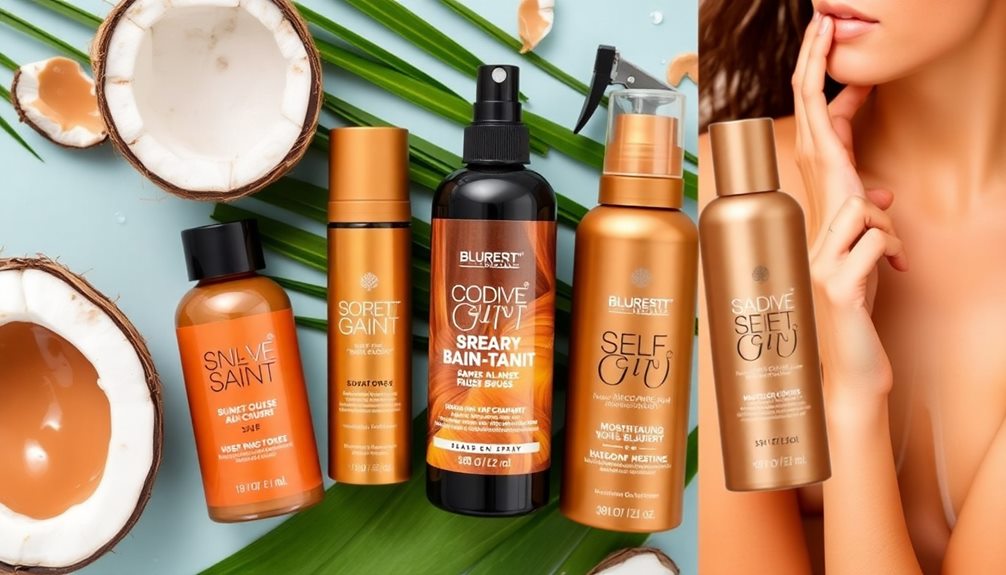
When it comes to achieving a sun-kissed glow, commercial self-tanners have become a popular choice. These products typically contain dihydroxyacetone (DHA), a chemical that reacts with your skin's amino acids to create a tanned appearance. However, many users experience adverse effects like rashes and dizziness, raising concerns about their safety.
The unpleasant smells and messiness associated with traditional self-tanners also contribute to dissatisfaction, prompting a shift toward natural alternatives. Additionally, just as moderation is key in dietary choices, it's crucial to evaluate the ingredients in self-tanners and their potential impacts on skin health, similar to how butter's health implications can affect overall well-being.
Despite the seasonal demand for that coveted tanned look after winter, there's a growing trend embracing natural skin tones. The FDA has noted adverse events linked to self-tanning products, which pushes consumers to seek safer options.
As tanning beds decline in popularity, more people are looking for self-tanners that avoid harmful chemicals. In your search for the perfect self-tanner, contemplate exploring natural products that prioritize skin care without the risks associated with commercial options.
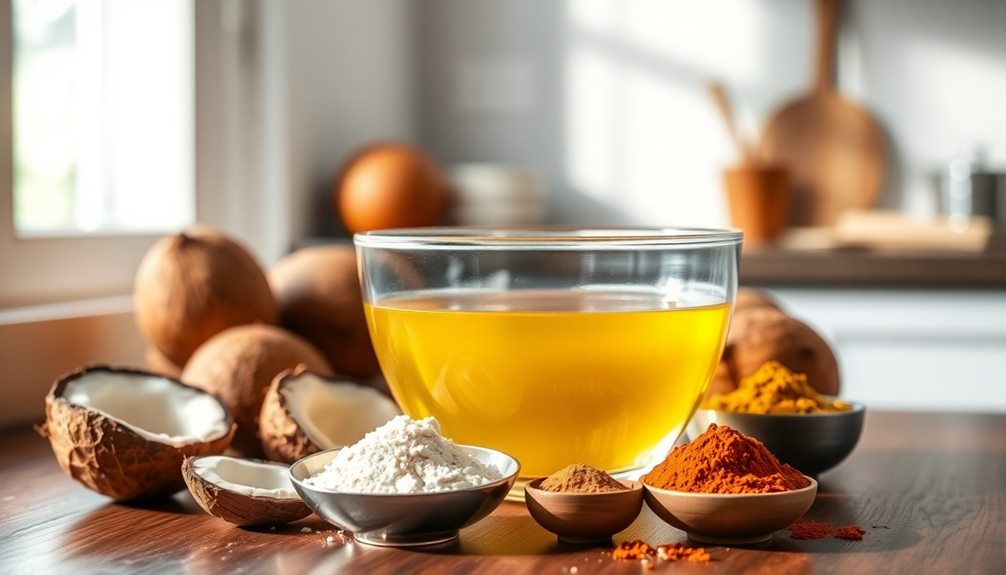
DIY Self-Tanner Ingredients

When it comes to DIY self-tanner ingredients, you'll find a range of natural options that not only enhance your color but also nourish your skin.
Incorporating ingredients like aloe vera can also provide additional hydration and soothe the skin, ensuring a radiant finish.
From cocoa powder for a bronzed glow to olive oil for hydration, you can customize your blend to suit your needs.
For those looking for tips on maintaining that glow, consider effective hydration techniques.
Let's explore essential ingredients and how to effectively apply them for the best results.
Essential Ingredients Overview
Creating your own self-tanner can be a fun and rewarding experience, especially when you know the essential ingredients that deliver a natural glow. To start, cocoa powder is a fantastic choice, providing a bronzing effect that works well when mixed with olive oil for smooth application.
Additionally, incorporating essential oils can't only enhance the scent but also provide natural antibacterial properties that benefit your skin. Coffee grounds not only enhance color but also offer exfoliation, ensuring an even tan.
If you're looking to add a touch of reddish tint, beet juice mimics that sun-kissed look beautifully. Combine it with aloe vera gel to soothe your skin while promoting an even spread.
Brewed black tea serves as an excellent base for your self-tanner, bringing antioxidant properties and a subtle glow when mixed with lotion or olive oil.
Lastly, don't forget about essential oils! They can personalize your DIY self-tanner's scent, but remember to limit them to 0.5% of your total formula to maintain skin safety.
With these essential ingredients, you'll be well on your way to creating a self-tanner that not only looks great but feels great on your skin, too.
Recipe Variations and Customization
How can you customize your DIY self-tanner to suit your skin's unique needs? With a few simple ingredients, you can create a self-tanning lotion that perfectly matches your desired shade and skin type. Here are some recipe variations you might consider:
| Recipe Name | Main Ingredients | Benefits |
|---|---|---|
| Cocoa Powder Mix | Cocoa powder, olive oil, water | Natural bronzing effect |
| Coffee Infusion | Brewed coffee, melted coconut oil | Rich tan + exfoliation |
| Beet Juice Blend | Beet juice, aloe vera gel | Hydrating with a reddish tint |
| Tea-Based Tanner | Brewed black tea, olive oil | Subtle glow + antioxidant benefits |
| Coconut Oil Formula | Melted coconut oil, cocoa powder | Moisturizing + rich color |
Experiment with these combinations to create your ideal bronzing lotion. For instance, if you love the moisturizing properties of coconut oil, try blending it with cocoa powder for a luxurious formula. Remember, customization is key! Adjusting these recipes allows you to achieve the perfect balance of hydration and color, ensuring your tanner is uniquely yours.
Application Techniques and Tips
Achieving a flawless tan with your DIY self-tanner requires attention to a few key application techniques.
First, always perform a patch test on a small area of your skin to prevent any adverse reactions. This step is vital for guaranteeing your skin tolerates the sunless tanner.
Next, exfoliate your skin thoroughly before application. A smooth surface helps achieve a more even and natural-looking tan.
Use gloves or a mitt during the application to avoid staining your hands and to guarantee better control over the product distribution.
When applying the tanner, use circular motions for even coverage, focusing on areas that typically tan more, like your arms and legs. This will help you avoid streaks and guarantee a uniform appearance.
After application, allow the self-tanner to fully dry before getting dressed, as this prevents any transfer or streaking on your clothes.
For best results, consider waiting a few hours before showering to let the tanner develop fully.
Application Techniques

To get the best results from your DIY self-tanner, start by exfoliating your skin thoroughly; this creates a smooth surface for even application.
If you want a deeper shade, consider layering the self-tanner, applying additional coats as needed.
Exfoliation for Even Application
Exfoliation is key for a flawless self-tanning experience. By exfoliating your skin before applying self-tanner, you remove dead skin cells, ensuring a smoother surface for even application. This step helps to prevent patchiness, especially in areas prone to dry skin.
It’s best to use a gentle exfoliant about 24 hours before your tanning session. This gives your skin time to recover and achieve ideal results. Pay extra attention to elbows, knees, and ankles, as these areas can absorb more product and lead to uneven color. Some other optimal skin preparation methods for a tanning session include moisturizing regularly in the days leading up to your appointment and making sure to shave or wax at least 24 hours before. This will help ensure that the tanning solution goes on smoothly and evenly, resulting in a flawless tan. Additionally, avoiding any harsh chemical peels or treatments in the days prior to tanning can also result in better absorption and color distribution.
Using a moisturizing scrub can enhance exfoliation while hydrating your skin, ultimately helping you achieve a more natural tan. Regular exfoliation not only improves your self-tanning results but also maintains a consistent tan by preventing buildup and allowing for even fading over time.
| Exfoliating Tips | Benefits |
|---|---|
| Use a gentle scrub | Removes dead skin cells |
| Focus on dry areas | Prevents uneven color |
| Exfoliate 24 hours prior | Allows skin recovery |
Layering for Desired Intensity
After prepping your skin with a good exfoliation, you can start layering your DIY self-tanner to achieve the desired intensity.
Begin with a light application of your tanning lotion, using a spray bottle or mitt. This initial layer should be subtle, allowing you to gauge the color. Wait for about 10-15 minutes for the first layer to dry completely before applying additional layers. This step is essential to avoid streaks and guarantee even absorption, thanks to the dihydroxyacetone (DHA) in your formulation.
Once the first layer is dry, assess the color and decide if you want a deeper tan. If so, apply another layer every few hours, building up the intensity gradually.
It's wise to test the intensity on a small, inconspicuous area first to fine-tune your technique for future applications. Remember, skin health is critical, so take care not to overload your skin with too many layers too quickly.
Always allow each layer to dry fully before dressing to prevent transfer and maintain that flawless finish. With patience and proper technique, you'll achieve the perfect natural bronze!
Effectiveness and Longevity

Achieving a sun-kissed glow with DIY self-tanners can be both satisfying and effective, but understanding their longevity is essential for maintaining that bronzed look. Typically, these formulations provide visible results lasting several days, though their effectiveness can diminish after showers due to their non-waterproof nature.
To keep your self-tanner fresh, remember the shelf life of homemade products is usually 1-2 weeks, influenced by perishable ingredients like brewed tea. Regular reapplication every 5-7 days is recommended to sustain your desired bronzing effect, as the tan fades over time. Proper storage in a cool, dark place can help preserve your DIY tanning solutions.
Here's a breakdown of factors affecting effectiveness and longevity:
| Factor | Impact |
|---|---|
| Showering Frequency | Reduces tan duration |
| Ingredient Concentration | Adjusts darkness of tan |
| Refrigeration | Extends shelf life |
| Storage Conditions | Maintains effectiveness |
| Reapplication Schedule | guarantees continuous bronzing |
User Experiences

Many users have found DIY self-tanners to be a game changer, often praising the pleasant aromas of natural ingredients over the chemical scents of commercial alternatives.
When using a lotion bar recipe, you can create a unique tanning experience that smells great and feels even better on your skin. Many individuals rave about the natural bronzing effects of black tea, which provides a subtle tint without harmful chemicals.
Incorporating coffee grounds into your formulations not only enhances color but also aids in exfoliation, ensuring a smoother application. Users love the customization options available, allowing you to adjust ingredients to suit your specific skin tone and desired intensity.
This level of personalization is one of the most appreciated aspects of DIY tanning.
Community discussions reveal a collaborative spirit, where you can share tips and recipe modifications to boost overall effectiveness and satisfaction.
Whether you're experimenting with an essential oil blend or a new lotion bar recipe, the feedback from other DIY enthusiasts provides valuable insights.
Ultimately, these shared experiences can help you achieve that perfect, natural glow.
Bronzing Lotion Bars

Bronzing lotion bars offer a fantastic way to achieve a sun-kissed glow while nourishing your skin. These solid skincare products blend natural ingredients, like coffee-infused oil and coconut oil, providing a subtle bronzing effect along with deep hydration.
You can easily customize your bronzing lotion bars by adding mica powder for that extra shimmer, making them an eco-friendly alternative to conventional self-tanners that often contain harmful chemicals like DHA.
Preparing your bronzing lotion bars is straightforward. Just melt the ingredients using a double boiler method to guarantee everything combines well for an even application.
Once you've made your bars, it's imperative to store them in a cool place to prevent melting and maintain their consistency for several weeks.
While many users appreciate the moisturizing benefits and the bronzing effect, some have expressed concerns about the scent from the coffee and coconut oil, as well as the longevity of the results.
Experiment with your formulations to find the right balance that works for you. With bronzing lotion bars, you can achieve that radiant glow without the worries of harsh chemicals.
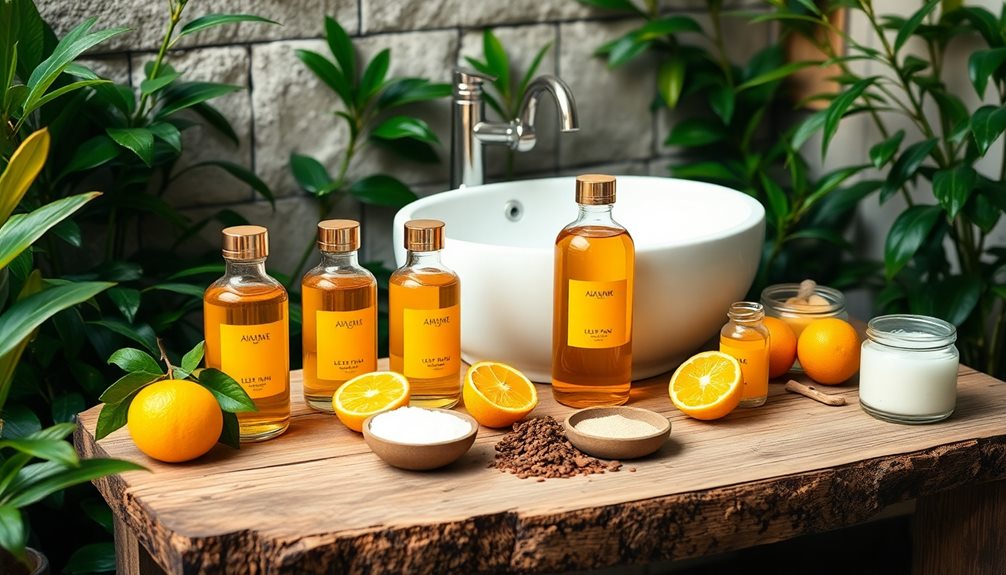
Infusing Coconut Oil
Infusing coconut oil with coffee creates a rich, aromatic base that enhances your DIY self-tanner formulations. This infusion not only provides a hydrating element but also delivers a subtle bronzing effect that many users love.
To get started, follow these simple steps:
- Combine 2 cups of coconut oil with 1 cup of finely ground coffee in a double boiler.
- Simmer the mixture on low heat for several hours until the oil darkens.
- Strain the mixture using cheesecloth or a clean cloth to remove the coffee grounds.
- Store the infused oil in a glass container in a cool, dark place.
This coffee-infused coconut oil is perfect for your self-tanner, ensuring a smooth application and even color.
Remember, you can always experiment with different ratios of coffee to coconut oil or even add essential oils for additional fragrance and skin benefits.
By infusing your coconut oil, you're creating a personalized product that not only enhances your bronzing effect but also nourishes your skin.
Enjoy the process and embrace your natural glow!
Customization Tips
Customizing your DIY self-tanner can elevate your tanning experience and help you achieve the perfect shade. Here are some handy customization tips to get you started:
| Customization Element | Tips |
|---|---|
| Color Depth | Steep black tea or coffee longer for a darker color, or increase cocoa powder for a richer hue. |
| Carrier Oils | Use jojoba or almond oil for hydration, adjusting the amount based on your skin type. |
| Natural Colorants | Add a small amount of beet juice or bronze mica for a unique tint that complements your skin tone. |
| Scenting | Mix in a few drops of essential oils like lavender or citrus, keeping it under 0.5% of the total mixture. |
If you have sensitive skin, always test a small amount on a patch before applying it all over. Adjust ingredient ratios as necessary to minimize irritation. With these tips, you can create a tailored self-tanner that enhances your natural glow while keeping your skin nourished!
Community Support and Feedback

In the vibrant DIY self-tanning community, members share their experiences and insights, making it easier for you to find the best formulations for your skin tone.
This collaborative environment fosters a spirit of community support, where feedback is integral to refining your self-tanning techniques. You can learn from others who've encountered similar challenges, exchanging tips and tricks to achieve that perfect, streak-free glow.
Here are some ways the community enhances your DIY self-tanning journey:
- Ingredient Insights: Discover which natural ingredients work best for different skin tones and sensitivities.
- Application Tips: Get advice on overcoming common application challenges and achieving even coverage.
- Success Stories: Read about others' experiences with homemade tanners and their skin-friendly benefits.
- Recipe Sharing: Find and share unique formulations that have yielded fantastic results for various skin types.
Frequently Asked Questions
How to Make Self Tanner With Bronzer?
To make a self-tanner with bronzer, brew black tea for a natural tint, mix in bronze mica powder, add aloe vera and a carrier oil, and customize the color depth to suit your skin tone.
How Do You Make Bronze Lotion?
Ever wondered how to create your own bronze lotion? Start by brewing black tea, mix it with a carrier oil and aloe vera, add bronze mica and vitamin E, then store it properly for best results.
What Are the Incompatibilities of Dihydroxyacetone?
When using dihydroxyacetone (DHA), you should avoid combining it with proteins, nitrogen-containing ingredients, or oxidizers. Maintaining a pH between 4-6 is vital to guarantee its effectiveness and prevent degradation.
How Can I Make Myself Tanner Naturally?
You can make a natural self-tanner by mixing brewed black tea or coffee with olive oil for moisture. For a deeper shade, try cocoa powder mixed with water and olive oil for a smooth application.
Conclusion
In the world of sun-kissed skin, crafting your own self-tanner opens a domain of radiant possibilities. Embrace the artistry of DIY formulations, where each ingredient dances together to create your perfect glow. With just a sprinkle of creativity and a dash of care, you can achieve that coveted bronze without stepping into the sun’s embrace. So go ahead, indulge in the joy of a personalized tanning experience, and let your skin shine with the warmth of your own creation. Explore the endless sunkissed bronzer options at your fingertips, from coconut oil-infused blends to nourishing aloe vera-based formulas. With a few simple steps, you can customize the intensity and tone of your tan, ensuring it perfectly complements your unique complexion. Whether you prefer a subtle glow or a deep, golden hue, the world of DIY self-tanner is yours to explore and enjoy.