Connect with us

Beauty Tips and Information

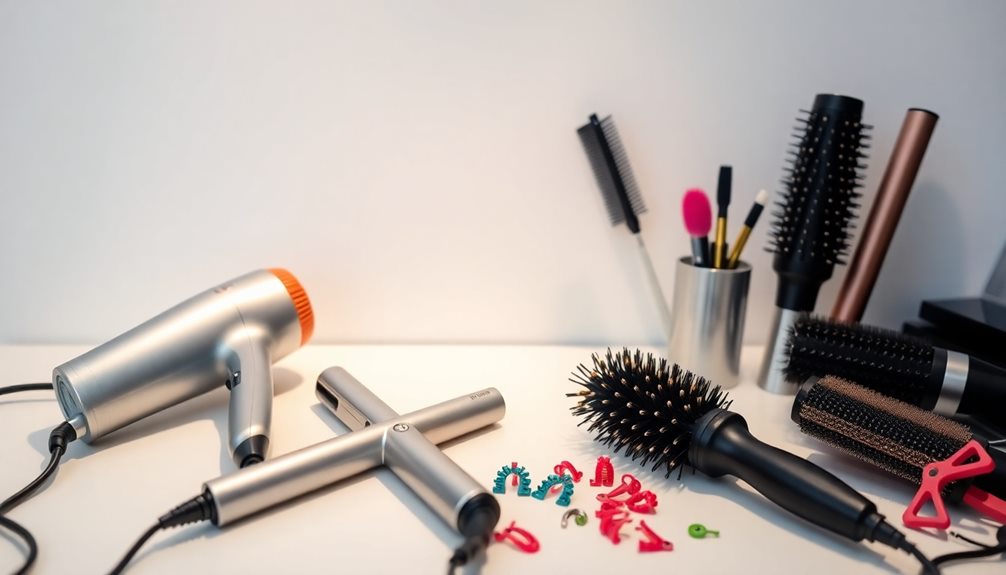
Professional Styling Arsenal: Top Hair Tools

Learn about essential hair tools to elevate your styling game, and uncover even more must-haves that will transform your hair routine!

Published

on

essential hair styling tools

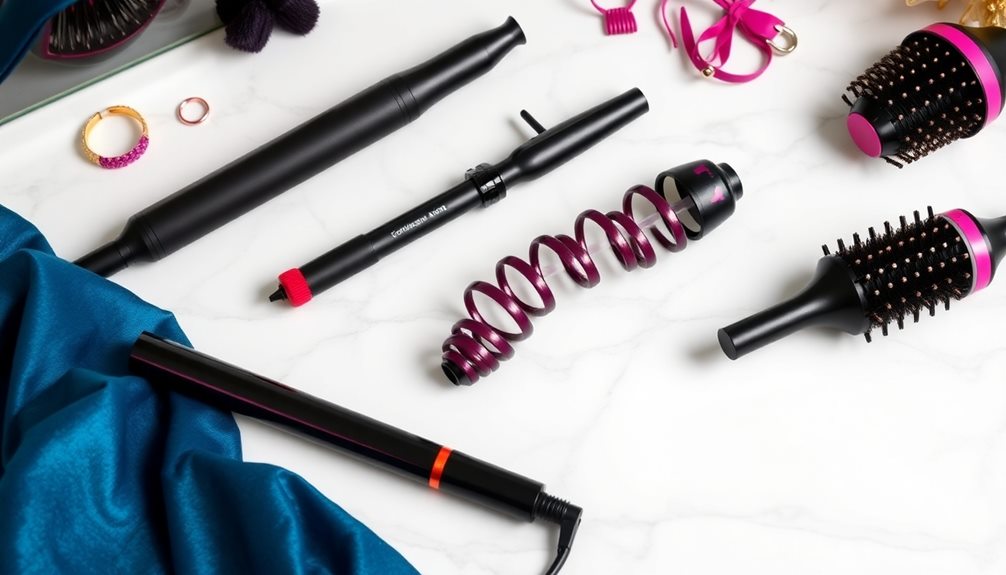
To build your professional styling arsenal, you need essential tools that deliver results. Start with a quality hair dryer like the Revlon One-Step Volumizer for quick drying and volume. Invest in versatile curling devices such as the Amika Chameleon or the CHI Spin N Curl for effortless, beautiful curls. Don't forget advanced flat irons with infrared technology for sleek styles and styling brushes for quick, salon-quality looks. Always use heat protectants to keep your hair healthy. With the right tools in hand, you can access endless styling possibilities; stick around to discover even more must-haves for your collection!

Key Takeaways

  • A quality hair dryer, like the Revlon One-Step Volumizer, is essential for efficient drying and styling, offering volume in less time.
  • Innovative curling devices, such as the Amika Chameleon, provide customizable styles with multiple temperature settings to minimize heat damage.
  • Advanced flat irons with ceramic plates and infrared technology ensure even heat distribution, promoting healthier styling and enhancing shine.
  • Styling brushes, like the T3 Edge Heated Brush, combine drying and styling for salon-quality results, ideal for achieving sleek, voluminous hair.
  • Don't forget protective styling products, such as heat protectant sprays, which shield hair from damage and enhance shine during the styling process.

Essential Blow-Dry Tools
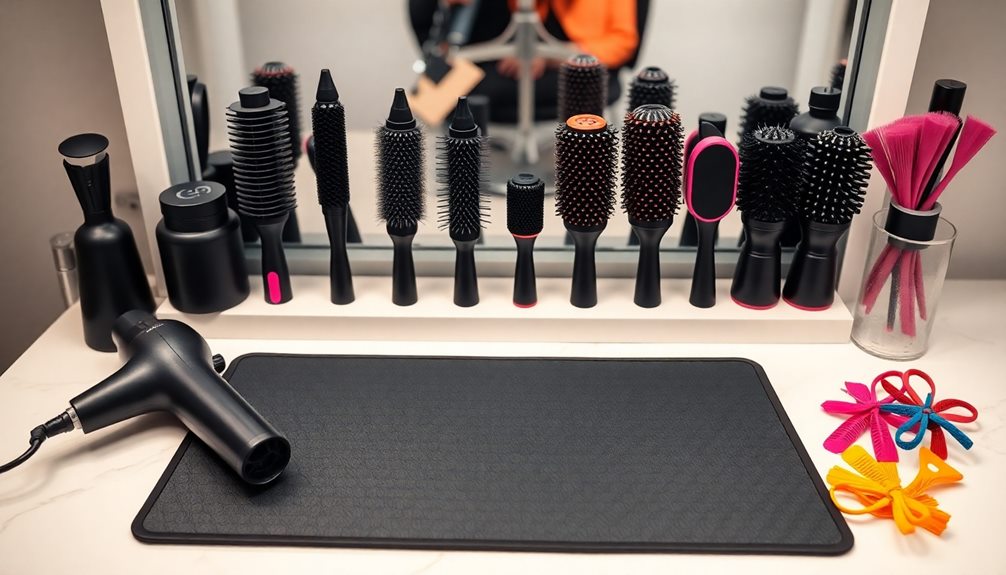
must have blow dry equipment

When it comes to blow-drying your hair, having the right tools can make all the difference. A quality hair dryer is essential, and options like the Revlon One-Step Volumizer can simplify your routine. Priced at $72, this tool combines a dryer and brush, making it easy to volumize all hair types in about 20 minutes.

For those looking to enhance their styling with natural products, consider incorporating best natural hair styling products for added shine and health benefits. If you're looking for versatility, the Dyson AirWrap is a fantastic choice. At $599.99, it offers six-in-one functionality, using hot air to dry and style while minimizing heat damage.

For a polished finish, consider the Shark Flex Style Hair Drying System, which is priced at $357.97. It reduces frizz and smooths hair effortlessly with its auto-wrap curlers and brushes.

If you're on a budget, the Shark SmoothStyle Hair Dryer Brush is under $100 and designed to volumize and smooth hair while preventing overheating, markedly cutting down drying time.

Don't forget to prep your hair with Kitsch Microfiber Hair Towels, which absorb water five times faster than regular towels. They enhance the blow-drying experience by reducing drying time and being gentle on your hair.

Advertisement

Versatile Curling Devices

flexible hair styling tools

When you're looking to achieve the perfect curls, versatile curling devices are key.

These tools feature innovative technologies and user-friendly designs that cater to every hair type and style preference. Incorporating glycolic acid for scalp care can also enhance your styling routine by promoting a healthy scalp environment.

Whether you want tight ringlets or loose beach waves, there's a curling device that can help you create your desired look effortlessly.

Innovative Curling Technologies

A variety of innovative curling technologies have transformed the way you can style your hair, making it easier than ever to achieve beautiful curls at home.

The Amika The Chameleon offers a 5 Barrel Interchangeable Curling Kit with digital heat settings from 250°F to 450°F, enabling you to create various styles tailored to your hair type. If you're in a rush, the Harry Josh Pro Tools Cordless Ceramic Curling Wand heats up to 400°F in just one minute and provides the convenience of a cordless design for quick styling.

Additionally, many users appreciate how these tools contribute to healthy hair practices by minimizing damage during styling.

Advertisement

For those who prefer an automatic approach, the Beachwaver Co. Rotating Curling Iron features an automatic spinning function and three simplified heat settings, enhancing your overall experience.

The Clamp-Free Curling Wand is another fantastic option, designed to prevent creases while creating loose, beachy waves with its lightweight, quick-heating design.

Lastly, the CHI Spin N Curl takes user-friendliness up a notch, drawing hair into its heating chamber for consistent curls with pre-set temperatures suitable for different hair types.

These innovative curling technologies guarantee you achieve salon-quality results right at home.

User-Friendly Design Features

Innovative curling tools don't just focus on performance; they also prioritize user-friendly design features that make styling easier and more enjoyable.

Advertisement

With the right curling devices, you'll find yourself achieving stunning results without the hassle.

Here are some standout features to look for:

  • Multiple Temperature Settings: Tailor the heat to your hair type, minimizing heat damage.
  • Cordless Design: Enjoy easy maneuverability, allowing you to style anywhere without tangled cords.
  • Automatic Spinning: Devices like the Beachwaver Co. Rotating Curling Iron effortlessly create consistent curls without the need for clamps.
  • Safety Features: Look for tools with auto shut-off and cool tips, enhancing your safety while styling.
  • Pre-set Options: Curling tools like the Chi Spin N Curl come with pre-set temperature options for different hair textures, ensuring ideal styling results.

These user-friendly design features not only make curling irons and wands easy to use but also enhance your overall styling experience.

Whether you're a beginner or a pro, investing in versatile curling devices with these elements can elevate your hair game to new heights.

Versatility for All Styles

Versatility in curling devices means you can effortlessly switch between styles, whether you're aiming for tight ringlets or loose beachy waves. With advanced styling tools like hybrid curling irons, you can enjoy the benefits of both spring-style clamps and rotating barrels, allowing you to create a variety of curl styles with ease.

Consider the Amika The Chameleon 5 Barrel Interchangeable Curling Kit, which features multiple barrel sizes and digital heat settings ranging from 250°F to 450°F, catering to all hair types.

Advertisement

If you're always on the go, the Harry Josh Pro Tools Cordless Ceramic Curling Wand heats up to 400°F in just one minute, providing freedom for quick touch-ups.

For those who prefer a user-friendly option, the Beachwaver Co. Rotating Curling Iron automatically rotates in both directions and offers three simplified heat settings, making it perfect for anyone with limited styling experience.

Plus, clamp-free curling wands prevent creases, allowing you to achieve that effortless, beachy look without compromising hair integrity. With these versatile professional tools, you'll have everything you need for any occasion.

Advanced Flat Irons

high tech hair styling tools

When you're looking to elevate your hair styling routine, advanced flat irons offer cutting-edge technology and features that cater to your specific needs.

These tools not only straighten but also improve the overall health of your hair. With infrared technology, they provide a more gentle heat, ensuring healthy styling while enhancing shine.

Here are some key features to take into account:

Advertisement
  • Digital heat settings: Choose from a range of temperatures for precise styling.
  • Ceramic plates: Benefit from even heat distribution that minimizes damage.
  • Quick heating capabilities: Get ready in no time with flat irons that heat up fast.
  • Versatile curl styles: Use advanced flat irons to create beachy waves or sleek looks.
  • Temperature settings: Adjust according to your hair type for ideal results.

Think about options like the Master Infrared Black Titanium Flat Iron, which offers a temperature range of 280°F to 450°F, or the Olivia Garden Ceramic + Ion Flat Iron with its 11 temperature settings.

Investing in an advanced flat iron can truly transform your styling game and promote healthier hair.

Innovative Styling Brushes
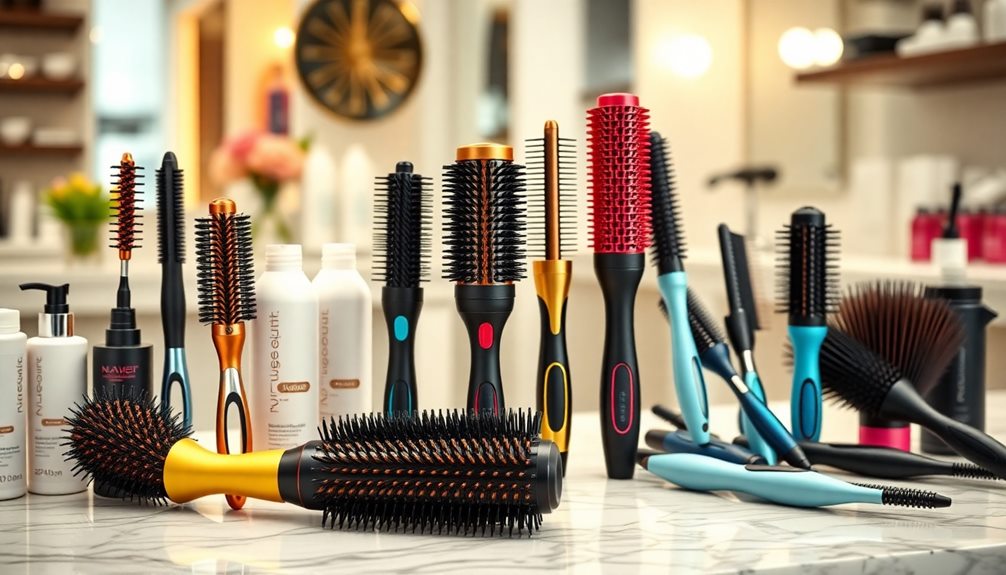
revolutionary hair styling tools

Styling brushes have revolutionized the way you can achieve salon-quality looks at home. These innovative tools combine the functions of drying and styling, allowing you to create sleek, voluminous hair quickly. A styling brush is not just a regular brush; it incorporates advanced hair styling techniques such as ionic technology and ceramic heating to achieve smooth and frizz-free results. With these innovative features, you can effortlessly achieve professional-looking hairstyles without having to spend hours at the salon. Whether you want to straighten, curl, or add volume to your hair, a styling brush can help you achieve your desired look with ease.

The T3 Edge Heated Smoothing & Styling Brush, for example, utilizes T3 Rapid HeatIQ technology for even heat distribution, making it beginner-friendly for achieving smooth styles, though it's not ideal for curly or coily hair.

Another popular option is the Revlon One-Step Volumizer Hair Dryer, which has garnered over 5,000 positive reviews for its ability to deliver impressive volume effortlessly.

If you're looking to enhance volume and shape, the Mane It's Giving Body Medium Hot Thermal Round Brush is designed for quick heating, though it may not suit thicker hair types.

Flat iron brushes like the GHD Duet Style 2-in-1 Hot Air Styler provide dual functionality, allowing you to dry and style simultaneously, perfect for busy schedules.

Advertisement

Hair Drying Accessories

essential hair care tools

When it comes to drying your hair efficiently, understanding essential blow dryer features is key.

You'll want to explore the best attachments for curling to enhance your styling routine.

With the right tools, you can reduce heat damage while achieving fabulous results.

Essential Blow Dryer Features

A high-quality blow dryer can be the game changer in your hair care routine, transforming damp strands into a sleek style in minutes.

To guarantee you get the most out of your blow dryer, it's important to look for certain features that cater to your specific hair needs.

Here are some crucial blow dryer features to take into account:

Advertisement
  • Heat and Speed Settings: Multiple options allow you to customize drying experiences for different hair types.
  • Cool Shot Button: This feature seals styles and enhances shine, giving you that professional finish.
  • Infrared Heat: Advanced technologies like infrared heat minimize heat damage by evenly distributing warmth, promoting healthier hair.
  • Lightweight Designs: A lighter blow dryer reduces fatigue, making it easier to handle during extended use.
  • Ergonomic Handles: These improve maneuverability and comfort, allowing for a more pleasant drying experience.

Investing in a blow dryer with these features guarantees you achieve salon-worthy results while keeping your hair healthy and looking fabulous.

Best Attachments for Curling

Curling your hair often becomes a breeze with the right attachments for your blow dryer. The key tools can make all the difference in achieving your desired style while minimizing frizz.

A diffuser is essential for enhancing curl definition, as it distributes heat evenly and reduces frizz. Look for options like the Xtava Hair Diffuser, which features 90 air vents for ideal airflow.

If you're aiming for a sleek, polished look, consider using a concentrator nozzle. This attachment directs focused heat onto specific sections of hair, allowing for precision styling and faster drying times.

For added versatility, a hot air brush with brush attachments can combine drying and styling in one step, giving you volume and smoothness without extra tools.

Additionally, comb attachments can help detangle your hair while you dry it, making the process gentler and more efficient.

Advertisement

Protective Styling Products

hair care essentials guide

Protective styling products are essential for maintaining healthy hair, especially when using heat tools. These products, like heat protectant sprays, play a vital role in shielding hair from damage caused by high temperatures. They form a barrier that minimizes heat exposure, ensuring your hair stays strong and vibrant no matter your styling choice.

Here are some key benefits of using protective styling products:

  • Suitable for all hair types and textures
  • Provides ideal protection against heat damage
  • Enhances shine and smoothness for a polished look
  • Includes various formulas, such as creams and oils
  • Easy application; just apply heat protectant to damp hair

Must-Have Hair Care Tools
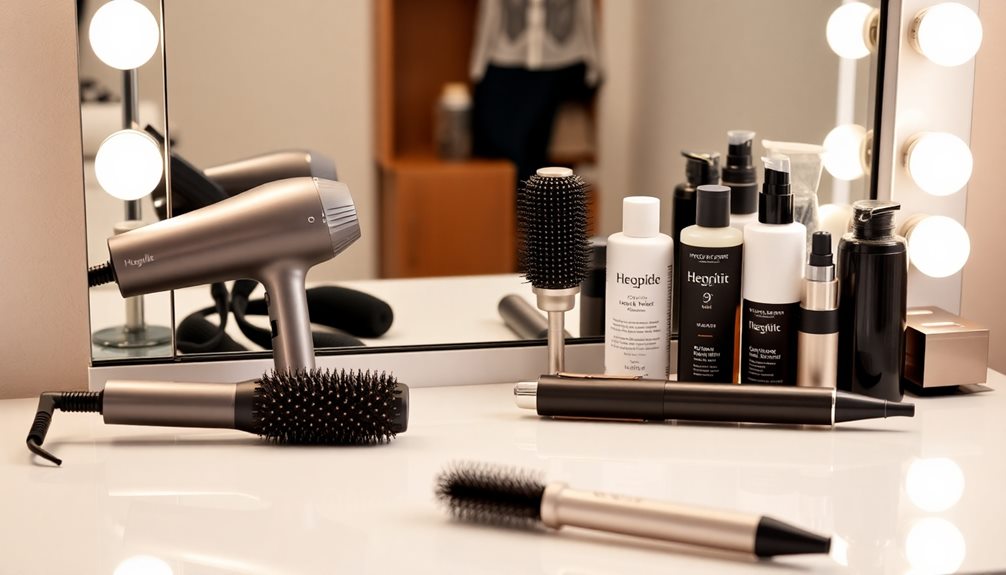
essential hair styling tools

When it comes to achieving your desired hairstyle, having the right hair care tools can make all the difference. A good hair dryer is essential; the Revlon One-Step Volumizer Hair Dryer is a user-friendly tool that helps you achieve volume quickly and efficiently.

If you have curly hair, the PATTERN Blow Dryer is highly versatile, featuring multiple attachments to promote healthy hair while you style.

For those who want to dry and style simultaneously, consider the GHD Duet Style 2-in-1 Hot Air Styler. Keep in mind, though, it may require longer styling times for thicker hair.

If you're looking for quick styling options, the Harry Josh Pro Tools Cordless Ceramic Curling Wand heats up to 400°F in just one minute, making it a powerful choice.

Don't forget the importance of heat protectants. These sprays create a barrier between your hair and high-temperature styling tools, preventing damage and enhancing shine.

Advertisement

Frequently Asked Questions

How Do I Choose the Right Heat Protectant for My Hair Type?

To choose the right heat protectant, identify your hair type first. If you have fine hair, opt for lightweight formulas. For thick or curly hair, select a more intense product to guarantee maximum protection against heat damage.

Can I Use Heat Styling Tools on Colored or Chemically Treated Hair?

Yes, you can use heat styling tools on colored or chemically treated hair, but you should always apply a heat protectant first. This helps minimize damage and keeps your hair looking vibrant and healthy.

What Is the Ideal Temperature for Flat Irons on Different Hair Types?

For flat irons, use lower temperatures around 250°F for fine hair, 350°F for medium hair, and 400°F for thick hair. Always start low, then adjust as needed to avoid damaging your hair.

How Often Should I Replace My Styling Tools for Optimal Performance?

You'd think styling tools last forever, right? But really, you should replace them every couple of years. Regularly check for wear and tear to guarantee your hair stays healthy and your styling routine remains effective.

Are There Travel-Size Versions of Professional Styling Tools Available?

Yes, there are travel-size versions of professional styling tools available. You'll find compact hair dryers, straighteners, and curling irons that fit easily in your luggage, ensuring you can maintain your style wherever you go.

Advertisement

Conclusion

As you explore your professional styling arsenal, you'll find that the right tools can transform your hair game. Coincidentally, the perfect blow-dryer might just be the key to achieving that salon-worthy look you've always wanted. With versatile curling devices and advanced flat irons at your fingertips, you're ready to unleash your imagination. Don't forget those protective styling products—they're essential for maintaining your hair's health. Embrace these must-haves, and watch your styling skills soar!

Advertisement

Nail Tips

Zebra Nail Designs: Fun and Fierce Patterns

Perfect your nail game with zebra designs that blend bold stripes and vibrant colors—discover tips to make your nails truly stand out!

Published

on

By

bold zebra nail art

Zebra nail designs are an awesome way to express your unique style and creativity! You can mix classic black and white stripes with vibrant colors or pastels for an extra splash of fun. Plus, these designs can totally match your mood, whether you're feeling fierce or elegant. To create the perfect stripes, use a thin brush and make sure your base color is dry first. Don't forget to seal your masterpiece with a clear top coat for added shine. If you're curious about more tips, tricks, and patterns that can make your nails really pop, there's plenty more to discover!

Key Takeaways

  • Zebra nail designs feature bold black and white stripes, making them visually striking and perfect for any season or occasion.
  • Personalize your zebra patterns by mixing vibrant colors or pastels, reflecting your unique style and creativity.
  • Incorporate playful elements, like dessert inspirations or accent nails, to add fun variations to your zebra nail art.
  • Use thin brushes for precise lines and ensure your base color is dry to avoid smudging during application.
  • Maintain your designs with regular touch-ups and a high-quality top coat to prevent chipping and fading.

Introduction

beginning of a discussion

Zebra nail designs offer a striking way to express your creativity and wild side with their bold black and white stripes. These fun patterns are a popular choice among nail art enthusiasts, and you can easily find them showcased across social media.

The cool thing about zebra print nails is how versatile they are; you can wear them in any season or for any occasion! To boost your visibility in the nail art niche, consider creating high-quality content that showcases unique designs and techniques.

Want to add a splash of color? You can mix in vibrant hues or even pastel shades to make your nails pop.

Creating zebra nail designs can be a blast, and there are different techniques you can try. You could use stamping for an easy application, or go for freehand painting if you're feeling adventurous! Nail tape can also help you achieve those clean lines.

No matter your skill level, there's a way for you to rock those bold stripes. Plus, you can combine zebra prints with other animal print nail art, making your designs even more exciting.

Advertisement

Expresses Individuality and Creativity

celebrating unique artistic expression

When you choose zebra nail designs, you're not just picking a trendy pattern; you're expressing your unique style and creativity. Zebra nail art is all about bold statements and fun animal prints that let your personality shine.

You can mix and match colors in countless combinations, making each design a reflection of who you are. Just like selecting the perfect best hair styling gels to enhance your look, you can choose nail colors that complement your outfit or mood. Whether you want something fierce and fabulous for a party or a chic, elegant look for a special occasion, these patterns adapt to fit any vibe.

Zebra prints can symbolize wildness and freedom, appealing to those who want to stand out in a crowd. Plus, with social media buzzing with creativity, sharing your unique style can inspire others and build a community of nail art lovers.

You can even experiment by combining zebra stripes with other patterns, unleashing your inner artist! In this playful world of zebra nail designs, every stroke of polish becomes a canvas for your personal expression.

Popular Variations and Ideas

trendy concepts and designs

You'll often find that zebra nail designs come in a variety of exciting variations, each offering a unique twist on the classic look. The classic black and white stripes are always a hit, making zebra print nails a perfect choice for any occasion.

For a fun and playful touch, consider incorporating elements from dessert inspirations, like the colorful sprinkles found in Birthday Cake Blondies, to add vibrancy to your nails. If you want to spice things up, try the Electric Zebra design, which features vibrant colors like pink and yellow, making your nails pop with energy!

For a softer touch, pastel zebra designs are trending, using gentle colors that look great with spring and summer outfits. They add a subtle flair while keeping your style fresh.

Advertisement

If you love mixing things up, consider accent nails! You can pair zebra stripes with other animal patterns, like leopard or giraffe, for a fun and playful effect.

Don't forget to explore creative techniques! Adding ombre effects or glitter to your zebra design can enhance its visual appeal and give your nails a modern twist.

With so many options, you can express your personality and creativity through zebra nail designs that truly stand out! Get ready to show off your unique style and have fun with these fabulous ideas!

Tips and Tricks

expert advice and strategies

Achieving the perfect zebra nail design requires a few handy tips and tricks to elevate your nail art game. First, make sure your base color is completely dry before adding zebra stripes. This prevents smudging and keeps your design looking sharp!

For a clean and professional look, use a thin nail art brush or even a toothpick for that precise application. You'll be amazed at how much easier it's to create those striking lines!

Don't shy away from exploring fun color combinations! Whether you go for pastels or neon shades, choose colors that reflect your personal style. You can even use different colors for accent nails to make your design pop!

Advertisement

Before you dive into the real deal, practice on a nail wheel or fake nails. This will help you refine your technique and boost your confidence.

Once you're happy with your zebra stripes, don't forget to finish with a clear top coat. It not only enhances shine but also prolongs the design's longevity.

With these tips and tricks, you'll be on your way to fabulous zebra nails that'll turn heads!

Care and Maintenance

regular upkeep and attention

To keep your zebra nail designs looking fresh and vibrant, regular care and maintenance are essential. You'll want to touch up your nails every 1-2 weeks to keep those bold colors and intricate patterns shining bright.

Applying a high-quality top coat is a secret weapon for extending the life of your designs. This magical layer helps prevent chipping and fading, making your nails the star of the show!

To keep your nails healthy, don't forget to avoid harsh chemicals in household cleaners. Wearing gloves during cleaning tasks can protect your fabulous designs.

Advertisement

Daily moisturizing of your cuticles and nails is super important, too! This keeps them from becoming dry and brittle, ensuring your zebra patterns look neat and well-maintained.

Scheduling professional manicures every 3-4 weeks is another great way to pamper your nails. Not only will you get precise application of new designs, but they'll also handle removal processes like pros.

With a little love and attention, your zebra nail art will always stand out, making you feel fun and fierce every day! So grab those tools and show your nails some care; they deserve it!

Common Mistakes to Avoid

avoiding common mistakes

Many nail enthusiasts overlook some common pitfalls when creating zebra nail designs. One big mistake isn't letting your base color dry completely before adding those fabulous zebra stripes. If you rush, you might end up with smudging, and nobody wants that!

It's also super important to remember to use a base coat. Skipping this step can weaken your nails and make them prone to chipping or discoloration.

When it comes to drawing your zebra patterns, make sure you use a thin brush or even a toothpick. A thick brush can create clumpy lines, ruining your design.

Advertisement

Plus, try not to overload your nails with too many colors. Sticking to three colors usually gives you the best results, keeping your nail art fun and fierce, not chaotic!

Lastly, don't forget to seal your masterpiece with a top coat! This step keeps your design shiny and prevents fading.

Frequently Asked Questions

Can Zebra Nail Designs Be Done at Home?

Yes, you can definitely do zebra nail designs at home! Grab some nail polish, a fine brush, and a steady hand. With a bit of practice, you'll create stunning patterns that showcase your unique style.

What Nail Polish Brands Work Best for Zebra Patterns?

When you're choosing nail polish brands for zebra patterns, opt for high-quality ones like OPI, Essie, or Sally Hansen. They offer great pigmentation and smooth application, making your zebra designs pop beautifully. You'll love the results!

How Long Do Zebra Nail Designs Typically Last?

Zebra nail designs typically last about a week or two, depending on your daily activities and how well you care for them. Regular maintenance and using a good topcoat can help extend their lifespan significantly.

Advertisement

Are Zebra Nails Suitable for All Occasions?

Zebra nails can definitely suit various occasions. You'll find they add a fun flair to casual outings, yet they might feel a bit bold for formal events. Choose the right moment, and you're set!

Can I Combine Zebra Patterns With Other Nail Art Styles?

Absolutely, you can combine zebra patterns with other nail art styles! Mixing them with florals or geometric designs can create a unique look. Just experiment with colors and techniques until you find the perfect combination!

Conclusion

Now that you know all about zebra nail designs, it's time to get creative and show off your wild side! Whether you choose classic black and white stripes or add some colorful flair, your nails can express your personality in a fun way. Remember, practice makes perfect, so don't worry if your first attempt isn't a masterpiece. Just have fun with it, and soon you'll be a zebra nail design pro, ready to impress your friends!

Continue Reading

Beauty Tips and Information

Dealing With Maskne: How to Prevent and Treat Mask-Related Breakouts

Discover effective strategies to prevent and treat maskne breakouts, and unlock the secrets to maintaining clear, healthy skin while wearing your mask.

Published

on

By

preventing and treating maskne

Dealing with maskne can be tough, but you can take steps to prevent and treat breakouts. Start by choosing breathable masks made of 100% cotton and wash them daily. Cleanse your face gently after wearing a mask to remove sweat and bacteria. Use non-comedogenic moisturizers to protect your skin barrier. Incorporate benzoyl peroxide or salicylic acid for effective treatment on breakouts. Keep your skincare routine simple and monitor your skin's reactions for the best results. If you're curious about more tips and tricks for healthier skin, you'll find plenty of helpful insights ahead.

Key Takeaways

  • Choose breathable, hypoallergenic mask materials to minimize moisture and friction that contribute to maskne.
  • Wash fabric masks daily with unscented, hypoallergenic detergent to eliminate bacteria and dirt buildup.
  • Use gentle cleansers and non-comedogenic moisturizers to maintain clear skin and protect the skin barrier.
  • Apply targeted treatments like benzoyl peroxide or salicylic acid on affected areas to reduce inflammation and breakouts.
  • Monitor skin reactions and adjust your skincare routine as necessary to manage irritations and prevent further breakouts.

Understanding Maskne

causes and solutions explained

Maskne, a term you've likely encountered during the pandemic, refers to the acne and skin irritations that can arise from wearing face masks. This condition often affects areas like your cheeks, chin, and nose, where masks typically sit.

The increase in humidity and friction from face masks can lead to clogged pores, making it easier for bacteria to thrive and worsen pre-existing skin conditions. To help soothe your skin, consider incorporating herbal teas into your routine, as certain varieties may promote relaxation and support skin health through their antioxidant properties, such as popular herbal teas like chamomile and peppermint.

If you have sensitive skin or conditions like rosacea, you're at a higher risk of experiencing symptoms of maskne. The occlusive environment created by your mask traps sweat, oil, and dead skin cells, which can result in breakouts and skin irritation.

Prolonged mask usage might even disrupt your skin's natural barrier, increasing irritation and potentially leading to acne cysts.

To combat maskne, you'll want to focus on prevention and treatment in your skin care routine. Consider using non-comedogenic products that won't clog pores, and make sure to cleanse your face regularly to remove trapped impurities.

Advertisement

Causes of Maskne

acne from face masks

Wearing a mask can considerably contribute to skin issues, particularly with the development of maskne. This condition primarily arises from clogged pores due to the accumulation of oil, dead skin cells, and bacteria, which is exacerbated by prolonged mask-wearing.

The humidity trapped beneath the mask from your breath and sweat creates a perfect breeding ground for acne-causing bacteria. It's crucial to maintain a consistent skincare routine and consider products designed for sensitive skin, much like how vet-approved recommendations for ideal nutrition can benefit pets with specific dietary needs.

Additionally, the friction from the mask rubbing against your skin can lead to irritation, especially in sensitive areas like your nose and cheeks. This constant movement heightens the likelihood of breakouts.

Prolonged use of masks can also disrupt your skin barrier, increasing sensitivity and irritation, which can worsen existing skin conditions like acne or rosacea.

Moreover, don't overlook the possibility of allergic reactions. Some people might react negatively to mask materials or the detergents used to wash them, further contributing to skin issues.

Treatment Options

available medical interventions

To effectively tackle maskne, it's vital to incorporate targeted treatments into your skincare routine. Start with products containing benzoyl peroxide or salicylic acid, as these ingredients effectively target clogged pores and reduce inflammation caused by mask-related skin issues.

Pair these with a gentle cleanser for daily cleansing, helping to keep your skin clear and fresh. Additionally, maintaining good overall health, including oral hygiene, can play a role in preventing skin issues, as poor dental health may contribute to systemic inflammation that can affect your skin. For more insights, check out how dental health impacts overall well-being.

Advertisement

If you experience persistent irritation, consider using an over-the-counter hydrocortisone cream to alleviate redness and swelling. For those facing severe cases of maskne, prescription topical retinoids can improve skin texture and reduce breakouts, providing a more long-term solution.

In addition to these treatments, light exfoliation is essential. It can help manage folliculitis and prevent further breakouts under your mask.

Don't forget to apply a non-comedogenic moisturizer before putting on your mask; this will protect your skin barrier and reduce irritation from materials.

Prevention Strategies

effective risk mitigation approaches

Effective prevention strategies can make a substantial difference in minimizing the risk of maskne. Start by choosing breathable, hypoallergenic materials for your masks, like 100% cotton. This helps reduce moisture and friction, both of which contribute to breakouts.

It's important to wash your fabric masks daily using unscented, hypoallergenic detergent. This practice eliminates dirt and bacteria that can exacerbate skin issues. Additionally, maintaining proper hydration is essential for overall skin health; hydrated skin can better withstand the effects of wearing a mask and prevent irritation.

Consider incorporating moisturizers and hydration techniques into your routine to enhance your skin's resilience. Before putting on your mask, apply a noncomedogenic moisturizer. This creates a protective barrier that helps prevent irritation and breakouts.

Advertisement

Additionally, try to limit heavy makeup under your mask. Doing so reduces the risk of clogged pores and irritation in those areas.

Don't forget to regularly change or wash your reusable masks; avoid reusing disposable masks to maintain hygiene. Accumulated oils and pathogens can lead to increased skin problems, so keeping your masks clean is critical for prevention.

Skincare Routine Adjustments

customized skincare routine changes

Adjusting your skincare routine is key to managing maskne effectively. Start by simplifying your regimen to focus on gentle cleansers and non-comedogenic products. This helps prevent clogged pores and minimizes breakouts.

Incorporating essential oils like tea tree oil, known for its antimicrobial properties, can also support skin health and prevent infections. Use a gentle cleanser twice daily, especially after wearing your mask, to remove sweat, oil, and bacteria that contribute to maskne.

Incorporate lightweight moisturizers enriched with hydrating ingredients like hyaluronic acid to maintain your skin's barrier function without feeling heavy. Be cautious with harsh treatments such as retinoids or strong chemical exfoliants; they can increase skin sensitivity and irritation, especially during prolonged mask use.

Monitor how your skin responds and adjust your routine as needed. Prioritize soothing ingredients like aloe vera to calm any irritation.

Advertisement

Importance of Mask Hygiene

proper mask usage practices

Maintaining proper mask hygiene is vital for preventing maskne and keeping your skin healthy. When you wear masks, they can quickly become dirty from oil, sweat, and bacteria. Daily washing of cloth masks with unscented, hypoallergenic detergent helps eliminate these impurities, reducing the risk of skin irritation and breakouts.

Additionally, ensuring good indoor air quality by using HEPA filters can help reduce airborne irritants that may exacerbate skin issues.

If you opt for disposable masks, remember to discard them after each use. This practice prevents the accumulation of pathogens that may worsen your skin condition.

Also, storing clean masks in a sealed container or bag protects them from contaminants, ensuring they're hygienic for your next use.

If you're engaging in physical activities or sweating, it's important to change or wash your mask regularly. This helps reduce moisture buildup, which can lead to acne.

Always follow the care instructions for your masks, focusing on proper washing and drying techniques. This way, you maintain their shape and effectiveness while minimizing skin irritation.

Advertisement

Post-Mask Care

post mask skin treatment

After you've taken off your mask, it's important to care for your skin to prevent any irritation or breakouts.

Start by washing your face with a gentle cleanser to remove trapped sweat, oil, and bacteria. This step is vital for preventing breakouts and maintaining healthy skin.

Next, follow up with a non-comedogenic moisturizer to replenish hydration and protect your skin barrier, minimizing irritation caused by prolonged mask wear.

If your skin feels irritated or shows signs of redness, consider applying a soothing product with ingredients like aloe vera or chamomile. These can help calm your skin and reduce discomfort.

Remember to frequently clean your reusable masks, ideally after each use, to reduce bacteria buildup, following CDC guidelines.

Incorporating these post-mask care steps into your routine will help maintain your skin's health and prevent maskne.

Advertisement

If you experience persistent skin issues, consulting a dermatologist for tailored recommendations and treatment options is a wise choice.

Taking these measures will guarantee your skin stays clear and healthy, even with regular mask use.

When to Seek Help

knowing when to ask

Sometimes, recognizing when to seek help for skin issues like maskne can be challenging. If you notice persistent acne or skin irritation that doesn't improve after two weeks of at-home care, it's time to consult a dermatologist for a professional evaluation. Ignoring these symptoms might lead to worse breakouts or complications.

Additionally, understanding your emotional state during this time is important, as stress can exacerbate skin conditions, making it beneficial to contemplate professional help when needed. You should seek immediate medical attention if you see signs of a skin infection, such as increased redness, swelling, pain, or pus drainage. These symptoms require prompt care to prevent further issues.

Dermatologists can provide tailored treatment plans, including prescription medications, especially for severe cases of maskne that over-the-counter products can't alleviate.

If your maskne symptoms worsen or cause significant discomfort, don't hesitate to reach out for expert advice. A dermatologist can help identify underlying issues and offer effective treatment options.

Advertisement

With the convenience of telehealth consultations, you can easily access care from the comfort of your home. Remember, addressing your skin concerns early can prevent more serious problems down the line, so don't wait too long to seek help.

Frequently Asked Questions

How Do You Prevent Breakouts From Masks?

To prevent breakouts from masks, choose breathable fabrics, wash masks daily, and apply a noncomedogenic moisturizer beforehand. Limit heavy makeup, and maintain a gentle skincare routine to keep your skin healthy and irritation-free.

What Is the Best Treatment for Maskne?

Mastering maskne management means you'll need mild cleansers, targeted treatments like salicylic acid, and soothing creams for redness. Don't forget a non-comedogenic moisturizer to maintain hydration and consult a dermatologist for personalized solutions.

Why Does My Face Break Out When I Wear a Mask?

When you wear a mask, trapped oil, sweat, and bacteria can clog your pores. The humid environment promotes bacterial growth, while friction causes irritation, leading to breakouts, especially in sensitive areas like your jawline and nose.

How to Get Rid of MAS?

To get rid of mask-related breakouts, cleanse your face twice daily, use a non-comedogenic moisturizer, apply spot treatments, and wash your masks regularly. If issues persist, consult a dermatologist for tailored solutions.

Advertisement

Conclusion

In your battle against maskne, remember that the right strategies can make all the difference. By understanding the causes and implementing effective treatments, you're already on the right path. But what if there's one essential step you're missing? One that could transform your skin and boost your confidence? Stay vigilant, keep adjusting your routine, and don't underestimate the power of post-mask care. The solution might be closer than you think—are you ready to discover it?

Continue Reading

Nail Tips

Short Christmas Nails for a Festive Look

Achieve a stunning festive look with short Christmas nails, and explore exciting design ideas that will make your holiday celebrations even more special!

Published

on

By

festive short christmas nails

Short Christmas nails are a practical yet stylish option for the holiday season. You can choose classic colors like vibrant red and deep green, or even mix in some pastels for a modern twist. Adding glitter or metallic accents enhances their festive appeal. Don't forget about fun designs like snowflakes, candy canes, or Christmas trees! Nail stamping or stickers can help you achieve intricate patterns easily at home. Whether you prefer a simple look or something more expressive, short nails offer versatility and creativity. Stick around to discover tips on creating your own festive nail art designs!

Key Takeaways

  • Short Christmas nails offer a stylish yet practical option for holiday activities while maintaining durability and aesthetics.
  • Common festive colors like red and green, along with glitter accents, enhance the seasonal look.
  • Creative designs such as snowflakes, candy canes, and Christmas trees can be achieved easily on short nails.
  • Nail stamping and stickers allow for precise and intricate designs, making festive nail art accessible for all skill levels.
  • Customizable press-on nails provide a quick and effortless way to achieve a festive look without extensive maintenance.

Introduction

beginning of the discussion

When the holiday season rolls around, short Christmas nails offer the perfect blend of style and practicality for your festive activities. You'll love how these nails allow you to dive into the holiday spirit without the worry of long, cumbersome tips.

With a variety of festive designs, you can easily express your creativity while keeping things manageable. Think classic red or emerald green as your base colors, and don't shy away from adding some glitter nail polish for that extra sparkle.

Short Christmas nails lend themselves well to simple nail art, from snowflakes and candy canes to charming Christmas trees. You'll find that many Christmas nail ideas can be achieved at home, making it easy to get ready for a night of gift wrapping or attending holiday parties.

If you're feeling a bit more adventurous, consider luxury designs featuring intricate detailing, 3D elements, or nail gems that add an elegant touch to your look. Whether you're keeping it simple or opting for something eye-catching, short Christmas nails ensure you stay stylish and festive all season long.

Victorian Christmas Nail Traditions

victorian holiday nail customs

Victorian Christmas nail traditions showcase a fascinating blend of artistry and cultural significance. During the Victorian period, women embraced intricate nail art designs as a vital part of their holiday celebrations. You might find them adorning their nails with seasonal motifs like holly, snowflakes, and ornaments, reflecting the era's craftsmanship and attention to detail.

The festive nails were often painted in shades of deep red, green, and gold, echoing the holiday spirit and adding a touch of elegance to their overall look. Nail care was essential during this time, with women using homemade concoctions of oils and waxes to maintain the health and appearance of their nails.

Advertisement

This focus on nail care mirrored societal expectations of femininity and refinement. Additionally, women often showcased their manicured nails as a sign of social status, using decorative nail guards and rings as both accessories and protection for their delicate nails.

In essence, Victorian Christmas nail traditions not only highlighted creativity through intricate nail art but also reinforced the importance of elegance and social standing during the festive season. Embracing these traditions can inspire your own festive nail designs today.

Nail Art Trends for 2024

2024 nail art trends

Nail art trends for 2024 are all about embracing short Christmas nails that blend practicality with festive style. As you prepare for the holiday season, you'll find that these nails cater to your busy lifestyle while still delivering a chic look. Emotional and psychological growth during this time can be reflected in the cheerful designs we choose for our nails.

Classic red and green colors remain popular, making them a go-to choice for festive designs. If you're looking for something a bit different, glittery nails with snowflake accents can add a touch of sparkle to your festivities.

Candy cane patterns are also trending, bringing a playful vibe to your short Christmas nails. For those who prefer a more subtle approach, minimalistic options like understated mistletoe designs or abstract patterns are gaining traction, offering a chic twist to your holiday manicure.

Don't forget about the luxurious feel of 3D and textured nails! With ornament-inspired designs and velvet finishes, you can add depth to your festive look.

Advertisement

Plus, nail stamping techniques have evolved, allowing you to easily recreate intricate holiday themes at home. Incorporating glitter and rhinestones can elevate your designs for a more glamorous touch. Embrace these nail art trends this season, and you'll be ready to celebrate in style!

Choose Seasonal Color Palettes

select seasonal color schemes

Choosing the right seasonal color palette can elevate your short Christmas nails and set the tone for your holiday festivities. To capture the festive spirit, consider classic holiday colors like vibrant red and deep green. These shades instantly evoke Christmas cheer and are perfect for creating simple yet striking designs.

If you want to try something different, mix these classic hues with soft pastels, like pale pink or mint, for a modern twist. Jewel tones such as ruby and emerald also provide a rich, luxurious vibe that's suitable for both casual gatherings and elegant events.

Don't forget about glittery shades! Incorporating reflective silver or shimmer-infused polishes adds an eye-catching element to your festive nail art, making your short nails stand out.

For more creative expression, opt for contrasting colors—think red with white or green with gold. This approach enhances the visual impact of your nails, allowing you to showcase your personal style while celebrating the season.

Embrace these seasonal color palettes to make your short Christmas nails a true reflection of holiday joy!

Advertisement

Nail Art for Holiday Parties

festive holiday nail designs

When it comes to holiday parties, short Christmas nails offer the perfect blend of festive flair and practicality. You can easily maintain your nails while showcasing fun nail art that celebrates the season. Classic red and green color schemes are always a hit, instantly putting you in the holiday spirit. If you’re looking for a more subtle approach, opt for shimmering metallics or elegant white designs that still capture the essence of the holidays. And when the holiday season has passed, you can switch gears and explore stunning birthday nail ideas that showcase your personality and style. From bold and bright patterns to sophisticated and understated looks, there are endless possibilities to make a statement with your nails for any occasion.

For a bit of sparkle, consider adding glitter or incorporating playful candy cane patterns that are sure to catch everyone's eye. If you're feeling creative, there are plenty of DIY options available. Techniques like nail stamping and using nail stickers can help you achieve intricate designs without the hassle of a salon visit.

Unique touches like 3D ornament nails or minimalistic mistletoe accents can elevate your look while still being manageable on shorter nails. To really stand out at your next holiday gathering, don't shy away from metallics and jewel tones.

These chic and sophisticated hues add a touch of elegance to your festive designs, making them suitable for any holiday event. With short Christmas nails, you can effortlessly blend style and convenience for the perfect holiday party look!

Nail Durability Versus Aesthetics

strength over visual appeal

Short Christmas nails strike a balance between durability and aesthetics, making them an ideal choice for the festive season. You'll find that short nails can be adorned with vibrant festive designs, including intricate patterns and 3D elements, without sacrificing strength.

When choosing your nail look, opt for high-quality polishes that resist chipping to ensure your nails stay stunning throughout holiday parties.

The average lifespan of well-applied press-on short nails ranges from one week to several weeks, depending on your care and the quality of materials used. With proper maintenance, you can enhance their durability and keep them looking fresh.

Advertisement

Regularly applying nourishing oils and steering clear of harsh chemicals will help maintain the integrity of your short nails while allowing those festive designs to shine.

While short nails may seem limited in style, they offer a robust canvas for creativity. You can experiment with glitter, intricate designs, and festive motifs, all while enjoying the confidence that comes with strong, long-lasting nails. Additionally, consider incorporating high-quality polishes to ensure your festive designs remain chip-free and vibrant throughout the holiday season.

Festive Snowflake Nail Art

holiday themed nail decorations

Transform your nails into a winter wonderland with festive snowflake nail art that captures the spirit of the season. Start by choosing a base color like royal blue or white, which allows your intricate snowflake designs to really pop.

Nail stamping techniques make it easy to achieve those precise designs right at home, even if you're a beginner. You can get creative with popular color combinations, such as shades of blue, silver, and white, to evoke that chilly vibe perfect for the holiday season.

Don't forget to enhance your manicure with glitter or metallic accents; these elements add a festive flair and elevate the overall look.

Snowflake designs are absolutely adaptable for short nails, ensuring that the delicate patterns remain visible while keeping your style practical for all your holiday activities.

Advertisement

Whether you're heading to a festive gathering or just want to embrace the season, this nail art is a stylish choice. So gather your supplies, experiment with different combinations, and let your nails shine bright with festive snowflake nail art this holiday season!

Nail Art for Joyful Celebrations

festive nail art designs

Nail art brings joy to your holiday celebrations, allowing you to express your festive spirit in a fun and creative way. Short Christmas nails can showcase delightful festive designs like candy canes, snowflakes, and Christmas trees, all while utilizing vibrant colors such as red, green, and gold. These hues instantly enhance your holiday vibe.

You can easily achieve intricate patterns at home through popular nail art techniques like stamping or using stickers, turning your nails into a canvas for creativity. Incorporating glitter and metallic finishes elevates your short Christmas nails, adding that perfect touch of sparkle for those festive gatherings.

For a more understated approach, consider minimalist styles. Subtle mistletoe or garland accents can provide a chic look that radiates elegance without being too over-the-top.

If you're short on time or prefer a quick solution, customizable press-on nails offer salon-quality designs that you can apply in minutes. With a variety of handmade styles available, you can express your individuality while celebrating the season.

Whether you choose acrylic nails or simple nail art, your festive designs will add joy to your holiday celebrations.

Advertisement

Frequently Asked Questions

How to Do Easy Christmas Nails?

To create easy Christmas nails, start with a base coat, then use vibrant holiday colors. Add stickers or simple nail art for quick designs, and finish with a top coat for lasting shine and protection.

What Is the Best Nail Color for Christmas?

When choosing the best nail color for Christmas, you can't go wrong with deep red, emerald green, or sparkling gold. These shades capture the festive spirit and perfectly complement your holiday outfits.

What Nails Look Good on Short Nails?

For short nails, vibrant colors and minimalist designs shine. Try deep reds or emerald greens with simple patterns like stripes or dots. You'll achieve an elegant look that's easy to maintain and showcases your creativity.

How to Do Christmas Plaid Nails?

To create Christmas plaid nails, start with a base coat, apply a solid color, then use tape or a brush to form a grid. Fill in with contrasting colors and finish with a top coat for shine.

Advertisement

Continue Reading

Trending