
To apply self-tanner evenly, start by prepping your skin—exfoliate and moisturize dry areas. Choose a self-tanner that suits your skin type, like a mousse for easy blending. When applying, use a tanning mitt in circular motions, working in sections. Don’t forget tricky spots like wrists and ankles. Give the tanner time to dry completely before dressing. If you make mistakes, there are quick fixes to help. Stick around to discover some handy tips for flawless results!
Key Takeaways
- Exfoliate and moisturize dry areas like elbows and knees before application to prevent dark patches.
- Use a tanning mitt and apply self-tanner in circular motions for even coverage.
- Start with the face and work downward in sections to avoid product transfer.
- Allow the self-tanner to dry completely for at least 10 minutes before dressing.
- Reapply as needed for a deeper color and check for missed spots after initial drying.
Step 1: Prep Your Skin for Perfection
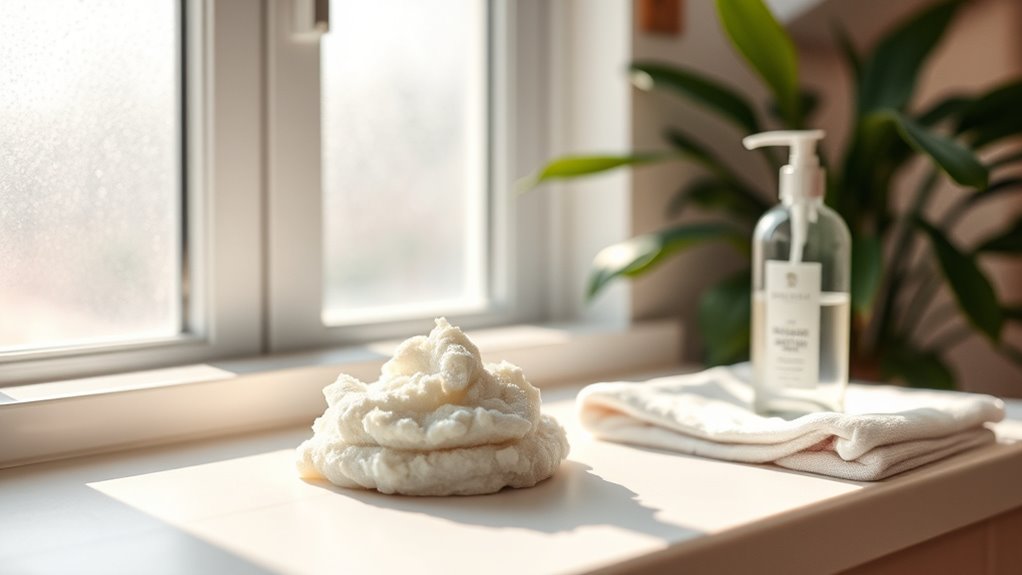
To achieve a flawless self-tan, you need to prep your skin properly. Start by exfoliating your skin with an oil-free scrub at least 24 hours before applying self-tanner. This removes dead skin cells and creates a smooth surface for even application.
Pay special attention to dry skin areas like elbows, knees, ankles, and heels to prevent dark patches from forming. Once you’ve exfoliated, it’s essential to guarantee your skin is completely dry before applying self-tanner, as moisture can cause uneven absorption and blotchiness. Additionally, maintaining proper hydration techniques is crucial for optimal skin texture and appearance, as well-hydrated skin promotes overall health and enhances the tanning process. Consider incorporating celery juice into your routine, as it is known for its hydration and electrolyte balance support. Essential oils, such as lavender oil, can also promote skin health and aid in relaxation during your tanning routine.
For those extra-dry spots, apply a light layer of oil-free moisturizer to promote a seamless tan. Completing any beauty treatments like waxing or shaving 48 hours prior is also an important part of your prep process. Additionally, consider routine health checks to ensure your skin is in optimal condition before tanning.
Step 2: Choose the Right Self-Tanner
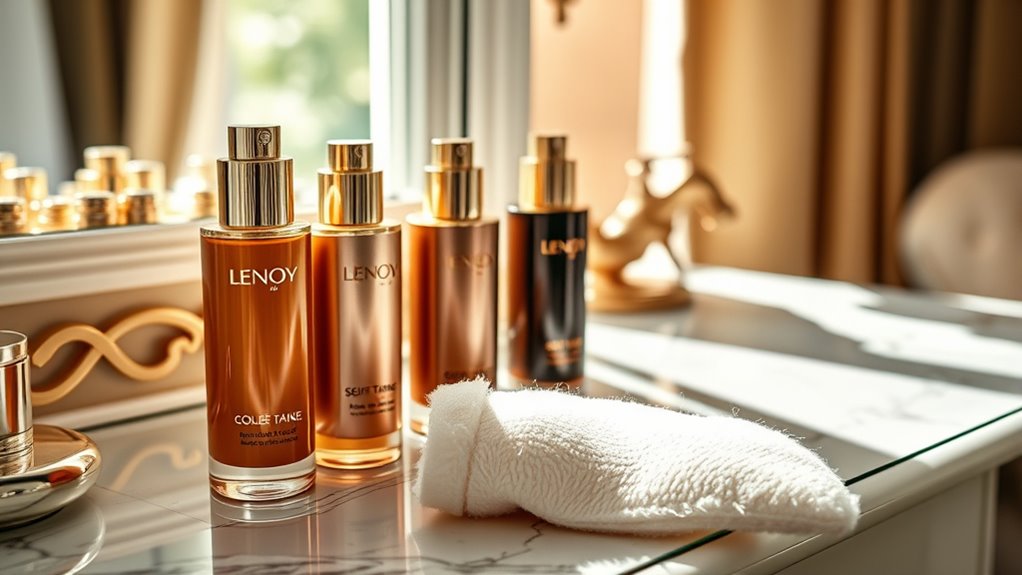
After prepping your skin, the next step is choosing the right self-tanner. If you’re a beginner, consider using a mousse; it dries quickly and blends easily for a streak-free finish. Additionally, many best hot rollers for long hair can help you achieve a polished look to complement your tan. When selecting a self-tanner, look for options that are made with natural ingredients to ensure your skin stays healthy and nourished. Using a self-tanner with broad-spectrum sunscreen can also protect your skin from harmful rays while you achieve your glow.
For those hard-to-reach areas, tan sprays are versatile and help achieve even tan lines. If you have dry or sensitive skin, lotions can provide added hydration while delivering a natural tan. Additionally, using a self-tanner with glycolic acid can enhance the overall look and feel of your skin by promoting smoother texture.
Alternatively, tan drops can be mixed with your favorite moisturizer for a customizable, gradual tanning effect, giving you better control over your desired shade. Boë’s products cater to various needs, ensuring you can choose a self-tanner that fits your skin type and tanning goals. Don’t forget to use a tanning mitt for even application!
Step 3: Application Tips for a Streak-Free Finish

Achieving a streak-free finish with self-tanner requires careful application techniques. Start by applying the self-tanner on your face first; this way, you can easily blend and fix any uneven spots before moving to larger areas.
Work in sections, beginning with your legs and moving upward to avoid transferring product to already-tanned areas, saving your hands for last. Use a tanning mitt and apply the self-tanner in circular motions to guarantee even coverage and minimize streaks. Essential oils can also help enhance your skin’s moisture before application. Additionally, maintaining self-awareness of your body’s reactions can help you adjust the application process as needed for optimal results. For the best results, consider using self-tanners with natural oils for added hydration. It’s also beneficial to ensure optimal water temperature when preparing your skin for tanning, as this can enhance absorption.
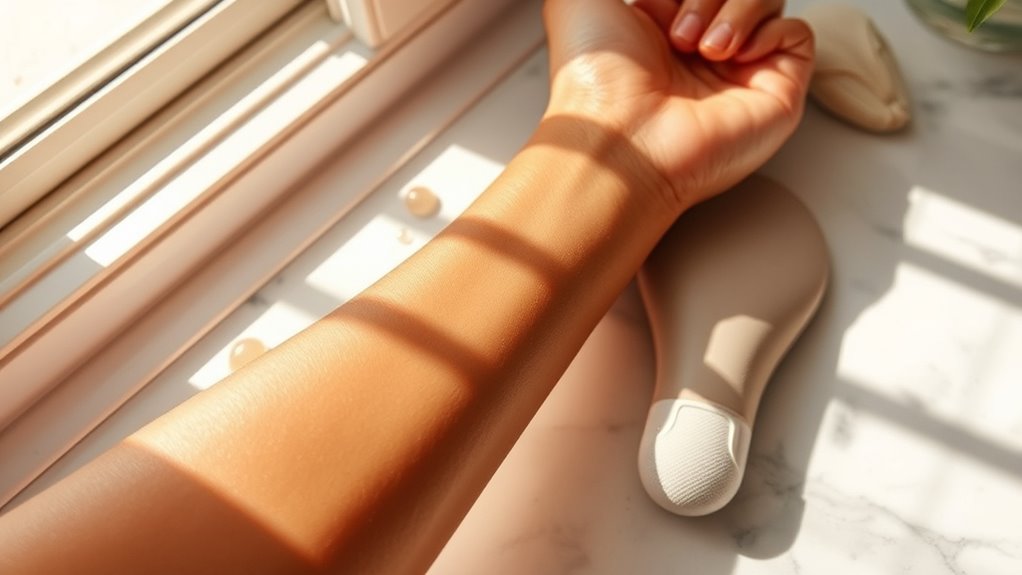
For tricky spots like wrists, ankles, and elbows, apply a light moisturizer beforehand or use leftover product on your mitt.
Finally, allow the self-tanner to dry completely for at least 10 minutes before dressing to prevent smudging or uneven development. Additionally, maintaining optimal performance of your self-tanner can be enhanced by ensuring that your skin is well-prepped and free of dead skin cells through regular exfoliation.
Step 4: Quick Fixes for Any Mistakes

Even the most careful application can lead to occasional mistakes, but don’t worry—quick fixes are at your fingertips.
Keep wipes handy to immediately correct any mistakes or excess product when you apply self-tanner. If streaks appear, a gentle exfoliator during your next shower can help blend them away, much like how high refresh rates enhance the gaming experience by providing smoother visuals. Remember that emotional manipulation can create confusion in other areas of life, so maintaining clarity during your self-tanning routine is essential. Additionally, ensuring that your skin is clean and dry, much like maintaining optimal airflow for an air purifier, can enhance the effectiveness of your self-tanner. Using a product with HEPA filters can also improve air quality while you tan, ensuring a more pleasant environment.
For lighter streaks or uneven areas, reapply a small amount of self-tanner with a light layer of moisturizer to help distribute the product evenly.
Remember, using your hands gives you more control for tricky areas like your face and wrists, while a tanning mitt guarantees an even application on larger sections of your body. Additionally, maintaining optimal usage timing can further enhance the final results of your self-tanning application.
With these quick fixes, you’ll achieve that flawless look you desire.
Step 5: Set It, But Don’t Forget It

You’ve corrected any mistakes and now it’s time to confirm your self-tanner sets perfectly. Start by allowing the self-tanner to dry completely for at least 10 minutes; this confirms even development and prevents transfer onto your clothing.
To make certain your self-tan lasts longer, avoid showering, sweating, or engaging in physical activities for at least 12 hours after applying the self-tanner. Look for non-transferable formulas that dry quickly to help set it without smudging or streaking. Additionally, consider using products that utilize air fryer technology for healthier options, which can help you achieve an even tan without the risk of streaking. Using a product with HEPA filters can also enhance air quality while you prepare for your tanning session, ensuring a more pleasant environment. Staying hydrated is also essential for maintaining optimal skin health, as proper water intake can contribute to a more radiant tan.
Remember, every product has its own recommended drying times, so follow the instructions carefully. Keep an eye on your skin during the development period, as some self-tanners may require different times to achieve the desired color.
Use these tips and tricks for a flawless finish!
Frequently Asked Questions
How Do You Apply Fake Tan Evenly?
To apply fake tan evenly, start by exfoliating your skin 24 hours before application.
Use a tanning mitt and apply the product in circular motions, beginning at your legs and moving upward.
Don’t forget to moisturize dry areas like elbows and knees to prevent dark patches.
Blend the tan at your wrists and ankles, using any leftover product on your hands and feet.
Finally, let the tan dry completely before dressing to achieve a flawless finish.
How Do You Apply Self-Tanner Perfectly?
To apply self-tanner perfectly, you need patience, precision, and practice.
Start by exfoliating your skin for a smooth base. Use a tanning mitt and apply the self-tanner in circular motions, working from your legs upwards.
Don’t forget those tricky areas—dilute the tanner for your elbows and wrists.
Let it dry for at least 10 minutes, then avoid soap for the first shower to keep that flawless glow.
Enjoy your beautiful, bronzed skin!
How Do I Even Out My Self Tan?
To even out your self-tan, gently exfoliate any streaky areas with a mild scrub or damp washcloth.
For lighter patches, use a tanning mitt to apply a small amount of self-tanner in circular motions.
If some areas look too dark, dilute the color with a non-oil-based moisturizer.
Remember to wipe excess product from your nails and cuticles right after application to avoid dark spots.
Moisturizing dry areas beforehand can also prevent future unevenness.
How to Fix Blotchy Fake Tan?
To fix your blotchy fake tan, start by gently exfoliating the uneven areas with a mild scrub or exfoliating mitt in the shower.
Once you’ve exfoliated, apply a non-oil-based moisturizer to those spots and let it absorb.
Next, use a damp tanning mitt to blend a thin layer of self-tanner over the patches in circular motions.
For stubborn blotches, consider a tan remover or bronzer for a temporary fix.
Conclusion
By following these steps, you’ll transform into a sun-kissed goddess with skin so flawless, it could rival a golden statue! With a little prep, the perfect self-tanner, and your expert application skills, you’ll be radiating confidence like a supernova. And if any mistakes pop up, fear not—your quick fixes will make them vanish faster than a magician’s rabbit! So go ahead, embrace your bronzed brilliance, and watch as everyone around you can’t help but be mesmerized!