Beauty Tips and Information
Unveiling the Origins: Who Invented Scissors -> Who Invented Scissors?
Journey through time to uncover the ingenious minds behind the invention of scissors, a tale of ancient craftsmanship and innovation waiting to be explored.
We found out that scissors were first created around 1500 B.C. in Egypt, displaying remarkable craftsmanship with bronze construction and dual blades. This advancement demonstrates the inventive nature of ancient civilizations such as the Egyptians and Romans. If you are interested in learning more about the fascinating beginnings and development of scissors, there are intriguing details ready to unveil a rich history of this essential cutting tool.
Key Takeaways
- Scissors were invented around 1500 B.C. in Egypt.
- Egyptians and Romans were early innovators in scissor design.
- Robert Hinchliffe revolutionized scissor production in 1761.
- Scissors were originally crafted from bronze with two blades.
- The evolution of scissors saw the introduction of mass production techniques with steel.
Ancient Scissors Origins
Ancient scissors trace their origins back to around 1500 B.C. in Egypt, crafted from bronze with two blades controlled by a metal strip. The Egyptians were pioneers in tool innovation, and their early scissors reflected their advanced craftsmanship. These ancient scissors not only served as cutting tools but also as symbols of artistic design.
The Romans later refined the concept around 100 A.D., introducing a pivoted design that improved the functionality of the scissors. This innovation allowed for more precise cutting, marking a significant advancement in scissor technology.
The use of bronze in the construction of these scissors showcased the skill and resourcefulness of ancient craftsmen. The intricate details in the design highlighted the blend of practical utility and aesthetic appeal. Through trade and exploration, the design of these scissors spread to different cultures, influencing the development of cutting tools worldwide. The Egyptians and Romans laid the foundation for scissors as essential tools, demonstrating the importance of quality craftsmanship in everyday objects.
Scissors Evolution in 18th Century
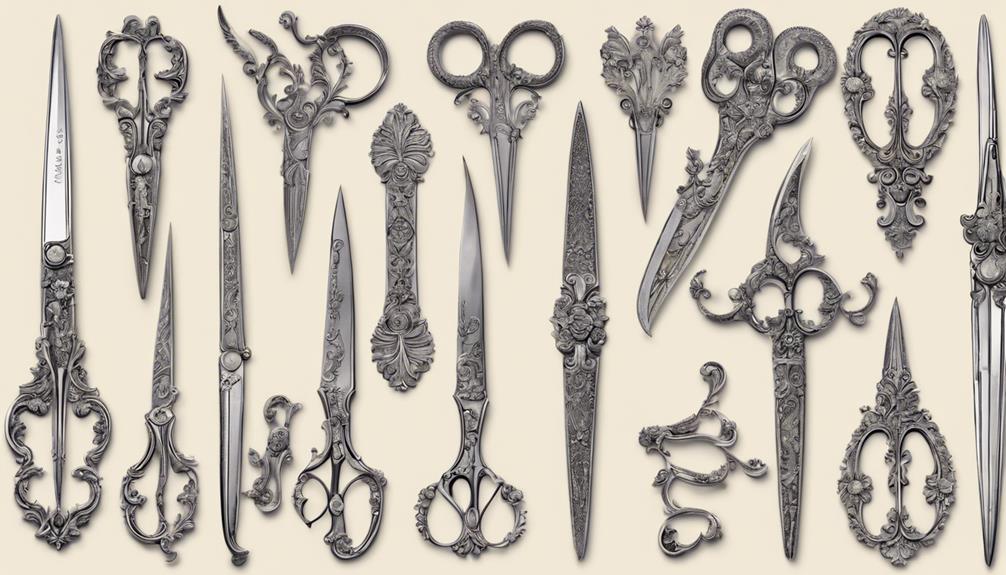
Revolutionizing scissor production, Robert Hinchliffe of Sheffield, England, introduced mass manufacturing techniques utilizing steel in 1761. This pivotal moment in the 18th century marked a significant advancement in scissor evolution, setting the stage for further innovations.
Here are three key developments during this transformative period:
- Mass Production: Hinchliffe's adoption of steel and mass production techniques revolutionized the scissor industry, making these essential tools more accessible and affordable for a wider audience.
- Pinking Shears: In 1893, Louise Austin invented and patented pinking shears, a specialized type of scissors that enabled the precise and rapid scalloping of fabric. This invention not only showcased the ongoing creativity in scissor design but also highlighted the importance of functionality in cutting tools.
- Technological Advancements: The 18th century saw a surge in scissor design improvements, laying the foundation for the diverse range of scissors we use today. These advancements not only enhanced the efficiency of cutting tasks but also contributed to the overall evolution of this indispensable tool.
Scissors in Different Cultures
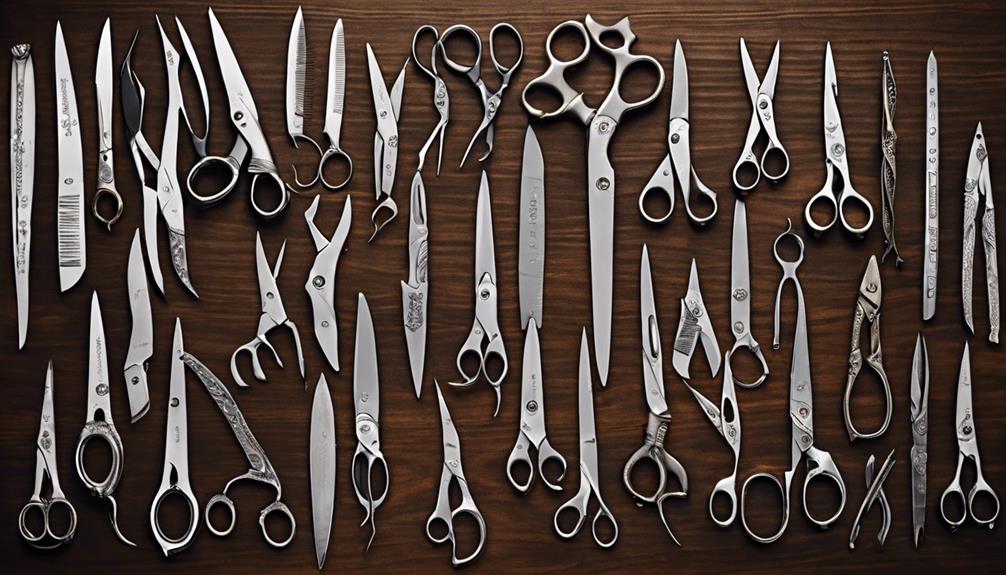
Scissors in different cultures showcase unique designs and symbolic meanings, adding a layer of cultural significance to this everyday tool. Chinese and Japanese scissors, for instance, are adorned with intricate patterns reflecting their rich heritage.
From the Maasai people in East Africa to ancient Egyptian societies, scissors haven't only been practical tools but also symbols of craftsmanship, cultural heritage, and even religious beliefs.
Cultural Scissor Designs
In various cultures around the world, scissors aren't just tools for cutting but also intricate symbols of cultural identity and artistic expression.
- Chinese and Japanese scissors boast ornate designs with deep cultural significance, mirroring the artistic traditions of these societies.
- The Maasai people of East Africa utilize the ngitiga scissors, showcasing unique scissor designs that symbolize craftsmanship and preserve their cultural heritage.
- Scissors in ancient Egyptian culture were linked to goddesses, religious practices, and protective qualities, highlighting their symbolic importance beyond mere functionality.
These diverse and specialized cutting tools across different cultures not only cater to practical cutting needs but also reflect the rich tapestry of traditions, beliefs, and creativity present in societies worldwide.
Symbolism in Scissors
Across various cultures, scissors have served as more than mere cutting tools, embodying deep symbolic meanings and cultural significance. In Chinese and Japanese societies, scissors are adorned with intricate designs symbolizing artistry and tradition.
The Maasai people of East Africa view the ngitiga scissors as representations of craftsmanship and cultural heritage, underscoring the importance of traditional tools in their identity.
In ancient Egypt, scissors were linked to goddesses, religious rituals, and protective attributes, emphasizing their symbolic value. Different cultures have developed specialized cutting tools with diverse designs, showcasing unique approaches to these implements and reflecting the cultural diversity in craftsmanship.
Scissors not only serve practical purposes but also hold symbolic weight, contributing to the cultural identity and traditions of various societies.
Scissors Folklore and Myths
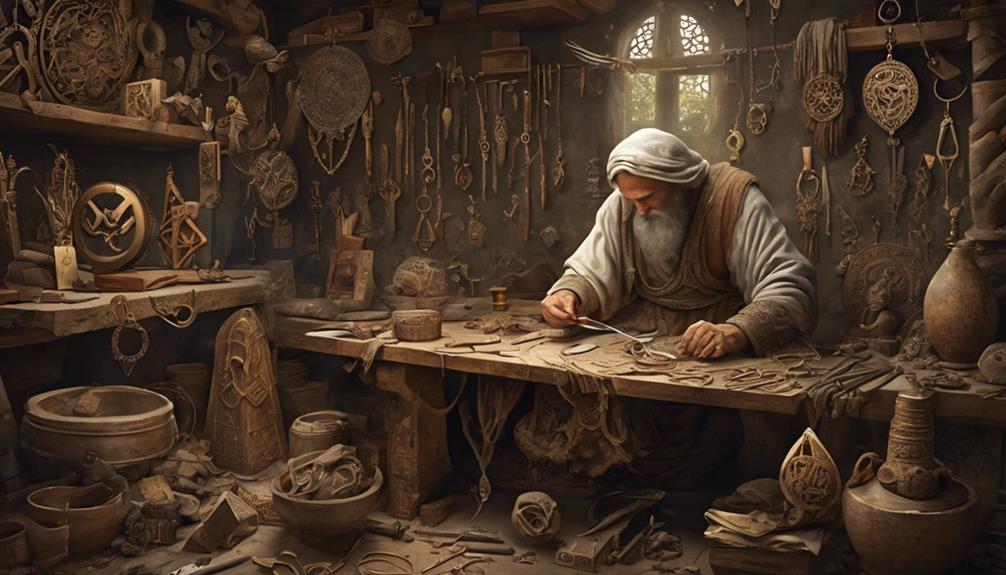
In folklore and myths, scissors hold significant roles beyond their practical use. Ancient legends and cultural depictions often portray scissors as symbols of protection, luck, and warding off evil.
These stories and beliefs have shaped various practices and rituals surrounding scissors, highlighting their enduring importance in different societies.
Scissors in Ancient Legends
Have ancient legends woven intriguing tales about the mystical origins and powers of scissors? Scissors in ancient times weren't merely tools for cutting but also held significant symbolism and meaning in various cultures.
Here are some fascinating beliefs surrounding scissors in ancient legends:
- Expectant mothers placed scissors under their pillow to induce labor, a practice steeped in superstition across different societies.
- Placing scissors on a surface for a friend to pick up was believed to safeguard relationships, reflecting cultural beliefs in the power of objects.
- Hanging scissors near the door in a cross shape was thought to ward off evil spirits, showcasing the blend of superstitions and folklore that surrounded scissors in ancient times.
Cultural Depictions of Scissors
Often overlooked in everyday life, scissors possess a rich tapestry of cultural folklore and myths that reveal a deeper significance beyond their utilitarian function. Superstitions surrounding scissors have existed for centuries, influencing cultural beliefs and practices. From expectant mothers placing scissors under their pillow to prompt labor to the belief that placing scissors on a surface can protect relationships, these objects hold a unique place in our daily lives. In ancient China, cross-blade scissors, or cross-bladed shears, were used, showing early recognition of their utility. The ancient Romans, influenced by Greek culture, also had their version of scissors. Even today, superstitions persist, with beliefs like hanging scissors in a cross shape near the door to ward off evil spirits.
Cultural Belief | Description | Origin |
---|---|---|
Scissors under pillow | Prompts labor | Various cultures |
Scissors for protection | Protects relationships | Folklore tradition |
Scissors in a cross shape | Ward off evil spirits | Superstitions |
Scissors Impact on Daily Life
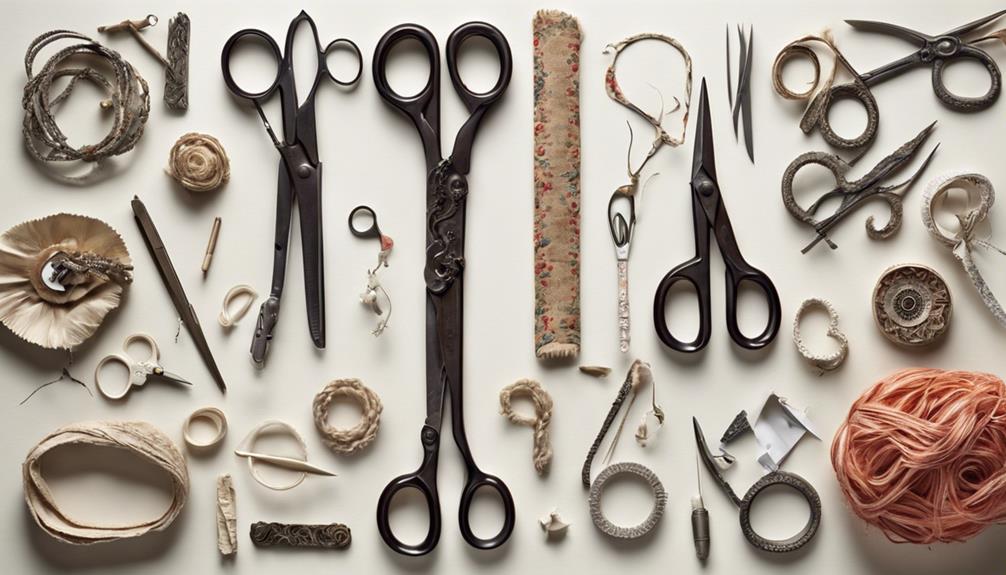
Scissors play an essential role in our daily routines by serving as indispensable tools for precise cutting tasks in various industries and activities. They've evolved from the development of cross-bladed shears years ago to become an integral part of modern scissors used for specific purposes. Here are three ways scissors impact our daily lives:
- Efficiency: Scissors are vital cutting tools in everyday life, aiding in tasks like crafting, sewing, and office work. They enable quick and accurate cuts, enhancing overall efficiency in various fields.
- Professional Use: Professionals such as tailors, hairdressers, and medical practitioners rely on scissors for their precise cutting abilities. In these industries, scissors are indispensable tools that contribute to the high-quality outcomes expected by customers.
- Skill Development: Proper use of scissors not only ensures precise cutting but also helps in developing hand and finger strength. This aids in improving coordination, dexterity, focus, and attention to detail, making scissors a valuable tool for skill enhancement.
Modern Advancements in Scissor Technology
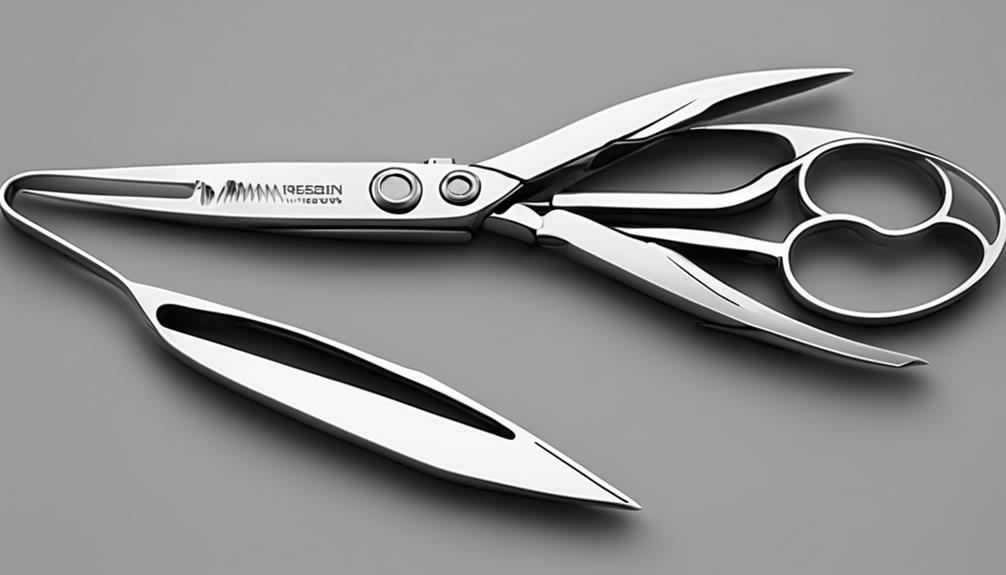
Incorporating high-quality materials and ergonomic designs, modern advancements in scissor technology have revolutionized the efficiency and precision of cutting tasks across various industries. Stainless steel, known for its durability and sharpness, is now a staple in scissor production, ensuring clean cuts and long-lasting performance.
Ergonomic handles have been introduced to enhance user comfort and reduce strain, making prolonged usage a breeze. Specialized scissors like pinking shears for decorative edges and surgical scissors for medical procedures cater to specific needs, showcasing the versatility of these tools.
The introduction of electric cutting scissors and laser-guided cutting has taken efficiency to new heights, offering automated and ultra-precise cutting solutions for different applications. Through continuous innovation, scissor technology has evolved into a domain of versatile tools that not only streamline cutting tasks but also elevate the overall precision and speed of operations.
Embracing these modern advancements is key to staying ahead in today's fast-paced industries.
Frequently Asked Questions
Who Actually Invented Scissors?
We may never pinpoint a single inventor of scissors due to their ancient origins and independent development in various regions. Ancient Egyptian and Roman civilizations had early versions of scissors with unique designs, leading to further evolution through cultural exchange and technological advancements.
The mystery surrounding the true inventor of scissors highlights the continuous innovation in cutting tools throughout history, showcasing human ingenuity and adaptability.
What Is the Origin of the Scissors?
Scissors have a rich history dating back 3,000-4,000 years to the Middle East. Ancient Egyptians and Romans also contributed to their development. While some may debate the exact inventor, it's clear that scissors have evolved over millennia into the essential tools we use today.
From basic designs to modern innovations, scissors have stood the test of time, showcasing human ingenuity and adaptability in crafting efficient cutting instruments.
Who Was the First Person to Use Scissors?
We can't pinpoint the first person to use scissors, but the ancient Egyptians developed a scissors-like tool around 1,500 B.C. The Romans later enhanced the design with pivoted scissors around 100 A.D.
The actual inventor remains a mystery, but scissors have come a long way since then. In 1761, English manufacturer Robert Hinchliffe revolutionized scissor production by crafting them out of steel. Their evolution over thousands of years showcases the continuous improvement of this common tool.
Did Leonardo Invent Scissors?
No, Leonardo da Vinci didn't invent scissors. Scissors have been around for thousands of years, predating da Vinci's era.
While da Vinci was a prolific inventor, scissors weren't among his documented creations. Their origins trace back to ancient civilizations like Egypt and Rome, showcasing a rich historical background.
What is the history of using scissors for nail designs?
Using scissors for nail designs has a long history. From intricate patterns to simple shapes, scissors have been a popular tool for creating fun nail designs for kids. This technique allows for more precision and detail, making it a favorite among nail artists and children alike.
Conclusion
To sum up, scissors have come a long way from their ancient origins to the modern advancements we see today.
Did you know that the average household owns about four pairs of scissors? Imagine all the snipping and cutting happening around the world every day!
From crafting to cooking, scissors play a crucial role in our daily lives.
So next time you pick up a pair of scissors, remember the long history and impact they've had on society.
Cindy, the editor-in-chief of Nightingale Studio, is the driving force behind our editorial vision. With years of experience in the beauty industry, Cindy ensures that all content published on our platform meets the highest standards of quality and accuracy. Her attention to detail and commitment to excellence ensures that our visitors receive valuable and trustworthy information they can rely on.
Nail Tips
Fall Manicure Ideas You’ll Want to Copy This Season
Transform your nails this fall with rich earth tones and unique designs that capture the season’s spirit—discover the must-try trends inside!
This fall, you're going to want to embrace rich earth tones and cozy vibes in your manicure. Try deep burgundies, warm terracottas, and playful orange shades for a seasonal pop. Edgy French manicures with colorful tips or textured designs like chocolate swirls can elevate your look. Don't forget about incorporating fun motifs, like leaves and pumpkins! Regular nail care, including moisturizing and using nourishing oils, will keep your nails looking their best. As you explore these ideas, you might find even more ways to showcase your fall spirit through your manicures.
Key Takeaways
- Opt for rich earth tones and deep burgundies for a moody fall aesthetic that complements seasonal wardrobes.
- Experiment with edgy French manicures using playful seasonal colors like terracotta and cinnamon for a modern twist.
- Incorporate autumn motifs such as leaves and pumpkins into your nail art for a festive touch.
- Try gradient French tips to add sophistication and depth to your fall nail designs.
- Maintain healthy nails with nourishing oils and regular moisturization to keep your manicures looking fabulous all season long.
Introduction
As fall approaches, it's time to refresh your manicure and embrace the season's vibrant colors and designs. This autumn season brings a shift from light pastels to rich earth tones, making fall nails the perfect canvas for showcasing deeper shades like chocolate brown, deep burgundies, and vibrant oranges.
You'll want to explore the latest fall nail trends that capture the essence of the season. One standout design is the Edgy French manicure, where traditional white tips transform into playful seasonal colors, allowing for creative combinations that reflect your personality.
Pair this with techniques like gradient French tips, which add a sophisticated twist to your look.
Don't forget the fun of incorporating seasonal motifs into your nail art; think scattered leaves and adorable pumpkins that celebrate the fall spirit.
Jelly nails also remain a favorite, transitioning to warmer tones while maintaining their glossy finish, making them versatile for any nail length.
With these ideas in mind, you're all set to nail your autumn aesthetic and flaunt your fabulous fall nails!
Autumn Harvest Festival Traditions
Autumn Harvest Festivals bring communities together to celebrate the bounty of the season, showcasing local produce and artisanal goods. You'll find these vibrant festivals from late September through November, perfectly timed with the peak of the harvest. Seasonal foods take center stage, allowing you to savor delicious treats made from freshly picked ingredients.
As you explore the festivities, you can participate in traditional activities like apple picking and pumpkin decorating, providing fun, family-friendly entertainment for everyone.
Don't miss the lively craft fairs, where local artisans display their talents and crafts, enriching the community's cultural heritage.
These festivals emphasize sustainability, encouraging support for local farmers and promoting farm-to-table practices. By attending, you're not just enjoying the autumn atmosphere; you're also preserving agricultural traditions that have been passed down through generations.
With live music and performances by regional artists, you'll experience a sense of connection to your community.
Seasonal Color Palette Inspiration
With the vibrant hues of autumn surrounding you, it's the perfect time to explore a seasonal color palette that reflects the essence of fall. This year, deep burgundies and rich plums create a moody aesthetic that's ideal for your fall nail ideas.
Pair these bold shades with earthy tones, like dusty rose mauve and terracotta, to balance the vibrancy with a cozy warmth.
Don't forget to include seasonal orange variations, such as vibrant Autumnal Orange and Pumpkin Chic, to add a fun pop of color that mirrors the beautiful foliage.
To elevate your look, consider textured finishes like chocolate swirls or chrome brown, which add depth and sophistication. These finishes can really make your manicure stand out during the season.
For a more youthful and light transition from summer to fall, incorporate creamy whites and light grays.
These transitional colors will help you bridge the gap between the two seasons while keeping your nails fresh and stylish.
Choose Warm-Toned Shades
Choosing warm-toned shades for your fall manicure can instantly elevate your style and capture the essence of the season. These colors, reminiscent of the vibrant fall foliage, not only evoke cozy vibes but also enhance the richness of your autumn wardrobe. Deep burgundy and chocolate brown are perfect choices that create a sophisticated look while complementing your outfits.
For a more playful touch, consider incorporating pumpkin spice or autumnal orange into your nail designs. Vibrant variations like tangerine tips can add a cheerful pop, keeping you on-trend as the leaves change.
Earthy tones such as terracotta and dusty rose mauve provide a beautiful transition from summer to fall, offering a warm and inviting palette.
If you want a chic yet cozy vibe, opt for shades like cinnamon latte or mocha marble in your manicure. These warm hues work wonderfully for both casual and formal settings, ensuring your nails always look polished.
Nail Care Tips for Fall
As the temperatures drop, your nails need extra care to stay healthy and strong. Start with these essential nail care tips for fall to keep your manicure looking flawless.
First, regularly moisturize your hands and cuticles. This combats dryness caused by cooler weather, preventing brittle nails.
Incorporate a nourishing nail oil into your routine, especially ones with jojoba or vitamin E. These ingredients help maintain hydration and promote stronger nail growth.
Don't forget to exfoliate your cuticles gently once a week. This prevents hangnails and keeps your manicure fresh.
Using a base coat with strengthening properties is crucial, too. It protects your nails from potential damage caused by darker fall polishes. Additionally, consider using gel manicures to enhance durability during the fall season, ensuring your nails remain resilient against the elements.
Pros and Cons of Trends
Nail trends each season bring fresh inspiration and excitement, but they also come with their own set of pros and cons.
For instance, this Fall, earthy tones and cozy coffee-inspired shades offer versatility, allowing you to achieve both casual and formal styles. These nail polish colors can easily transition from day to night, making them a practical choice.
On the flip side, while the Edgy French mani gives you a modern twist with creative color options, it can also be challenging to master. You might find that some designs, like Fall Florals and Scattered Leaves, require more effort and skill, which could be a downside if you prefer nail art without the hassle.
Moreover, the nostalgic jelly nails in warmer hues reflect a balance between trendy and classic, but you'll need to consider how long these styles will remain fashionable. Additionally, trends in nail art can reflect a broader understanding of software quality assurance principles, as attention to detail is crucial in both fields.
Lastly, trends like the Russian manicure can offer an elegant look, but they come with risks to nail health that you should be aware of.
Ultimately, embracing these trends can enhance your Fall nails, but weigh the pros and cons to find what suits you best.
Pumpkin Chic Inspiration
Embracing the vibrant hues of autumn, Pumpkin Chic nail designs bring a festive flair to your fall looks. These trendy fall nail designs feature bright orange hues that perfectly capture the essence of the season. You can easily pair them with Halloween-themed attire for various festive occasions.
If you're looking to enhance your autumn aesthetic, consider incorporating pumpkin motifs into your nail art. Simple pumpkin colors or playful designs with glitter can add a unique touch while remaining easy to replicate at home. This versatility allows you to express your creativity, whether you prefer bold statements or subtle accents.
Pumpkin Chic nails not only celebrate the fall season but also reflect current nail art trends, making them a popular choice among nail enthusiasts.
You'll find that these designs can effortlessly add a pop of color to more muted autumn outfits, ensuring you stand out.
Embrace Cozy Fall Vibes
After celebrating the festive Pumpkin Chic designs, it's time to embrace the cozy vibes that fall brings. This season, opt for nail colors that reflect the warmth of your favorite coffee drinks. Cozy coffee-inspired shades like Cinnamon Latte and Mocha Marble create an inviting aesthetic that's perfect for any chic manicure. Maintaining skin hydration is also important during this time, as it helps keep your cuticles healthy and your nails looking their best. Additionally, using essential oils can enhance your nail care routine, providing benefits such as improved skin hydration.
Consider earthy and neutral tones such as browns, greens, and dark teals; these colors evoke the natural beauty of autumn and pair effortlessly with your fall wardrobe. For a splash of vibrancy, try seasonal orange variations like Pumpkin Chic and Autumnal Orange, which enhance the cozy feel of muted outfits. Additionally, you might want to incorporate natural ingredients in your nail care routine, as they can help maintain healthy nails during the seasonal transitions.
Don't forget to experiment with textured and metallic finishes, like Mocha Marble and Magic Metallic, adding depth and sophistication to your nail designs. Additionally, opting for developmental milestones in nail art can inspire unique patterns that reflect the progression of seasonal trends.
If you're leaning towards more playful looks, fun and casual styles, such as Wavy Baby and Check Mate, reflect the carefree spirit of the season while keeping your nails trendy. Staying hydrated not only benefits your skin but also supports overall nail health, ensuring your manicure looks fabulous all season long.
Whether you prefer short nails or longer ones, these ideas offer the perfect blend of comfort and style for your fall manicure.
Frequently Asked Questions
What Nail Color Is in Trend for Fall 2024?
For fall 2024, you'll see deep burgundies, plums, and chocolate browns trending. Earthy tones and vibrant shades like pumpkin orange add warmth. Don't forget to experiment with glossy finishes and creative nail art styles!
What Nail Trend Is in 2024 for Short Nails Fall?
This fall, you'll love experimenting with earthy tones and ombre styles for short nails. Edgy French manicures and playful patterns offer a chic twist, while deep burgundy and plum shades elevate your seasonal look effortlessly.
What Nail Shape Is Trending for Fall?
This fall, you'll find classic square and almond shapes trending, offering elegance and modernity. Coffin and stiletto shapes add drama, while short rounded nails provide comfort. Don't forget the versatile squoval shape for a flattering look!
What Is the Most Popular Nail Color for Fall?
For fall, deep burgundies and plums dominate the nail color scene, giving you that rich, warm vibe. Earthy tones like terracotta and muted greens also shine, perfectly complementing your autumn wardrobe and keeping things cozy.
Ken is our in-house hair expert, committed to sharing his knowledge and passion for hairstyling with our audience. With a sharp eye for trends and techniques, Ken offers insightful articles, tips, and tutorials to help our visitors achieve their desired hair looks. Whether you’re looking to master the latest hairstyle or learn how to care for your locks, Ken’s expertise will guide you every step of the way.
Nail Tips
How to Use Nail Clippers Like a Pro!
Discover the secrets to mastering nail clippers like a pro and achieve salon-quality results at home—your nails will thank you!
Using nail clippers like a pro is super easy and fun! First, grab a high-quality pair for sharp, clean cuts. Always use separate clippers for your fingers and toes to stay hygienic. Hold your clippers at a 45-degree angle, and make 3-4 small cuts on each nail. Remember to leave a tiny white tip to prevent cutting too close to your skin. Afterward, gently smooth any rough edges with a nail file. Keep your clippers clean and disinfected to avoid germs. With these tips, your nails will look fabulous and fresh, and there's even more to discover about nail care!
Key Takeaways
- Use high-quality stainless steel clippers and separate clippers for fingernails and toenails to maintain hygiene and achieve precise cuts.
- Position clippers at a 45-degree angle and make 3-4 small cuts per nail to prevent tearing and ensure a smooth finish.
- Leave a tiny white tip (1-2 mm) on each nail to protect sensitive skin and avoid cutting too close to the nail bed.
- Regularly clean and disinfect your clippers with rubbing alcohol to maintain hygiene and prevent infections.
- Experiment with different nail shapes and file nails in one direction to enhance your personal style and maintain a polished appearance.
Introduction
Nail clippers are essential tools for maintaining healthy nails, whether on your fingers or toes. Using nail clippers correctly can make a huge difference in your nail care routine.
First, make sure you've got high-quality clippers with sharp, stainless steel blades. These will help you cut and clip your nails without damaging them or causing any tearing. Proper nail care is also important for overall skin health and can enhance your maintenance routine.
Remember, it's best to have separate clippers for your fingernails and toenails. This helps keep things hygienic and effective!
When you're clipping your nails, position the clippers at a 45-degree angle and take 3-4 small cuts per nail. This way, you'll create a smooth finish and protect your nail bed. Always leave a small white tip at the end of your nails—about 1-2 mm—to prevent cutting too close, which can lead to pain or infection.
After you've finished, don't forget to disinfect your clippers with rubbing alcohol. This simple step keeps bacteria away and ensures your nails stay healthy and happy!
Prevent Painful Nail Injuries
Using the right technique when clipping your nails is key to preventing painful injuries. First, make sure you use the appropriate clippers for your fingernails or toenails. Using the wrong tool can lead to nail damage or even hurt you!
When you clip your nails, try to do it at a slight angle. Instead of making one big cut, take several small cuts. This way, you avoid cutting too close to the nail bed, which helps prevent painful ingrown nails. Additionally, maintaining good hygiene is essential, just like how the safety of certain foods for dogs can contribute to their overall well-being.
It's also super important to leave a tiny white tip at the end, about 1-2 mm. This helps you avoid cutting too short, which can expose your sensitive skin and increase the risk of infections.
Always clip your nails in a well-lit area so you can see what you're doing clearly. This minimizes the chance of accidental cuts or uneven trimming.
Don't forget to disinfect your nail clippers regularly! Cleaning them helps keep away pesky bacteria and fungus that could lead to painful infections in your nail bed.
Following these tips will keep your nail clipping experience safe and enjoyable! Happy clipping!
Popular Variations and Ideas
Clipping your nails can be an opportunity to express your personal style and keep your hands and feet looking great. Proper nail care is essential, as neglect can lead to issues like ingrown nails, similar to how routine health checks are recommended for pets.
You can create the perfect nail look by experimenting with different shapes! For fingernails, use curved blade clippers to follow the natural rounded shape, while straight blade clippers are best for toenails to help prevent nail problems like ingrown nails. When clipping, aim to cut straight or at a 45-degree angle, making several small cuts instead of one big one. This helps avoid splits and tears!
Once you've clipped your nails, remember to leave a small white tip (about 1-2 mm) at the end of each nail to keep them healthy and comfy.
Don't forget to file your nails too! Use an emory board and file your nails in one direction to smooth those edges and prevent breakage. You can try different shapes, like rounded or squared, to see what suits you best.
Regularly assess your nail length, and stay on top of trimming to keep your nails looking fantastic. With these tips, you'll be a nail-clipping pro in no time!
Tips and Tricks
When it comes to achieving the best results with your nail clippers, keeping a few essential tips in mind can make all the difference. First, always use high-quality stainless steel clippers for a clean, precise cut. Low-quality clippers can cause damage and leave you with uneven nails.
When you cut your nails, try to clip at a slight angle instead of straight across. This helps prevent tearing and gives you a smooth finish!
Another common mistake is cutting too close to the nail bed. To avoid this, keep a slight white tip, about one or two millimeters, at the edge of your nails. This not only looks nice but allows for healthy nail growth, too!
After you've clipped, don't forget to gently scrape the edges with a nail file, smoothing them out and preventing breakage.
Care and Maintenance
To keep your nail clippers in top condition, proper care and maintenance are essential. After each use, make sure to clean nail clippers by disinfecting them with rubbing alcohol or an antibacterial solution. This helps maintain hygiene and prevents the spread of bacteria. It's a quick step, but it makes a big difference!
Before you trim your nails, always inspect clippers for any signs of wear or damage. If you notice dull blades or loose parts, it's time to replace them for safety. Keeping those blades sharp is important too; sharp blades help prevent tearing or damaging your nails while clipping.
Don't forget to dispose of nail clippings properly after each use! This keeps your grooming area neat and hygienic.
Lastly, store clippers in a clean, dry place. This protects them from rust and bacterial growth, ensuring they're ready for your next nail care session.
With these simple steps, you'll be on your way to using nail clippers like a pro, keeping your nails looking great and your clippers in fantastic shape! Happy clipping!
Common Mistakes to Avoid
Before you start trimming your nails, it's crucial to be aware of common mistakes that can lead to nail damage or discomfort.
First, always choose the right clippers for every nail shape—using fingernail clippers on toenails can cause problems. When you clip, don't go too short! You still need a tiny white tip to keep your nails safe from injury and infection.
Another mistake is clipping straight across. Instead, clip at an angle; this helps prevent ingrown toenails and keeps your nails healthy.
When you hold the clippers, make sure you're steady and focused. Poor lighting can lead to uneven cuts, so try to find a bright spot to work in.
Also, don't forget about your tools! Clean clippers are essential. If you neglect to disinfect them, you could introduce bacteria to your nails and skin, leading to infections.
Frequently Asked Questions
How Do You Cut Your Nails Like a Professional?
To cut your nails like a professional, use high-quality stainless steel clippers. For fingers, clip at a 45-degree angle in small cuts. For toes, cut straight across, leaving a small white edge for safety.
What Is the Correct Way to Use Nail Clippers?
To use nail clippers correctly, choose the right type for your nails, hold them at a 45-degree angle, make small cuts, leave a tiny white edge, and clean them after each use for hygiene.
How Do You Cut Your Toenails Like a Pro?
To cut your toenails like a pro, use larger clippers, trim straight across, and start with the big toe. Make several cuts per nail, ensuring good lighting for precision, then disinfect your clippers afterward.
How Do You File Your Nails Like a Pro?
To file your nails like a pro, always file in one direction. Start with a coarse file, then switch to a finer one. Keep the file angled for control and regularly check your nail length.
Conclusion
Now you're ready to tackle nail trimming like a pro! Remember to keep your clippers clean, take your time, and avoid those pesky mistakes. With these tips, you'll have neat and healthy nails in no time. Plus, you'll impress your friends when they see how great your nails look! So grab your clippers, relax, and enjoy the process. Happy clipping, and may your nails shine bright like a star! 🌟
Khetoli is an expert in hair and nail care and brings her knowledge and creativity to Nightingale Studio. As a skilled writer, she creates informative and engaging content that covers a wide range of beauty topics. Whether you need advice on nail art, hair treatments, or overall beauty maintenance, Khetoli’s expertise ensures that our content is informative and inspiring.
Beauty Tips and Information
Professional Tips for Home Hair Maintenance That Save You Time and Money
Navigate the world of home hair maintenance with expert tips that promise to save you time and money; discover the secrets to vibrant locks today!
You can maintain your hair at home effectively with a few professional tips that save you time and money. Start by mastering basic cutting techniques, like trimming the neck and around ears to reduce salon visits. Keep your hair healthy with quality shampoos and DIY masks made from natural ingredients like honey or avocado. Trim bangs regularly and maintain longer hairstyles with strategic cuts every six months. Embrace low-maintenance styles and invest in good accessories. Regular care prevents damage and keeps your hair looking vibrant. Stick around to uncover more valuable strategies for effortless home hair maintenance!
Key Takeaways
- Learn basic hair cutting skills like buzz cuts to reduce barber visits and build confidence in maintaining your style.
- Schedule trims every six months to remove split ends, keeping longer hairstyles healthy and reducing salon expenses.
- Utilize DIY hair masks with natural ingredients, such as avocado and honey, for effective hydration at a fraction of salon costs.
- Invest in quality, cost-effective hair care products, focusing on sulfate-free options to maintain moisture without breaking the bank.
- Embrace versatile low-maintenance styles, like braids and buns, to manage growth while minimizing heat styling and damage.
Hair Cutting Skills
When it comes to hair cutting skills, mastering the basics can save you time and money. Starting with simple techniques, like buzz cuts, is ideal for beginners. They're quick to execute and help you build confidence in your abilities.
Additionally, investing in a clean and organized space can enhance your hair cutting experience, allowing for better focus and efficiency healthier lifestyle benefits. Investing in quality clippers, such as those from the Wahl brand, can cost you under $40, making them a smart addition to your hair care routine.
Practice is key. Regularly trimming around the ears and neck not only hones your skills but also reduces the frequency of barber visits. This is especially beneficial for families with multiple boys, where learning to cut hair at home can lead to substantial savings—potentially hundreds of dollars each year.
As you get comfortable with basic hair cutting skills, you can gradually move on to more sophisticated styles. The more you practice, the better your results will be.
Effective Bang Trimming
Achieving the perfect bang trim can transform your look and boost your confidence. To get started, make certain your hair is dry and grab a pair of sharp scissors. For a glamorous look, consider incorporating bold colors or accessories to enhance your overall style while you work on your bangs.
It's vital to cut small sections at a time; this way, you avoid removing too much length all at once. For a soft, blended appearance, cut your bangs at an angle instead of straight across. This technique creates a more natural look that frames your face beautifully.
Regularly trimming your bangs every 4-6 weeks is essential for maintaining their shape and preventing them from becoming too long and unmanageable. When you trim, pull the hair slightly taut to guarantee an even cut—remember that wet bangs can appear shorter when they dry.
If you're unsure about your technique, start by practicing on a small section or use a comb to lift the bangs and cut just the tips. This approach helps you build confidence and refine your skills. You might also explore glamour makeup and hair styling ideas to complement your refreshed look.
With these effective bang trimming tips, you'll keep your bangs looking fresh and fabulous, saving both time and money on salon visits!
Maintaining Longer Hairstyles
When you embrace longer hairstyles, you can extend the time between cuts and save money on salon visits.
By opting for low-maintenance styles and incorporating DIY techniques, you'll keep your hair healthy and manageable.
Utilizing products like pomades and gels can enhance your styling options and maintain your locks in great shape, particularly when you consider their importance based on hair type.
Let's explore how to make the most of your longer locks with simple tips and tricks.
Extend Time Between Cuts
With a little patience and the right care, you can extend the time between haircuts while maintaining a stylish, longer hairstyle.
By following these hair care tips, you'll keep your locks looking healthy and polished without frequent visits to the barber. Additionally, using best hair styling gels can help tame frizz and add shine, enhancing your overall look between trims.
- Schedule Regular Trims: Aim for a trim every six months to remove split ends and maintain hair health.
- Use Quality Products: Invest in shampoos and conditioners designed for longer hairstyles to nourish and protect your hair.
- Experiment with Styles: Longer hair is versatile—try braids, buns, or half-up styles to keep things fresh and manage any growth.
- Embrace Natural Growth: Allow your hair to grow naturally without constant adjustments, giving you a more relaxed maintenance routine.
Embrace Low-Maintenance Styles
Maintaining longer hairstyles doesn't have to be a burden, especially if you embrace low-maintenance styles. By incorporating long layers into your hair, you can greatly reduce the frequency of salon visits. This not only saves you time but also money, potentially cutting up to $400 off your annual haircut expenses.
Additionally, using best shampoos for highlighted hair can help maintain your color and shine, keeping your longer style looking vibrant.
Simple styling techniques like braiding or using hair accessories can elevate your look while keeping maintenance minimal. These styles allow you to manage longer hairstyles effortlessly, giving you a chic appearance without the need for frequent trims.
Scheduling regular trims every six months can keep your hair looking fresh and healthy without overwhelming your calendar. This routine helps prevent split ends and guarantees your hair remains in great shape.
Longer hairstyles are particularly practical for families, especially as children grow and grooming costs rise. By adopting these low-maintenance approaches, you create a style that suits your lifestyle while keeping your hair healthy and beautiful.
Embrace the simplicity of longer hairstyles and enjoy the time and money you save!
DIY Styling Techniques
Longer hairstyles can be both stunning and manageable with the right DIY styling techniques. By embracing these methods, you can enjoy less styling time and keep your hair healthy without breaking the bank.
Additionally, incorporating effective fungus nail treatment options into your overall beauty routine can enhance your self-care practices. Here are four effective strategies to contemplate:
- Simple Styles: Incorporate braids or buns into your routine. These styles not only look chic but also minimize heat styling, reducing damage over time.
- High-Quality Accessories: Invest in silk scrunchies or clips. They help prevent breakage and frizz, keeping your long locks neat and well-kept between trims.
- Self-Trimming: Learn basic self-trimming techniques to maintain your hairstyle's shape. This allows you to extend the time between professional cuts.
- DIY Hair Masks: Embrace natural products and regularly use hair masks to nourish your strands. This DIY hair approach improves texture and appearance, further decreasing reliance on salon treatments.
Smart Hair Care Products
When it comes to hair care, you don't have to break the bank to achieve great results. By choosing cost-effective product alternatives and incorporating fundamental ingredients, you can nourish your hair without overspending.
Additionally, staying hydrated is essential for maintaining not just skin health but also your hair's liveliness, as effective hydration techniques can enhance shine and manageability.
Plus, experimenting with DIY treatments can provide impressive hydration and shine, making your hair maintenance both smart and budget-friendly.
Cost-Effective Product Alternatives
For those looking to save on hair care without sacrificing quality, exploring cost-effective product alternatives is a smart move. You can maintain your hair's health and style while being budget-conscious, much like how a well-planned budget can improve overall financial health.
Here are some effective options to weigh:
- Adult Shampoo and Conditioner: Choose adult formulas instead of overpriced kids' products; they often perform just as well at a lower cost.
- DIY Hair Masks: Whip up nourishing treatments using pantry staples like avocado, honey, and olive oil. These ingredients hydrate your hair without the salon price tag.
- Homemade Dry Shampoo: Use cornstarch or cocoa powder to create your own dry shampoo. This will refresh greasy hair and reduce the need for frequent washes.
- Quality Leave-In Conditioner: Invest in a quality leave-in treatment that can be used sparingly. This approach prolongs the life of pricier products and delivers daily hydration.
Essential Hair Care Ingredients
Finding cost-effective alternatives is just the first step in your hair care journey; understanding the right ingredients to look for in products can elevate your routine even further. Focus on formulations that keep your hair healthy and manageable.
Ingredient | Benefits | Look For In Products |
---|---|---|
Natural Oils | Hydrate, reduce frizz | Argan, coconut oil |
Proteins | Strengthen, minimize breakage | Keratin |
Vitamins | Promote hair growth | Vitamin D |
Deep Conditioning | Improve texture, add moisture | Shea butter, honey |
Incorporate shampoos and conditioners that are sulfate-free to maintain your hair's natural oils and moisture balance. Products enriched with natural oils like argan or coconut oil will nourish your hair while helping to combat split ends. For those dealing with damage, opt for protein-infused treatments to strengthen your strands and prevent breakage. Don't forget the power of vitamins—Vitamin D can greatly boost scalp health. Finally, treat yourself to deep conditioning masks to enhance moisture and improve the overall texture of your hair. Your hair will thank you!
DIY Hair Treatments Benefits
Regularly exploring DIY hair treatments can greatly enhance your hair care routine while saving you money. These treatments often use common pantry ingredients, making them less expensive than salon alternatives.
Additionally, some essential oils, such as lavender for relaxation or peppermint for a revitalizing boost, can be incorporated into your hair treatments for added benefits. Here are some benefits to evaluate:
- Nourishment: Ingredients like honey and avocado hydrate and nourish your hair.
- Improved Texture: Regular use of homemade masks can meaningfully improve your hair's texture and overall health.
- Customizable Care: You can tailor treatments to meet your specific hair needs, ensuring your hair gets exactly what it requires.
- Cost Savings: Many users report saving over 50% compared to high-end products, allowing you to enjoy healthier hair without breaking the bank.
Incorporating DIY hair treatments into your routine can also prolong the time between salon visits, giving you an extra day or two of healthy-looking hair.
For instance, coconut oil and olive oil masks deeply condition and repair damage, making them effective and budget-friendly.
Cost-Effective Hair Strategies
One of the best ways to save money on hair maintenance is by adopting cost-effective strategies that keep your locks looking great without breaking the bank. Regular trims every six months can greatly extend the time between professional haircuts, allowing you to save both time and money in the long run.
Embracing longer hairstyles can also help you reduce the frequency of barber visits, keeping your grooming expenses in check. Additionally, maintaining a healthy diet can improve your hair's overall health, as certain nutrients are essential for strong and vibrant hair; think about incorporating honey varieties like Pine Honey that boost your immune system and can promote healthier hair.
Think about utilizing DIY hair coloring kits for a budget-friendly alternative that delivers salon-quality results at a fraction of the cost. When it comes to hair care, investing in quality products, like adult shampoos, can lead to considerable savings without compromising on effectiveness. Avoid overpriced kids' shampoos that offer little value.
Another smart strategy is to donate your hair. Not only can this provide you with a free haircut, but it also supports charitable causes while maintaining your hair's health and style.
Healthy Hair Washing Techniques
Maintaining healthy hair goes hand in hand with effective washing techniques. To keep your locks looking their best, consider these essential tips:
- Use lukewarm water: Hot water strips your hair of natural oils, so stick to lukewarm for washing.
- Focus on the scalp: Apply shampoo primarily to your scalp, where oil and buildup accumulate, rather than the ends to prevent dryness.
- Wash less frequently: Allow natural oils time to condition your hair; aim for washing two to three times a week.
- Rinse with cold water: Finish with a cold rinse to seal the cuticle, locking in moisture and enhancing shine.
Nourishing Hair Treatments
Nourishing hair treatments can transform your locks from dull and lifeless to vibrant and healthy. Regular deep conditioning treatments, ideally once a week, can greatly improve your hair's texture and moisture levels, making it more manageable and reducing the need for frequent salon visits.
Consider incorporating DIY hair masks into your routine. Ingredients like avocado, honey, and olive oil not only nourish your hair but also serve as cost-effective alternatives to salon treatments, enhancing both shine and strength.
Don't forget about leave-in conditioners! They provide extra hydration and protection, helping to reduce breakage and improve overall hair health without breaking the bank on expensive products.
Using oils such as argan or coconut as weekly treatments can also help restore moisture and shine, promoting healthier hair while saving you money.
Frequently Asked Questions
How to Save Money on a Hairdresser?
To save money on a hairdresser, consider learning basic cutting skills for trims and buzz cuts. Invest in quality clippers, embrace longer styles, and try DIY coloring or conditioning to reduce salon visits considerably.
How Can I Maintain My Hair at Home?
You're in the bathroom, shampoo bottle in hand, when you realize washing less often lets your hair's natural oils thrive. Embrace conditioning treatments, snip split ends, and try DIY masks for effortless home maintenance.
How to Save Money on Shampoo and Conditioner?
To save money on shampoo and conditioner, wash your hair less often, use sulfate-free products, create DIY dry shampoo, cut open bottles for every last drop, and consider multi-use products to simplify your routine.
What Makes a Good Hair Care Routine?
Imagine you're preparing for a big event. A good hair care routine includes sulfate-free shampoo, regular conditioning, deep treatments, heat protection, and trims every 6-8 weeks. Your hair will shine, feeling vibrant and healthy!
Conclusion
By embracing these professional tips, you'll not only elevate your hair game but also transform your routine into a delightful ritual. You're not just saving time and money; you're investing in a more confident you. With a little practice and the right products, you can turn potential hair disasters into opportunities for creativity. So, go ahead and indulge in your own hair maintenance journey—your locks will thank you, and your wallet will too!
Cindy, the editor-in-chief of Nightingale Studio, is the driving force behind our editorial vision. With years of experience in the beauty industry, Cindy ensures that all content published on our platform meets the highest standards of quality and accuracy. Her attention to detail and commitment to excellence ensures that our visitors receive valuable and trustworthy information they can rely on.
-
Entertainment News2 months ago
Cristiano Ronaldo’s Net Worth: How Much Is the Football Superstar Worth?
-
Entertainment News3 months ago
Net Worth of Michael Corleone Blanco: Inside the Real-Life Narco Empire!
-
Entertainment News3 months ago
James Best Net Worth: How Much Was He Worth at His Peak?
-
Entertainment News3 months ago
Free Spirit Equestrian Net Worth: How She Built an Empire on Horseback!
-
Entertainment News3 months ago
Pete Best Net Worth in 2023: How Much Is the Former Beatle Worth Now?
-
Entertainment News2 months ago
What Is Shahid Anwar’s Net Worth? The Story Behind His Financial Success!
-
Entertainment News2 months ago
Selena Gomez Vs Justin Bieber: Who Has the Higher Net Worth?
-
Entertainment News3 months ago
Who Is the Highest Net Worth K-pop Idol? Find Out Who’s on Top!