To create rustic boho shelves for books and decor, you can use simple DIY techniques like building floating shelves with reclaimed or pine wood, adding textured finishes with baking soda paint, or repurposing crates and pallets. Incorporate natural materials like rattan, wicker, or jute for an authentic touch. Style your shelves with plants, personal collectibles, and artisanal decor to boost the cozy vibe. Continue exploring these ideas to craft your perfect boho space.
Key Takeaways
- Use reclaimed wood or pallet materials to create rustic, eco-friendly open shelves with a distressed or weathered finish.
- Incorporate natural fiber ropes or jute for hanging or supporting shelves, enhancing boho charm.
- Add decorative accents like woven baskets, potted plants, or artisanal ceramics to personalize and style your shelves.
- Use simple, hidden brackets or floating supports for a clean, minimalist look that emphasizes rustic textures.
- Incorporate textured finishes with baking soda paint or dry brushing for a layered, vintage boho aesthetic.
Crafting No-Sew Boho Pillows With Dollar Tree Materials

Ever wondered how to create stylish boho pillows without sewing? DIY pillows are easy to make using Dollar Tree supplies, giving your decor a trendy boho vibe without breaking the bank. Start by choosing fabric from Dollar Tree that matches your style, then cut it to the right size. Wrap the fabric around a pillow insert and secure it with hot glue or fabric glue for a seamless finish. Adding tassels, fringes, or embroidered accents instantly boosts the boho look. Since these DIY pillows are customizable, you can pick patterns and sizes that blend seamlessly with your existing decor. Plus, this quick project takes less than 30 minutes, making it a perfect weekend craft to elevate your boho-inspired space effortlessly. Additionally, selecting the right fabric type can improve the longevity and appearance of your handmade pillows, especially when considering creative practice to experiment with different textures and styles. Using DIY techniques can also help you achieve professional-looking results with minimal effort. Incorporating rustic decor elements can further enhance the farmhouse or boho charm of your space. To further refine your project, consider exploring text transformation tools to easily adjust your project descriptions or labels for a cohesive presentation.
Using Baking Soda Paint for Textured Rustic Finishes
You can create a rustic, textured look on your open shelves by mixing baking soda into acrylic paint for a thicker, more tactile finish. Applying this mixture in multiple layers or with a sponge adds depth and visual interest. Incorporating an understanding of ethical hacking can inspire creative approaches to DIY projects by emphasizing security and durability in your finishes. Additionally, experimenting with different surface textures can further enhance the weathered, vintage vibe of your decor. Exploring personality traits can help you personalize your design style to reflect your unique character and preferences.
Mixing Baking Soda Paint
Have you considered how simple household ingredients can transform your furniture with textured, rustic finishes? Mixing baking soda paint is a straightforward step in DIY projects that adds instant character to your pieces. To start, combine baking soda with your chosen paint or plaster—usually a ratio of about one part baking soda to two parts paint. Stir thoroughly until the mixture is smooth and consistent. This creates a textured, matte surface that mimics aged or distressed wood. The baking soda reaction produces subtle pilling or bubbling, giving your furniture a unique, dimensional look. Once mixed, you can apply the baking soda paint with a brush or sponge. After drying, sand or distress the surface for an authentic vintage finish, perfect for rustic boho decor. Additionally, sensor technology in smart toilets can detect humidity and temperature, which could inspire innovative ways to monitor moisture levels in your DIY projects. Incorporating textured finishes can further enhance the rustic appeal and depth of your decor.
Applying for Texture
Applying baking soda paint for texture involves using a sponge or brush to create uneven, layered strokes that highlight the rustic, boho-inspired finish. As you work, the baking soda mixes with your paint or primer to produce a gritty, matte surface, mimicking natural materials. To enhance the texture, try these techniques:
- Dab with a sponge for a mottled, irregular look
- Use a dry brush for subtle, layered strokes
- Apply thicker paint in certain areas for dimension
- Create random patterns to emphasize unevenness
- Vary pressure to deepen or soften texture
Once the baking soda paint dries, it results in a chalky, distressed surface perfect for vintage or rustic shelves. Seal with a clear matte topcoat to preserve the textured finish and prevent chipping.
Achieving Rustic Finish
Building on the textured effects achieved with baking soda paint, focusing on a rustic finish enhances the vintage charm of your shelves. To create this look, mix baking soda with your paint at a ratio of 1:1 to 1:3, depending on the desired texture. Apply multiple coats to build a layered, chippy appearance typical of farmhouse decor. Once dry, gently sand the surface to expose the textured layers and add authentic weathered details. The gritty, matte texture from baking soda paint mimics distressed surfaces, elevating your DIY project’s rustic appeal. This method is cost-effective and versatile, making it easy to transform plain shelves into charming, vintage-inspired storage solutions. Achieving a rustic finish with baking soda paint truly brings a cozy, boho vibe to your space. Understanding surface texture techniques can further enhance the authenticity of your rustic finish, especially when combined with authentic weathered details for a more genuine look.
Building Stylish Rope Trays for Rustic Organization
Creating a stylish rope tray for rustic organization is a simple and rewarding DIY project. This versatile piece works perfectly as a hanging shelf or a standalone organizer. To start, you’ll need a sturdy base—wood or cardboard—and thick natural fiber rope like jute or sisal. Secure the rope with hot glue or a staple gun, wrapping it tightly around the edges for a durable border. For extra stability, weave the rope in a grid pattern inside the tray before securing the edges. Add decorative touches like tassels or beads along the rope for a boho vibe. Imagine a tray with:
- Rustic jute borders
- Beaded accents
- Tightly woven grid pattern
- Hanging loops for wall use
- Filled with candles or small decor items
This DIY project transforms basic materials into charming storage for your space.
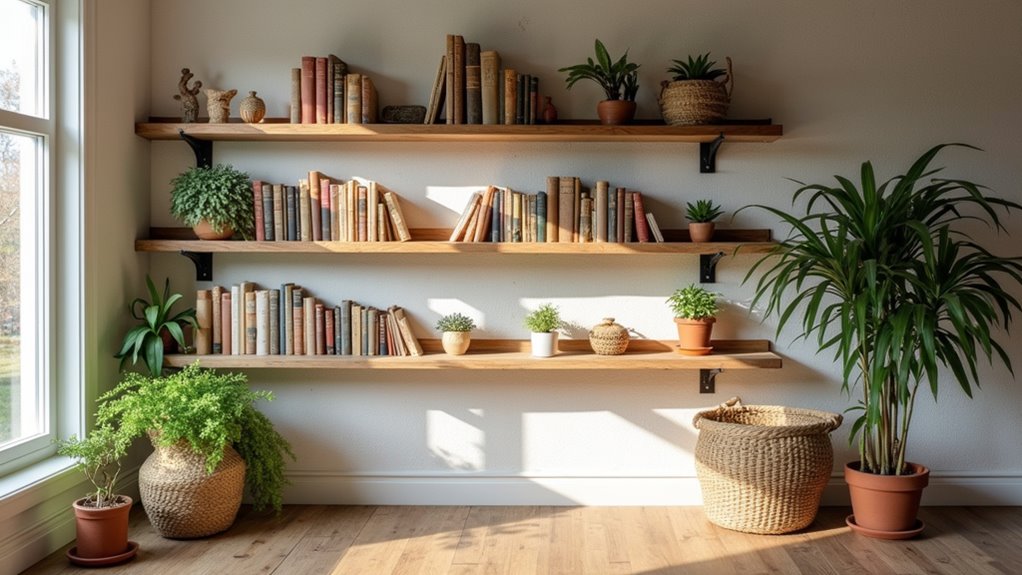
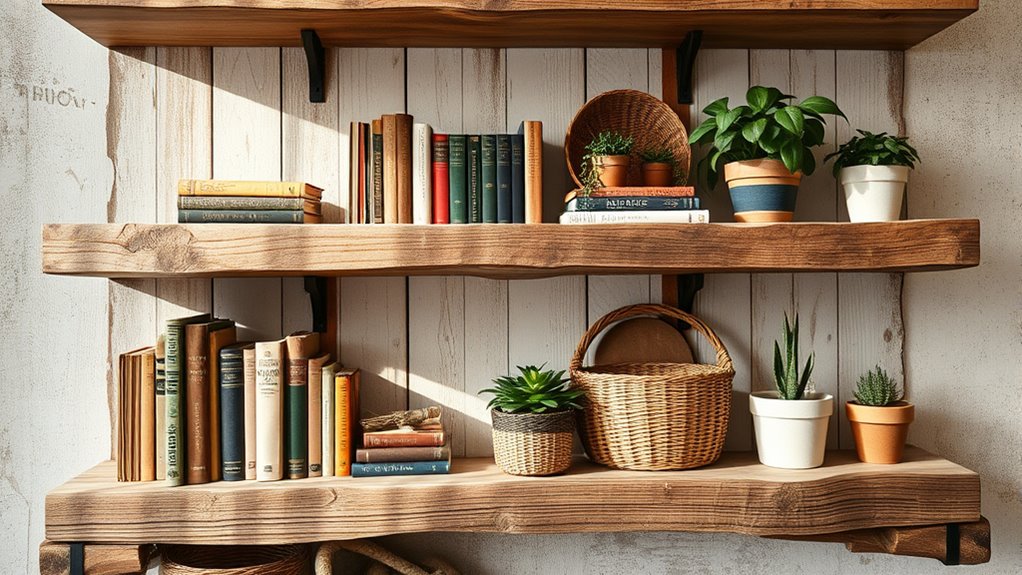
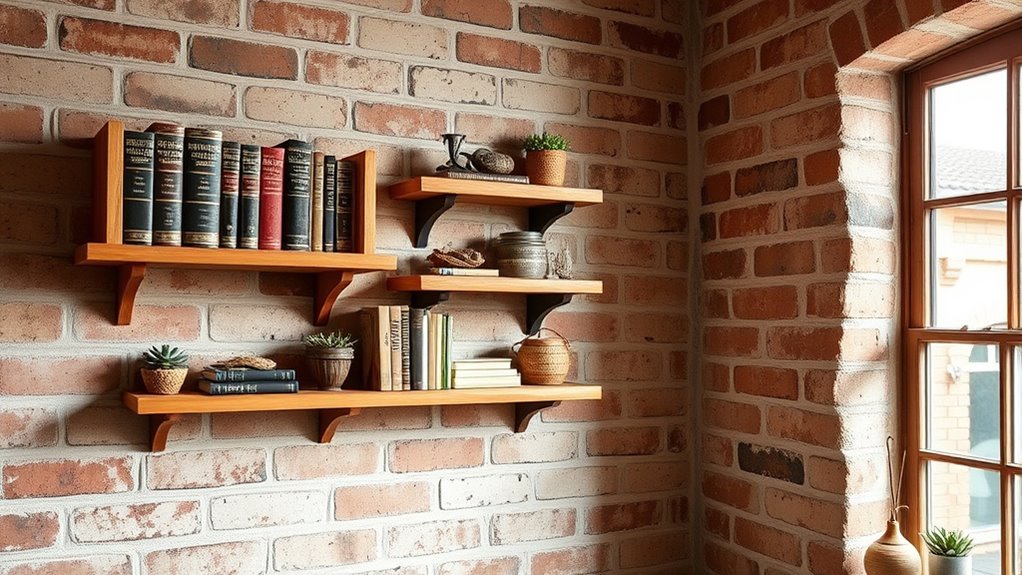
Creating Versatile Wall Shelves With Reclaimed Wood
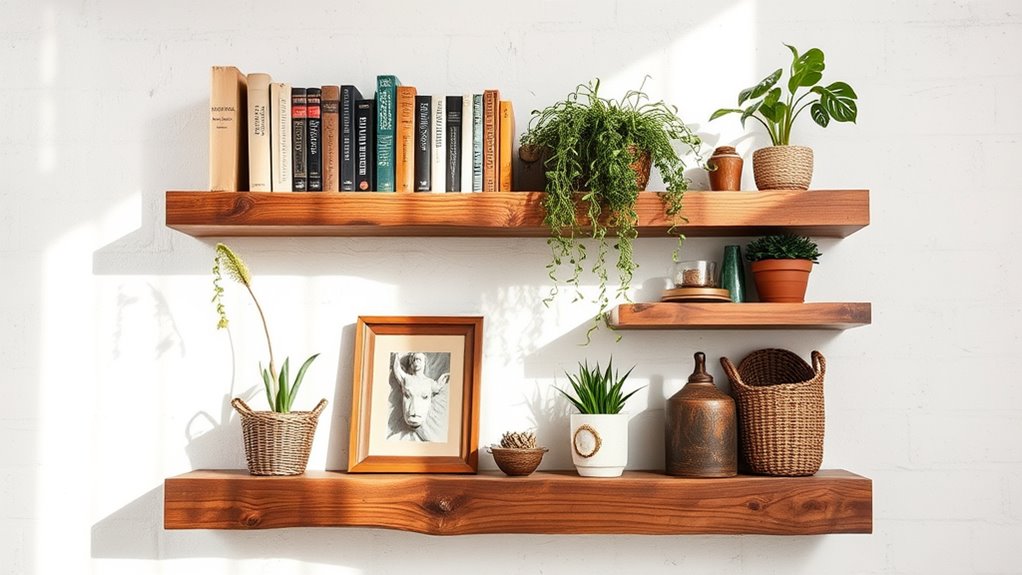
Reclaimed wood offers a charming and eco-friendly option for crafting versatile wall shelves that add warmth and character to your space. Using reclaimed wood for a wall shelf not only creates a rustic boho vibe but also guarantees durability, especially when choosing sturdy, weathered, or knotty pieces. You can cut reclaimed wood into different lengths and widths to customize the shelf size for your storage or display needs. Before installation, sand and seal the wood to prevent splinters and create a smooth surface, making it safe and functional. To maintain a clean, minimalist look, mount your reclaimed wood shelf with hidden brackets or floating shelf hardware. This approach combines style, practicality, and sustainability in your decor. Incorporating wood tuning techniques can help you achieve a perfect finish and enhance the natural beauty of reclaimed wood. Additionally, selecting proper mounting hardware ensures stability and safety, especially when displaying heavier items. Remember that proper maintenance can extend the life of your reclaimed wood shelves and keep them looking their best over time. Regularly assessing your organizational needs can help you maximize space and prevent clutter buildup on your shelves, keeping your space both functional and aesthetically pleasing.
Installing Hanging Rope Shelves for Plants and Decor

Ever wondered how to add a touch of boho charm to your space? Installing hanging rope shelves is a simple way to do it. Choose natural jute or cotton ropes paired with wooden planks for that rustic look. Securely anchor the ropes to wall hooks or brackets, adjusting the length to set the perfect height. Picture a hanging shelf supporting:
- Small potted succulents with trailing vines
- Lightweight decorative objects
- Tiny books or vintage trinkets
- Air plants in glass containers
- String lights draped along the ropes
When completing your DIY projects, double-check all knots and hardware for safety. Regularly inspect for wear and tear to keep your hanging shelf secure. Understanding regional legal resources can help if you need guidance or support during your DIY projects. Additionally, choosing the right materials and tools ensures your shelves are both sturdy and attractive. With some basic tools and a little effort, you can create a charming boho display that’s both functional and stylish.
Designing Small Wooden Shelves for Niche Displays
Creating small wooden shelves allows you to make the most of tight spaces while adding charm to your decor. Using simple materials like pine or reclaimed wood makes the project affordable and customizable. With a few finishing touches, you can style niche displays that highlight your favorite collectibles or plants. Incorporating solar energy graph fluctuations in your decor can also provide a functional touch for skincare enthusiasts.
Crafting Compact Wooden Shelves
Crafting small wooden shelves is a practical way to add personalized storage or display space in tight areas. Using reclaimed scrap wood or 1×2 pine boards keeps your DIY Projects budget-friendly and eco-conscious. These tiny shelves are perfect for organizing miniature plants, framed photos, or decorative trinkets. To enhance your boho aesthetic, incorporate rustic elements like driftwood or live edge wood. Installing small floating or wall-mounted shelves with simple brackets or hidden supports creates a clean, minimal look ideal for compact spaces. Visualize:
- Reclaimed wood with a weathered finish
- Floating shelves with discreet supports
- Soft pastel or neutral stained wood
- Niche displays with tiny plants or keepsakes
- Rustic accents like driftwood embellishments
Enhancing the overall aesthetic with rustic materials can add authentic charm to your small shelves. Incorporating DIY shelving techniques can help you achieve a sturdy and stylish finish. Selecting the right electric bike conversion kit can inspire creative ways to incorporate functional, eco-friendly elements into your space or projects. Utilizing best anime movies as inspiration for themed decor ideas can further personalize your space. These small wooden shelves transform tight corners into charming, functional displays. Additionally, choosing sustainable building materials ensures your project remains environmentally friendly and durable.
Styling Niche Wall Displays
To effectively style niche wall displays, focus on selecting small wooden shelves that fit the specific dimensions of the space and showcase your favorite decor or collectibles. Custom-sized shelves made from scrap wood or pine boards let you tailor the shelf to your niche’s size and purpose. Installing these shelves with hidden brackets or floating supports creates a sleek, minimalist look that highlights your items without clutter. Use natural finishes or distressed paint on the small shelves to enhance a rustic boho vibe and seamlessly blend with other decor elements. Proper spacing and layering of the shelves add visual interest and maximize storage for books, plants, or decorative accents. Paying attention to emotional alignment can also help you choose styles and arrangements that truly resonate with your personal energy, creating a harmonious display. With thoughtful placement, your niche wall becomes a compelling display that combines function with style.
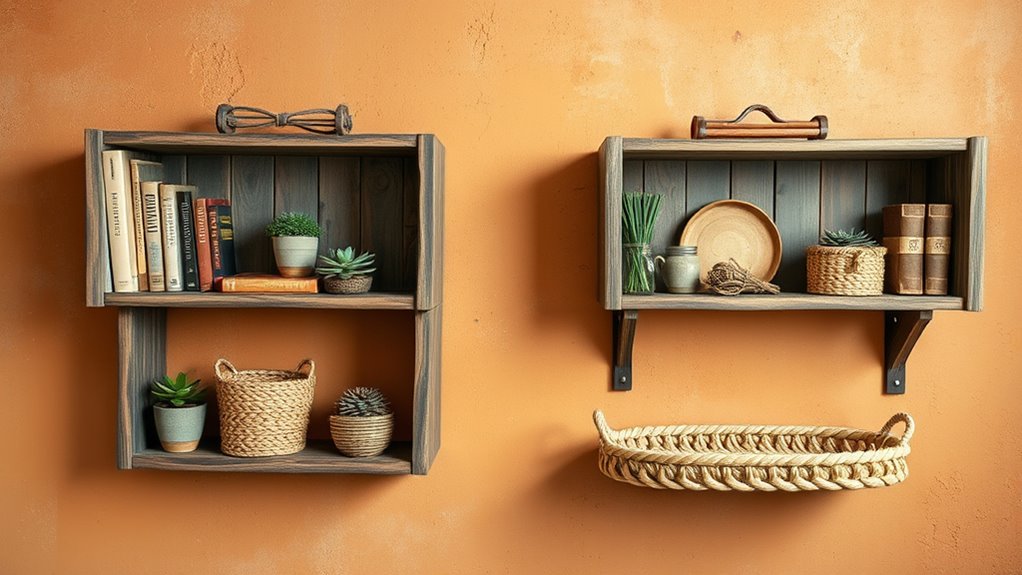
Repurposing Wooden Crates and Pallets for Decor
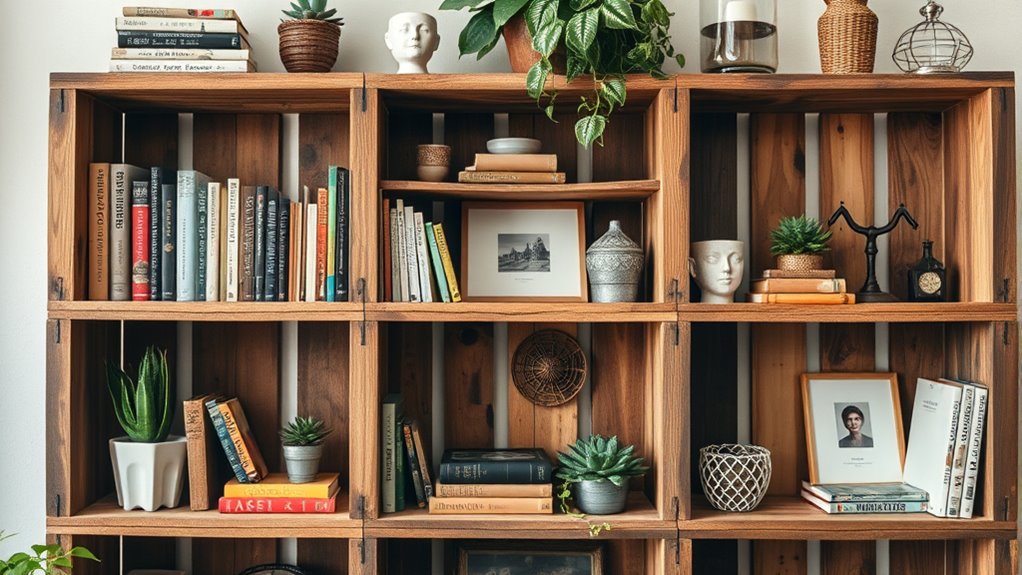
Repurposing wooden crates and pallets into open shelves is a simple and budget-friendly way to enhance your space with rustic charm. You can easily transform these items by sanding, staining, or painting them to match your decor. With just a saw, drill, and brackets, you’re ready to create stylish storage solutions. Imagine:
- Wooden crates stacked to form a unique wall display
- Pallets cut and mounted to hold books or plants
- Reclaimed crates painted in vibrant hues for a pop of color
- Pallet shelves with open ends for easy access
- Crates arranged to add a layered, textured look
Using wooden crates and pallets not only adds character and eco-friendliness but also offers affordable, personalized decor options that suit any space.
Incorporating Wicker and Rattan Shelves in Boho Spaces
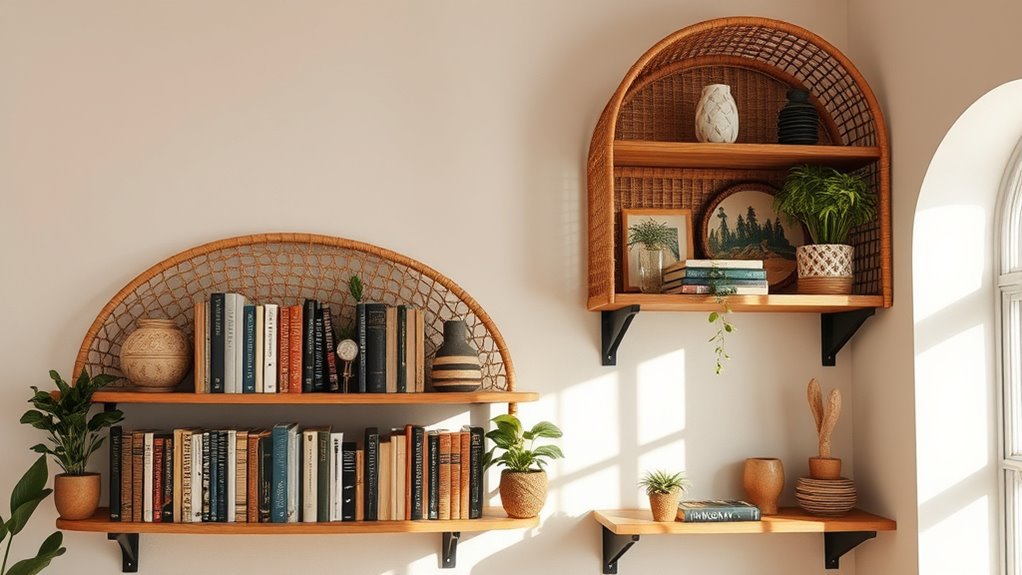
Wicker and rattan shelves seamlessly enhance boho spaces by adding natural texture and warmth. Their textured, rustic appearance complements the eclectic vibe, making your space feel cozy and inviting. Handmade wicker and rattan units often showcase intricate weaving patterns, adding artisanal charm that elevates your decor. These shelves are lightweight yet sturdy, perfect for displaying plants, books, or decorative objects without feeling bulky. Choosing recycled or sustainable wicker and rattan aligns with eco-conscious boho principles, allowing you to decorate responsibly. Available in various styles—wall-mounted, corner, or free-standing—these shelves offer versatile storage solutions that blend seamlessly into any boho interior, creating a relaxed, natural aesthetic that’s both functional and visually appealing.
Making Custom Floating Shelves With Natural and Recycled Materials
Creating custom floating shelves with natural and recycled materials allows you to add an authentic, rustic touch to your boho space. You can craft stunning floating shelves using natural wood, reclaimed pallet wood, or recycled materials like old barn wood. With simple tools like a saw, drill, and level, you can measure, cut, and assemble your own shelves easily at home. Secure mounting brackets or hidden cleats are key to ensuring your floating shelves are sturdy and seamless, supporting books and decor. Incorporate eco-friendly materials such as bamboo or driftwood to enhance sustainability and natural appeal. Finishing touches like sanding, staining, or sealing give your shelves a polished look while protecting the wood. Imagine:
Transform your boho space with handcrafted floating shelves made from reclaimed, natural, and eco-friendly materials for a rustic, authentic touch.
- Weathered barn wood with rustic knots
- Smooth bamboo for a sleek, eco-friendly finish
- Reclaimed pallet wood with unique character
- Driftwood with natural curves
- Carefully sanded and sealed surfaces
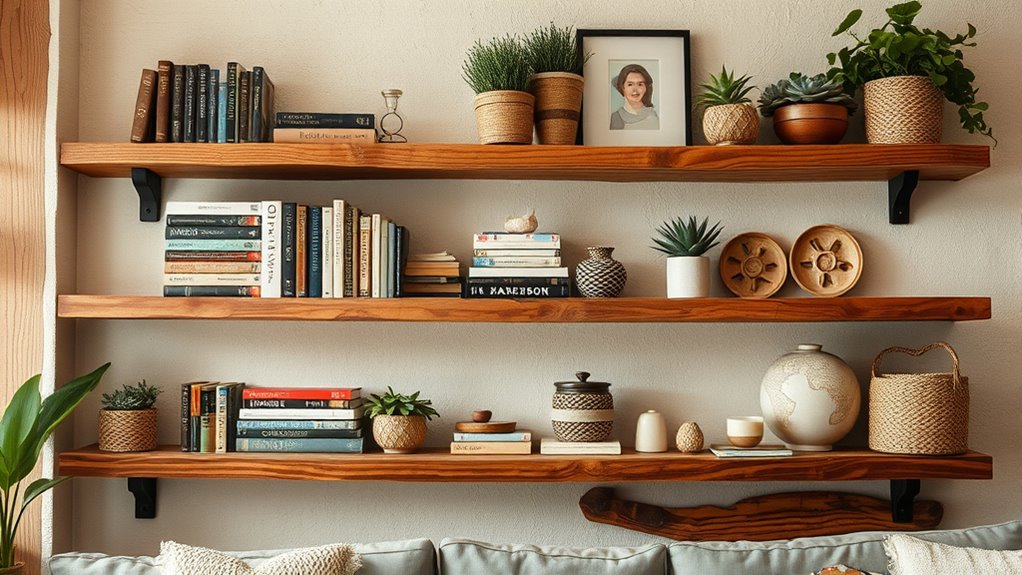
Styling Your Shelves With Plants, Books, and Personal Touches
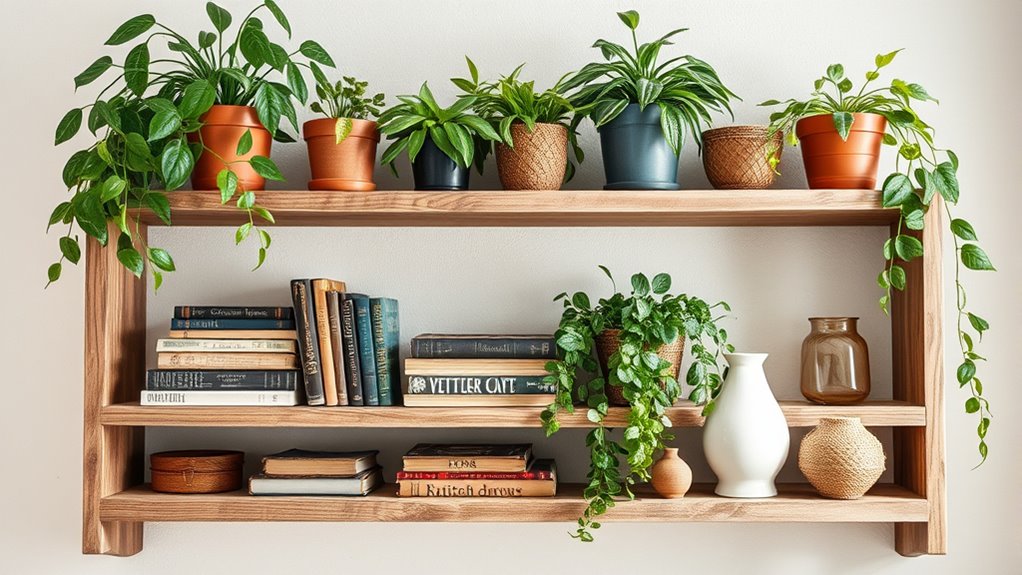
To achieve a warm, inviting look on your open shelves, mix a variety of plants, books, and personal items in a way that reflects your style. Incorporate lush greenery and trailing plants to add life and texture, creating a boho-inspired vibe. Balance books with decorative decor like candles, vases, or small sculptures to personalize your space while maintaining visual harmony. Use floating or wall-mounted wooden shelves to display personal touches such as framed photos, vintage finds, or artisanal crafts, giving your shelves a cozy, lived-in feel. Arrange your items in layers, combining different heights, colors, and textures to add depth and interest. Natural elements like woven baskets or rattan accents can further enhance your rustic boho decor, tying the look together.
Frequently Asked Questions
How Do You Style Rustic Shelves?
You style rustic shelves by balancing height, texture, and color to create visual interest. Incorporate natural elements like plants, woven baskets, and driftwood for an authentic boho vibe. Use asymmetrical or layered arrangements with books, artwork, and decorative objects to add depth and personality. Keep clutter minimal by choosing a few statement pieces and leaving space around each item. Pair distressed wood with vintage accents to enhance rustic charm.
How Do You Decorate a Bookshelf Without It Looking Cluttered?
To decorate a bookshelf without it looking cluttered, you should balance open and closed storage options. Incorporate decorative items like plants, candles, or art to add personality, and arrange books by size, color, or theme for a tidy look. Leave negative space between items, and regularly refresh your decor to keep the shelf feeling fresh and organized. This approach creates a visually appealing, clutter-free display that reflects your style.
How Do You Make Open Shelves Look Less Cluttered?
A place for everything, and everything in its place. To make open shelves look less cluttered, you should keep items minimal and intentionally spaced. Use baskets or containers to hide clutter, and arrange books vertically with decorative accents for balance. Regularly declutter and rotate items to keep the shelves fresh. Focus on cohesiveness in decor, and leave some empty space to give your shelves a clean, organized look.
How Do You Arrange Decorative Shelves?
When arranging decorative shelves, you should vary their heights and depths to create visual interest. Group similar or complementary items like plants and books to keep things organized, and leave some space between objects so everything doesn’t look cluttered. Use the rule of thirds or asymmetrical layouts for a dynamic look, and add decorative touches like small art pieces, baskets, or lighting to enhance the overall style.
Conclusion
With simple skills and savvy supplies, you can create mesmerizing, cozy, and clutter-free spaces. Embrace the beauty of bold boho shelves, blending rustic charm with personal touches. By building, repurposing, and styling, you turn everyday materials into eye-catching essentials. So, start shaping your space with spirited shelving solutions, and watch your home blossom into a beautiful, balanced haven of harmony and happiness. Let your creative core shine through with charming, crafted storage!