
To revamp your floors with a boho touch, start by choosing vibrant, eclectic stencil patterns like floral, geometric, or tribal motifs that match your decor. Prepare your surface thoroughly by cleaning, sanding, and priming to guarantee smooth application. Use quality paints and tools, applying multiple light coats for durability. Play with bold colors and metallic accents to create a unique look. Keep your design protected with sealant, and regular maintenance preserves its charm—if you keep going, you’ll discover how to transform your space effortlessly.
Key Takeaways
- Choose boho-inspired patterns like floral, geometric, or mandala stencils in earthy or pastel colors to enhance the aesthetic.
- Prepare and clean your floor thoroughly, sanding glossy surfaces and applying primer for optimal paint adhesion.
- Use high-quality stencil tools and techniques, dabbing paint carefully to create crisp, seamless patterns.
- Incorporate warm neutral tones with vibrant accents such as gold or turquoise for a cozy, eclectic boho vibe.
- Seal the finished design with a durable topcoat and maintain regularly to preserve the painted tiles’ beauty.
Choosing the Perfect Boho-Inspired Floor Stencil Designs
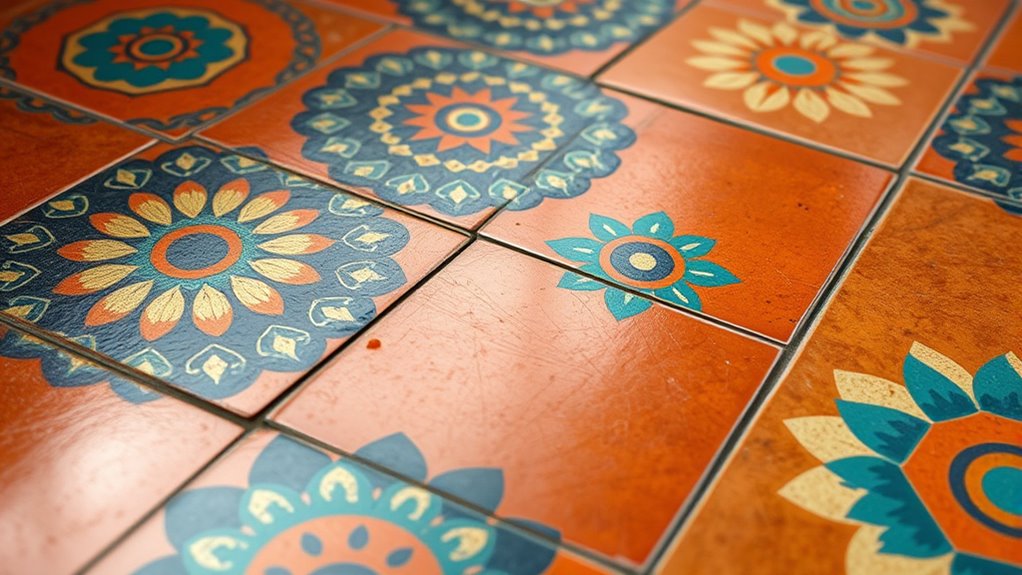
To choose the perfect boho-inspired floor stencil designs, start by considering your existing decor style and color palette. This helps you select a floor stencil that complements your space’s vibe. Look for boho tile design options featuring eclectic patterns like tribal motifs, floral designs, or geometric shapes that match your aesthetic. Pattern selection is key—choose motifs such as mandalas, paisley, or Moroccan-inspired tiles to add a relaxed, artistic feel. Reusable stencils made from durable laser-cut mylar make DIY floor painting easier and more precise, allowing you to experiment with different looks. Keep in mind the size of the stencil—6×6, 8×8, or larger—based on your floor dimensions and desired complexity. Picking the right pattern ensures your DIY project enhances your space beautifully. Additionally, incorporating rustic decor strategies such as adding vintage furniture or distressed finishes can help create a cohesive farmhouse-inspired atmosphere that complements your new flooring.
Essential Tools and Materials for DIY Floor Painting Projects

Starting your DIY floor painting project requires assembling the right tools and materials to guarantee a professional-looking finish. You’ll need stencil brushes for detailed work and dense foam rollers for larger areas, ensuring clean lines and even coverage. Choose your paint color carefully—opt for high-quality, water-based floor paints or acrylics designed for durability and adhesion on surfaces like concrete, tile, or wood. Before painting, focus on proper prep work by cleaning and lightly sanding the surface to enhance paint adhesion. Proper surface preparation is essential for a smooth and long-lasting finish, much like maintaining surface integrity in other projects. Additional supplies like painter’s tape and a level help keep your design precise. Don’t forget a sealant, such as water-based polyurethane, to protect your work. Optional spray adhesive can also assist in securing stencils for accurate pattern transfer. Understanding the role of contrast ratio in your project can help you choose colors that enhance the visual appeal of your painted tiles and patterns. Ensuring your surface is free of debris and imperfections is crucial, much like maintaining Angel Number Soulmate connections in relationships, where attention to detail fosters harmony. Incorporating the Vetted flat iron bike can be a helpful analogy for ensuring your surface is properly prepared and maintained, much like maintaining the functionality of your bike components.
Preparing Your Surface for a Seamless Stenciling Experience
Before you start stenciling, make sure your surface is clean, dry, and free of dust or grease. Lightly sand glossy or textured areas to help the paint adhere smoothly. Applying a suitable primer will also boost adhesion and guarantee a professional-looking finish. Ensuring proper air quality in your workspace can further improve the drying process and final results. Additionally, consider the type of paint used, as choosing the right kind can significantly affect durability and appearance. Selecting the appropriate paint pressure can ensure an even application and prevent paint runs. Proper watering techniques for your plants can help maintain a healthy environment in your space, indirectly supporting better workspace conditions. Monitoring AI safety in manufacturing processes can help prevent accidents and ensure optimal quality.
Surface Cleaning and Sanding
Ensuring your surface is clean and properly prepared is essential for a flawless stenciling project. Start by thoroughly cleaning the surface with a degreaser or mild soap and water to remove dirt, grease, and dust that can hinder paint adhesion. After cleaning, sand the surface with fine-grit sandpaper (around 220 grit) to create a smooth, slightly textured surface that helps the paint and stencil adhere better. For glossy or ceramic surfaces, lightly scuff with a sanding block or sponge to dull the shine, improving adhesion. Once sanding is complete, wipe away all dust and debris with a damp cloth or tack cloth to ensure a dust-free surface. Let it dry completely before proceeding to the next step for excellent results. Proper surface preparation is key to achieving a professional-looking finish and long-lasting design. Additionally, using glycolic acid for surface treatment can help in removing residual buildup and preparing certain surfaces for better adhesion, especially when dealing with glossy finishes or surfaces with previous coatings. Incorporating a cleaning and sanding routine ensures your painted tiles and stenciled patterns will last and look stunning over time.
Primer Application for Adhesion
After cleaning and sanding your surface, applying a suitable primer is the next step to achieve a smooth, durable finish. The primer enhances adhesion, making your paint and stenciling much easier and longer-lasting. Choose a primer designed for your surface—bonding primer for tiles or concrete, or stain-blocking for tricky areas. Confirm the surface is thoroughly cleaned, free of dust, grease, or old coatings, to maximize preparation. Use a brush or roller to apply a thin, even coat of primer and let it dry completely per product instructions. For porous surfaces like concrete or plywood, a primer seals the material, reducing seepage and ensuring cleaner stencil results. Proper primer application is key to a seamless, professional-looking boho floor transformation.
Step-by-Step Guide to Painting and Stenciling Your Floors

To get started, make sure your floor is thoroughly cleaned and primed for ideal paint adhesion. Then, select high-quality, water-based paints and use spray adhesive or repositionable spray to keep your stencils steady. Additionally, using proper stencil techniques can help prevent smudging and ensure sharp edges. Proper paint application methods such as light, multiple coats can also enhance the finish and durability of your design. Using precision tools like stencil brushes or foam rollers can help you achieve cleaner lines, and removing the stencil while the paint is still wet will guarantee a crisp design. Incorporating automation technologies can further streamline the process and ensure consistent results. Additionally, utilizing local resources such as workshops or tutorials can help you master techniques for a professional-looking finish.
Surface Preparation Tips
Before you start painting or stenciling your floors, it’s essential to prepare the surface thoroughly. Begin by cleaning and degreasing the floor to ensure proper adhesion of the paint and stencil. Any dirt, grease, or residue can cause peeling or uneven results. Inspect the floor for cracks, chips, or uneven spots, and repair these with a patching compound, sanding smooth once dry for a professional finish. Applying a bonding primer suited to your floor material—concrete, tile, or wood—will improve paint adherence and durability. Use painter’s tape to mask off edges and areas outside your stencil design, ensuring clean lines. Allow each layer, primer, paint, and sealant, to dry fully—usually 24 hours—to prevent smudging or smearing during painting floors.
Choosing and Applying Stencils
Choosing the right stencil size and pattern is key to achieving a professional look on your floors. Measure your space carefully and select stencils that fit your floor dimensions to guarantee proper coverage and pattern alignment. Before starting, clean and prime the surface to prevent paint seepage and help the stencil adhere smoothly. When applying paint, use a stencil brush or dense foam roller, dabbing gently to avoid excess paint that can bleed underneath. Rotate and reposition the stencil as needed to create seamless, repeating patterns, using painter’s tape or repositionable spray adhesive for stability. Proper pattern alignment is vital for a cohesive design. Once finished, seal your work with a water-based polyurethane or topcoat to protect your DIY project and increase durability. Incorporating attention and focus into your process can significantly improve the quality of your painted floors. Additionally, understanding paint adhesion principles can help ensure your design stays vibrant and intact over time.
Creative Color Combinations to Enhance Your Boho Theme

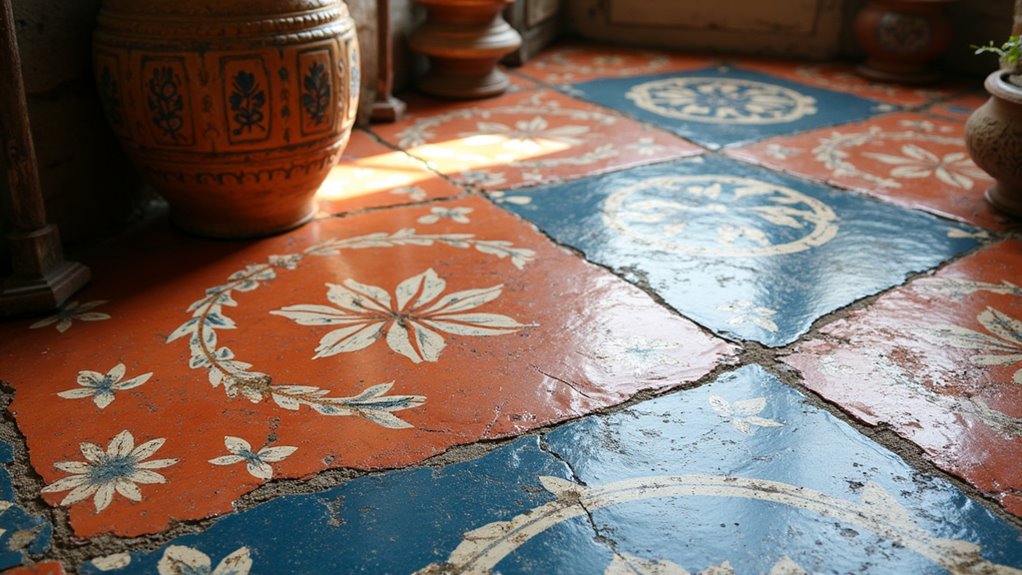
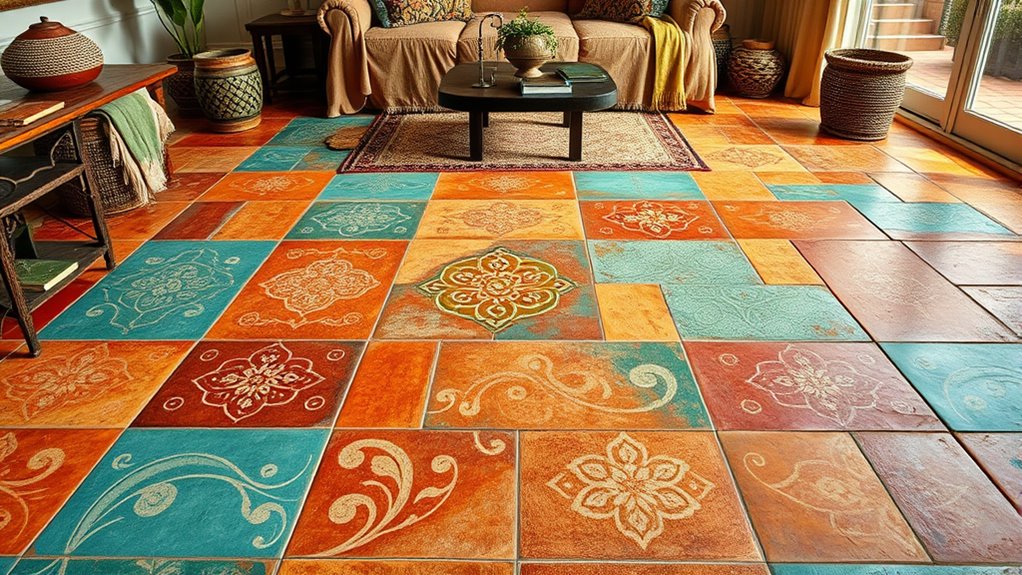
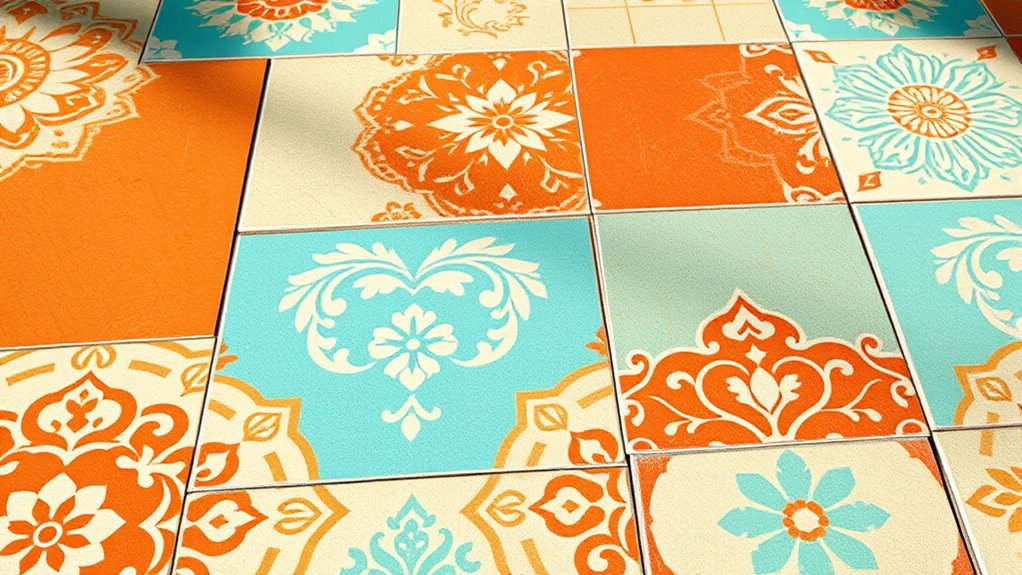
Enhancing your boho-themed floors with creative color combinations can transform your space into a vibrant, eclectic haven. Focus on tile design by mixing earthy tones like terracotta, mustard yellow, and deep teal to create warmth and inviting energy. Incorporate stencil patterns using soft pastels such as blush pink, sage green, and lavender to add a relaxed, dreamy boho aesthetic. For a bolder look, pair black and white geometric designs with pops of coral or turquoise to boost visual interest. Metallic accents like gold or bronze within stencil details can elevate the overall style, adding a touch of sophistication. By blending multiple color palettes—warm neutrals with jewel tones—you craft layered floors that reflect your unique personality and enhance your boho-inspired decor.
Tips for Achieving Precise and Professional-Looking Results

Achieving professional-looking results when stenciling your floors requires careful preparation and attention to detail. Start by using painter’s tape and a level to ensure your stencil designs are straight and properly aligned before you begin painting. To maintain precision, secure your stencil with repositionable spray adhesive or painter’s tape to prevent shifting. When applying paint on your floor tiles, use a dense foam roller or a stencil brush to add thin, even layers—this helps avoid bleeding and creates clean, crisp lines. Work from the center outward to keep the pattern aligned and prevent smudging. Carefully remove the stencil while the paint is still slightly wet to avoid chipping or smudging your painted tiles. These tips help achieve a polished, professional look.
Maintaining and Caring for Your Stenciled Floors
To keep your stenciled floors looking their best, regular maintenance is essential. Start by sweeping or vacuuming frequently to remove dirt and debris that can cause scratches or uneven wear. Use a damp mop with a mild, water-based cleaner for gentle cleaning—avoid harsh chemicals, abrasive scrubbers, or bleach, which can damage the paint or stencil design. Protect your floors by applying a clear, water-based sealant or protective topcoat; this adds durability and resists stains and moisture. Reapply the sealant every 1-2 years or as needed to maintain vibrancy and prevent wear. Proper cleaning and sealing will guarantee your stenciled floors stay beautiful, vibrant, and well-preserved for years to come.
Showcasing Stunning Before & After Transformations

Seeing the dramatic difference a well-executed stenciled floor can make is truly inspiring. Before and after photos reveal how dull, ordinary tile transforms into a vibrant, stylish space with strategic painting and stencil work. Successful projects often feature intricate designs, like Moroccan motifs, floral patterns, or geometric tiles that mimic high-end materials. Using high-quality stencils, such as laser-cut mylar templates, guarantees precise and professional results, whether you’re working on small accents or large areas. The addition of vibrant or metallic paints in the after photos highlights the depth and richness achievable through DIY techniques. These visual comparisons prove how simple tools and creative design can elevate floors, giving your space a personalized, Pinterest-worthy boho touch.
Frequently Asked Questions
Do Stenciled Floors Last?
Stenciled floors can last for several years if you properly seal them with a water-based polyurethane. Keep in mind, their durability depends on the quality of paint, stencil material, and how well you apply it. Outdoor surfaces may need re-sealing or touch-ups due to weather. Regular cleaning and reapplication of the protective sealant will help extend their lifespan, ensuring your design stays crisp and vibrant over time.
What Paint to Use to Stencil Tile Floor?
When stenciling your tile floor, you should use high-quality water-based acrylic or latex paints designed for durability and adhesion. Choose a matte or satin finish to minimize glare and enhance your design’s hand-painted look. Always apply a suitable primer beforehand to guarantee proper sticking and prevent chipping. Finish with a water-based polyurethane sealant to protect your artwork from wear, moisture, and stains over time.
How Do You Seal a Stenciled Floor?
To seal your stenciled floor, wait at least 24-48 hours for the paint to cure. Then, apply a water-based polyurethane or clear acrylic sealer with a soft roller or brush in thin, even coats. Follow the manufacturer’s instructions for drying times. Lightly sand between coats with fine-grit paper for better adhesion. Reapply the sealer every 1-2 years to keep it protected and vibrant.
Do Tile Stencils Work?
You might think tile stencils won’t give you a professional look, but they definitely do. When used properly, they work great on surfaces like ceramic, concrete, and wood floors. With durable, reusable stencils and good surface prep, you can create detailed, eye-catching patterns. Using multiple colors and techniques enhances the effect. Many DIYers have successfully transformed plain floors into stylish, tiled-looking masterpieces with simple stenciling skills.
Conclusion
Now that you’ve learned how to transform your floors with painted tiles and stenciled patterns, imagine the stunning possibilities that await. With a little creativity and the right techniques, your space can become a true boho haven. But wait—there’s more to discover that can elevate your design even further. Ready to take the next step and open the full potential of your DIY project? Your dream floors are closer than you think.