To DIY limewash walls, start by preparing a mixture of hydrated lime, water, and optional pigments until it’s creamy like paint. Apply multiple thin coats over a prepared lime plaster base using brushes or sprayers, working quickly to maintain consistency. This traditional technique creates a natural, breathable finish with a textured, authentic look that enhances both historic charm and durability. Keep exploring to discover all the tips and tricks to perfect your limewash project.
Key Takeaways
- Recreate traditional limewash techniques by preparing a proper lime and water mixture with optional natural pigments.
- Apply multiple thin, even coats to achieve authentic texture, depth, and a matte, velvety finish.
- Use brushes or sprayers for precise application, working quickly before each layer dries.
- Ensure a solid lime plaster base to enhance adhesion, durability, and historic authenticity.
- Maintain the natural, breathable properties of limewash to promote wall longevity and moisture regulation.
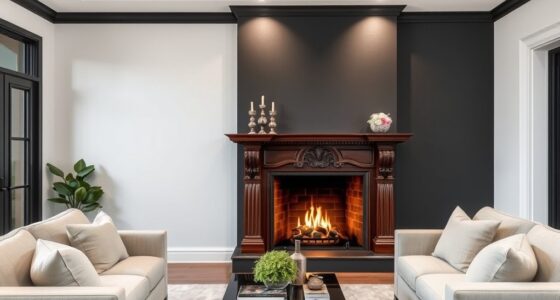
Have you ever considered giving your walls a timeless, textured look? If so, exploring the art of limewash might be just what you need. Limewash has been used for centuries to create beautiful, durable finishes, and it remains a popular choice for those interested in historical preservation. Unlike modern paints, lime plaster and limewash offer a natural, breathable coating that enhances the character of any space. This technique not only preserves the historical integrity of old buildings but also brings a unique charm to contemporary interiors. Recreating this finish yourself allows you to connect with centuries of craftsmanship while customizing your home’s aesthetic.
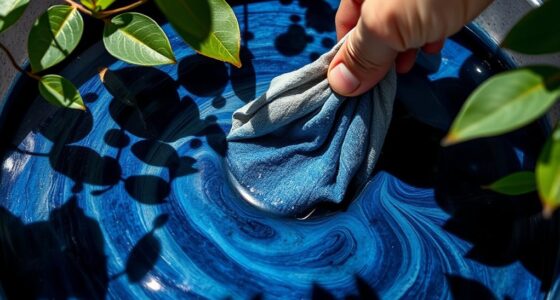
The process begins with preparing a limewash mixture that’s easy to apply and long-lasting. Traditionally, lime plaster forms the base layer, which acts as a foundation for the limewash. To make your own limewash, you’ll need hydrated lime, water, and sometimes natural pigments for color. You mix these ingredients until you achieve a creamy, paint-like consistency. It’s essential to use high-quality lime to guarantee the finish remains breathable and flexible, especially if you’re working on historic walls that need to withstand age. Applying lime plaster initially helps create a sound, solid surface, which is vital in maintaining the structural integrity of older walls and aligning with preservation standards.
Once your base coat of lime plaster has dried, you can start applying the limewash. This is where the magic happens—your walls transform with each thin, even coat. Because limewash is semi-translucent, multiple layers deepen the color and bring out the textured character of the plaster beneath. Using a brush or sprayer, you’ll want to work quickly and evenly, ensuring each layer is applied before the previous one dries. The result is a matte, velvety finish that ages beautifully over time. Plus, limewash’s natural properties help regulate indoor humidity, making it an excellent choice for maintaining the health of historic structures while giving them a fresh, authentic look. Incorporating traditional techniques such as limewash can also improve the longevity of your walls by allowing them to breathe and reducing trapped moisture.
Frequently Asked Questions
Can Limewash Be Used on Exterior Surfaces?
Yes, limewash can be used on exterior surfaces. Historically, it’s been applied to stone, brick, and stucco, showcasing its durability and aesthetic appeal. You should start with proper surface preparation—cleaning and repairing any damage—to guarantee good adhesion. Limewash offers a breathable, weather-resistant finish that ages beautifully over time, making it a great choice for outdoor walls. Just follow proper techniques similar to those used in historic applications for best results.
How Long Does Limewash Typically Last?
Imagine your walls aging gracefully like a cherished heirloom, developing a charming patina over time. Limewash typically lasts 5-7 years, but this can vary with climate and maintenance. As the years pass, expect subtle color fading and a beautiful, natural patina that adds character. Proper upkeep helps preserve its appearance, allowing your walls to tell a story of timeless beauty while mellowing into a soft, inviting hue.
Is Limewash Suitable for Humid Climates?
You might wonder if limewash suits humid climates. While its durability can be affected by moisture, proper application and maintenance can improve its longevity. Limewash’s breathable nature helps prevent trapped moisture, making it a good choice for humid areas. However, the impact of humidity on limewash durability varies, so sealing and reapplication might be necessary to guarantee it stays vibrant and intact over time.
Can Limewash Be Applied Over Existing Painted Walls?
You might wonder if limewash can go over painted walls. The truth is, proper surface preparation is key for good paint adhesion. You should clean and lightly sand the existing surface to remove any glossy paint and guarantee the limewash bonds well. Applying a bonding primer can also help. If these steps are followed, you can successfully apply limewash over painted walls for a beautiful, historic look.
Are There Eco-Friendly Alternatives to Traditional Limewash?
You’re asking about eco-friendly alternatives to traditional limewash. You can explore options like natural pigments, which add color without chemicals, and eco-friendly binders, like plant-based oils or clay, that hold the pigments together. These alternatives are safer for the environment and healthier for your home. By choosing these natural materials, you preserve the historic look while reducing your ecological footprint, making your project both beautiful and sustainable.
Conclusion
As you step back and admire your limewashed walls, you realize that embracing historic techniques brings a unique charm to your home. It’s funny how in trying to recreate the past, you often find new creativity in the present. Limewash’s imperfect beauty reminds us that history and modern life often intersect in the most unexpected ways. Sometimes, it’s the coincidence of tradition meeting innovation that results in truly timeless spaces.