
TL;DR
Moving your rig into a closet can drastically cut noise, but trapping heat is a real challenge. Proper placement and layered absorption make tiny spaces sound much better. Distance and ventilation are your best friends.
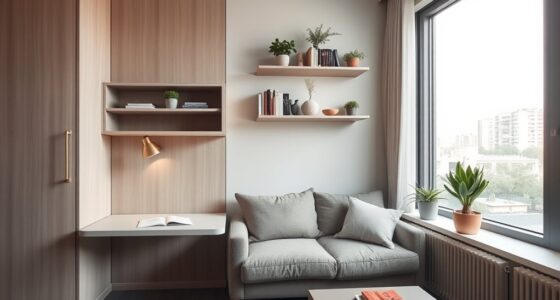
If your workspace sounds like a spaceship landing every time your rig kicks on, you’re not alone. Many creators underestimate the power of placement and simple treatment in tiny spaces. The truth? Moving noisy equipment into a closet can be your best, low-cost solution—if you handle heat and reflections right.
In this guide, you’ll learn how to dampen sound, position your gear, and treat a closet without turning it into a dead-sounding box. It’s all about smart tricks, layered treatment, and understanding what really makes a difference.
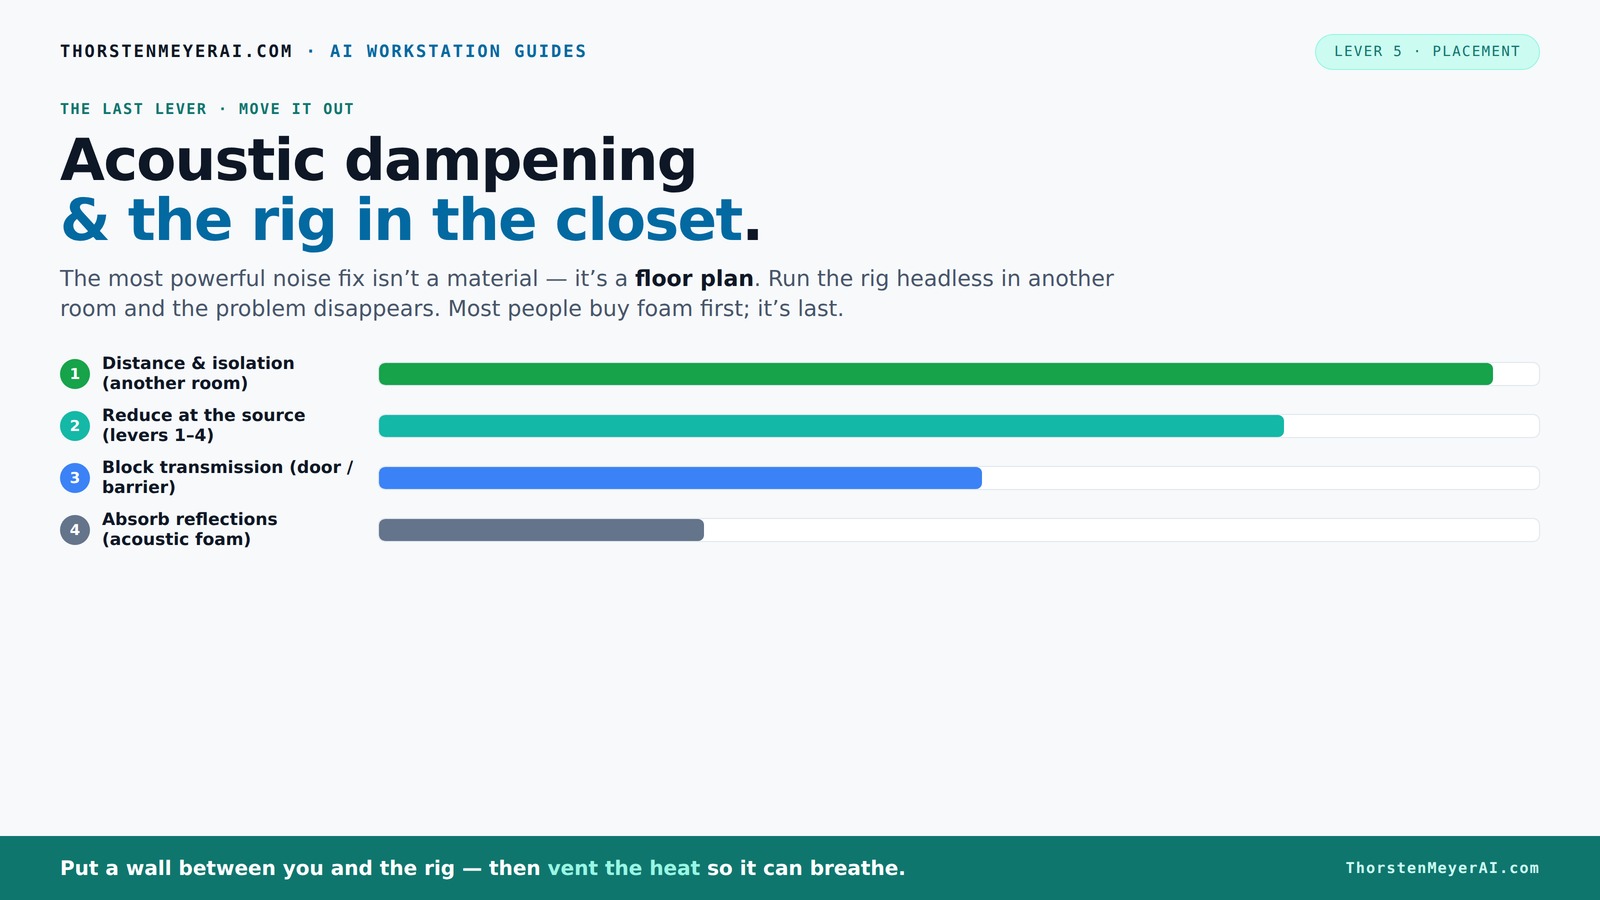
Acoustic dampening
& the rig in the closet.
The most powerful noise fix isn’t a material — it’s a floor plan. A rig you can’t hear because it’s in another room beats any amount of foam. Tap the approaches in Part 1 to see what actually works.
(another room)
(levers 1–4)
(door / barrier)
(acoustic foam)
Contain the noise, not the heat
Key Takeaways
- Moving your rig into another room or closet is the most effective way to cut noise without complex treatment.
- Ventilation is critical—sealed closets trap heat, risking hardware damage. Use passive vents or exhaust fans.
- Layered absorption—treat reflection points, corners, and overhead—dramatically improves sound quality in small spaces.
- Thicker panels (2-3 inches) handle high frequencies well, but add bass traps for low-end problems.
- Don’t overdo foam—balance absorption with natural room liveliness by leaving some open space and soft furnishings.

Focusound 52 Pack Acoustic Foam Panels 1" x 12" x 12" Sound Proof Foam Panles Soundproofing Noise Cancelling Wedge Panels for Home Office Recoding Studio with 300PCS Double-Side Adhesive
- Soundproofing Design: Triangular grooves for noise absorption
- Includes Adhesive Tape: 300pcs double-sided adhesive for easy installation
- Easy Shape Recovery: Reverts to shape after soaking in water
As an affiliate, we earn on qualifying purchases.
As an affiliate, we earn on qualifying purchases.
Why Moving Your Rig Is the #1 Noise Fix
The biggest leap in quieting your setup isn't acoustic foam or fancy panels—it's distance. Moving your rig into another room or closet puts a wall between you and the noise, often making everything quieter than any foam could.
Imagine a GPU running at full tilt. On your desk, it’s loud enough to distract you. But in a separate closet, you might barely notice it. Your network connection becomes the new link, and the rig’s noise stays trapped where it belongs.
Why does this matter? Because sound waves diminish with distance—each foot or meter you add absorbs some of the energy, making the noise less perceivable. Plus, separating noisy gear reduces direct sound energy hitting your ears and your microphone, which can drastically improve your recordings or work environment. The tradeoff? You lose some convenience and may need longer cables or network setups, but the payoff is a much quieter workspace.
The 'Rig in the Closet' Setup: How to Keep It Cool and Quiet
Placing a heat-generating machine in a closet is smart for noise, but only if you solve the heat trap. Sealed spaces quickly turn into hotboxes, throttling your hardware and making fans roar louder. Overheating can also shorten your equipment's lifespan, risking failures or damage.
To prevent this, add ventilation—either passive vents or quiet exhaust fans. Open a small vent hole or use a purpose-built soundproof cabinet with ducted airflow. This creates a controlled airflow that keeps your rig cool without letting noise escape. The tradeoff? More complexity and cost, but it ensures stable operation and preserves silence. Proper ventilation maintains optimal hardware performance, prevents thermal throttling, and prolongs equipment life—all critical in a small, confined space.
Acoustic Dampening vs. Soundproofing: What’s the Difference?
Acoustic dampening and soundproofing are often confused, but they serve different goals. Dampening reduces echoes and reflections inside a space—think of it as softening the room’s reverberations. Soundproofing, on the other hand, aims to block sound from escaping or entering, creating a barrier that prevents noise transmission.
In a closet, dampening materials like foam panels or blankets absorb the sound waves bouncing around, reducing flutter echo and making the room sound less live. Soundproofing involves sealing gaps, adding dense barriers, and using mass-loaded materials to prevent sound leakage. The tradeoff? Perfect soundproofing can be expensive and may reduce room liveliness, but layered treatment—combining both—can strike a balance, providing clarity while minimizing noise escape.
Understanding when to focus on dampening versus soundproofing helps you prioritize based on your noise sources and goals. For example, if your main concern is controlling internal reflections, dampening is key. If you need to prevent noise from escaping your closet, soundproofing is essential.
Where to Place Acoustic Treatment for Best Results
Proper placement of acoustic panels and blankets is crucial for transforming a noisy closet into a controlled environment. The goal is to target the most reflective surfaces and low-frequency trouble zones, which are often the hardest to tame.
Reflective surfaces like walls and ceilings bounce sound waves back into the room, creating comb-filtering and muddiness. Placing absorption at these points reduces early reflections, resulting in clearer sound. For example, behind the mic—at the first reflection point—install a panel or blanket to absorb sound bouncing straight back. Overhead reflections can be mitigated by hanging a blanket or foam directly above your setup, preventing sound from bouncing down onto your mic. Side walls are critical; covering 2-3 feet from the mic in both directions reduces early reflections that cause phase issues and comb-filtering. Corners are hotspots for bass buildup; installing bass traps or thick blankets here helps control low-end rumble and standing waves. The tradeoff? More coverage improves sound but can reduce room liveliness; balance is key for natural sound.
How Thick Should Your Acoustic Panels Be?
In a small closet, 2-3 inch thick panels are usually sufficient to absorb high and mid frequencies effectively. Thicker panels, around 4 inches or more, excel at controlling bass and low-end rumble, which tend to linger and cause muddy recordings. The reason? Thicker materials provide more mass and longer absorption times, especially at lower frequencies, which have longer wavelengths and require more material to damp effectively.
Think of it like a curtain: a thin curtain blocks high-pitched light, but a heavy, thick curtain can block drafts and noise. Similarly, in a tiny space, using thicker panels or bass traps in corners ensures you’re tackling the full spectrum of sound. For larger spaces or serious low-frequency issues, consider adding corner bass traps or hanging thicker blankets with an air gap—these enhance low-end absorption and reduce standing waves. The tradeoff? Thicker panels and bass traps are more expensive and take up more space but are essential for achieving a balanced, natural sound in a confined environment.
Treating a Closet Without Making It Boxy or Dead-Sounding
Many think adding foam will turn a closet into a dead, soundproof box. While some absorption is good, overdoing it can dull the room’s natural liveliness, making recordings sound flat and unnatural. The key is to absorb enough reflections to reduce echo without creating a space that sounds muffled or boxy.
Use layered blankets with an air gap, hang thick curtains, and cover as much wall surface as possible without sealing everything tightly. Soft furnishings like rugs, fabric panels, or even clothing can break up standing waves and improve room balance. An important trick is to avoid completely sealing the space—leave the ceiling and door partly open or covered with breathable fabric. This allows some sound to escape and prevents the room from sounding overly dead or boxy, maintaining a natural, lively tone that is more pleasing for recording and monitoring.
Common Questions About Closet Acoustic Treatment
Is acoustic foam enough for a closet studio? Usually not. Foam helps with high-frequency reflections but doesn’t address low-end buildup or sound leakage. For a balanced sound, layering with bass traps and room treatment is necessary.
Where should I place panels or blankets? Focus on reflection points—behind the mic, ceiling, side walls, and corners—where sound bounces directly into your microphone or causes problematic echoes. Proper placement ensures maximum absorption efficiency.
Should the mic face the closet wall? No. Position the mic facing away from reflective surfaces and towards treated or open space to minimize unwanted reflections and phase issues, leading to clearer recordings.
How do I stop echo and flutter? Cover hard surfaces with absorption materials, add layered blankets, and strategically place panels at reflection points. This reduces sound bouncing around and creates a more controlled acoustic environment.
Do I need bass traps? Yes, especially if you notice boomy low-end or standing waves in the closet. Bass traps in corners help flatten these issues, resulting in a more accurate sound for mixing and recording.
Conclusion
The best way to keep your workspace quiet isn’t just adding foam or panels. It’s about smart placement, layering treatment, and controlling heat. A closet can become a surprisingly good studio with the right approach—quiet, cool, and natural-sounding.
Remember: distance beats treatment every time. If you want peace and clarity, move the rig away and give it room to breathe.