
TL;DR

Get beauty and skincare favorites delivered free — and shop member deals
- Fast, free delivery on millions of items
- Access to Prime Big Deal Days deals on October 6–7
- Prime Video, Amazon Music and more included
Professional hair styling tools are built for frequent, controlled use, but “professional” is not a standardized rating or a promise of safer styling. Choose by your hair’s condition, the finish you want, temperature control, comfort, and maintenance needs. Use the lowest effective heat, follow the maker’s instructions, and remember that protectant cannot make high heat harmless.
A flat iron that reaches a higher temperature can still leave you with a worse result: dry ends, an awkward grip, and a style that drops by lunch. Professional hair styling tools can offer useful control and durability, but their labels don’t tell you whether they suit your hair or your routine.
This guide helps you match tools to a styling goal, read the specs without getting swept up in marketing, and use heat with care. You’ll also get a practical checklist for choosing a dryer, flat iron, curling tool, or multi-styler.
Treat “professional” as a product label, then compare controls, warranty, repair options, and independent reviews.
Match tool shape and size to your desired finish, hair length, and ability to control it.
Use the lowest effective heat; protectant can help reduce some heat-related damage but cannot make high heat harmless.
Check comfort, airflow, attachments, and maintenance needs alongside dryer wattage or motor type.
Clean and store tools according to the maker’s instructions, and check voltage before travel.
What “professional” tells you—and what it doesn’t
Professional hair styling tools are tools designed for frequent, controlled use in salons and at home, including dryers, flat irons, curling irons, wands, and hot brushes. The label can point to sturdy parts, more precise controls, or service options, but it is not a standardized performance rating. Those features matter because repeated use puts more demand on a tool: a cleanable filter can help maintain airflow, and repair support can keep a salon tool useful through daily work. Neither tells you how evenly a model heats or whether it will feel comfortable in your hand. Compare the actual features, warranty, repair options, and independent reviews before you buy.
For example, a stylist who dries several clients’ hair a day may value a balanced dryer with a long cord and a filter that’s easy to clean. A long cord can reduce the need to reposition a client, while a balanced grip may ease strain over repeated appointments. If you style your own hair twice a week, a lighter model with simple controls may feel better in your hand. Infrequent users may get little value from salon-focused durability if the extra weight or cost makes the tool less pleasant to use. The best fit depends on who uses it and how often.
Look beyond a high maximum temperature or wattage figure. Heat stability, airflow, shape, and comfort can matter more to your results than a headline number. A high maximum temperature is only a limit; it does not show how steadily the tool holds a setting or whether that setting suits your hair. Airflow can affect drying time, while shape and balance affect how precisely you can work. A tool that feels clumsy can make a five-minute touch-up feel like a wrestling match, and discomfort can encourage rushed, uneven styling.
Match your tool to the finish you want
Professional hair styling tools work best when their shape and attachments match the finish you want and the condition of your hair. A dryer helps with drying and shaping; a flat iron smooths or bends strands; a curling iron grips hair with a clamp, while a wand has no clamp. The clamp can make wrapping hair more repeatable, but it may leave a mark if you pause or place it unevenly. A wand avoids that clamp mark, though holding and wrapping hair without one takes practice and can expose your fingers to heat. Multi-stylers can save space, though changing attachments takes practice and each attachment may feel different to handle.
Say you want loose waves in shoulder-length hair. A medium barrel may feel easier to wrap around than a very wide one, while a wand can create a relaxed shape without a clamp mark. Barrel size also affects how much hair fits around the tool: a very wide barrel can produce a softer bend, but may be awkward for shorter layers or hair that does not hold a loose shape easily. For a smooth blowout, a round brush attachment or separate brush may give you more control than a flat nozzle alone. That control comes from being able to guide the hair around the brush as air passes over it, though it takes coordination and practice.
Tool size changes the result: wide flat-iron plates can cover more hair quickly, but they may be harder to maneuver near short layers or roots. Narrow plates make smaller sections easier and can offer better access around the hairline, but they take longer over long or thick hair. A large tool is useful only if you can position it without pulling or repeatedly going over the same area. If you’re unsure, choose a versatile size you can control on the hardest-to-reach areas, not just the easiest ones.
Tools are designed for different tasks; they include blow dryers, curling irons and wands, plus specialty pieces such as diffusers and heated rollers. A diffuser spreads airflow to help shape curls, while a concentrator directs air along a brush. A diffuser’s broader airflow can help avoid disrupting the curl pattern, but it won’t create the same smooth tension as a brush and concentrator. Attachments help only when their shape suits your technique; an unfamiliar attachment can add steps without improving the finish.
Read the specs that affect your daily routine
Professional hair styling tools deserve a closer look at controls, ergonomics, safety, and care—not just materials or price. Adjustable heat lets you tailor use to your hair and styling goal, while clear buttons and a comfortable grip make small adjustments easier. A setting that is easy to read and change helps you repeat a routine without guessing, which matters when small differences in heat or technique affect the result. For a salon, weight, cord length, and replaceable parts can shape an entire workday: a minor inconvenience at home can become a repeated source of fatigue or downtime across a full schedule.
| Feature | What it can offer | What to check |
|---|---|---|
| Ceramic coating | Often associated with even heat distribution | Construction and temperature regulation still matter |
| Titanium | Can heat quickly and feel lightweight | Fast heating does not mean you need the highest setting |
| Ionic or infrared claims | May be included in some styling designs | Results depend on the full device and your hair |
| Dryer motor and airflow | Affect how the dryer moves air and feels in use | Consider balance, noise, heat stability, and attachments |
Materials are not guarantees of a particular finish, and marketing claims can vary. A coating or feature name says little by itself about how well a complete tool performs, so the controls and construction deserve attention too. If a salon dryer feels loud or heavy after ten minutes, imagine holding it above your head for thirty. Comfort is a practical feature, especially when you style often: a manageable tool is easier to position steadily, while a tiring one can turn precise work into rushed work.
Choose heat for your hair’s condition, not its label
Professional hair styling tools should let you use the lowest effective temperature for your hair’s condition and the result you want. Fine, bleached, or damaged hair generally needs less heat than coarse, resistant hair, but texture alone does not tell the whole story. Previously lightened ends, for example, may be more vulnerable than the newer growth at the roots. A high maximum setting is not proof that a tool will style better; it only gives you the option to use more heat, which can increase exposure without solving a problem caused by unsuitable sections or technique.
For instance, if your ends are lightened and feel rough, start low and test a small section rather than turning the dial straight to its maximum. If one slow pass gives you the shape you want, repeating the same section several times adds heat without necessarily improving the finish. If the style does not hold, consider whether the hair was fully dry, the section was too large, or the tool shape did not suit the result before increasing the temperature. Heat protectant may reduce some heat-related damage, but it does not make high heat harmless.
Use the lowest heat that works, and don’t pass a hot tool over wet hair unless the device is specifically designed for damp-hair styling.
Some newer devices use digital sensing to adjust heat during use, and some dryers use brushless digital motors. These features may suit your routine, but they do not remove the need for sound technique. A control system can regulate a device; it cannot assess whether your hair is already fragile or whether you are repeating passes unnecessarily. Follow the device’s instructions, especially for tools made to style damp hair.
Follow a safer routine that keeps styling simple
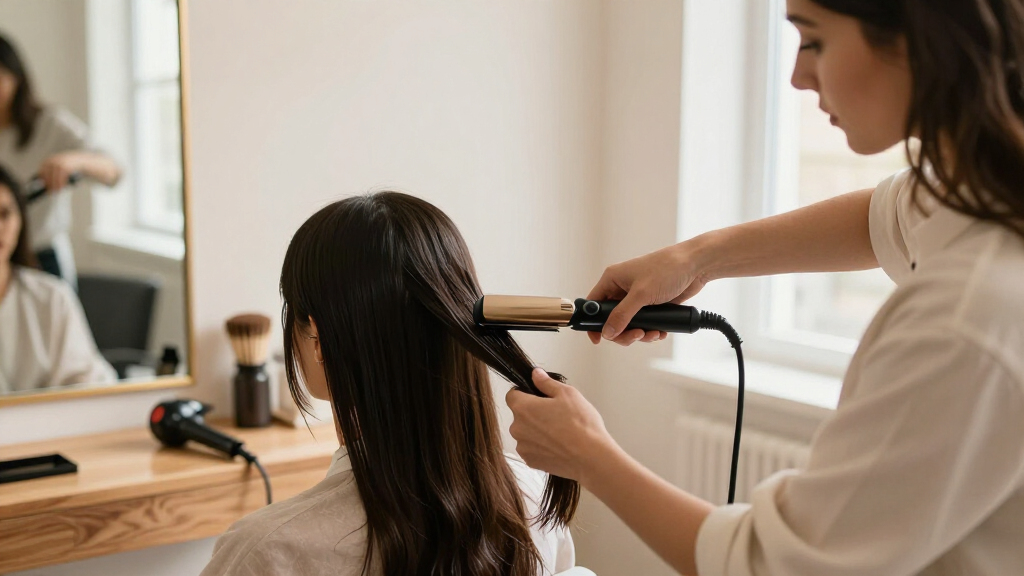
Professional hair styling tools are easier to use with care when you prepare your hair, set up a safe space, and work in controlled sections. Keeping a clear, dry place for a hot tool reduces the chance of setting it near water or brushing against it while you search for something else. Never leave it unattended while on, and check its instructions for safe use and storage. A few small habits can prevent rushed passes and accidental burns, while orderly sections help you avoid repeatedly heating hair you have already styled.
- Start with dry hair unless the tool is made for damp-hair styling; use a heat protectant according to its label. Hair that is wet inside can heat rapidly under a hot plate, so surface dryness matters too.
- Choose a modest setting suited to your hair’s condition, then test a small section. A test helps you judge whether the tool can make the shape you want before you expose all your hair to that setting.
- Work in manageable sections so you can move steadily instead of clamping repeatedly. Sections that are too large may not heat evenly, prompting extra passes that add exposure without giving you consistent results.
- Switch the tool off when you finish, and let it cool on a heat-safe surface away from water. The hot surface can remain a burn or fire risk after the switch is off.
- Check the cord and housing before use; follow the maker’s guidance if anything looks damaged. Damaged insulation or a loose housing can affect safe operation, so do not assume a tool is fine because it still turns on.
Imagine getting ready before work with five minutes to spare. Smaller sections and a clear temperature setting help you work calmly; grabbing a hot iron with one hand while searching for a brush with the other does not. Good setup saves time because you can move through the style in a consistent order, and gives you more control over where the tool goes and how often it touches each section.
Keep your tools working well between styles
Professional hair styling tools need regular care to keep airflow and surfaces clear, and the maker’s instructions should guide cleaning and storage. Product residue on plates or barrels can build up into a tacky film, which may catch hair or transfer product during styling. Lint in a dryer filter can restrict airflow and contribute to overheating; reduced airflow can also make drying take longer, encouraging extra heat exposure. A quick check after styling can prevent grime from becoming part of your next blowout.
For example, once a cool flat iron has a visible film, unplug it and clean it only as the manufacturer directs; don’t scrape the plates with a sharp object. Abrasive cleaning could damage the surface and change how it contacts the hair. Check dryer filters for lint and inspect cords for damage. Unplug tools before cleaning, and keep them dry.
Frequent salon use can make serviceability and replaceable parts more useful than a long list of modes. If a part can be replaced, a minor failure may not require replacing the whole tool; for a salon, that can reduce disruption to a working routine. At home, an easy-to-clean filter or a storage case that protects the plates may matter more because it helps a tool stay ready between occasional uses. If you travel, check voltage and plug requirements for your destination, then confirm the tool supports them before connecting it. A plug adapter changes the plug shape, but does not by itself make a tool compatible with a different voltage.
Spend on the features you’ll actually use
Professional hair styling tools can be worth the price when they offer features you rely on, fit your hand, and suit how often you style. A premium dryer may be a sensible choice for someone who uses it every morning, because even modest gains in comfort or drying time are repeated often. An occasional user may prefer a simpler model with dependable temperature controls; paying for modes that rarely get used does not improve the routine. Price alone does not guarantee a better result, so think about which features solve a real inconvenience for you.
If you’re shopping for professional hair styling, ask yourself whether you need the tool for daily work or a few events each year. Try to hold it if possible, check the warranty and repair options, and look for instructions you can understand. These checks help reveal the tradeoffs behind a purchase: a tool can have many settings but be awkward to adjust, or be easy to handle but lack a repair option that matters for frequent use. If a cordless tool appeals for travel, compare its runtime and power with the styling time you actually need. A short runtime may be fine for quick touch-ups but frustrating if you need to style all your hair.
Take the challenge: choose one feature you’d notice every time you style—perhaps a lighter dryer, a narrower plate, or a temperature dial you can read at a glance. Spend for that feature, and let the marketing extras compete for what’s left in your attention. The right tool should make your routine feel easier, not more complicated. This gives you a practical way to weigh the cost: focus on a daily benefit you can describe, rather than assuming a longer feature list will make styling better.
Frequently Asked Questions
What makes a hair styling tool professional?
The label may signal parts intended for frequent use, more precise controls, or service options, but it is not a standardized performance rating. Compare the features, warranty, repair options, and independent reviews for the model itself.
Is ceramic or titanium better for a flat iron?
Neither is best for everyone. Ceramic coatings are often associated with even heat distribution, while titanium can heat quickly and feel lightweight; construction and temperature regulation matter too. Choose based on the tool’s controls and how it feels to use.
Do ionic hair dryers reduce frizz?
Some dryers include ionic features, but results depend on the device and your hair. Airflow, heat control, attachments, and your drying technique also shape the finish. Treat a feature label as a reason to compare models, not a guaranteed result.
Can I use a flat iron or curling tool on damp hair?
Use hot tools on dry hair unless the device is specifically designed for damp-hair styling. Follow the manufacturer’s directions for the tool and the temperature range. Heat protectant does not make high heat harmless.
How often should I clean my styling tools?
Check them regularly for product residue, lint, and cord damage, and follow the maker’s cleaning schedule and method. A clogged dryer filter can restrict airflow and contribute to overheating. Unplug tools and let them cool before cleaning.
Conclusion
Choose a tool you can control comfortably, set it to the lowest heat that gives you the finish you want, and care for it as its maker directs. A good styling routine should leave you with the look you wanted—and enough patience to enjoy the rest of your morning.
Evergreen bestsellers Picks
bestsellers
As an affiliate, we earn on qualifying purchases.