Nail Tips
7 Funky Nail Art Ideas to Spice Up Your Look
Create show-stopping nails with 7 funky nail art ideas that will elevate your style – perfect for those looking to stand out from the crowd!
Ready to spice up your style? Try abstract geometric patterns for a modern look with shapes like triangles and lines. Immerse yourself in cartoon character nail art for a playful touch with iconic figures like Mickey Mouse. Add some sparkle with a glitter glam manicure using different types of glitter. Go bold with neon color block designs or opt for intricate floral fantasy nails for a natural vibe. Trendy animal print accents can also amp up your nails. To wrap it up, add some glamour with metallic foil detailing. Get ready to rock these funky nail art ideas and express your creativity!
Key Takeaways
- Abstract Geometric Patterns for a modern and edgy look.
- Cartoon Character Nail Art for a playful and nostalgic vibe.
- Glitter Glam Manicure for a dazzling and glamorous finish.
- Neon Color Block Design for bold and vibrant nails.
- Animal Print Accents for trendy and versatile nail art.
Abstract Geometric Patterns
Exploring abstract geometric patterns in nail art can add a modern and edgy flair to your manicure. Bold shapes like triangles, squares, and lines come together in unique ways, creating a statement look that's all about standing out.
Nail technicians use various techniques like freehand painting, nail stamping, and tape to achieve precise geometric designs that are as sharp as they're stylish. The best part? You can customize these patterns with a wide range of colors, from vibrant neons to chic neutrals, giving you endless possibilities to play with.
Mixing and matching these abstract designs can take your manicure to the next level. Layer them up, combine them with other nail art elements, and watch your nails transform into personalized works of art that catch everyone's eye.
Abstract geometric patterns aren't just about shapes; they're about creativity, individuality, and turning your nails into a canvas for self-expression. Try them out and see how a touch of geometry can elevate your nail game!
Cartoon Character Nail Art
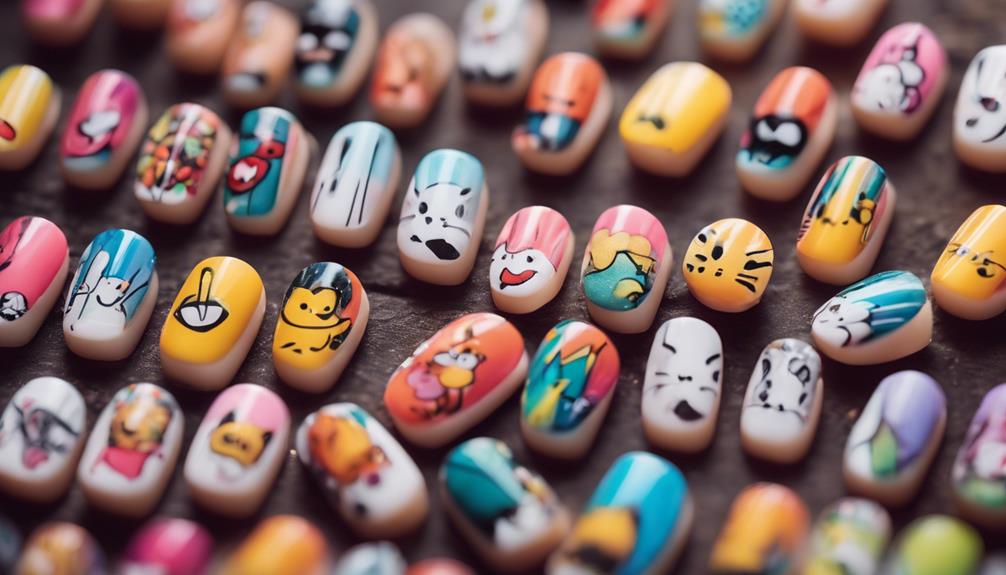
Ready to add a touch of whimsy to your nails? Cartoon character nail art is all about bringing your favorite animated icons to life in vibrant colors and intricate details.
From the iconic Mickey Mouse to the lovable SpongeBob SquarePants, these designs are bright, playful, and perfect for showcasing your unique style.
Bright and Playful
Colorful and vibrant, cartoon character nail art brings a playful and whimsical touch to your manicure, showcasing beloved animated figures in intricate detail. Imagine having your favorite childhood characters like Mickey Mouse or SpongeBob SquarePants right at your fingertips! Nail artists use a mix of vibrant shades and precise detailing to recreate these iconic personalities on your nails, adding a fun and youthful vibe to your overall look.
To give you some inspiration, here are a few ideas for cartoon character nail art designs:
Cartoon Character | Description |
---|---|
Mickey Mouse | Classic black, white, and red design featuring Mickey's iconic ears and gloves. |
SpongeBob SquarePants | Bright yellow base with SpongeBob's face, tie, and big smile for a cheerful look. |
Hello Kitty | Pink and white nails with Hello Kitty's adorable bow and whiskers for a cute style. |
These designs are perfect for those who want to express their love for animated icons and add a touch of nostalgia to their nail art. Let your nails reflect your playful personality with these bright and cheerful cartoon character designs!
Iconic Designs
Depicting beloved animated characters on your nails, cartoon character nail art showcases iconic designs that bring a playful and whimsical touch to your manicure. From the classic charm of Mickey Mouse to the goofy appeal of SpongeBob SquarePants, these popular cartoon characters inspire nail art creations that are both fun and eye-catching.
Talented nail technicians wield fine brushes and vibrant colors to meticulously recreate these beloved characters on your nails with precision and detail.
Embracing cartoon character nail art isn't just about showcasing your favorite animated figures; it's a creative way to express your personality and interests. Whether you opt for the adorable Hello Kitty or the adventurous Pikachu, these iconic designs can add a nostalgic and whimsical flair to your overall look.
DIY Techniques
To immerse yourself in the world of cartoon character nail art designs, you'll need to master specific DIY techniques that guarantee precision and creativity in your manicure. Cartoon character nail art is a delightful way to showcase your favorite animated characters right on your fingertips. Achieving detailed designs requires a steady hand and the right tools. Make sure to have fine brushes and dotting tools handy to bring these intricate creations to life.
Embrace the fun and colorful world of cartoon character nail art as a means to express your personality through creative designs. Whether you're a fan of classic characters or modern animations, there's a nail art design waiting for you to try.
Explore the world of DIY nail art and let your imagination run wild as you recreate beloved cartoon characters on your nails. With practice and patience, you'll soon be showcasing unique and eye-catching designs that are sure to impress.
Glitter Glam Manicure
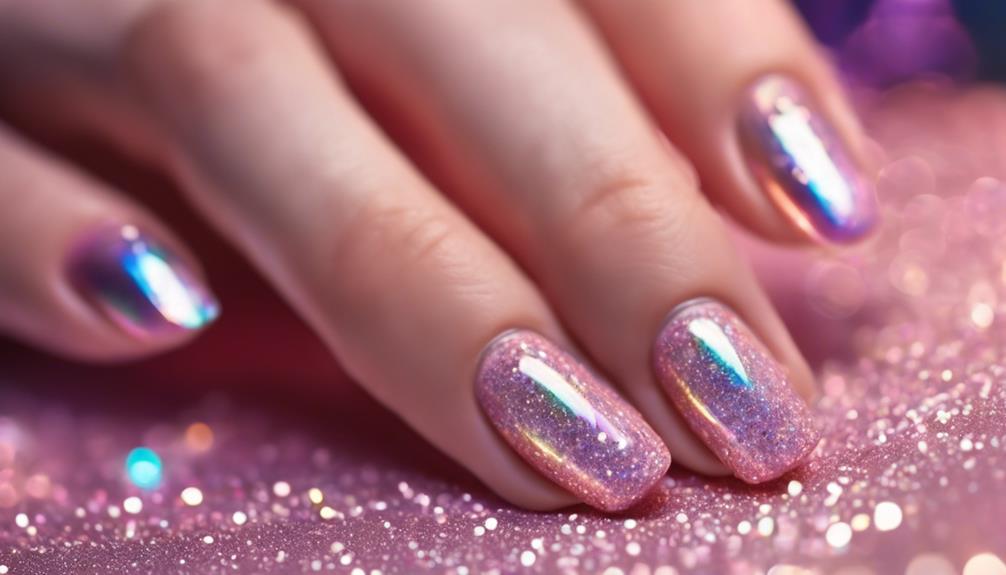
Ready to add some glittery pizzazz to your nails?
Glitter glam manicures are all about that sparkle!
From mixing colors creatively to nailing down design tips, get ready to shine with these dazzling nail art ideas. Transform your nails into miniature canvases with these stunning nail design ideas. Whether you prefer minimalist and elegant or bold and eye-catching, there’s a design out there to match your style. Experiment with different techniques like ombre, marble, or geometric patterns to elevate your nail art game.
Sparkling Glitter Application
How can you achieve a dazzling and glamorous manicure with sparkling glitter application? Glitter adds that extra oomph to your nails, making them stand out and shine. By choosing from a variety of glitter types like fine, chunky, holographic, or iridescent, you can create different effects ranging from subtle to bold. Whether you want an all-over dazzling look or just a few glitter accents for that touch of sparkle, the possibilities are endless.
To help you visualize the options available, here's a table showcasing different glitter application techniques:
Glitter Type | Effect | Style |
---|---|---|
Fine | Subtle shimmer | Elegant and classy |
Chunky | Bold sparkle | Fun and playful |
Holographic | Rainbow reflections | Futuristic and edgy |
Iridescent | Color-changing shine | Whimsical and magical |
Experimenting with mixing various glitter colors and sizes can result in personalized nail art that truly reflects your unique personality. Don't forget to seal in your glitter masterpiece with a clear top coat for long-lasting glam! You can also add additional accents to your stunning glitter nail art by incorporating gems, studs, or decals. These extra touches will elevate your nail art to the next level and make your manicure stand out even more. By experimenting with different combinations of glitter and embellishments, you can create a truly one-of-a-kind look that is sure to turn heads and showcase your individual style.
Mixing Colors Creatively
Get ready to infuse your glitter glam manicure with a burst of creativity by exploring innovative color mixing techniques. Mixing colors creatively can take your nail art to the next level, making it truly unique and eye-catching.
Blend different shades together for a stunning ombre effect, or create striking contrasts by pairing bold colors for a dynamic look. When it comes to glitter, the possibilities are endless. You can apply it as a topcoat for a subtle shimmer, mix it with polish for a dazzling finish, or strategically place it to add dimension and sparkle to your nails.
Experimenting with metallic, holographic, or iridescent glitter can elevate your manicure, giving it a touch of glamour that stands out from the crowd. These glitter glam manicures are versatile and can be tailored to suit any occasion, whether it's for everyday wear or a special event where you want your nails to steal the show.
Nail Art Design Tips
To create a stunning glitter glam manicure, incorporate sparkly glitter into your nail designs for a glamorous and eye-catching look. Glitter glam manicures offer a variety of options for adding that extra sparkle to your nails. Whether you prefer glitter polish, loose glitter, or glitter accessories, there are endless ways to achieve a dazzling effect. You can go all out with glitter covering your entire nail for a bold statement or use it sparingly to accentuate specific parts of your design.
Here's a handy table to help you explore different ways to rock a glitter glam manicure:
Glitter Application | Description | Effect |
---|---|---|
All-Over Glitter | Cover the entire nail with glitter | Bold and glamorous look |
Glitter Accents | Add glitter to specific areas or as part of a design | Subtle yet eye-catching detail |
Ombre Glitter | Fade glitter from the base to the tip of the nail | Gradient sparkle effect |
With these tips, you can customize your glitter glam manicure to suit your style, occasion, or nail length. Let your nails shine bright like diamonds!
Neon Color Block Design
For a bold and vibrant nail art look, consider trying out neon color block designs featuring geometric shapes and lines. Neon color block designs are all about those eye-catching, bright colors like neon pink, green, orange, and yellow.
Picture this: your nails adorned with a mix of these vivid hues in funky patterns that scream fun and energy! The beauty of this style lies in its modern twist – a perfect way to make a statement and stand out from the crowd.
What's great about neon color block designs is the freedom they offer for customization. You can play around with the placement of colors, experiment with different shapes, and let your creativity run wild.
Whether you're going for a minimalist look with subtle neon accents or a bold, geometric explosion of colors, this trend is sure to add a pop of excitement to your nails.
Floral Fantasy Nails
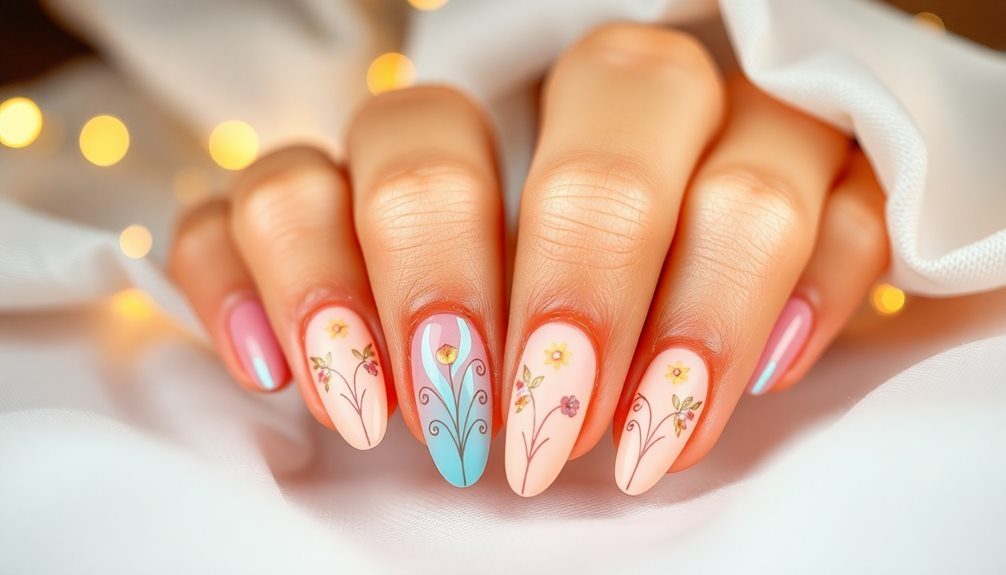
Embrace a whimsical and feminine vibe with intricate floral fantasy nails featuring delicate flower designs. These stunning nail art creations bring a touch of nature to your fingertips, allowing you to express your love for all things floral in a fun and creative way.
From dainty petals to lush leaves and vibrant blossoms, floral fantasy nails offer a wide range of designs to suit your style preferences.
With a color palette that includes soft pastels and bright hues, you can customize your floral nails to match any season or occasion. Whether you prefer a subtle and elegant look or want to make a bold statement, there's a floral fantasy nail design for everyone.
Imagine sporting a garden of flowers on your nails, blooming with beauty and charm.
Animal Print Accents
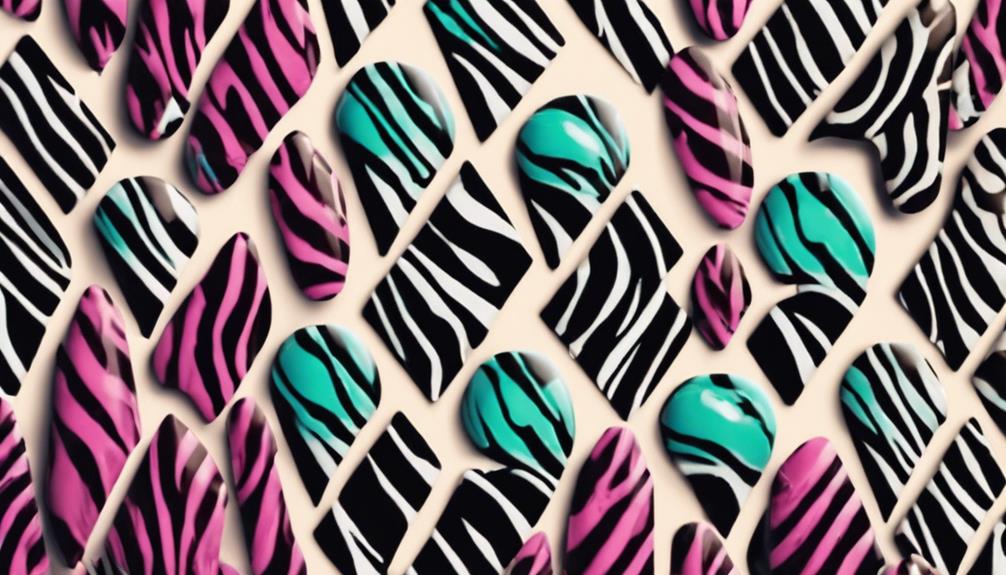
Get ready to heighten your nail art game with trendy animal print accents that add a fierce and stylish flair to your manicure. Animal print designs like leopard spots, zebra stripes, or snake scales are all the rage in the nail art world. You can achieve these sassy looks using nail art brushes, stamping plates, or convenient nail stickers for a quick application that still looks fabulous.
Neutral tones like brown, black, and white are popular choices for animal print accents, mimicking the natural patterns of our wild friends. These accents can be incorporated into various nail art styles, whether you prefer French tips, ombre designs, or as standalone accent nails.
Metallic Foil Detailing
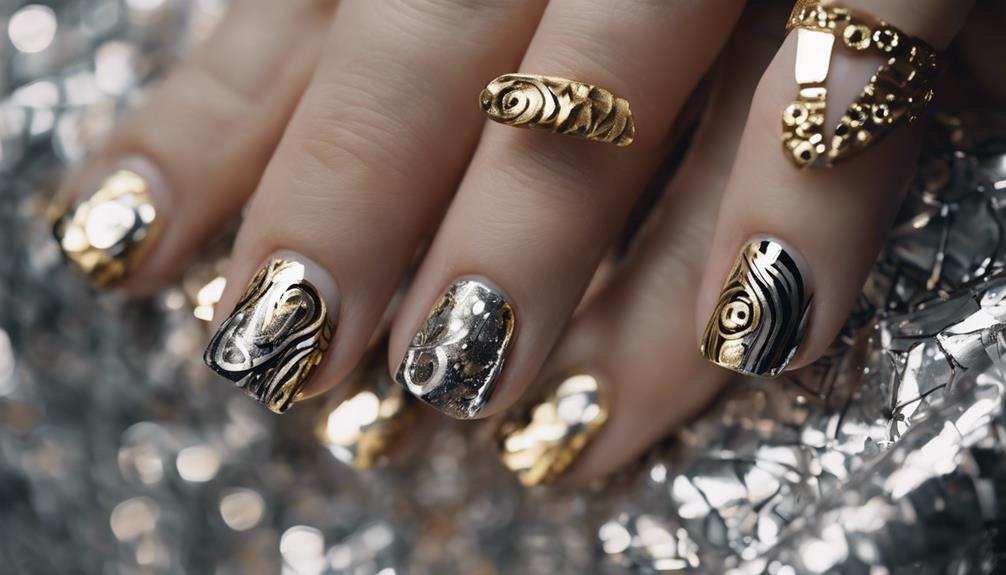
Add a touch of glamour to your nail art designs with metallic foil detailing. This trendy technique allows you to create a stunning, reflective finish on your nails that's sure to turn heads.
The metallic foil sheets come in a variety of colors and patterns, giving you endless options for customization. To achieve this bold look, you'll need a special adhesive and a steady hand to carefully apply the foil to your nails.
Once the foil is in place, the shiny metallic finish adds a touch of sophistication and luxury to your manicure. Whether you opt for a full foil design or just a few accents, this nail art trend is perfect for adding a bit of sparkle to your everyday look.
Frequently Asked Questions
What Is the Hottest Nail Trend Right Now?
The hottest nail trend right now is all about bold colors and creative designs. Nail artists are going wild with geometric shapes, abstract art, and playful textures.
Negative space nail art, where parts of the nail are left bare for a modern look, is gaining steam. Mix-and-match nails are a hit, letting you flaunt different designs on each nail.
Metallic accents, glitter gradients, and holographic finishes are bringing glamour and sparkle to nail art.
How Do You Do Ghost Nail Art?
To do ghost nail art, start with a base coat of white nail polish.
Use a thin brush or nail art pen to draw ghostly shapes on your nails.
Add eyes with black polish or googly eyes for a fun twist.
For extra flair, incorporate glow-in-the-dark elements.
Experiment with different facial expressions for your ghosts to give them personality.
Mix in other Halloween designs like pumpkins or bats for a festive look.
Let your creativity shine!
How to Do Sprinkle Nail Art?
To create sprinkle nail art, start with a base coat and a neutral polish. Then, grab a thin nail art brush or toothpick. Playfully dot bright colors all over each nail, like sprinkles on a cupcake.
Let your creation dry completely before finishing with a top coat for durability. Mix up colors and sprinkle placements for a unique touch.
Get ready to rock your nails with a sprinkle explosion that's as fun as it's stylish!
What Nail Shape Is 2024?
In 2024, the nail shape trend is a fusion of almond and square nails, offering both elegance and practicality. This unique style combines the rounded point of almond nails with the straight edge of square nails for a modern and versatile look.
Nail enthusiasts can anticipate the rise in popularity of this hybrid shape, with nail technicians likely to provide variations to suit different preferences and styles. It's a trendy choice that blends the best of both worlds!
Conclusion
So, give your nails the attention they deserve with these funky nail art ideas!
Don't let doubts hold you back – embrace the creativity and fun of trying something new.
Whether you're a nail art newbie or a seasoned pro, these designs are sure to add a pop of personality to your look.
So go ahead, take a risk, and let your nails do the talking!
Elena is an accomplished Beauty Editor with over a decade of experience in the beauty industry. She is known for her keen eye for detail and deep understanding of beauty trends. Elena has established herself as a trusted authority in the field. Her expertise lies in providing comprehensive reviews of beauty products, covering industry events, conducting insightful interviews with industry insiders, and conducting trend analyses that shape the beauty landscape.
Nail Tips
Ocean-Themed Nails to Capture Vacation Vibes
Splash into ocean-themed nails that evoke summer vibes; discover fun designs and techniques that will leave you dreaming of seaside adventures!
Ocean-themed nails are a fantastic way to feel those vacation vibes all year long! Imagine vibrant shades of blue and green, playful seashells, or beautiful wave patterns dancing on your fingertips. You can even add some sparkle with glitter, mimicking the sun on water. Try techniques like water marbling for gorgeous wave effects, or stick on 3D seashells for extra fun. Don't forget a glossy top coat, so your nails shine like the ocean! With just a few tips, you'll create stunning looks that remind you of summer adventures, and there's even more helpful information waiting for you!
Key Takeaways
- Choose vibrant shades of blue and green to reflect the essence of the ocean and summer fun.
- Incorporate playful designs like wave patterns, seashells, and tropical motifs for a beachy vibe.
- Use glitter and rhinestones to mimic sunlight shimmering on water for added sparkle.
- Experiment with techniques like ombre effects and water marbling to recreate ocean depths and wave movement.
- Maintain nail health with regular manicures and moisture to keep designs looking fresh and vibrant.
Introduction
Ocean-themed nails are a fantastic way to express your love for the sea and its vibrant beauty. Imagine painting your nails in shades of blue and green, just like the ocean waves! You can create beach-inspired nails that bring tropical vibes right to your fingertips.
Popular nail designs include wave patterns that swirl like the tide, seashell motifs that sparkle, and intricate coral art that captures the magic of underwater life. To enhance your ocean-themed look, consider incorporating vibrant colors inspired by Indonesian Decorative Pillows that reflect the lively essence of coastal decor.
To make your ocean-themed nails even more special, try adding some glitter or rhinestones! These little gems can twinkle just like sunlight dancing on the water. You can also use cool techniques, like ombre effects, to blend different colors together, creating a beautiful gradient that reminds you of the ocean depths.
During summer, vibrant and bold colors are all the rage, so now's the perfect time to show off your ocean-inspired style. Whether you're heading to the beach or just want to feel like you're on vacation, these nail designs will surely make you smile.
Enhances Summer Vacation Aesthetics
Summer vacation aesthetics thrive on vibrant colors and playful designs, and ocean-themed nails fit perfectly into this vibe. When you think about a tropical getaway, those beautiful shades of blue and green come to mind, just like the sparkling sea!
Ocean-themed nails often feature these lively hues, capturing the essence of beachy fun and creating a delightful look. Incorporating elements of financial planning can also help you budget for those summer nail art supplies, ensuring you have the funds to express your creativity.
Imagine your nails adorned with fun designs like seashells and wave patterns! These designs evoke memories of sun-soaked beach adventures, making them super popular for summer nail art. You can also add some glitter accents to mimic the sunlight bouncing off the water, giving your nails a festive touch for vacation outings.
Techniques like ombre effects and water marbling can make your beachy nails even more dynamic, reflecting the gentle movement of waves. Want to add a luxurious feel? Consider using rhinestones to represent pearls or incorporate textured elements.
This adds an extra touch of charm, perfectly aligning with summer's playful and relaxed spirit. So, grab those nail polishes and let your creativity flow, making your ocean-themed nails the ultimate accessory for your summer vacation aesthetics!
Popular Variations and Ideas
There are countless ways to express your love for the ocean through nail art, and each variation brings a unique twist to the table. One popular choice is Oceanic Swirls, which uses a water marbling technique to create beautiful wave-like patterns.
If you're feeling adventurous, try the Deep Sea Set, featuring seahorses and coral against deep blue backgrounds that make you feel like you're exploring the ocean depths! Additionally, consider incorporating some calming scents through essential oils, like lavender oil to enhance your relaxation while pampering yourself with a nail art session.
For a trendy look, consider Chrome Seashells with their shiny chrome finish. These nails often have gradient colors and seashell motifs, perfect for summer.
Or, you might love Fresh Out of the Sea, which showcases lifelike seashell designs with 3D textures and pearl accents, bringing the beach right to your fingertips!
If you're heading to a beach party, check out Tropical Jelly Nails. These vibrant nails feature jelly finishes and cute hibiscus flowers, capturing the essence of summer vibes.
With so many ocean-themed options, you can find the perfect design to show off your love for the sea and add a splash of fun to your nails!
Tips and Tricks
Dive into creating stunning ocean-themed nails with a few helpful tips and tricks! Start by picking a mix of ocean-inspired colors like deep blues and turquoise. These shades perfectly encapsulate the sea.
Don't forget to add some white or sandy shades for that balanced beach vibe!
Next, get creative with nail art techniques. You can use water marbling or dotting tools to create fun wave patterns or water droplet effects. These little details make your nails look like they've just come from the ocean!
For extra flair, consider adding 3D elements like seashell decals or pearl embellishments. This adds texture and makes your design pop.
To take your beach-inspired nail ideas to the next level, think about accent nails featuring tropical motifs, like palm trees or a bright hibiscus flower. These playful touches bring a bit of paradise to your fingertips!
Lastly, apply a glossy top coat to give your nails a shiny finish, mimicking the sunlight's reflection on water.
With these tips, you'll be ready to show off your ocean-themed nails and feel those vacation vibes wherever you go!
Care and Maintenance
To keep your ocean-themed nails looking vibrant and beautiful, regular care and maintenance are essential. Start by moisturizing your cuticles and nails daily. This helps prevent brittleness and breakage, ensuring your stunning designs stay intact.
Before you dive into applying colored polish, don't forget to use a base coat. It enhances adhesion and keeps your nails from staining, making your beach-inspired art last longer!
Be mindful of excessive exposure to water and harsh chemicals, as these can weaken your nail polish and cause chipping. Your intricate ocean designs deserve the best protection!
When it comes to shaping your nails, opt for gentle filing techniques instead of aggressive clipping. This keeps your nails looking neat while maintaining a perfect canvas for your oceanic nail art.
Lastly, aim for regular manicures at least every two weeks. Not only will this improve your nail health, but it'll also keep your nails looking fresh and fabulous.
Common Mistakes to Avoid
Many nail enthusiasts make common mistakes that can undermine their beautiful ocean-themed designs. First, don't skip the base coat! It protects your natural nails from staining, especially with vibrant colors like deep blues and greens.
Next, when you're doing nail stamping or creating detailed designs, avoid overloading your artwork with too many elements. A cluttered design can confuse the eye—stick to a few key features, like seashells or waves!
Another mistake is forgetting to seal your masterpiece with a top coat. This step is crucial, as it prevents chipping and fading, keeping your ocean vibes strong.
If you're using long nails, precision is key, so always use the right tools. Non-precision brushes can lead to uneven lines and messy patterns—yikes!
Lastly, prep is essential! Clean and buff your nails before applying nail polish. This ensures better adhesion, preventing peeling or lifting over time.
Frequently Asked Questions
What Are Some Ocean-Themed Nail Colors to Consider?
You can consider colors like deep navy, sandy beige, coral pink, and seafoam green. These shades evoke beach vibes and ocean beauty, making your nails a perfect summer accessory that reflects your love for the sea.
How Can I Incorporate Ocean Elements Into Nail Art?
You can incorporate ocean elements into your nail art by using wave patterns, seashell decals, and marine colors like turquoise and sandy beige. Add glitter for a shimmering effect, mimicking sunlight on water. Get creative!
Are There Specific Tools Needed for Ocean-Themed Nail Designs?
For ocean-themed nail designs, you'll need a few essential tools: nail polish brushes, dotting tools, sponges for blending, and nail art tape. These will help you create stunning waves and intricate sea-inspired patterns.
Can I Do Ocean-Themed Nails at Home or Should I Go to a Salon?
You can definitely create ocean-themed nails at home! With some basic tools, nail polish, and creativity, you'll achieve beautiful results. However, if you prefer a professional touch, visiting a salon is always an option.
What Are the Best Occasions to Sport Ocean-Themed Nails?
You can rock ocean-themed nails at beach parties, summer festivals, or vacations. They add a fun touch to poolside gatherings, birthday celebrations, or even casual outings. Just let your creativity flow and enjoy the vibe!
Conclusion
Now that you know how to create ocean-themed nails, you're ready to dive into summer fun! Whether you choose bright blue waves or sparkly starfish, your nails will totally capture those vacation vibes. Remember to take care of your designs, so they stay fabulous and fresh. And don't forget, practice makes perfect! So grab your nail polish and let your creativity flow like the tide. You'll be the star of the beach with those awesome nails!
Khetoli is an expert in hair and nail care and brings her knowledge and creativity to Nightingale Studio. As a skilled writer, she creates informative and engaging content that covers a wide range of beauty topics. Whether you need advice on nail art, hair treatments, or overall beauty maintenance, Khetoli’s expertise ensures that our content is informative and inspiring.
Nail Tips
Ombre Spring Nails for a Fresh and Fun Look
Keep your nails fresh and fun this spring with vibrant ombre designs that will brighten your look—discover how to create the perfect gradient!
Ombre spring nails are a fun way to brighten up your look! You can create beautiful gradient designs using soft pastels like baby pink or mint green. Start by shaping your nails and applying a base coat, then use a makeup sponge to blend two colors for that perfect ombre effect. Don't forget to finish with a shiny or matte top coat for a polished finish! Remember, keeping your nails hydrated is key, so use cuticle oil daily. With these tips, you'll have fresh nails that reflect the joys of spring. There's even more exciting inspiration just ahead!
Key Takeaways
- Embrace vibrant pastel shades like baby pink and mint green for a refreshing spring ombre look.
- Utilize sponging techniques to blend contrasting colors smoothly, creating a stunning gradient effect.
- Incorporate floral designs or hearts in pastel hues to celebrate the season's joy and romance.
- Maintain your ombre nails with regular manicures, cuticle oil, and a protective top coat.
- Follow seasonal trends on social media for creative inspiration and unique color combinations.
Introduction
As spring blooms around us, ombre nails emerge as a stylish choice that perfectly captures the season's essence. Imagine your fingertips adorned with soft hues, like Baby Pink or mint green, creating a sweet and cheerful look!
Ombre nail designs let you play with colors, blending them into a stunning gradient look that's as fresh as the flowers outside. You can easily create this look using fun techniques like sponging or brushing, making your nails stand out. With the rise of bold colors and highlights in fashion, top trends in grooming can inspire your nail art choices as well.
Spring is all about lightness and joy, so pastel nails are a perfect match. You might even try adding cute floral accents to your ombre nails, giving them a special touch just for the season. If you love the classic vibe, consider blending pastel shades with French tips for a unique twist!
To keep your ombre nails looking fabulous, remember to give them a little extra care. Regular maintenance and hydration are key to ensuring they stay fresh and healthy.
Seasonal Nail Trends Evolve
Seasonal nail trends are constantly evolving, and spring 2023 is no exception. This year, vibrant ombré nails are stealing the spotlight, especially in delightful pastel shades. Imagine your nails transitioning from a soft baby pink to a cheerful peach—it's like having a mini sunset on your fingers! These colorful combinations not only brighten your look but also perfectly match the fun, playful energy of spring.
For those looking for a refreshing twist, incorporating essential oils like lavender oil can provide calming effects that enhance your self-care routine while you pamper your nails. With the rising popularity of Japanese gel techniques, you can enjoy healthy nails while rocking intricate nail art. People are excited to try out unique designs for spring celebrations and festivals, and ombré styles are the perfect way to stand out.
You might even want to experiment with a modern twist on the classic French manicure, blending pastel colors for a fresh update. Social media is buzzing with inspiration for spring nails, with hashtags like #springnails and #ombrenails helping you discover new ideas.
Popular Variations and Ideas
This spring, you'll find a range of popular variations for ombré nails that perfectly capture the season's essence. One fun idea is to try pastel ombré, blending colors like soft pinks, blues, and yellows. These shades create a delicate effect that feels just right for the season.
You can also incorporate nail styles for Valentine's Day by adding romantic designs like hearts in soft, pastel colors. If you're looking for something trendy, consider the "Peach Fuzz" ombre, which pairs beautifully with other spring shades and matches Pantone's Color of the Year!
Floral ombre designs are also super popular this time of year. Imagine lovely gradients that remind you of blooming flowers—what a lovely way to celebrate spring!
Plus, short nails can showcase intricate ombre patterns, making them both practical and stylish. You can play around with nail ideas like adding glitter accents or even negative space designs, giving your ombre nails a unique twist.
Tips and Tricks
Achieving a flawless ombré effect on your nails requires some handy tips and tricks to ensure a smooth and stunning finish. First, start by shaping and buffing your nails, then apply a base coat to create a nice foundation for your ombre nails.
Next, choose your colors—maybe a lovely pink gradient—and get ready to blend!
To achieve that beautiful ombre look, use a makeup sponge to dab and blend two contrasting polish colors. This will help you create a smooth transition between shades. If you want to keep things tidy, use liquid latex or nail tape around your nails to catch any polish that might go astray.
You can try different techniques, like the gradient brush method for more control or the reverse ombre for a fun twist!
Once you're happy with your design, finish off your gradient nails with a shiny top coat. This won't only make your nails sparkle but also protect your nail art from chipping. If you're feeling adventurous, a matte top coat can give your ombre nails a unique look.
Enjoy your fabulous spring nails!
Care and Maintenance
To keep your ombré nails looking fresh and vibrant, regular care and maintenance are essential. First, don't forget to apply cuticle oil daily! This helps keep both your nails and cuticles hydrated, which is super important for the health of your nails and the beauty of your ombré designs.
Next up, schedule regular manicures every 2-3 weeks. This isn't just a treat; it helps maintain the bright colors of your ombré nails and fixes any growth or chipping issues.
Speaking of protection, reapply a top coat every few days. This shiny layer protects your nails from wear and tear, making sure your ombré art stays fabulous!
Also, be mindful of the products you use. Avoid harsh chemicals and pick gentle removers instead; they'll help prolong the lifespan of your nail art.
Lastly, a balanced diet rich in vitamins and minerals supports strong and healthy nails. When your nails are healthy, your ombré designs will look even better!
Common Mistakes to Avoid
When it comes to creating the perfect ombré nails, there are several common mistakes you should steer clear of. First, don't apply too much polish at once! This can lead to uneven blending, making your nails look messy. Instead, use a makeup sponge to build the color gradually for a smoother ombré effect.
Another mistake is skipping the base coat. A base coat protects your natural nails from staining and damage, so always start with it!
Also, remember to allow enough drying time between layers. If you rush, you'll end up with smudged nails—yikes! Patience is key for achieving that flawless look.
Don't forget the top coat, either! Skipping it can leave your ombré nails vulnerable to chipping and looking dull. A top coat enhances shine and durability, making your nails pop for the perfect spring vibe.
Lastly, using the right tools is essential. A regular brush won't help in the blending process, so reach for a makeup sponge or gradient brush instead.
Avoid these common mistakes, and you'll be on your way to fabulous ombré nails everyone will admire!
Frequently Asked Questions
What Colors Are Best for Ombre Spring Nails?
When choosing colors for ombre spring nails, you'll want to consider soft pastels like lavender, mint green, and blush pink. These shades blend beautifully, creating a fresh, vibrant look perfect for the season.
Can I Do Ombre Nails Without Professional Help?
Absolutely, you can do ombre nails without professional help! With the right tools, practice, and a little patience, you'll create a stunning look. Just choose your colors, blend, and enjoy your beautiful DIY nails!
How Long Do Ombre Nails Typically Last?
Ombre nails typically last around two to three weeks, depending on your nail growth and care. If you keep them hydrated and avoid harsh chemicals, you'll enjoy your beautiful look longer.
Are Ombre Nails Suitable for Short Nails?
Absolutely, ombre nails can look fantastic on short nails! They create a stylish gradient effect that enhances your fingers' appearance. Just choose colors that complement each other, and you'll have a chic look in no time!
What Tools Do I Need for DIY Ombre Nails?
For DIY ombre nails, you'll need a makeup sponge, nail polish in two or more colors, a base coat, top coat, and a small brush for cleanup. You're ready to create your stunning design!
Conclusion
So, get ready to dazzle this spring with your fabulous ombre nails! With so many fun colors and styles to choose from, you can truly express yourself. Remember to take care of your nails and avoid common mistakes, like skipping the base coat. Whether you go for pastel shades or bold hues, you're sure to turn heads. So grab your nail polish and let your creativity shine! Happy painting, and may your nails be as bright as your smile!
Khetoli is an expert in hair and nail care and brings her knowledge and creativity to Nightingale Studio. As a skilled writer, she creates informative and engaging content that covers a wide range of beauty topics. Whether you need advice on nail art, hair treatments, or overall beauty maintenance, Khetoli’s expertise ensures that our content is informative and inspiring.
Nail Tips
Light Purple Lilac Nail Designs for a Soft, Sweet Look
With light purple lilac nail designs, you can achieve a soft, sweet look that captivates; discover more fabulous ideas to elevate your style!
Light purple lilac nail designs are perfect for adding a soft, sweet vibe to your look! You can try fun styles like ombré effects, where you mix different shades of purple, or cute floral patterns with tiny white or pastel pink flowers. For a little sparkle, add some glitter, too! Remember to start with a base coat to keep your nails safe, and finish with a top coat for shine. Keep those nails hydrated, and you're all set! With these tips, you'll have everyone admiring your fabulous nails in no time. Want to know more fun ideas? Keep going!
Key Takeaways
- Opt for a gradient ombré effect, blending light lilac with deeper purples for a soft and romantic look.
- Incorporate delicate floral patterns with tiny white or pastel pink flowers to enhance femininity and sweetness.
- Use glitter sparingly to add a touch of sparkle without overwhelming the soft aesthetic of lilac nails.
- Experiment with minimalist geometric patterns in complementary pastel shades for a modern yet gentle style.
- Always apply a base and top coat to protect nails and maintain the soft, glossy finish of lilac designs.
Introduction
When it comes to nail art, lilac nail designs stand out for their unique blend of elegance and playfulness. This soft hue, often called light purple, perfectly complements a variety of skin tones, giving you a fresh vibe that brightens up your look!
To enhance your overall wellness while flaunting your beautiful nails, consider incorporating healthy habits such as drinking fresh juices for skin hydration and vitality, as suggested in drinking celery juice. Whether you're heading to a party or just want to feel fabulous, lilac nails can fit any occasion.
You can get creative with your designs, too! Popular choices include floral patterns that add a touch of nature, ombre effects that blend colors beautifully, and minimalist accents that keep things simple yet stylish. All these options make lilac a favorite among nail art lovers.
To keep your light purple nails looking their best, regular moisturizing is key! It helps prevent dryness and keeps your nails shiny.
Don't forget to use a good base coat and a top coat, too, to ensure your nail designs last longer and look fabulous! So, if you're ready to show off a soft, sweet look, lilac nail designs are the way to go. Get ready to express yourself and have fun with your nails!
Embraces Seasonal Color Trends
Lilac's charm truly shines as it embraces seasonal color trends, especially during spring and summer. You'll notice how light purple, particularly the lovely lilac shades, perfectly matches all those bright, cheerful outfits you love wearing.
This soft hue brings a fresh feeling to your nails, making them an elegant look for any occasion, from picnics in the park to fancy birthday parties! Engaging in outdoor activities while sporting these lovely colors enhances the overall experience, much like how balance bikes and scooters promote physical activity and coordination for children.
When you explore nail art, think of adding floral motifs or delightful ombre effects that echo the vibrant spirit of the season. Designers are all about those romantic palettes, and you can easily join in by painting your nails in pastel colors that remind you of blooming flowers and sunny days.
Plus, light purple nails can be paired with other pastel shades or earthy tones, creating a stylish look that reflects the beauty of summer seasons.
Popular Variations and Ideas
Exploring popular variations and ideas for lilac nail designs opens up a world of creativity that complements the seasonal charm discussed earlier.
One delightful option is the gradient ombré effect, where light purple gradually blends into deeper purple shades, creating a stunning look that's both soft and eye-catching. To maintain that salon glow, incorporating proper hydration techniques, like using hydrating face masks, can also enhance the overall aesthetic of your nails as part of your beauty routine effective hydration techniques.
You can also add floral designs, like tiny white or pastel pink flowers, which give your nails a sweet look and a feminine touch.
If you want to make your nails sparkle, glitter is your best friend! Adding a sprinkle of glitter over your light purple nails gives you that fabulous sparkle finish, perfect for special occasions.
For a modern twist, try incorporating geometric patterns in complementary colors. These fun designs can add a playful edge while still keeping the soft aesthetic you love.
Tips and Tricks
Achieving the perfect lilac nail design requires a few essential tips and tricks to ensure your manicure stands out.
First, always start with a base coat! This protects your nails from staining and helps the color last longer.
Next, don't be afraid to experiment with different nail art techniques. You can try ombré, marbling, or even stamping to create unique designs using your light purple polish.
To give your nails a high gloss finish, use quality gel polish. This not only looks fabulous but also keeps your lilac nails vibrant and chip-free!
You can also mix in soft pinks or pastel blues for a harmonious look that complements your light purple base.
Care and Maintenance
To keep your lilac nails looking their best, regular care and maintenance are essential. Start by always applying a base coat before your nail polish. This protects your natural nails from staining and helps the polish stick better.
After you've painted your nails, don't forget to use a top coat! It adds shine and helps prevent chipping, so your lovely lilac nails stay gorgeous for longer.
Make sure to moisturize your nails and cuticles regularly. This keeps them from getting dry and maintains a healthy appearance, especially since light purple shades can show imperfections.
It's also important to avoid harsh chemicals—like those in cleaning products—without wearing gloves. These can weaken your nails and ruin your beautiful polish finish.
For routine maintenance, try to schedule filling or reapplying your polish every two weeks. This way, your nails will always look fresh and beautiful, ready to impress!
Common Mistakes to Avoid
When you're styling your lilac nails, it's easy to make a few common mistakes that can detract from their delicate beauty. First, always start with clean nails, as this helps your light purple polish go on smoothly and prevents chipping. Remember, a base coat is essential! It protects your nails and helps the color last longer.
Next, when choosing nail art designs, stick to pastel shades or neutrals instead of using too many contrasting colors. This keeps your look soft and sweet. If you're trying ombré nails or a subtle gradient, practice blending carefully to avoid harsh lines. You want that lovely, smooth transition!
Also, while a little bit of glitter can be fun, avoid excessive glitter. Too much can clash with the gentle vibe of light purple, making your nails look busy instead of refined.
Frequently Asked Questions
What Color Goes With Purple Nails?
When choosing colors to pair with purple nails, consider soft pastels like pink or blue for a delicate look. Deep purples and rich greens create striking contrasts, while neutrals enhance the elegance of your manicure.
Are Purple Nails in Style?
Yes, purple nails are definitely in style! You'll notice they're popular among celebrities and influencers. Their versatility allows you to experiment with various designs, making them perfect for any occasion or personal expression.
What Is the Purple Nail Theory?
The Purple Nail Theory suggests that wearing purple nail polish boosts your creativity and confidence. This hue's association with luxury and calmness makes it a popular choice for expressing individuality in fashion and beauty trends.
Conclusion
In conclusion, light purple lilac nail designs are perfect for adding a soft and sweet touch to your look! Whether you choose fun patterns or simple shades, you can express your unique style. Remember to take care of your nails and avoid common mistakes for the best results. So, grab your favorite lilac polish, get creative, and let your nails shine! Who knew a little color could bring so much joy? Happy painting!
Khetoli is an expert in hair and nail care and brings her knowledge and creativity to Nightingale Studio. As a skilled writer, she creates informative and engaging content that covers a wide range of beauty topics. Whether you need advice on nail art, hair treatments, or overall beauty maintenance, Khetoli’s expertise ensures that our content is informative and inspiring.
-
Entertainment News3 months ago
Cristiano Ronaldo’s Net Worth: How Much Is the Football Superstar Worth?
-
Entertainment News3 months ago
Pete Best Net Worth in 2023: How Much Is the Former Beatle Worth Now?
-
Nail Tips2 months ago
2025 Nail Colors by Month: Stay Trendy All Year Long!
-
Entertainment News3 months ago
What Is Shahid Anwar’s Net Worth? The Story Behind His Financial Success!
-
Entertainment News3 months ago
Selena Gomez Vs Justin Bieber: Who Has the Higher Net Worth?
-
Entertainment News3 months ago
Top Actors in India by Net Worth: Who’s Leading the Bollywood Rich List?
-
Entertainment News1 month ago
How Shift Work Affects Nutrient Absorption and Metabolism
-
Entertainment News3 months ago
Will Smith’s Net Worth After the Slap: How the Controversy Impacted His Fortune!