Creating nail designs with purple flowers involves choosing lavender, lilac, and deep plum colors for a diverse color palette. Take inspiration from CE Nails 102 for detailed floral concepts using gradient shading and stamping plates. Start by applying a base coat followed by two layers of purple gel polish. Enhance the design with sparkling crystals, such as rhinestones, for an extra touch of glamour. Finish off with a shiny top coat to seal and protect the artwork. Appreciate the intricate details and rich purple shades for a sophisticated appearance. For more tips on perfecting your purple flower nail art, explore techniques like French tip designs and utilizing stamping plates.
Key Takeaways
- Experiment with lavender, lilac, and deep plum shades for a varied and elegant color palette.
- Draw inspiration from CE Nails 102 for intricate floral designs using multiple purple hues.
- Utilize gradient shading, stamping plates, slanted lines, and crystal placement for detailed floral patterns.
- Apply two coats of purple gel polish over a base coat for vibrancy using high-quality products like Madame Glam.
- Enhance the design with sparkling crystals and finish with a glossy top coat for a professional and long-lasting look.
Selecting the Perfect Purple Shades
When choosing the perfect purple shades for your nail designs, consider a range of hues including lavender, lilac, and deep plum to create a vibrant and varied color palette. Lavender offers a soft, delicate touch, ideal for a subtle and elegant look. Lilac brings a slightly brighter tone, adding a pop of color without being too overwhelming. Deep plum, on the other hand, exudes a rich and luxurious feel, perfect for creating a bold statement. By incorporating these shades of purple into your nail art, you can achieve a harmonious blend that showcases both depth and contrast.
Exploring the diverse shades of purple allows for endless creativity in your nail designs. Whether you prefer a monochromatic look using varying shades of purple or want to mix and match different hues for a more dynamic effect, the options are limitless. Experimenting with these shades can lead to stunning ombre effects, gradient designs, or intricate patterns that truly elevate your purple flower nail art to the next level.
Drawing Inspiration From CE Nails 102
When exploring purple flower nail designs, we often look to CE Nails 102 for inspiration. This Instagram account offers a wealth of creative ideas for intricate floral designs, guiding us in selecting design techniques and color combinations.
CE Nails 102 Influence
Indulging in the enchanting designs of CE Nails 102 sparks creativity for crafting exquisite purple flower nail art.
The influence from CE Nails 102 is evident in the way multiple shades of purple are skillfully combined to create stunning floral nail designs.
By observing the detailed nail art on CE Nails 102, one can glean inspiration for incorporating various purple hues into their own nail art repertoire.
The artistic designs showcased by CE Nails 102 serve as a masterclass in utilizing shades to enhance the beauty and complexity of floral patterns.
Drawing from this inspiration can elevate your nail art game, allowing you to create unique and eye-catching purple flower designs that are sure to captivate admirers.
Design Techniques Explained
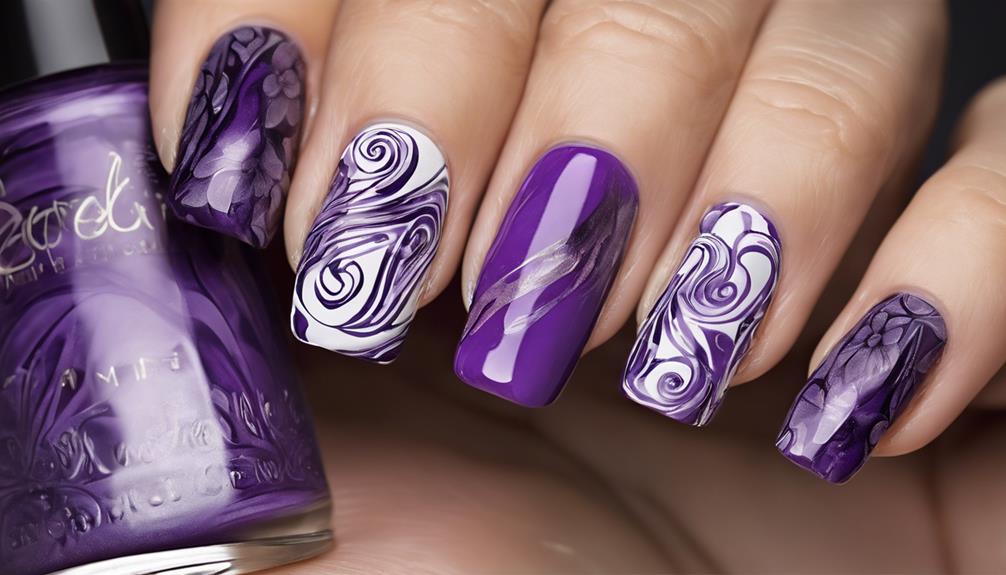
Exploring design techniques inspired by CE Nails 102, we investigate the intricacies of incorporating multiple shades of purple and precise detailing to create enchanting purple flower nail art. When aiming for exquisite purple nails, techniques such as gradient shading, delicate outlining, and strategic crystal placement play vital roles in achieving a visually enchanting design.
To master the art of purple flower nails, consider the following:
- Experimenting with different shades of purple to create depth and dimension.
- Using stamping plates for intricate floral patterns.
- Incorporating unique elements like slanted lines for a modern twist.
Color Choices for Nails
Drawing inspiration from CE Nails 102, the selection of color choices for nail designs, particularly focused on shades of purple and nude, plays a significant role in creating alluring and trendy nail art.
The use of beautiful purple hues, ranging from light lavender to deep plum, can add sophistication and elegance to your nail designs. By incorporating different shades of purple, such as the darkest tone for a French tip or a lighter shade for floral accents, you can achieve a visually appealing and cohesive look.
Madame Glam Gel Polishes offer a wide range of purple and nude shades that can be creatively combined to create stunning purple flower nail designs.
Taking cues from social media platforms like Instagram can help you stay updated on trending color choices for your nail art endeavors.
Applying Base Coat and Purple Layers
Before diving into the fun part of creating intricate designs, it's essential to start with a solid foundation.
First, apply a base coat to protect your nails and provide a smooth canvas for the purple polish.
Then, layer on two coats of your chosen purple gel polish to achieve that vibrant and opaque look for your purple flower nail design.
Base Coat Application
To establish a strong and lasting foundation for your purple flower nail design, start by applying a thin layer of protective base coat to the natural nail. This step is important for enhancing the longevity and durability of your manicure.
Here are some essential tips for applying the base coat effectively:
- Make sure the entire nail surface is covered with the base coat.
- Allow the base coat to dry completely before proceeding with the purple gel polish application.
- Apply a second thin layer of base coat if needed to create a smooth canvas for the shades of purple to come.
Layering Purple Polish
After applying a protective base coat to establish a strong foundation, the next step in creating purple flower nail designs involves layering two coats of your chosen purple polish for a vibrant and opaque base color. This step is essential in nail art as it provides a solid canvas for intricate designs to come.
Make sure each layer dries completely before applying the next to avoid any smudges or streaks that could ruin your nail art masterpiece. Opt for high-quality gel polishes like Madame Glam for a professional and long-lasting finish.
Creating a French Tip Design

For a classic and elegant look, consider starting the French tip design by applying a light purple base coat. This base will serve as the foundation for your design, allowing the darker shades to pop against the light background.
Here are some tips for creating a stunning French tip design with different shades of purple:
- Use a darker shade of purple for the tip of the nail to create contrast and definition.
- Add dots or other decorative elements in coordinating shades of purple for a cohesive look.
- Consider incorporating crystals or rhinestones for added glamour and sparkle.
Adding Intricate Dot Detailing
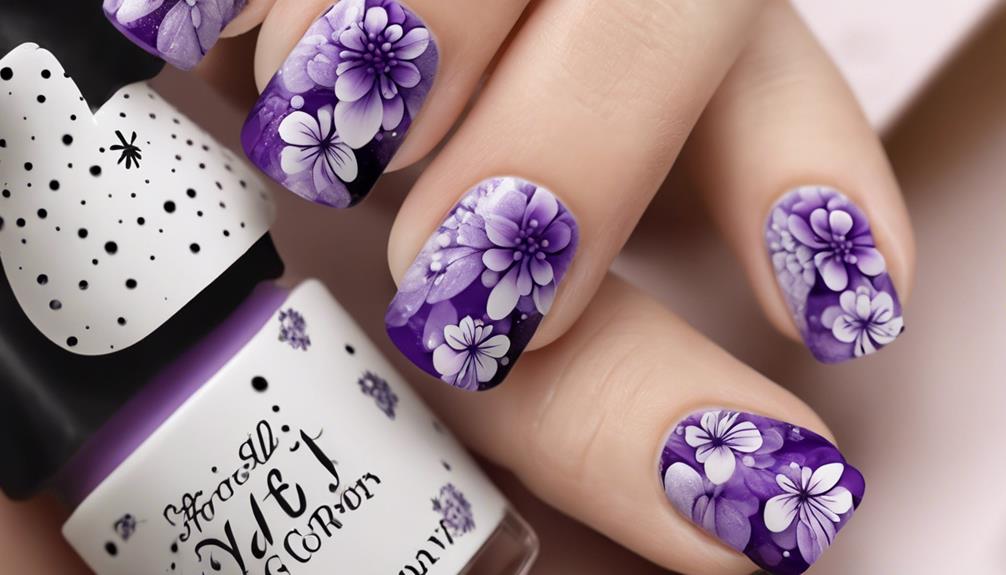
Using a dotting tool allows for the creation of intricate dot detailing in varying sizes on the nail. By strategically placing dots, you can enhance the overall design and achieve a cohesive look. Experiment with different dot patterns such as clusters or lines to add depth and visual interest to your nail art. Combining dots with other elements like flowers or geometric shapes can result in a unique and personalized design that stands out.
When adding intricate dot detailing, remember to practice accuracy and patience. Take your time to guarantee each dot is placed with precision, contributing to a professional and polished finish. Once you have completed your dot design, seal it with a top coat to protect the dots and give your nails a glossy and long-lasting look.
Mastering the art of dot detailing can elevate your nail designs and showcase your creativity. Keep practicing and exploring different patterns to create stunning and intricate nail art.
Utilizing Stamping Plates for Unique Designs
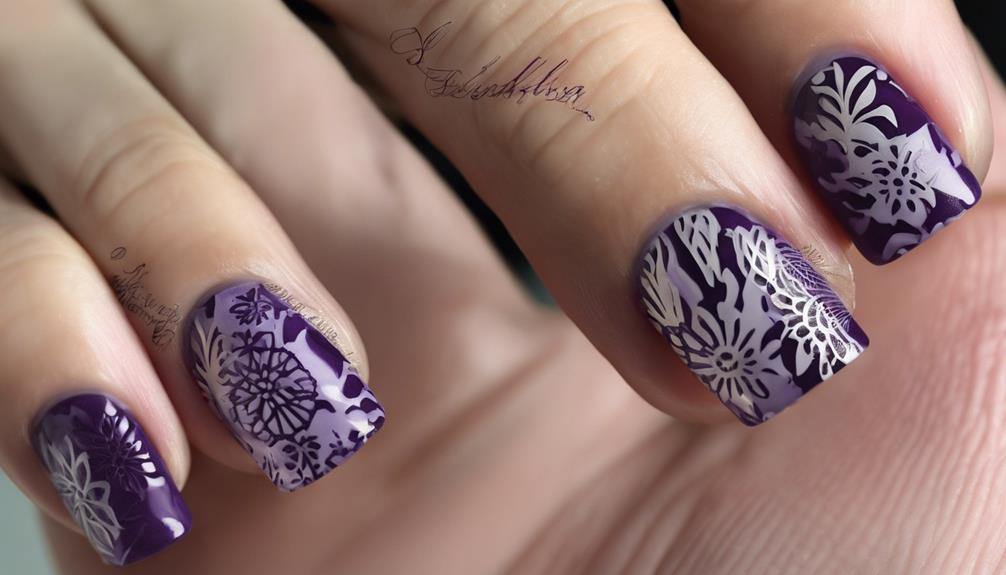
Stamping plates, with their engraved designs that transfer intricate patterns onto the nail using nail polish or stamping polish, provide a unique and professional touch to nail art creations. These tools offer a convenient way to achieve detailed and precise designs that may be challenging to create by hand.
Here are some tips for utilizing stamping plates effectively:
- Experiment with different designs: Stamping plates come in a wide range of patterns, from floral motifs to abstract shapes. Try out various designs to discover what suits your style best.
- Use the right tools: To achieve the best results with stamping plates, make sure you have a quality stamper, scraper, and stamping polish. Using the correct tools can make a significant difference in the outcome.
- Practice makes perfect: Like any nail art technique, mastering stamping plates requires practice. Don't get discouraged if your first attempts aren't flawless; keep practicing to refine your skills and create stunning nail designs.
Stamping plates are versatile instruments that can elevate your nail art to a professional level, allowing for endless creativity and intricate details.
Incorporating Sparkling Crystals

To enhance your purple flower nail design, consider incorporating sparkling crystals strategically for added elegance and glamour. When placing crystals on the next nail, opt for a large crystal in the center to serve as a focal point.
Balance and symmetry can be achieved by adding two purple crystals on each side of the central crystal. For a cohesive look, include small AB crystals on both sides of the larger crystals to bring a touch of sparkle and elegance to your design.
To guarantee the longevity of the crystals, it's crucial to cure them in a lamp after placement. Experimenting with rhinestones to create floral designs can add a unique and eye-catching element to your purple flower nail art.
Finishing Touch: Adding a Glossy Top Coat

To finalize the stunning purple flower nail design, we must now apply a glossy top coat. This essential step not only enhances the beauty of the nail design but also provides protection and longevity. Here are three key reasons why adding a glossy top coat is vital in perfecting your nail design:
- Sealing and Protection: The glossy top coat acts as a barrier, sealing in the intricate details of the purple flowers and protecting them from damage caused by daily activities.
- Enhanced Shine: By adding a glossy finish, the nail design gains a professional look with a beautiful shine that catches the light and adds dimension to the overall appearance.
- Smooth and Flawless Finish: The top coat helps to even out any rough edges or uneven surfaces on the nail, ensuring a flawless and polished final result that showcases your nail art in the best possible way.
Admiring Your Purple Flower Nail Art
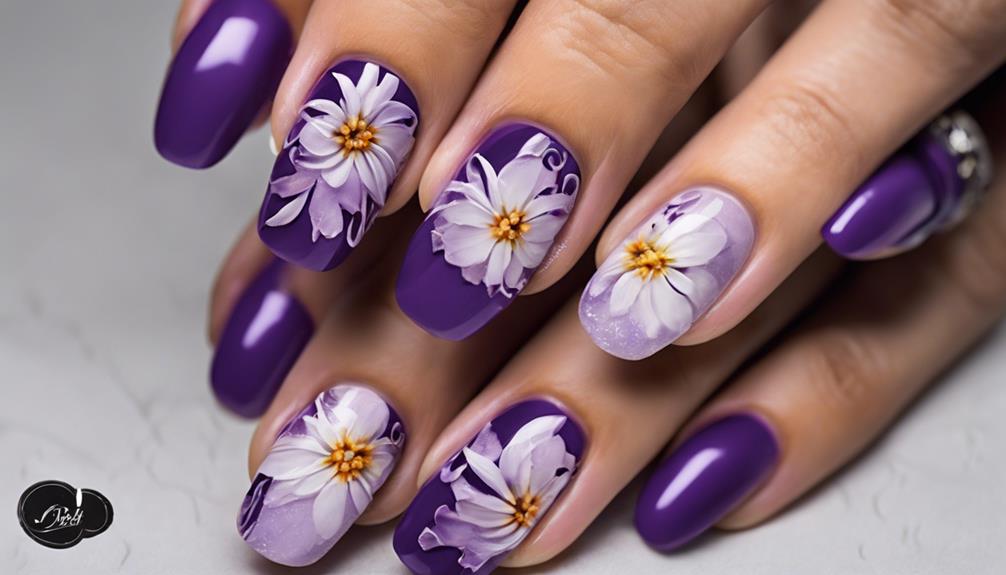
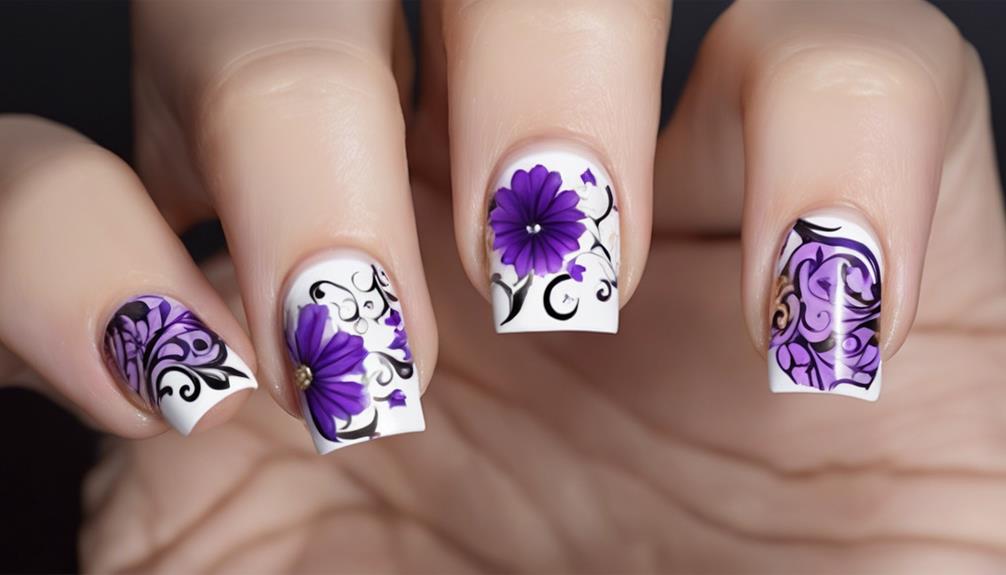
Upon gazing at the intricate details of our purple flower nail art, a sense of awe and admiration washes over us. The dark purple hues used to create the delicate flower petals add depth and dimension to the design, giving it a realistic and blooming effect.
The precise placement of crystals, including a large center crystal and smaller crystals on each side, enhances the overall floral aesthetic. Remarkable is the slanted line design on the nail, which complements the flower art, adding a unique and stylish element to the look.
The skillful application of crystals in this design creates a visually stunning and elegant purple flower nail art, showcasing the beauty of the Madame Glam Gel Polishes collection. Each element has been carefully curated to ensure a harmonious and captivating composition that captivates the eye with its intricate beauty.
Frequently Asked Questions
What Is the Blooming Technique for Nails?
The blooming technique for nails involves intricate flower designs using gel polishes and nail art tools. It allows for creating realistic floral patterns with depth and dimension.
By layering shades of purple and precise brush strokes, beautiful designs are achieved. Customizable with various flower shapes and colors, this technique suits individual preferences.
With practice, anyone can master this technique for vibrant purple flower nail designs.
How Do You Make a Flower With Blooming Gel?
When making a flower with blooming gel, we apply a base gel first and cure it. Then, we use blooming gel to outline petals, letting it spread naturally for a delicate, blooming effect.
After curing the blooming gel, we add color to the petals using gel polish or nail art paint. A top coat is applied to seal the design and enhance its shine.
This process results in a vibrant and realistic flower nail design.
What Can I Use Instead of Blooming Gel?
Instead of blooming gel, we can mix regular gel polish with a clear top coat for a similar effect. Using a thin nail art brush dipped in gel polish allows for delicate flower designs.
Acrylic paints work well too, offering intricate floral nail art with precise detailing. Watercolor techniques using nail polish or gel create a soft, blended look like blooming gel.
Experiment with tools like toothpicks and fine brushes for blooming flower designs without the need for blooming gel.
How to Do Blossom Nail Art?
To do blossom nail art, start by painting nails with a base coat and a purple polish.
Use a thin brush or dotting tool to create petals with lighter shades around a central point. Layer different shades for depth.
Add crystal accents for sparkle. Seal with a top coat for lasting beauty.
This technique allows for creating delicate and beautiful floral designs on your nails with ease.
Can the Technique for Chic Nail Designs be Applied to Create Purple Flower Nail Designs?
Yes, the technique for creating chic burgundy nail designs can definitely be applied to create beautiful purple flower nail designs. By using the same artistic skills and attention to detail, it is possible to combine the two styles to create stunning and unique nail art.
Conclusion
To sum up, creating purple flower nail designs is a blooming beauty that combines creativity with precision. By selecting the perfect shades, drawing inspiration from CE Nails 102, and adding intricate details like sparkling crystals, you can achieve a stunning and unique look.
With the right techniques and a glossy top coat, you can admire your masterpiece and showcase your artistic flair. Let your nails blossom with vibrant purple hues and intricate floral designs for a truly eye-catching look.